![]()
Contents
3
A DIFFERENT WAY TO START
Boston TypeTM
| A Different Way to Start | |
|
|
What follows is a summary of my perceptions, decisions and techniques. Since it's the main focus of this web site, this page is kind of long. But if you want to jump ahead and see a few, brief suggested steps, click here. (This link will also appear a the bottom of the page.)
|
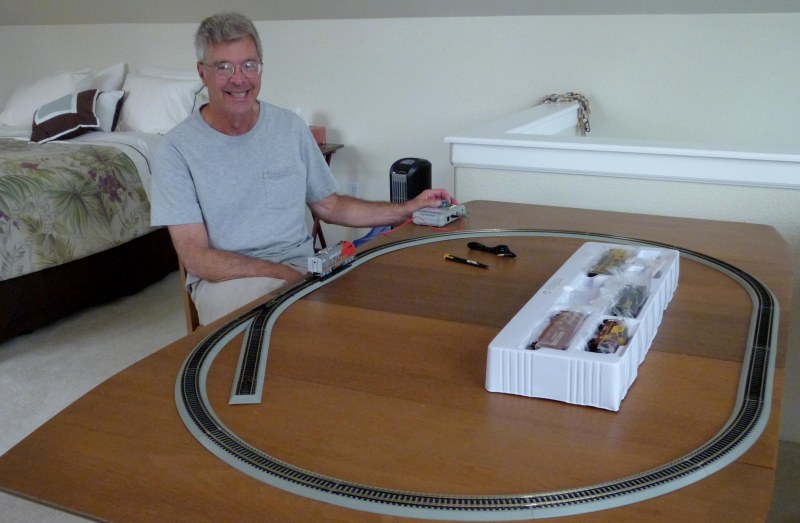
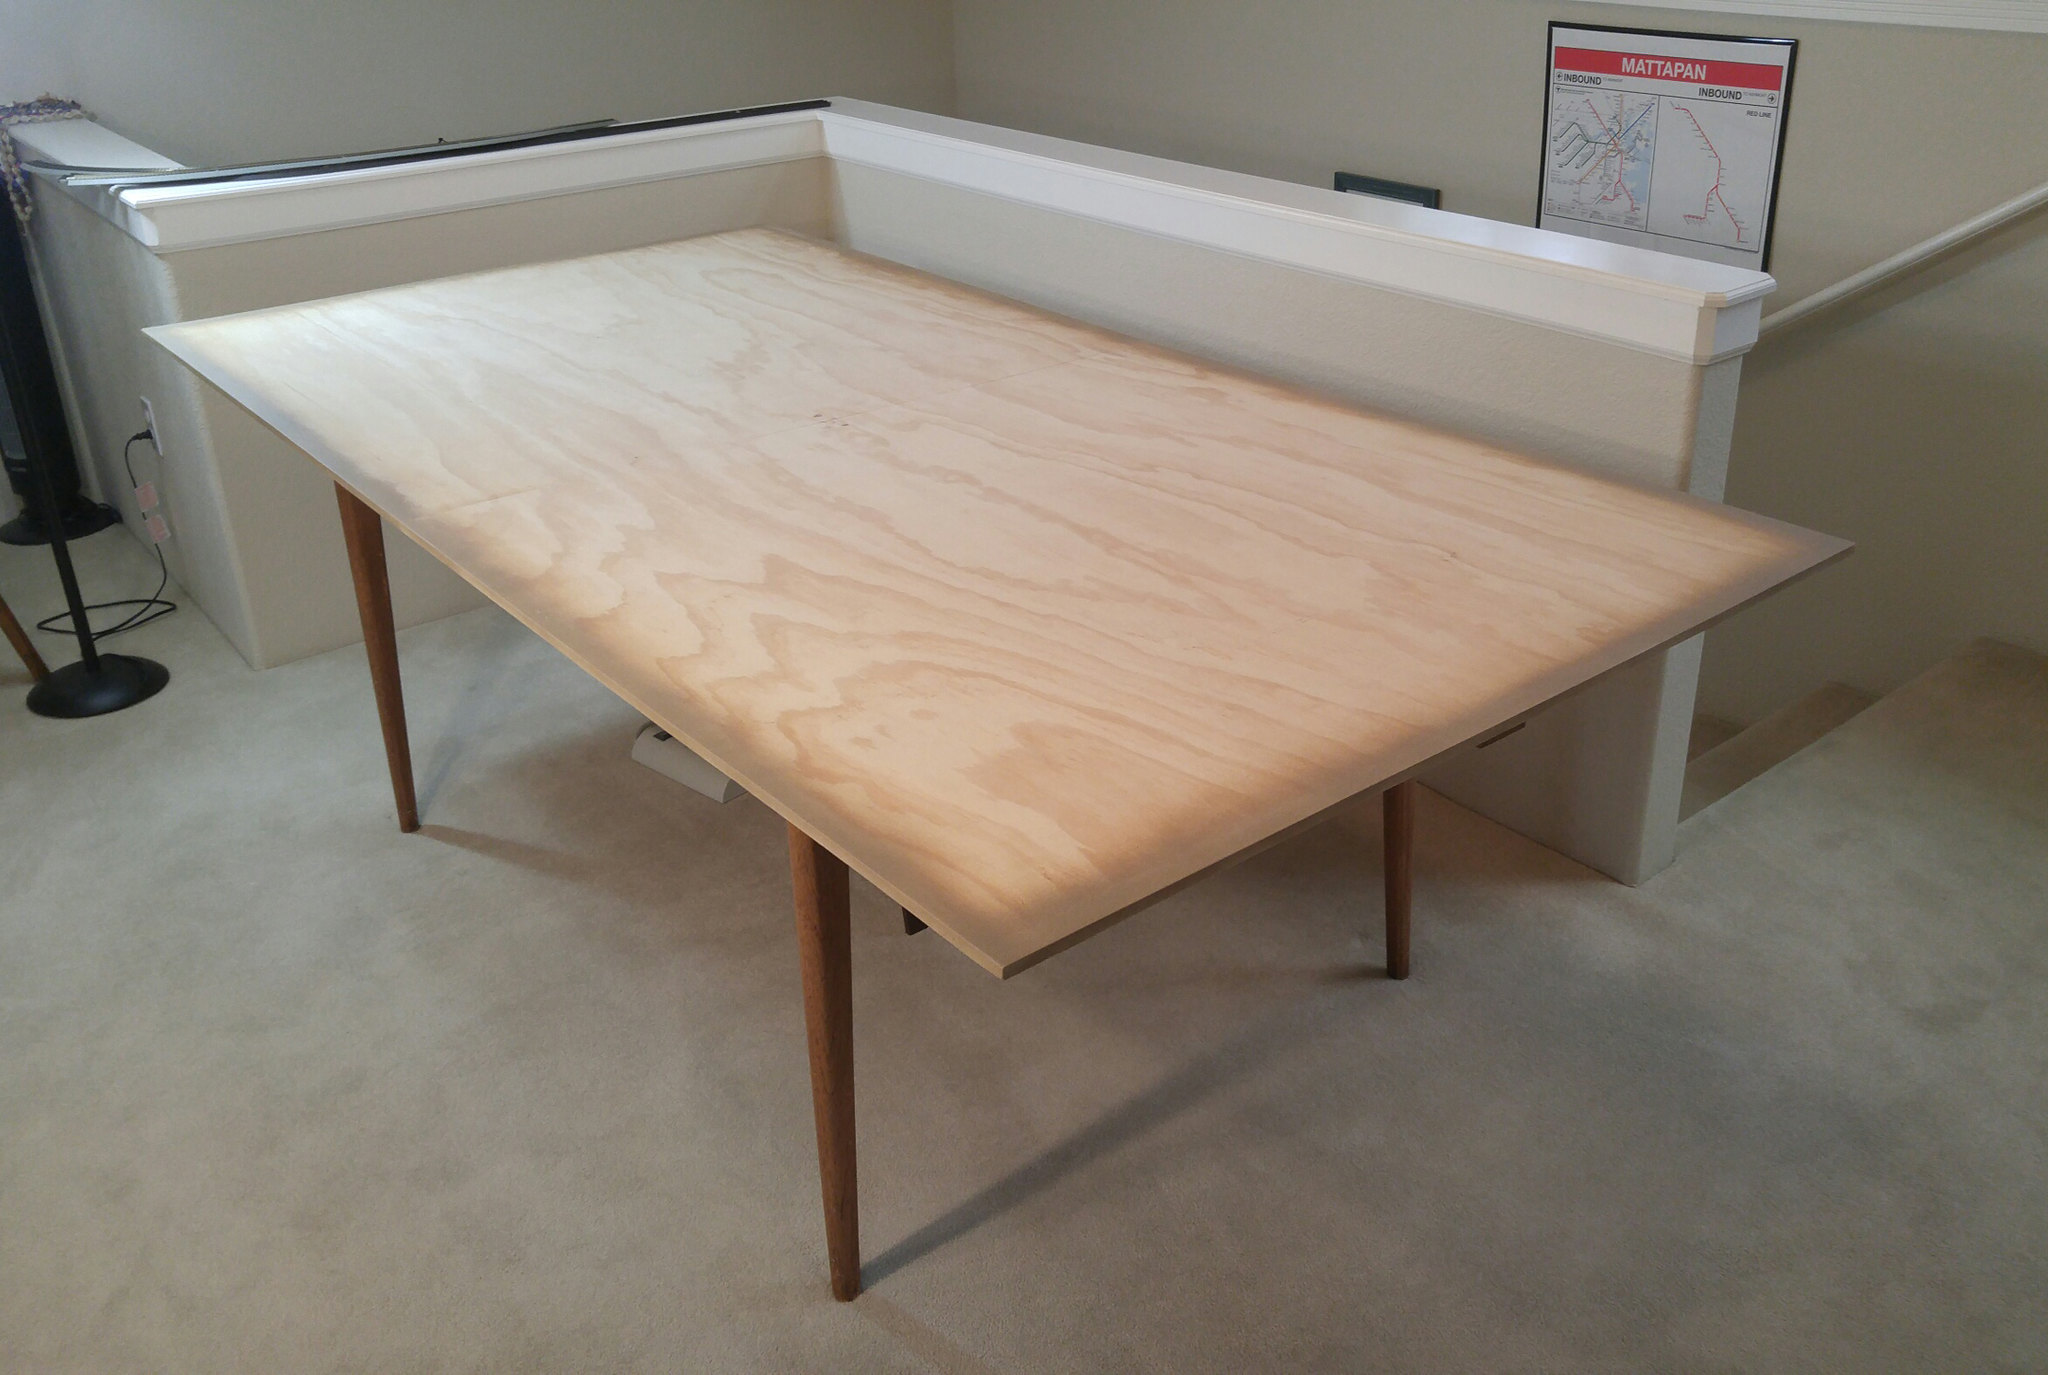 Quick and simple benchwork. |
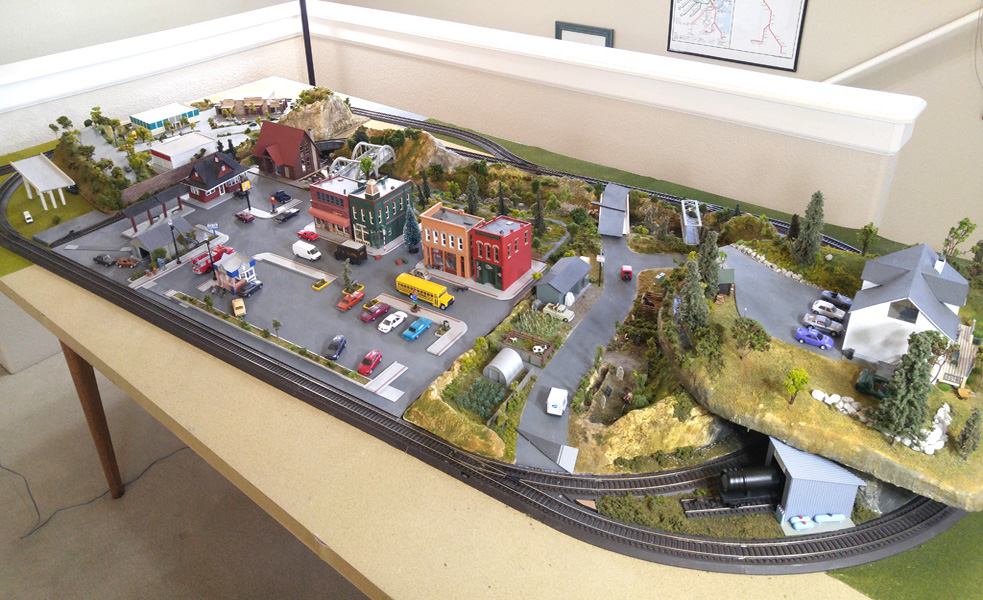
BenchworkMost "how to" articles and books seem to start off with benchwork, constructing the layout table. That project can range from relatively simple to quite elaborate. But my feeling is that many beginners are not ready to undertake that task as a first step – at least I wasn't. How could someone new to the hobby possibly know enough to plan and build an entire layout (including track and wiring plans) as a first step? I think facing those tasks could possibly intimidate a newcomer who may not have been presented with alternatives. Instead, I utilized an old, unused (but nice) dining room table, eventually putting a piece of plywood on top and a sheet of 1" pink foam on top of that. (More on that later.) I did not want to damage or modify the table. (I secured the plywood with small blocks of wood fastened only to the plywood itself at certain locations so it would not move if bumped.) But a dining room table works. (And from what I've seen, kids love being close to the action.) And if you're going to build a layout table from scratch, you'll want to do some research to decide on the proper height for your needs. I've found very few articles which focus on layouts that had been created using a train set with snap-together track. But after my initial research, I chose an inexpensive starter set, Bachmann's HO Digital Commander. It was perfect for me, and provided hands-on experience with, among other things, the basics of DCC (Digital Command Control) something I had never even heard of until a few weeks earlier. With the snap-together E-Z Track included in the set, I was able to set up and run the train the day it arrived. The E-Z Track also allowed me to test several track plans, and to make changes as my layout evolved over the next few years. Using snap-together track (also referred to as "sectional") doesn't seem very common at the upper level of model railroads like the ones you see in magazines or at shows. One complaint is that, out of the box, the track doesn't look very realistic. But there are some techniques that address this, if it's a consideration. (More on this later.) A Personal NoteI don't want to imply the techniques that I'm presenting are necessarily meant as a substitute for a more traditional process. What I'm suggesting is that for some folks, especially someone who isn't sure of which direction they are going to take, a relatively inexpensive train set is a good first step. It will provide experience with equipment, scenery, spatial relations, etc., before they make a much more complex commitment. Plus they'll have some fun very quickly. In other words, the "basic" approach may be a temporary stop before you move forward. You can always sell or donate your train set if you do decide to create something more elaborate. And if, for some reason, you decide not to pursue the model railroading hobby, you've saved yourself a lot of time and money! But you just might find that keeping it all simple provides enough of a challenge and reward to continue along that path. And, as I hope you will see, you can continue to build a layout as detailed and elobarate as you want. While you may run into folks in the hobby who don't consider train sets to be "real" model railroading, I'd bet most don't agree. We all have the same goal: have a little fun playing with choo choos. Right? My Track LayoutAs the pictures on the top of the left column show, the out-of-the-box track layout was a simple oval with a manual switch. It had been expanded quite a bit over the first year or so, and now has one siding and two spurs. The four switches now operate from the controller using DCC (Digital Command Control). It's a pretty basic rail layout, but was, and continues to be, perfect for my needs. (Further expansion is possible.)While I don't run the trains as often as many, if not most other model railroaders, I have fun with a regular routine to keep all the equipment functioning (locomotives and switches) properly. And I like ringing the trolley bell. ;) |
Time Frames, Locations and ScalesDuring my research phase, I discovered that many available model kits looked similar to the buildings in the "old town" area of our little city of Grants Pass, Oregon, which, incidentally, still has a small freight line running regularly through downtown. So my starting point was to construct a replica of the town and surrounding area. I quickly realized how enjoyable it was to assemble and modify the structures. And when I realized there was no way to fit the post office in, I learned just how few buildings I'd be able to place on the layout, even in HO scale. | |
|
The small town took shape on a 2' x 3' board, placed near the center of the table. I kept adding a bit of detail to the scene and improving the streets and sidewalks. I also took my first venture into scenery: trees, grass, bushes, etc.
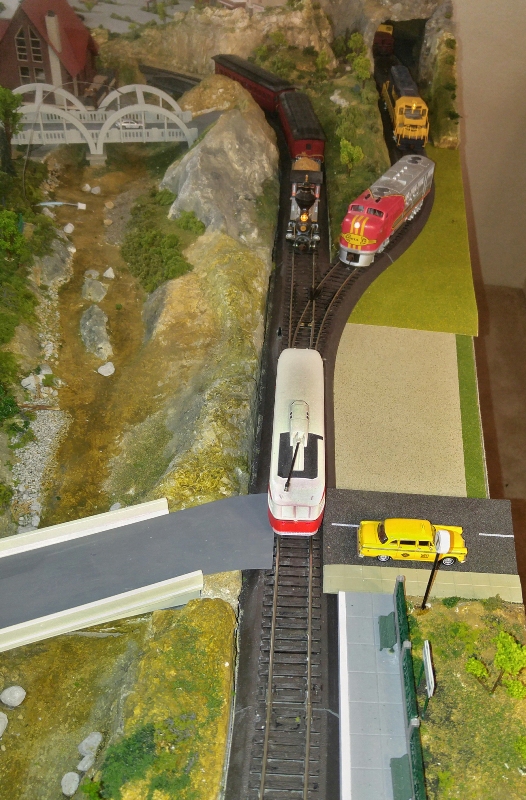
After the "downtown" section was completed, I started expanding into other areas. Although I added some track and a couple of switches, I didn't try to build one large, continuous layout. Instead, I treated each section as a separate diorama, loosely connected (visually or otherwise) with each other. (See Seams on Production Tidbits.) For added effect, in some areas I've utilized different scales. Although my main layout is HO, I created other locations in N and Z scale to simulate distance and perspective. In some areas, multiple scales are used. (Note that I have no N or Z scale trains running on my main layout.) The one common element to the somewhat unrelated sections are the rails running through or adjacent to each scene. As such, it is not uncommon to see a 50's Boston PCC trolley stopped at a station next to the Rogue River, or a steam locomotive from the early 1900s rumbling past the car wash. There's a sense of freedom that comes when reality isn't a priority. |
RealismEarly on I noticed that "realism" is often used as a gauge, if not a synonym, for the quality of a layout. While I don't disagree with that point of view, I see alternatives. Don't get me wrong. I find highly realistic layouts fascinating. Looking through magazines and web sites, some of the scenery is so real that it's often difficult to tell a model from the real thing. I'm in awe of what some modelers are able to do. And I do strive for detail and realism in many aspects and components of my scenes. In fact, my philosophy has been to include lots of details, some of which may never even be seen. When someone walks away from my layout, I want them to get the feeling that they didn't see everything – because I know they didn't. But reality was never the priority for me. (I think inventing the "floating diorama" proves that.) As it turned out, I wound up building sort of a "caricature" of the town and surrounding areas, having more to do with feelings than accuracy. As such, some parts have a "dreamlike" or "Twilight Zone" feel about it. (The fact that there are only four residents on the table can make it feel a little spooky.) Same with the dioramas that I've made – in fact, one does model a scene from an old episode of The Twilight Zone. (More details about my layout and dioramas follow on page 6.) I haven't done much "weathering" to my trains or buildings. However after a few years, I've noticed that dust makes a nice "natural" weathering effect. (That's my excuse for not cleaning the tops of the buildings and other horizontal surfaces.) Another interesting facet of realism is one's point of view. Unless your chin (or the camera) is on the surface of the layout, you're viewing the scene as if you were in a helicopter. In reality, most people probably don't have much of an idea what the roofs of buildings or tree tops look like. Ideally, I think a train layout should be at or near eye-level. And if you've never watched your train go by while your chin was on the table next to the track, give it a try. It's a neat, and rarely seen, vantage point. There's no real lesson to all of this – it just helps to be aware of it. An Observation About Accuracy When I started my N-scale layout recently, I perused Modeling the '50s from Kalmbach Publishing. I had purchased it a few years ago, and, because I would be creating a layout from the 50's era, I thought I'd re-read it. There are some very useful tips and ideas in there. But one picture lead to an interesting observation. One of the articles depicts a 1950's Los Angeles scene not unlike what I would be including in my Superchief layout. The entire street is wonderfully modeled, the signs on the buildings are especially attractive and effective. While I have two billboards so far, my buildings are anonymous. And therein is my discovery: I build my layouts to match a memory or feeling, not to present an accurate model of the subject. Of course neither method is right or wrong. But it helps to explain my somewhat abstract approach and, perhaps, a bit about my personality. (I'll let the psychoanalysts among us handle that one.) |
|
|
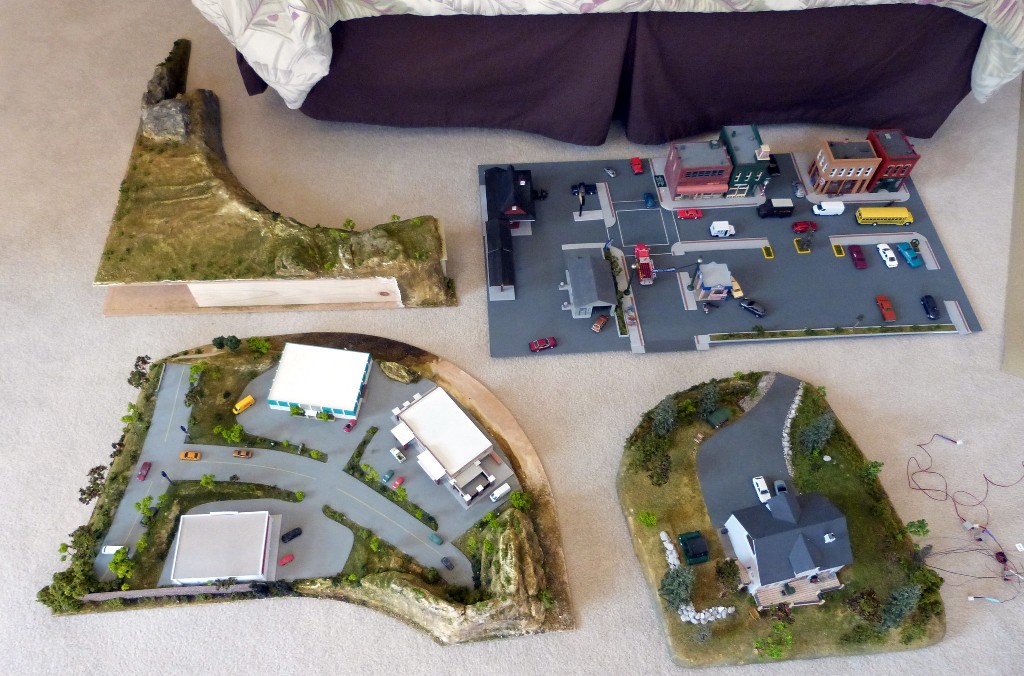
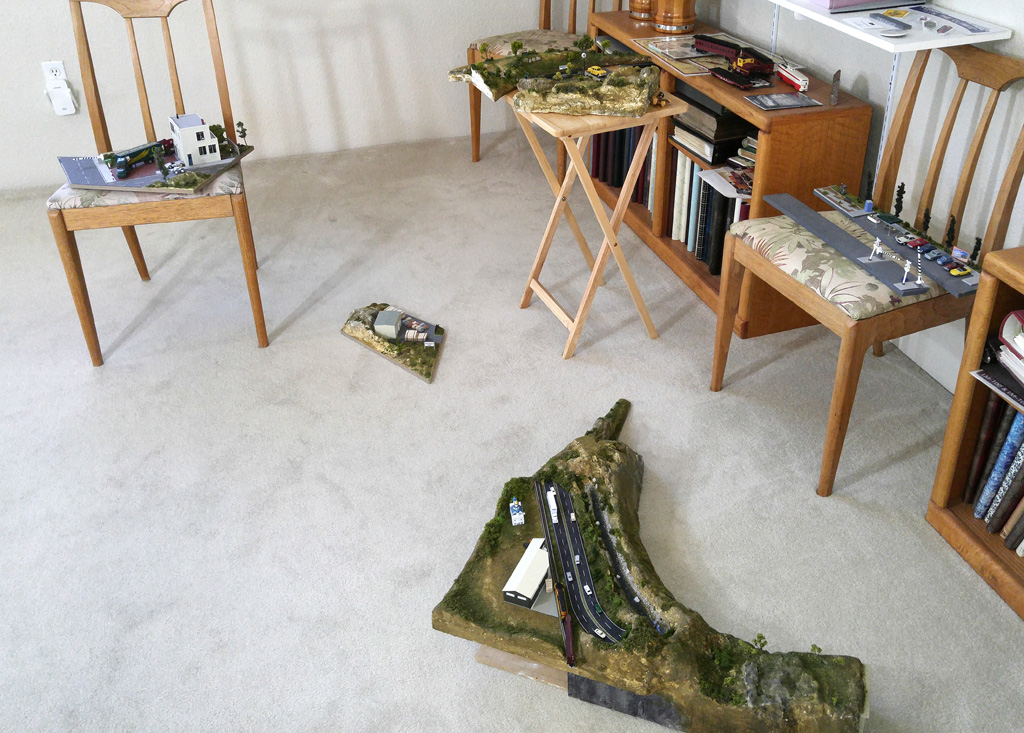
Jigsaw Modular ApproachThe word "modular" is used quite often in this hobby. Note that my modular methods have little to do with standards like NTrack or Z-Track that allow different modelers to build small, usually rectangular sections to a set of specifications so that they can be assembled into a larger layout at a club event or train show. (By the way, if you haven't checked out these techniques, they're worth a peek using the links above.) My modular approach was implemented out of necessity as well as preference. One challenge I faced was with the layout's mobility. Because my hobby area is also our guest room (visited annually by my young nephews) the entire layout had to be removable. The necessity of this "modular" approach turned out to be a fun and challenging aspect in designing buildings and scenes as the layout expanded. My mainlayout turned out like a jigsaw puzzle. It consists of about a dozen modules of varying shapes and sizes that can all be easily removed from the layout. I'm lucky that I don't have to relocate the layout to the garage very often - it does take some time. But being able to remove the entire layout and turn the table back to a table seems like a good way to enjoy model railroading for someone with limited space and/or budget. And with some planning (like gluing most of the components down) and a couple of shelves under the table, one could create a "quick-change" layout. |
|
Another huge benefit for a table-top layout that resides in a living-area is that having modules that are easily removed greatly simplifies being able to work on them in a garage or workshop rather than in a room. (Mrs. Pauley would not have appreciated my plastering and other relatively messy processes in the guest room.)
However there is one big caveat when not working from a unified plan. As available space is filled in, it becomes more challenging to figure out what should be added, where and how. Having to fit modules in the right places has been a very rewarding part of my experience and constantly tested my creativity and resourcefulness. It all fell into place incredibly well, and I'm sure that some viewers might think I did have a master plan. Another huge benefit to the modular approach is track maintenance. Several years after I completed my layout, I decided to give the track a good cleaning. After watching a video on YouTube, I decided to use mineral spirits for cleaning, followed by an application of a product called NO-OX-ID A Special that supposedly enhances electrical contact and keeps the rails cleaner. (Check out the video for more information.) By being able to remove several of the modules, access to the track was so much easier. As of this writing, the jury is still out regarding the NO-OX. Since I don't run the trains very often, I guess it might be a good "long-term" test, although there is a chance I may never notice any change. |
|
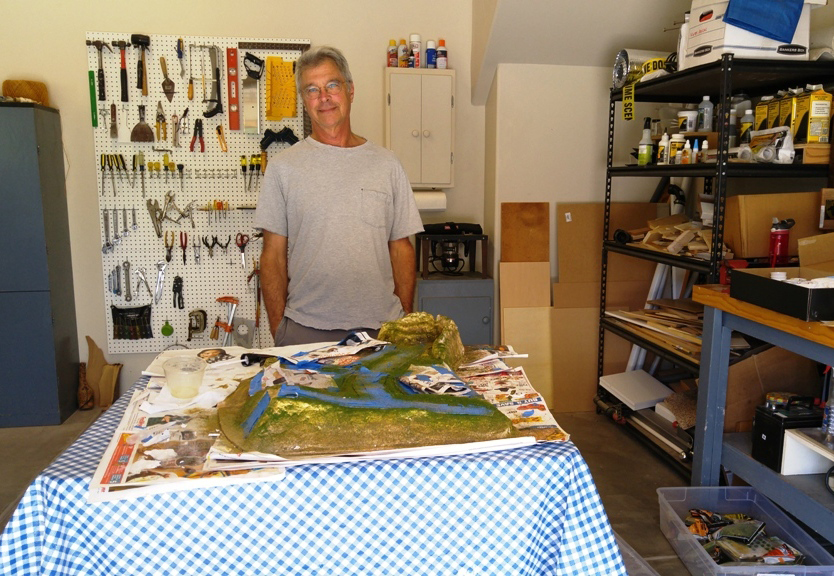
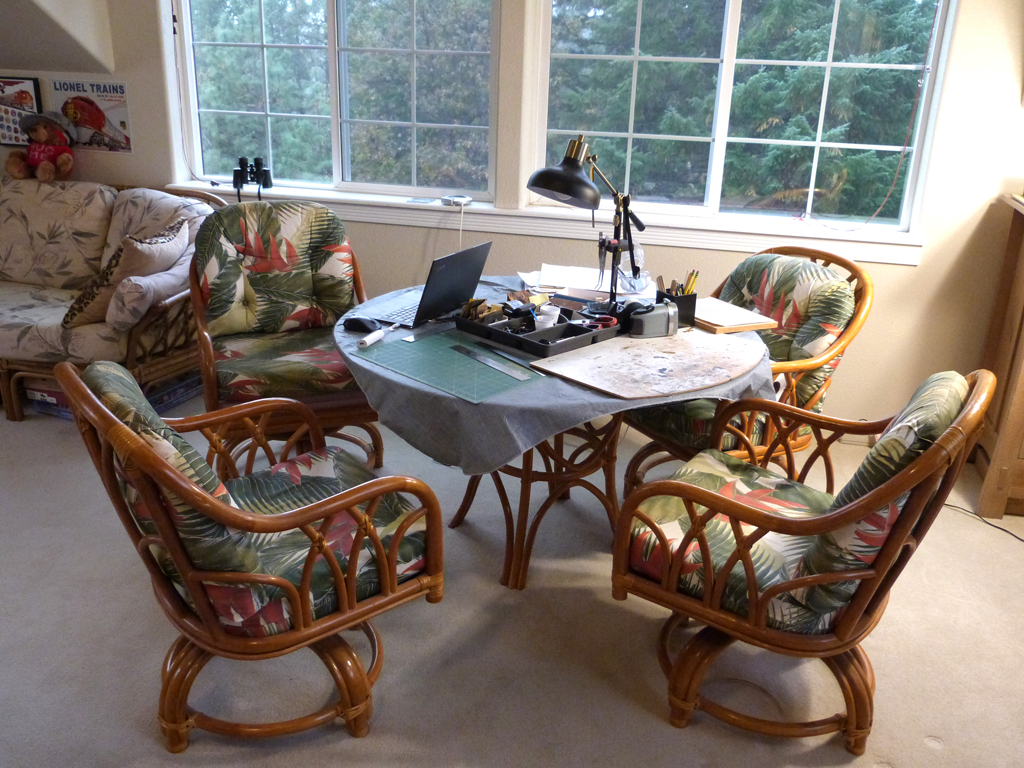
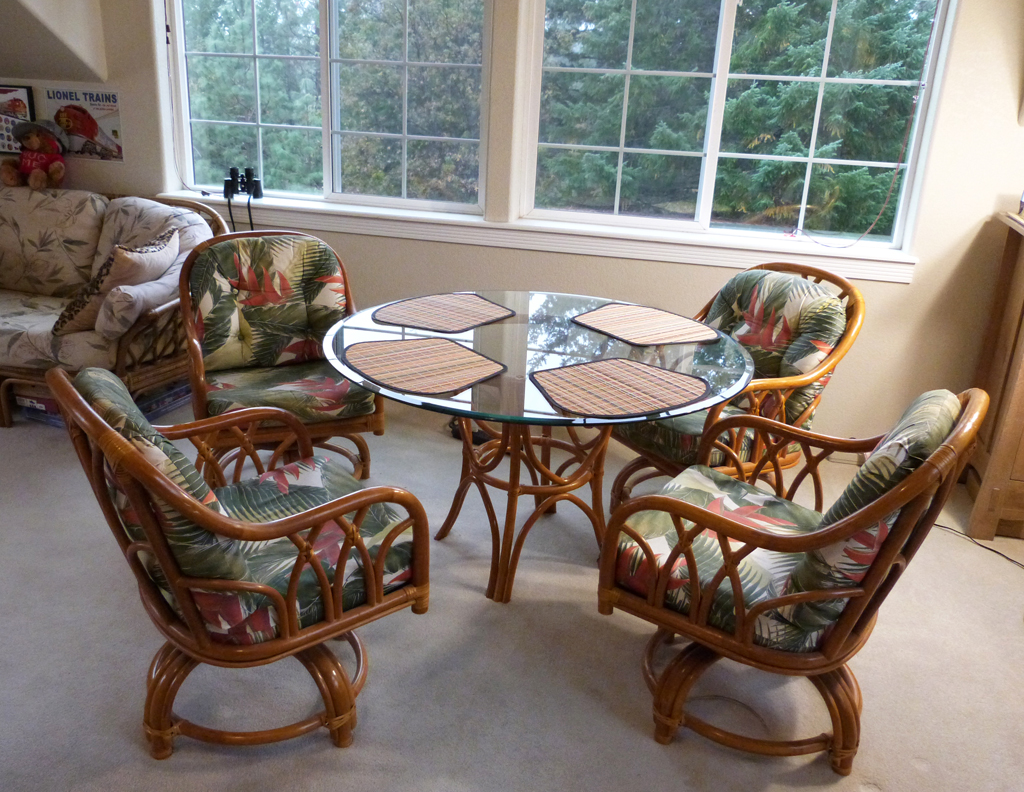
Quick Change Work Area Because the train room is also our guest room, I had to remain flexible in setting up my work space. While my major construction and plaster work is done in my garage, my "desk-like" work area in the train room consists of a 4' diameter round table set up with individual sections for various tasks: gluing/painting, cutting, computer, a stack of different notebooks and folders, and a sanding block. Often used tools are stored in the center of the table, as is a desk light which can be easily rotated to face different areas. I built and added a little hanging block on the lamp for tweezers. The fact that it's a glass-top table comes in handy when I need a light table. I simply put the lamp under the table. When we're going to have guests for more than one night, I can quickly place most of the contents of the "work" table in a storage box, and put it into a closet until the guests leave. It's a great opportunity to give the area a good cleaning. Make or BuySimply put, this is a decision whether to perform a function or produce something in one's own shop (or house), or to purchase that particular service or product from an outside vendor. Let's take lighting for example. When I decided to build a representation of my house, it was going to be on top of a mountain and very visible - sort of the "center piece" of the layout. As such, I wanted to take it to a higher level of detail than I had with previous buildings, and that included lighting, something that I knew somewhere between nothing and next to nothing about. If one has the knowledge or desire to create electrical work from scratch, I'm sure it would be rewarding and perhaps less expensive than purchasing complete products. But I was never very good with a soldering iron (especially at the tiny sizes of model lights and wires), and I had no desire to learn what I would need to know about wiring, lights, amps, etc. So I turned to an available system of easy wiring, connections and lights. Once again, I was up and running almost instantly. Scenery is another area in which many modelers formulate their own materials. At the beginning of one particular "how to" book I purchased early on, the author describes a formula for making basic scenery material. It contains, among other ingredients, vermiculite, Celluclay, Lysol, Earth brown paint, nonmagnetic dirt, and tea leaves.
|
|
While I have no doubt it's a fine mixture and would produce nice results, once again, I wasn't ready to prepare a concoction like that for my first scenery test. Instead I chose several types of plaster and "off-the-shelf" scenery products. I'm happy to say that my first test turned out pretty good.
Many modelers formulate there own scenery glue products rather than purchase them. It seems like a good place to save money. However I realized that I don't use enough glue to save that much, so I purchase scenic glue and scenic cement by the bottle. For me, it's worth a "buy" not to have to formulate my own glue. Of course, if I were to need a large supply for a huge layout, I might feel differently. When it comes to deciding whether you want to make something or buy it, ask yourself, "Is this something I want to do?" If the answer is "yes" by all means give it a go. Even if the answer is "maybe" give it a try. (If we can't experiment here in our hobby, then where?) But if you don't want to pursue things like scratch-built lighting, scenery, or other aspects of construction, there are simpler alternatives. You'll probably run into a number of decisions like that as you move along. Only you can determine if it's worth doing. Don't let others make up your mind for you. Of course you may purchase certain products at first, but later decide to get deeper into making them yourself. I'm sure that many folks with elaborate layouts started with a small set. Starting simpler means that you're committing less time and money to the project. And just because you start with one method, you can change it up later when you have more time, money, experience or just feel like it. |
|
Several years ago, I downloaded a trial version of AnyRail, a software application to assist in creating track layouts. At the time, my main layout was pretty far along and I really didn't need to use it. Not too long ago, that changed. As I was starting to get into my second version of an N scale layout, I thought it might be a good time to learn the software and see if it would be helpful. Bottom line – yes indeed, greatly helpful – and fun. I downloaded a newer version (much better than the original I had) and, after a short session, bought it. It's great being able to test fit track that you don't have. One of the very cool features is the selection of libraries which presents a list of all track available from a vendor. I'm glad I was already familiar with Kato Unitrack – it made using the software much easier. Anyrail is an extremely robust program that, as of this writing, I haven't fully explored. And their forum has links to some great videos. If you are planning a layout, especially using sectional track included with a train set, give it a try. It costs nothing to download (although I heavily suggest purchasing it if you actually use it in your production). |
|
The above outlines the approach I took and I'm sure it's not unique. On the other hand, it doesn't seem to be well-documented. That's why I'm here. ;) Check out this link for a summary of ideas and a suggested plan: |
  |
  |