10.
Déjà Vu All Over Again
(aka My N Scale Adventure, Part II)
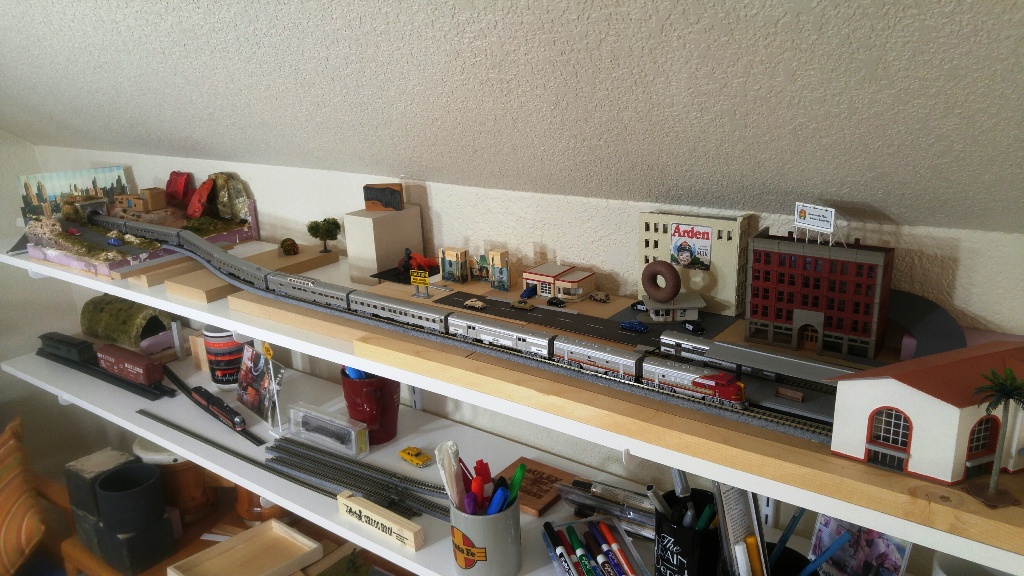
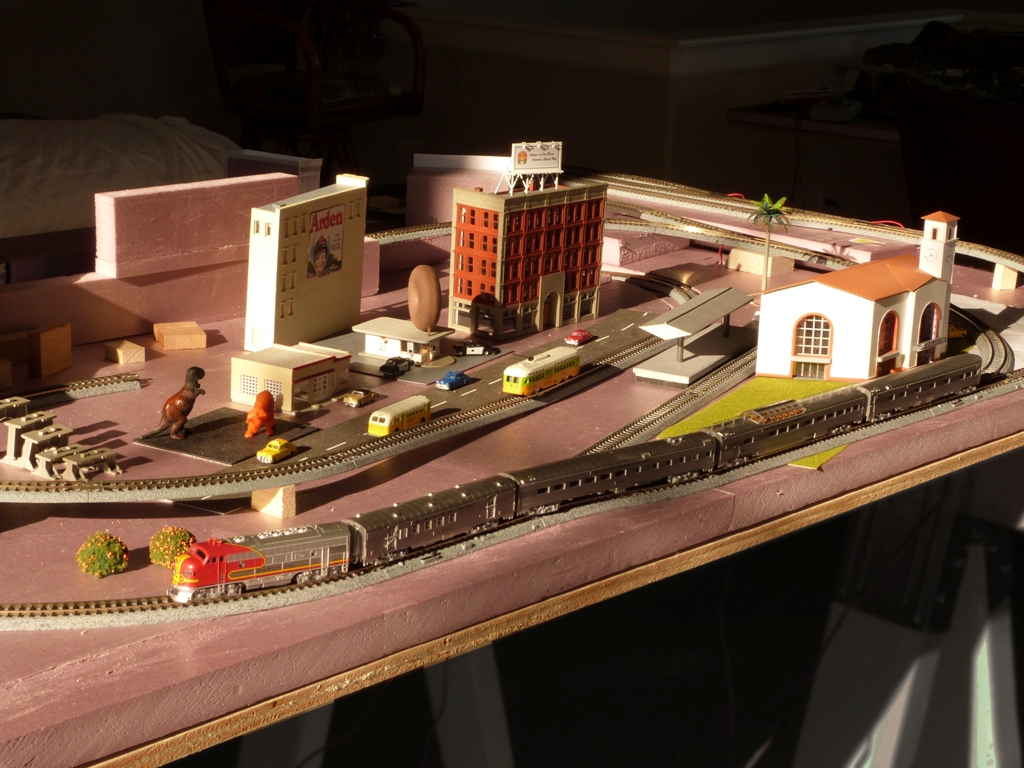
Like that quote usually attributed to Yogi Berra, this is like déjà vu all over again. As I described in My N Scale Adventure, a while back, I decided to experiment making a smaller layout and working in a smaller scale with Kato's Super Chief (my favorite train). Unfortunately the length of the train I wanted to model was way too long to fit on the smaller layout I had planned. I wound up filling a six foot shelf with a mock-up of a yet-to-be created Super Chief diorama.
|
|
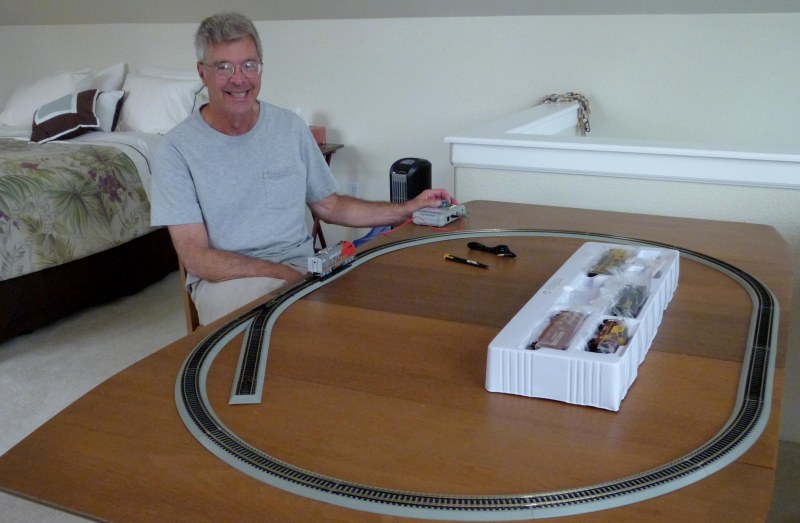
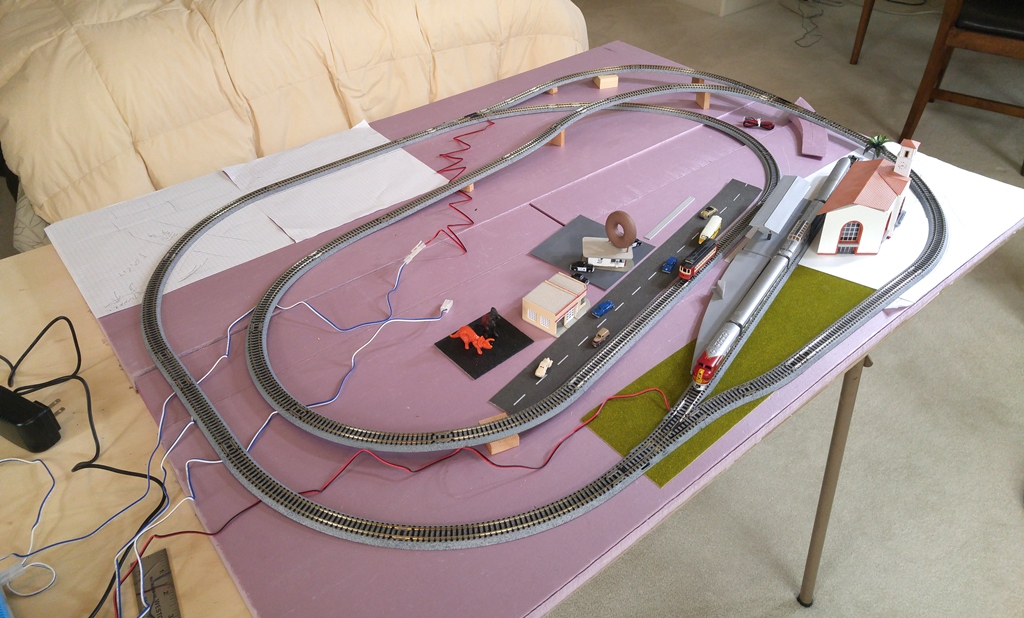
So for over a year, I've had a large, unused, N scale oval sitting on a 3' x 7' piece of plywood under my table. I reached a good stopping point on my main layout and, probably not coincidentally, started eyeing the layout below it, finding myself essentially at the same point that I was almost four years before when I started the hobby: staring at an oval track on a table, wondering what's next. |
|
|
|
|
Note This page will be devoted to the overall infrastructure of this layout. Specific sections/areas will be covered on subsequent pages.
I spent some time familiarizing myself with Kato's Unitrack. And I've got to say, it's pretty neat. It took a little time to decipher, but the way Kato sells their main and add-on kits can help someone new to the hobby build a good-looking, sophisticated layout relatively quickly. Besides the main track sets (M1 and M2) and the add-on sets they call V# (for Variations), they also sell a wide assortment of track (lengths, radii, etc.) in small packs. They have several accessories as well. Check out their web site, katousa.com.
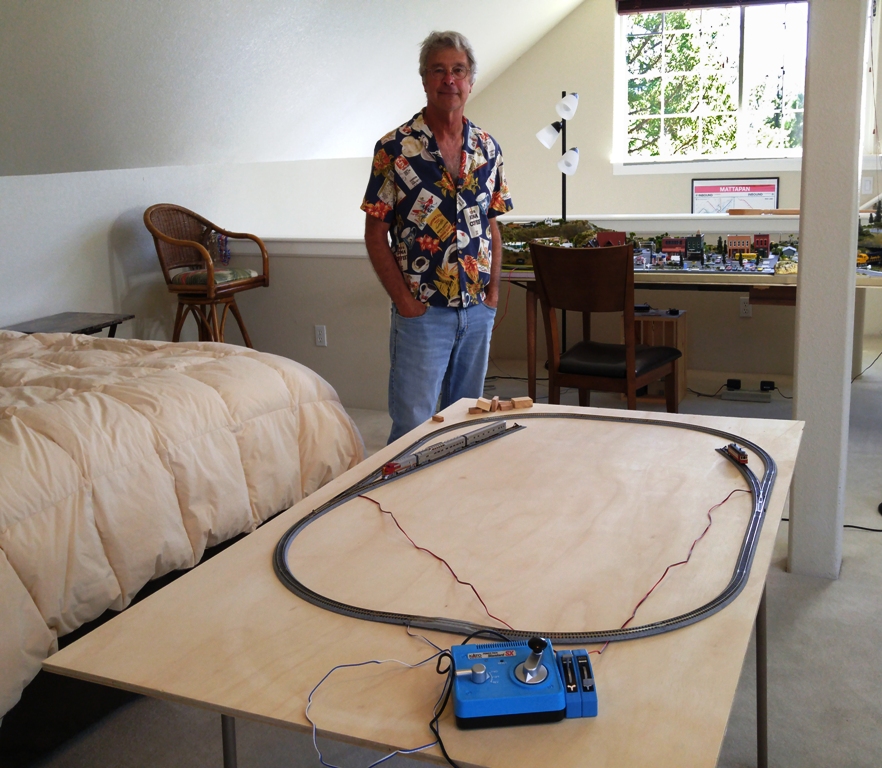
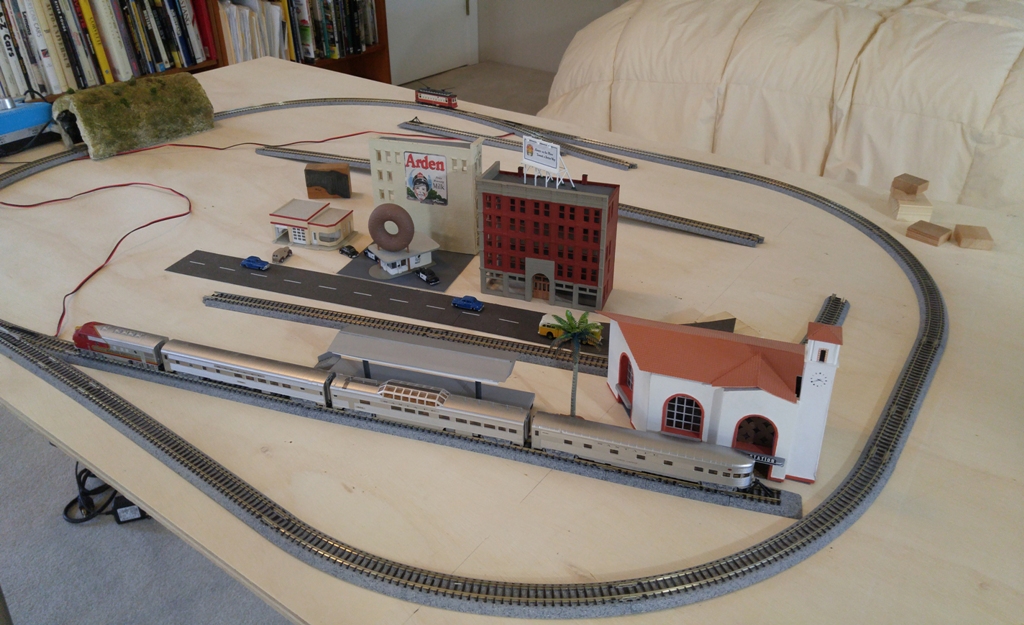
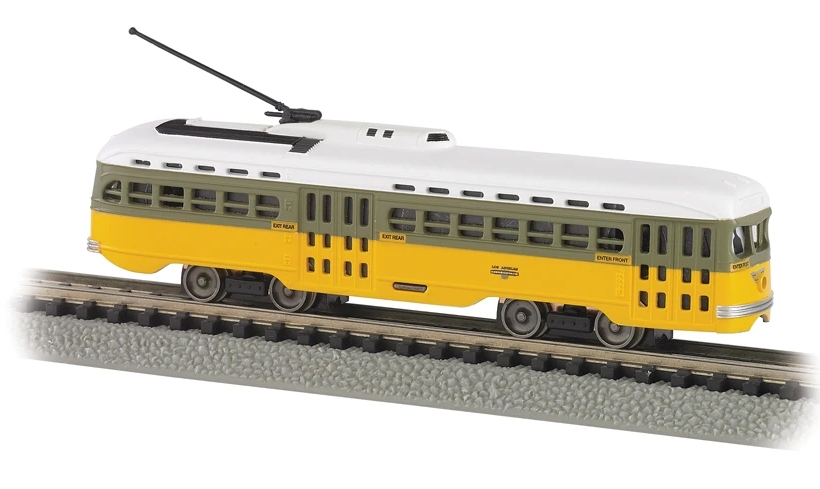
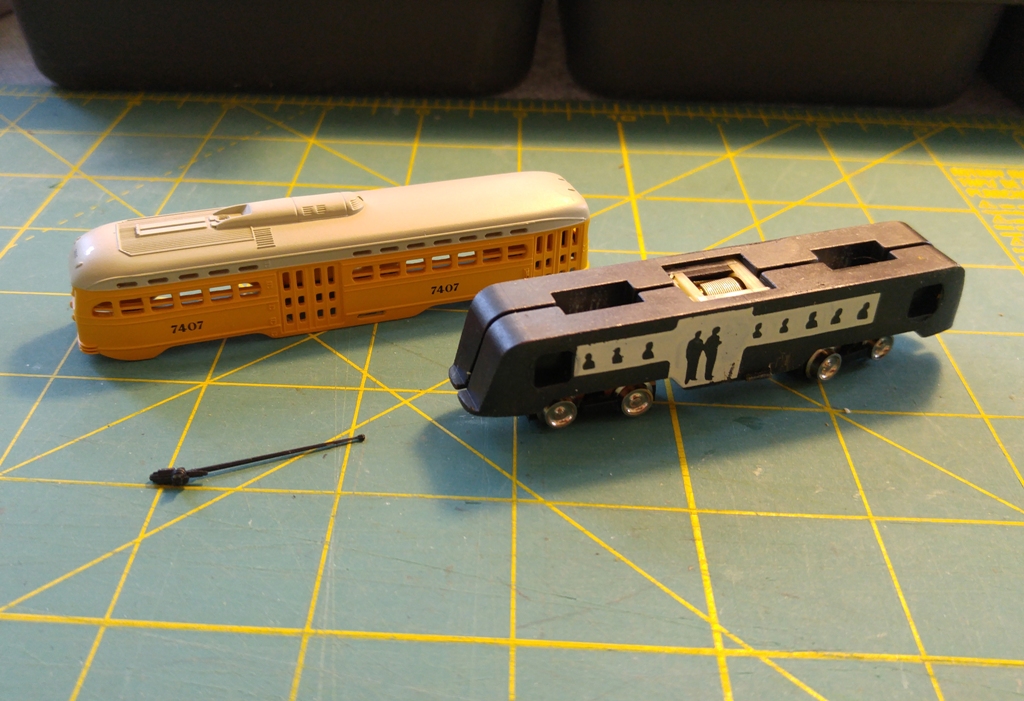
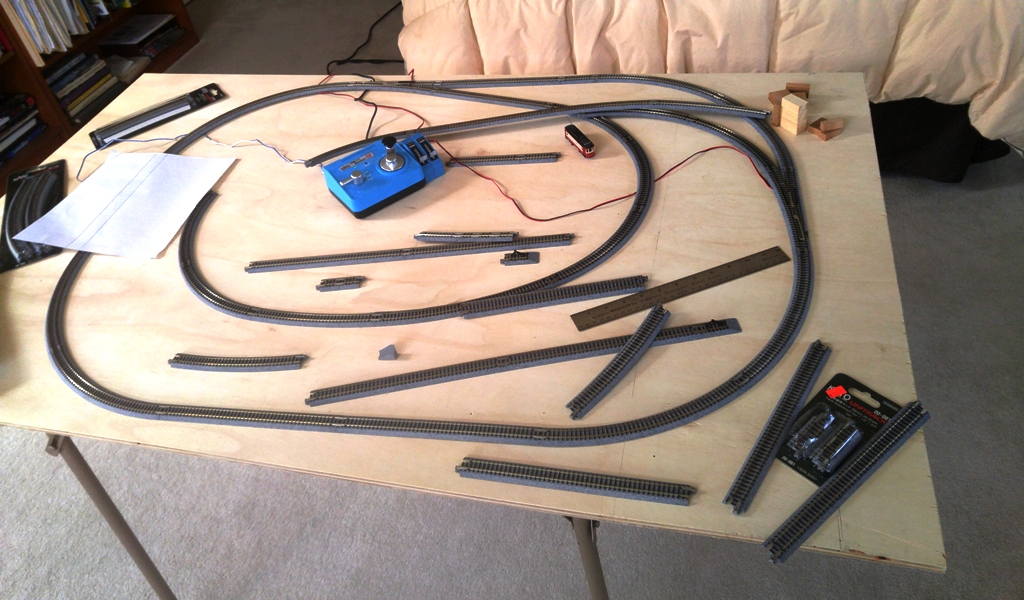
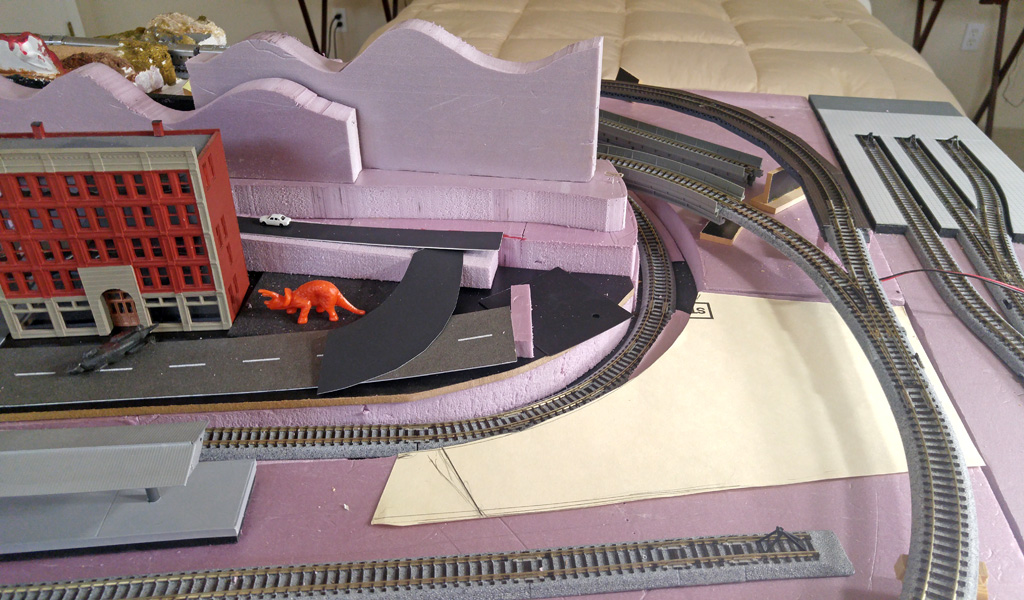
I cut the old seven foot piece of plywood down to five to keep my options open. But my goal is to build something small and easily transportable and I'm thinking that I will keep the length at four feet. The depth will be three feet. The plywood was temporarily placed on a slightly shaky 45-year-old folding card table. (That's not a typo - I've had that little table for over 45 years.) That issue was soon addressed (see below). In the first few days that I started playing with the track, I had already assembled three or four different configurations, testing different size ovals, sidings and, something I've always wanted to do, a "track over track" bridge. After pondering potential themes for several weeks, I decided to revert to my original plan for the Super Chief (trying to include as many cars as I could) and run a truncated version. I'd build a combination of an oval and a siding for the Super Chief as well as a Los Angeles trolley line of the 1950s. As a bonus, I'd be able to use a number of the components already on the shelf diorama shown above. I figure that the (heavily truncated) Super Chief will run on the outside (larger radius) track, while the trolley would run on an inner circle since it's comfortable on tighter radius curves. But I am going to connect the loops so that the trolley can experience a longer route and stretch his legs once in a while. Finding an N scale PCC trolley in 1950's Los Angeles colors proved impossible. But I was able to purchase a generic yellow PCC on Ebay and it wasn't very difficult to disassemble and paint it. It came out pretty good. In fact, I think it matches my 50's LA bus better than the Bachmann version does. |
|
|
|
|
|
It's kind of funny that the original plan – spelled out in My N Scale Adventure – is emerging as my direction. I guess once I became resigned to the fact that the Super Chief itself had to be significantly compressed, it all kind of fell into place, and I'm continuing the N scale project pretty much as I had envisioned it two years ago. The final layout will consist of several "modules" so that I'm easily able to bring sections to the garage or relocate the layout. But I am trying to plan and design most of the layout at once - something I didn't do with my first layout. It makes me all the more confident that sectional track is a great way to start for many newcomers. While I had a basic idea of the layout I wanted, I didn't know what was possible or what configuration worked best until I got some extra track and tried a few. I'm also going to make this a 360 degree layout - viewable from all sides. |
|
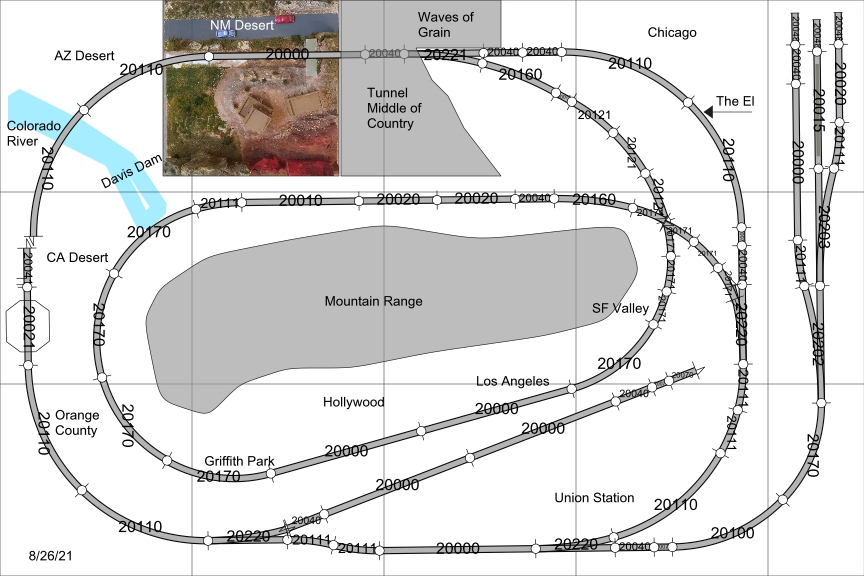
I used a software (AnyRail) to help create model railroad track layouts. (More information about this is on the A Different Way to Start page.) After having spent some time playing with the software, I produced what I think is something close to my final layout. Late in the process, I decided to add a small (6"x36") diorama of a switching yard where I'll store other cars of the Super Chief which I had wanted to keep on display somewhere. Perfect! And if I can get good at switching, they could be part of a functional rail yard. (This idea changed later on, with the area for the switching yard became a small representation of Dearborn Station in Chicago.)
|
|
The square photograph at the top of the track diagram on the left is a small test section I made for the shelf diorama a while ago. I think I can incorporate it here. Now that I'm playing with actual track, I've realized that a big advantage in assembling sectional track is how much play there is. I'm sure the software produces an exact geometric solution relying on the specs of the track (length, radius, etc.), but, in reality, there is quite a bit of flexibility, especially on the longer lengths of multiple pieces. I came close to the plan that the software produced, but it's good to know that there is a range of comfortable "adjustments" one can make without putting strain on the track in any direction. As such, I moved the track slightly in two places to make connections. And no, I don't consider it cheating. ;)
If you've come here the long way (reading everything I've previously written) you know that I've avoided traditional benchwork. But it caught up to me in this project. I knew some day it would. It occurred to me that a great way to "spice up" my little layout would be to include lights. Woodland Scenic's "Just Plug" lighting worked so well in a few spots on my HO layout, I thought they would be a great addition here. But the need to drop wires throughout the layout at various locations has negated my idea of using a regular table. With that in mind, a custom bench seems like the way to go. Of course, it's no surprise that a guy who is into "simple" would take a simple approach to benchwork. I figured a frame on four legs would be the base for my sections which will have wires hanging from below. Once the sections are placed on or in the frame, I can attach the wires to control boxes, perhaps affixed to the inside of the frame rails.
It may look like I'm planning to build a pink pool table but this was only a quick model so I could visualize it in 3D. (Plus it was fun to make.) It looks like this plan could work well. And after four years, I've finally watched a few "how-to" videos on benchwork. (There are several good ones on Model Railroader's Video Plus.) And I've gone back to some "how-to" books I purchased years ago, finding good information and possible design ideas. But, even after all that, I'm still not ready to build the bench until I'm further along in my project. I have some production steps to figure out, like wiring and module breaks, and probably some stuff I haven't thought of yet. So I came up with a fast and easy solution to creating a temporary, function layout bench.
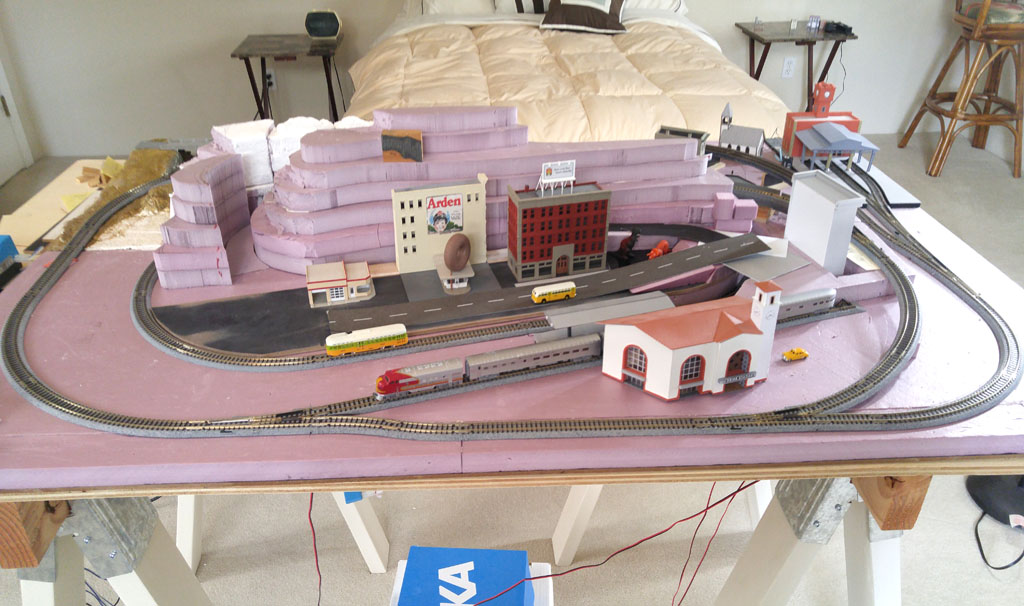
Using inexpensive brackets and 2x4s, I've constructed two saw horses on which I placed the plywood. (I'm sure I'm not the first to do something like that.) On top of that, I'll build my main modules which will consist of two 18"x48" sheets of 3/16" MDF with 1" foam on top. My rail yard will be a similar, smaller module built adjacent to the main 3'x4' layout. Holes can then be drilled anywhere for light and switch wires. (As of now, the foam is in place, but not the MDF.) I was surprised that the 1/2" plywood is slightly warped as it has been sitting on the floor for a long time. But it's fine for my current purpose, and I'll continue building my layout on this temporary bench. At some point, I'll build a real one. The modules, by their nature and design, will be easily transferrable. "A Celebration of the Super Chief" starts to take shape. With the temporary bench in place, it's time to start mocking up the layout and see how it all might fit together. |
|
|
|
|
|
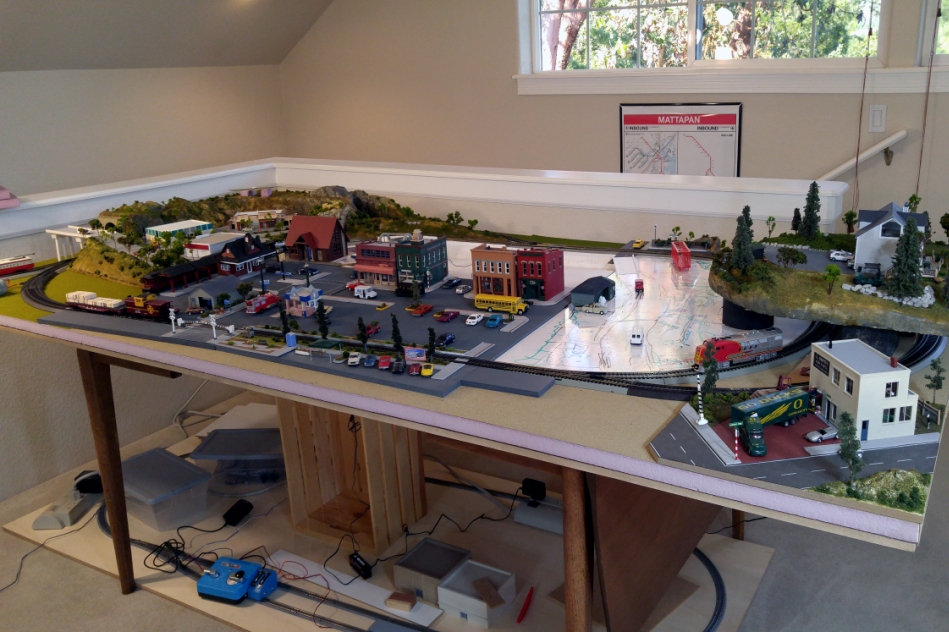
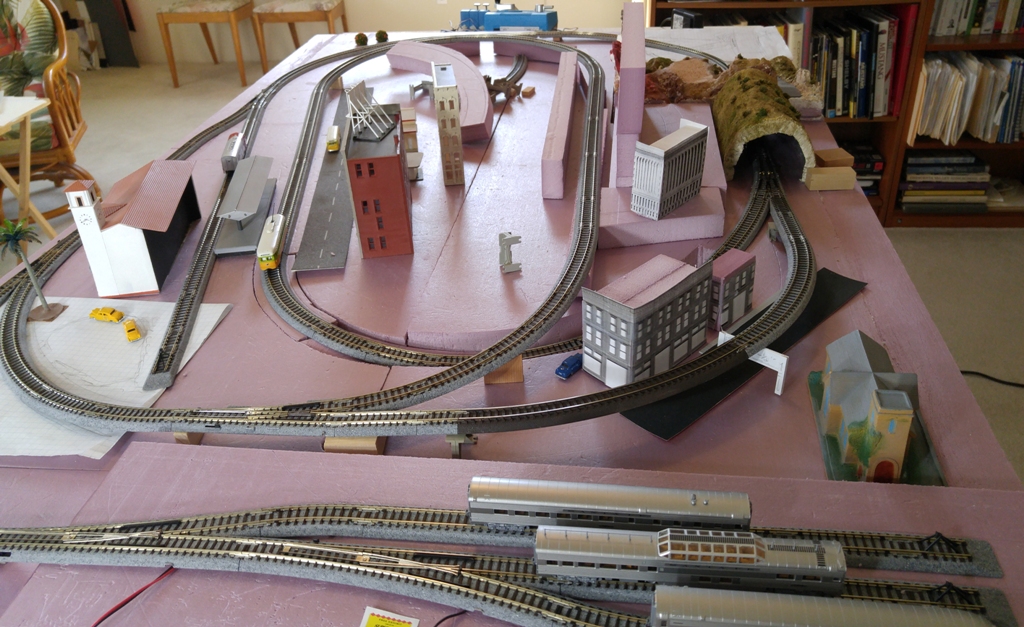
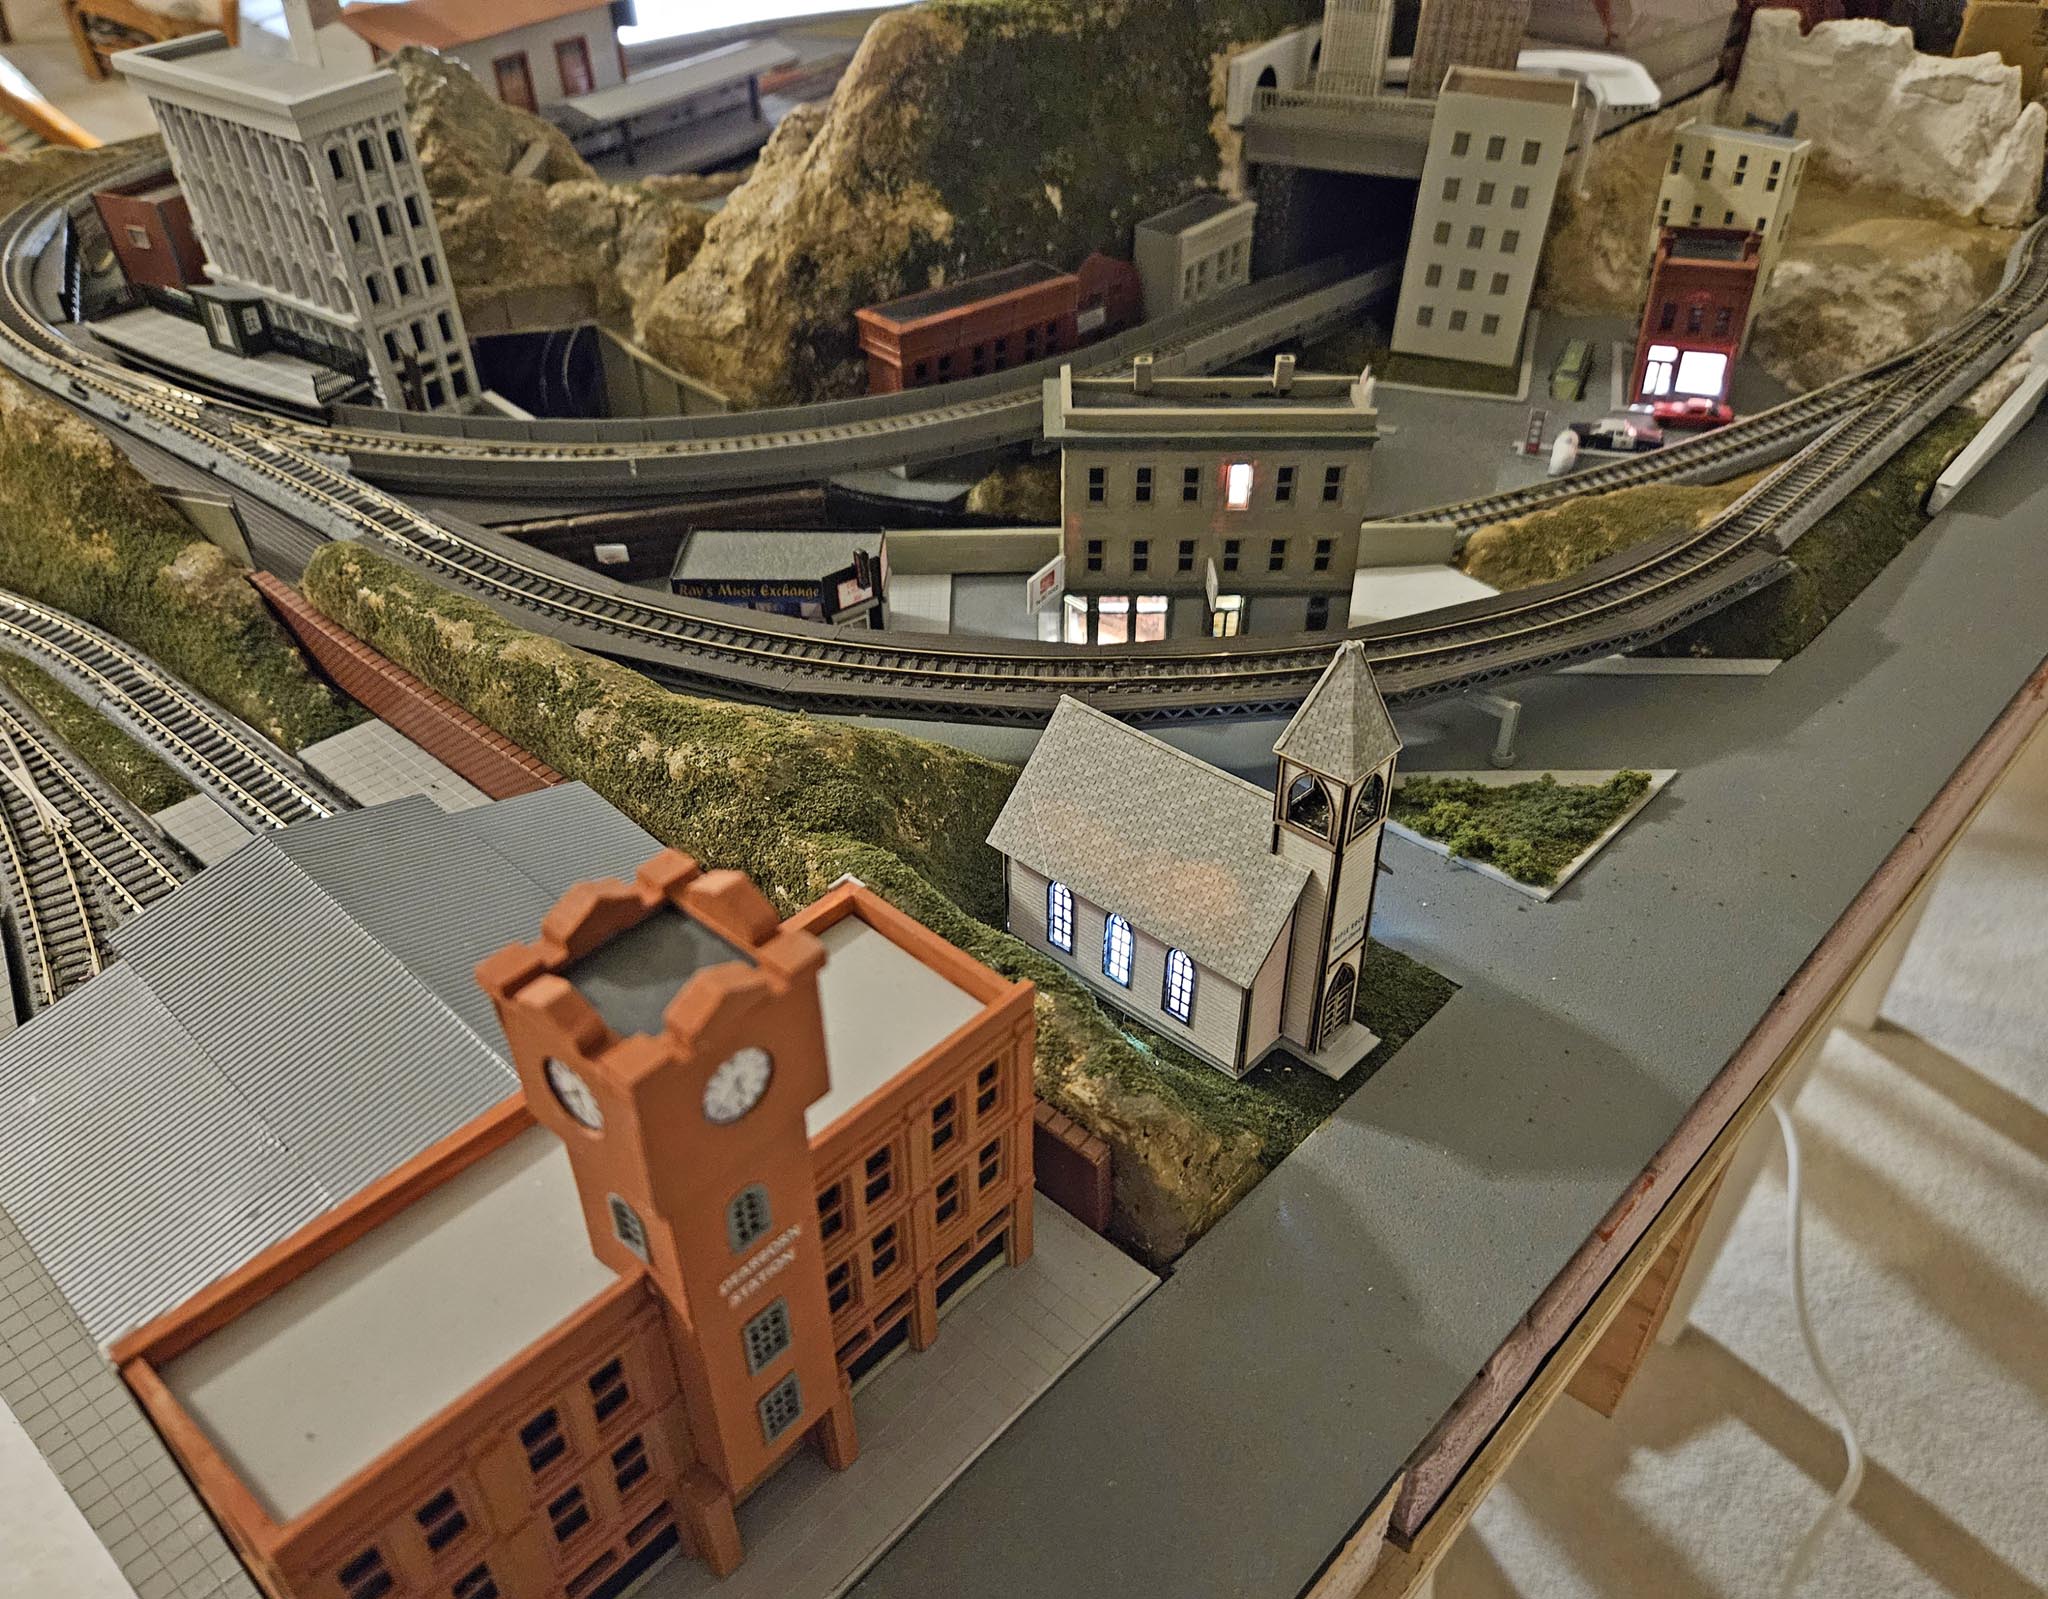
I spent quite a bit of time in the mock-up process. Unlike my first layout when I was working on one small section at time with little or no thought about the next one, I wanted to have a good idea of how this one will all come together before I dig in too deeply. I will also test topography, bridges, tunnels, etc. After spending some time altering the mockups, the overall layout has started to take shape. |
|
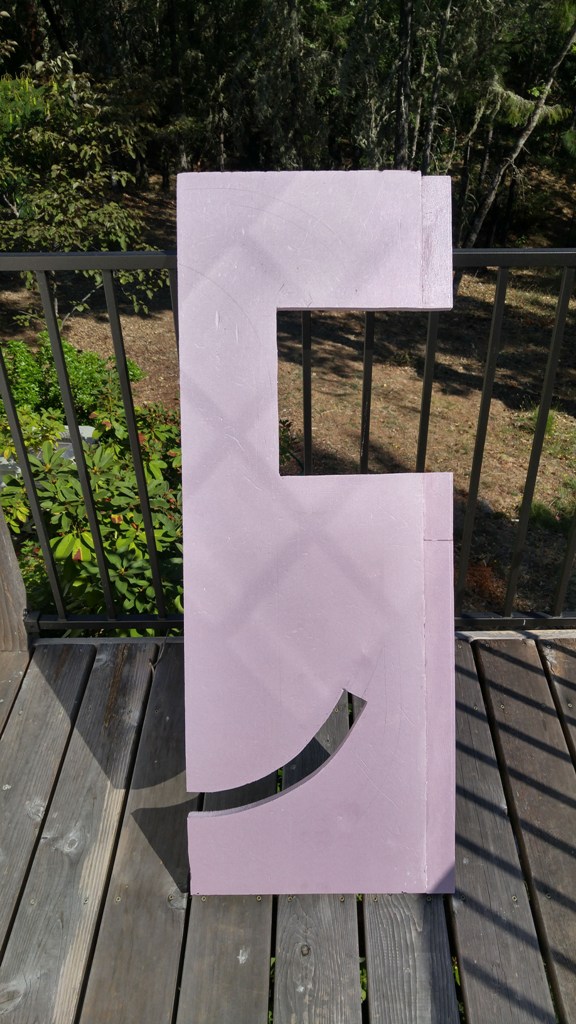
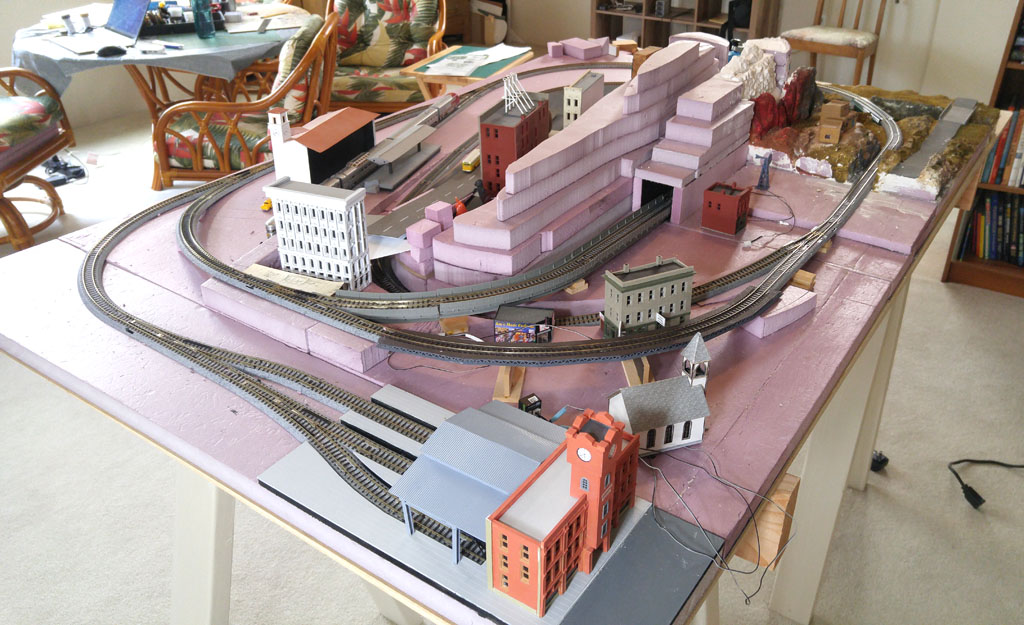
As documented on other pages, I've spent some time working on the "Southwest " and "Chicago" sections. And I have pretty much finalized the four modules that will make up the layout. The largest one is Los Angeles (not surprising since I spent 40 years there). I glued the foam base to 3/16" MDF boards, cutting out where the trolley will descend under a bridge. Then I fine-tuned the sizes so that the pieces fit against each other. The entire layout will measure 54"x36", with an additional 6" on the side for controllers. The next step was to mock up the heights of all the track to make sure it will be fully functional. To be honest, it is not an ideal set up. The biggest problem is that the radius of my curves is much tighter than they should be. Although the train will run, it will not look as good as it should - and it will not be able to negotiate the trolley run. My other challenge is the short distances I have for the necessary slopes. The trains will not perform well - if at all - on an overly-steep incline. I think I'll be stretching the capability of sectional track. By using shorter pieces in certain areas, it will provide a better capability to vary the inclines in a given length. I also plan to disguise the sectional track with ballast to make it look a bit more realistic. I created an incline test by inserting temporary height adjustments where needed. For the risers, I used pieces of wood in quarter-inch increments so that I could document how high the terrain should be under the tracks when I am going to place the foam. I then ran the train and trolley to discover and fix any little kinks in the track or scenery – I found and fixed a few where the train touched the scenery or the tracks did not bump together smoothly. When all the trains ran with no issues I moved onto the scenery. |
|
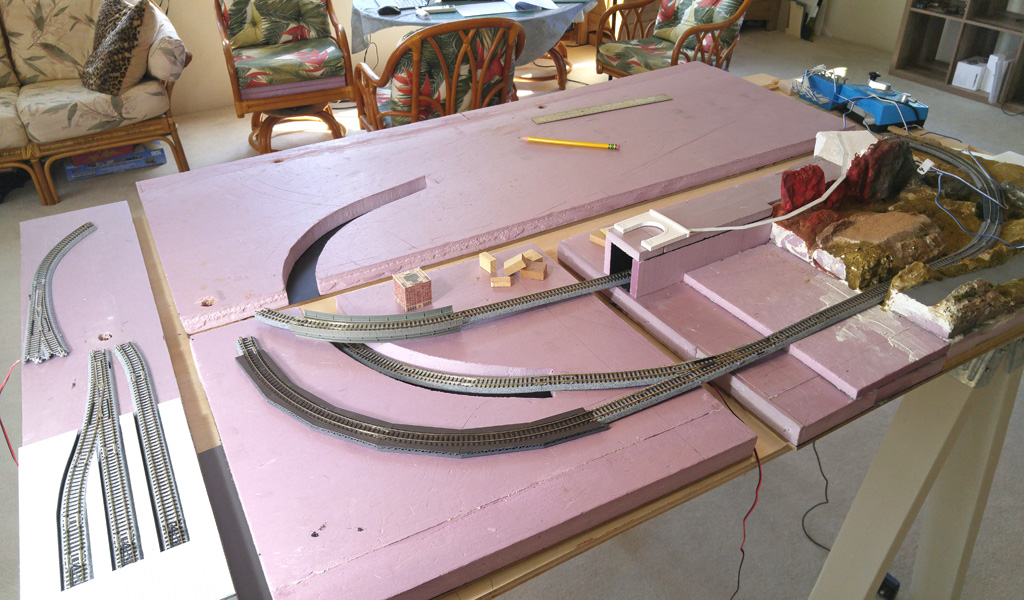
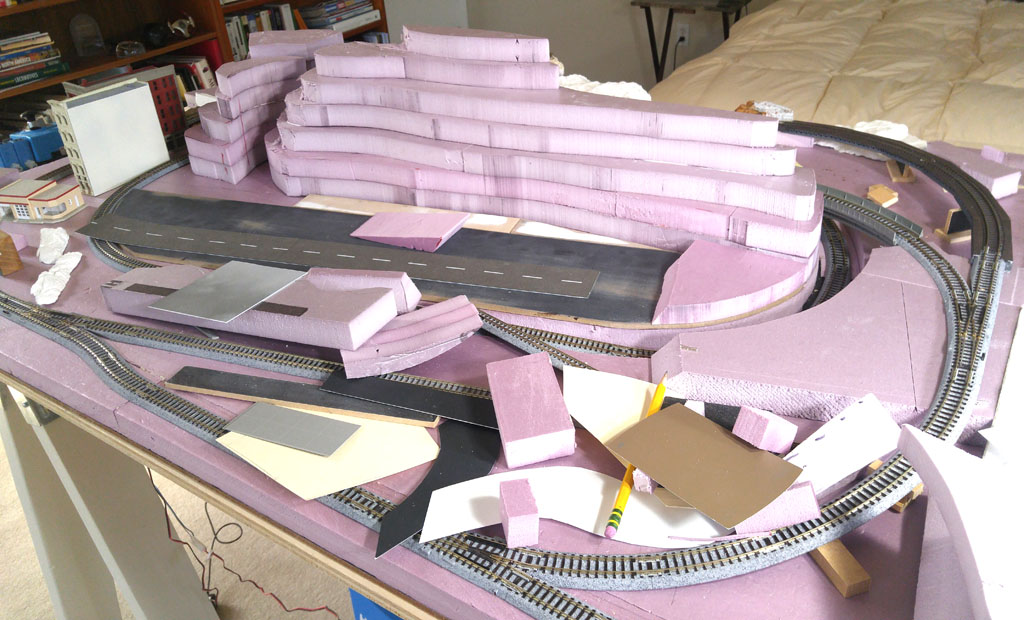
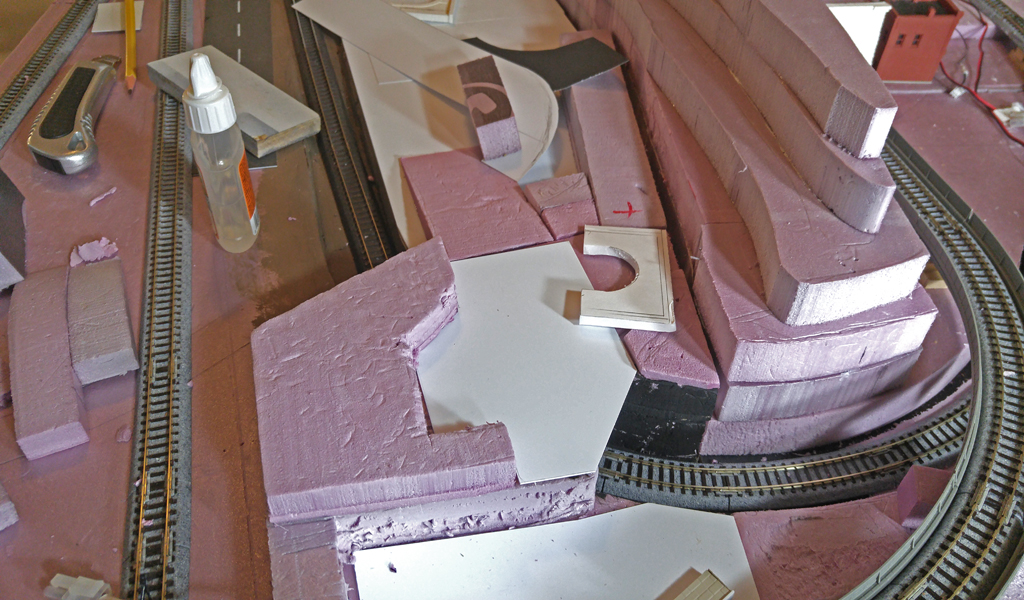
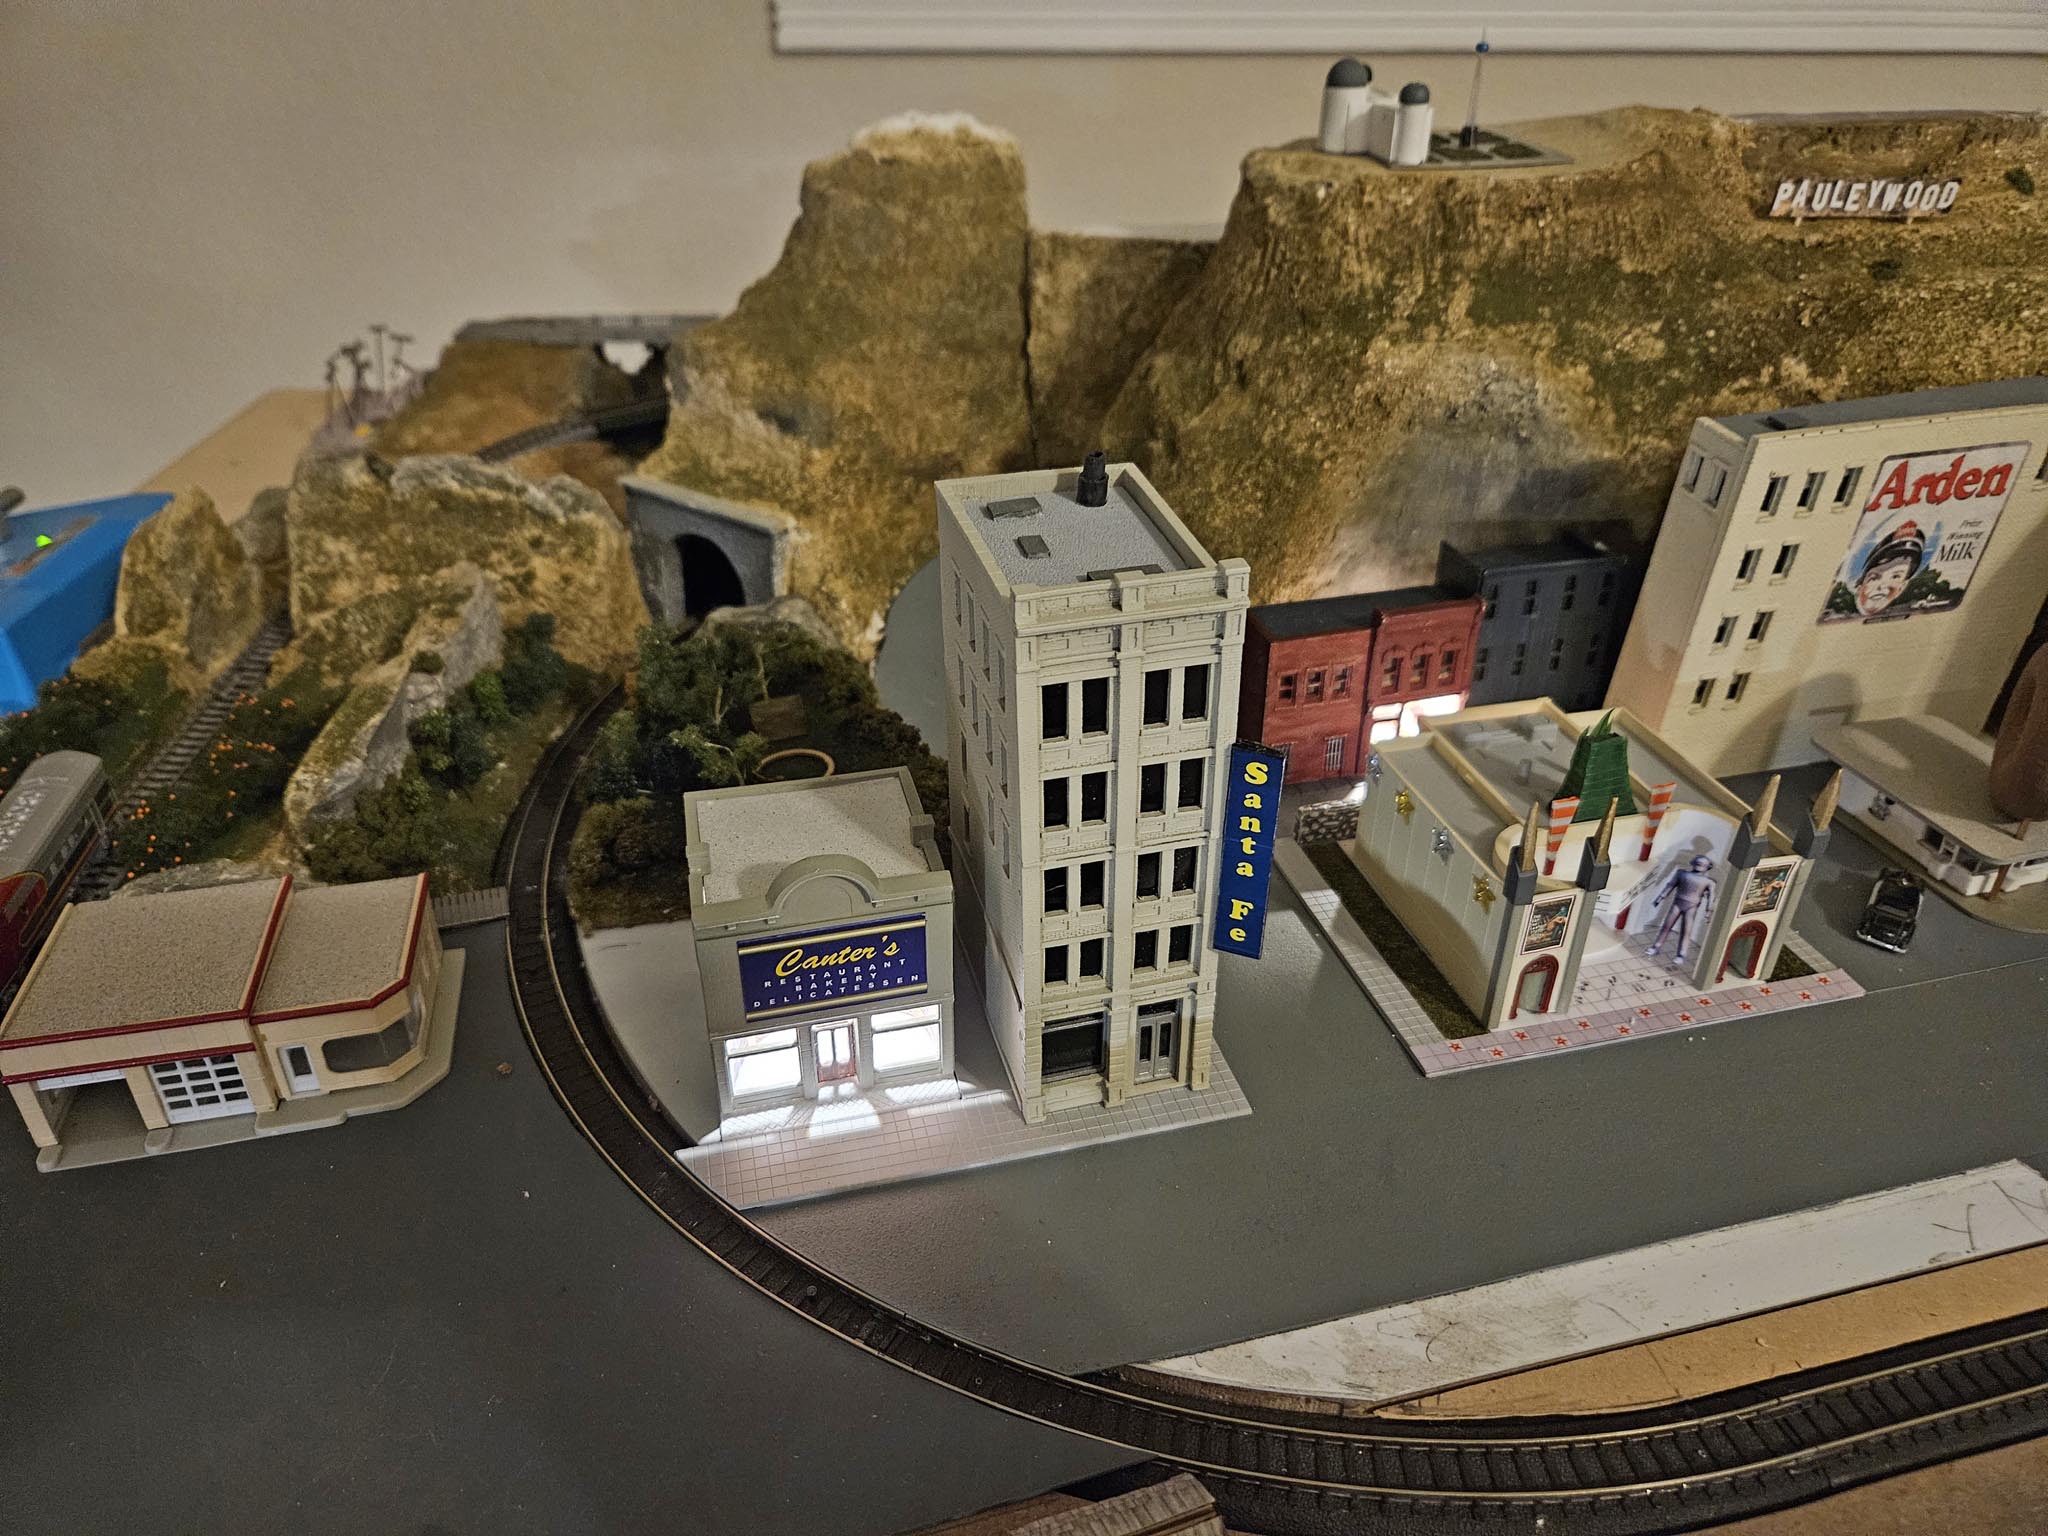
Using pink foam, I started to mock up what will be several areas of mountainous terrain. In some spots where simple measurements weren't easy, I used an old file folder to fine tune a template for cutting the foam. This is a great technique as you can easily add or remove material to the template until it's a perfect fit. The mountain range is literally going to be the centerpiece of the layout, creating a backdrop for the main areas. I've been slowly adding layers, continuing to evaluate the surrounding mockups. When it feels "right" I'll start to carve shapes and add plaster material.
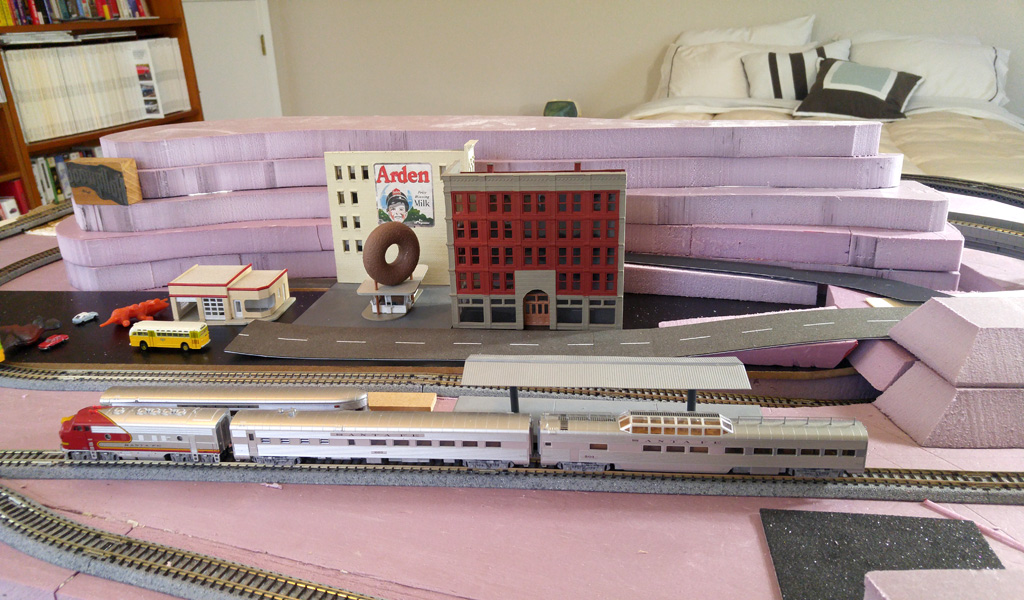
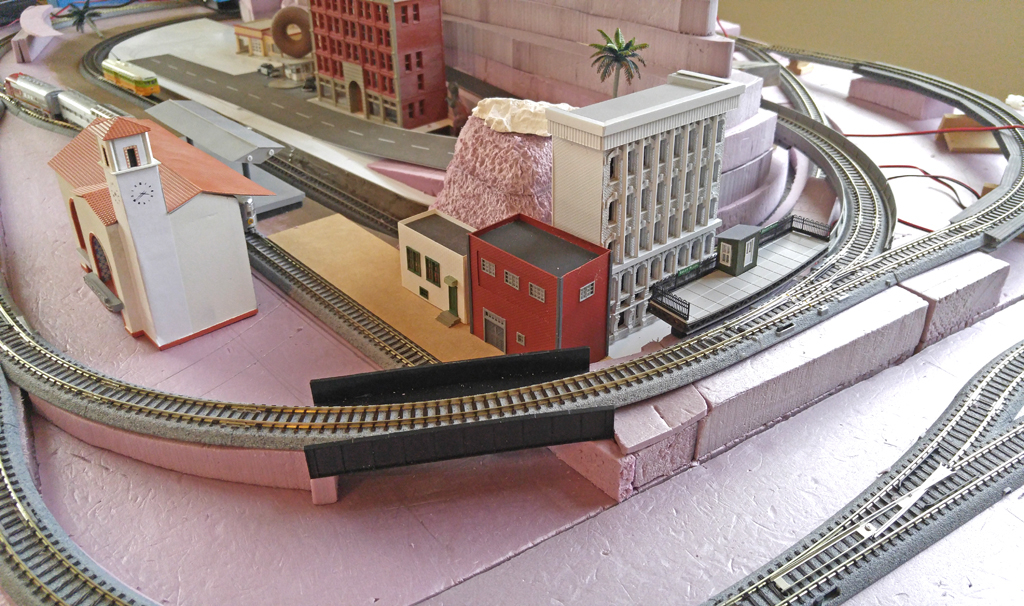
Stepping Back In the past couple of months, I've made a lot of progress in several areas of the layout, mainly designing, building (and re-building) some mountains, and finalizing track placement and elevation. Foam makes a good tool for "prototyping" and designing in 3D. It's cheap, cuts and shapes very easily, and, because it can be removed or modified quickly, is a good material for "trial and error" designs of terrain and structures. But I realized that before I added many more details, I needed to finalize some of the general topography and structure placement. I decided to step back a bit. First, I cleared the entire layout of non-essential material (small pieces of foam, wood, cardboard, etc.). Then I placed all the structures and other components that I've completed. The final step was getting the train and trolley running smoothly by adjusting some track clearance and elevation issues. (For a long train on a track that's way too tight, it runs fine.) It's all sort of like a "dress rehearsal." |
|
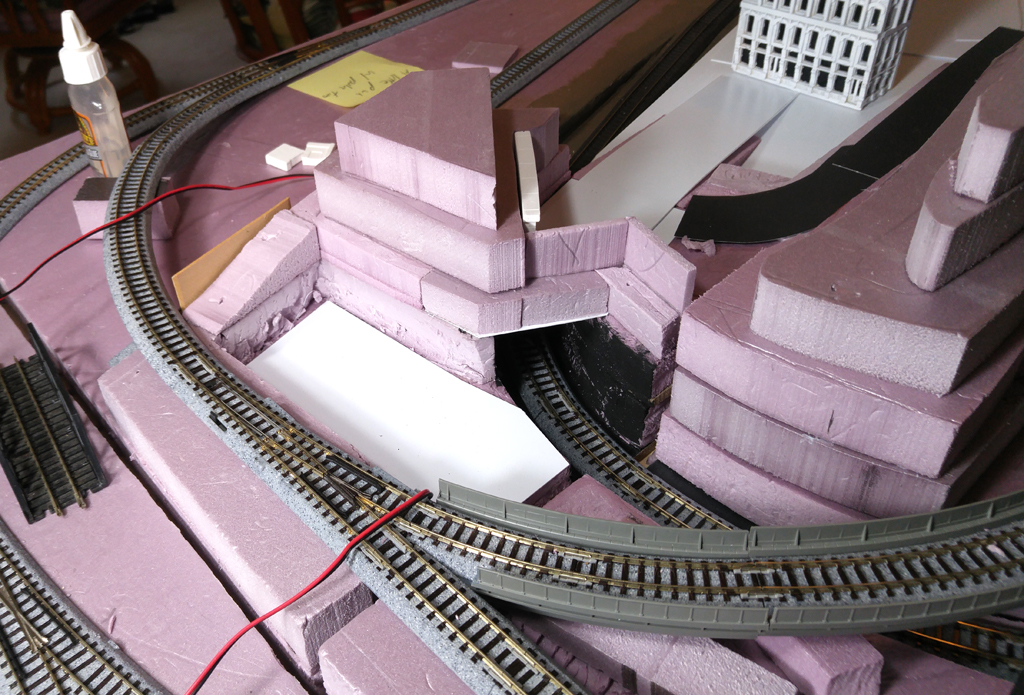
A New Technique I took a little time to get a big-picture feel for the layout, and plan my next steps. After that "evalution" period, I decided to work on a complex little section that will blend several different parts of the layout. Besides having Los Angeles on one side and Chicago on the other, it also has to include a trolley tunnel and disguise the sudden ending of a street. I had a general idea about what I was going to do, but I needed more detail, and the only way I could accomplish that was by actually building topography and roadway with pink foam, styrene and clear Gorilla Glue. It's like using custom-made building blocks that can be easily modified. It also ties into the mountain-building technique described above. I discovered this technique sort of by accident when, after I glued up some foam thinking it was finalized, I decided to change it. As it tuned out, it was very easy to break apart the pieces with a minimal amount of damage. I find it very valuable to envision a proposed area in 3D. A big bonus to this method is that once part of the layout is shaped and configured just the way I want it, I don't have to do anything else. Even though it pulls apart relatively easily if desired, I consider it strong enough and ready for the next step - probably a surface like plaster cloth or Sculpt-a-mold. To be honest, it's temporary until I stop messing with it – and then it becomes permanent. :) I've actually used this technique somewhat in the past with two-sided tape. But working with more than a piece or two is too cumbersome to be precise. And it would have to be taken apart and glued when finalized. |
|
|
|
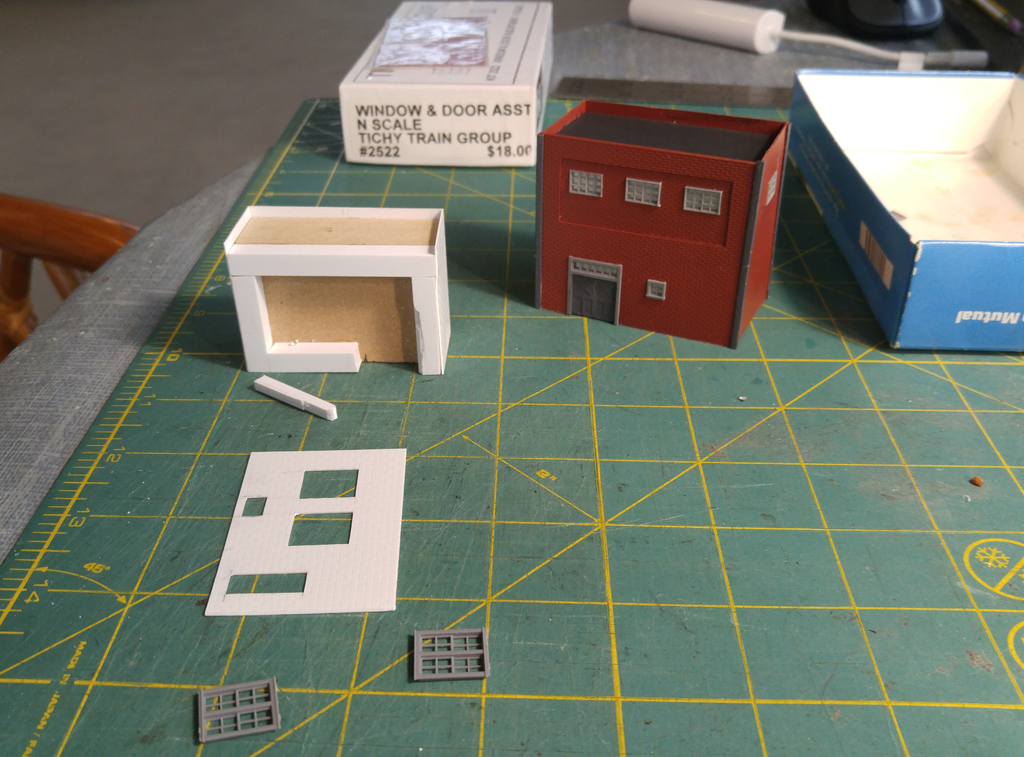
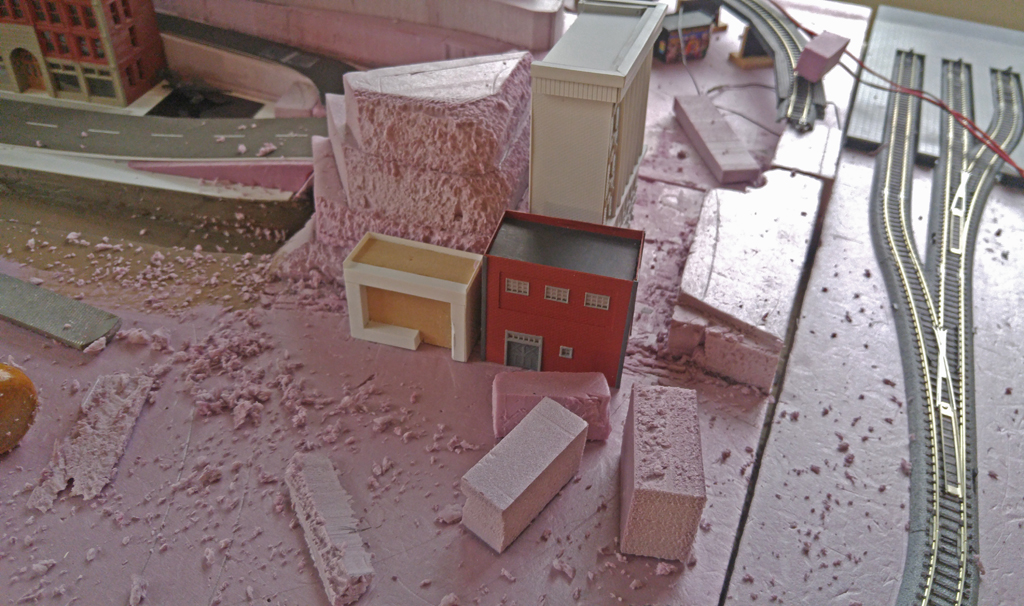
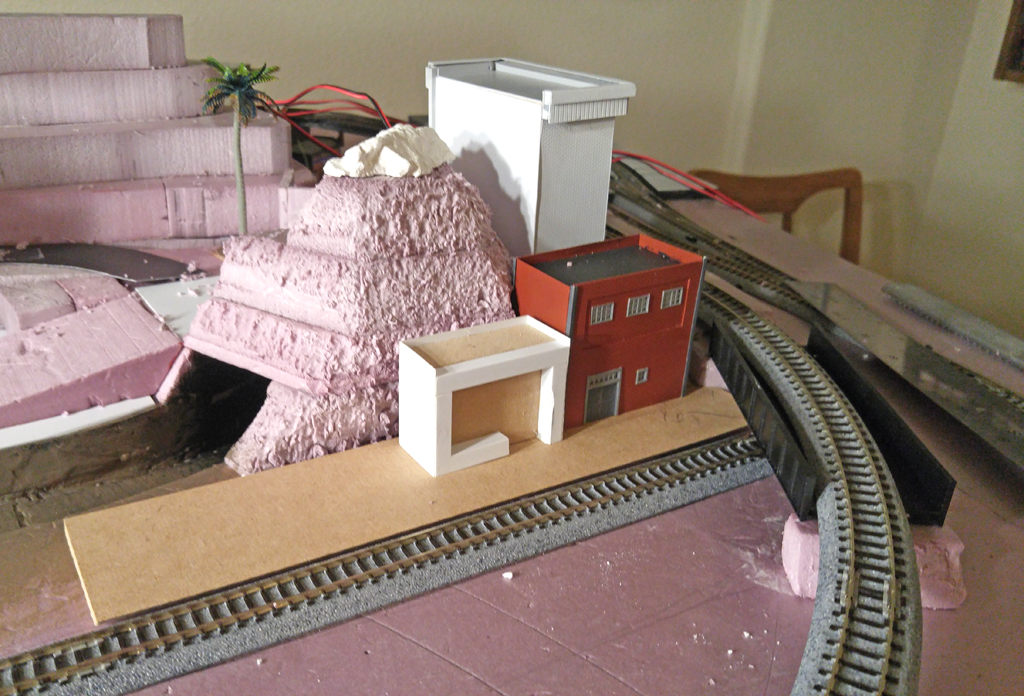
As I continued to shape the mountain above (separating Chicago and Los Angeles), I realized that a few small warehouse-type of buildings would be appropriate next to the track. They may someday be replaced by something more specific, but right now they will be just a bit of background scenery. Once again, I used a simple technique for quick construction: a block of wood, some patterned styrene sheets and a few doors and windows.
|
|
|
|
|
|
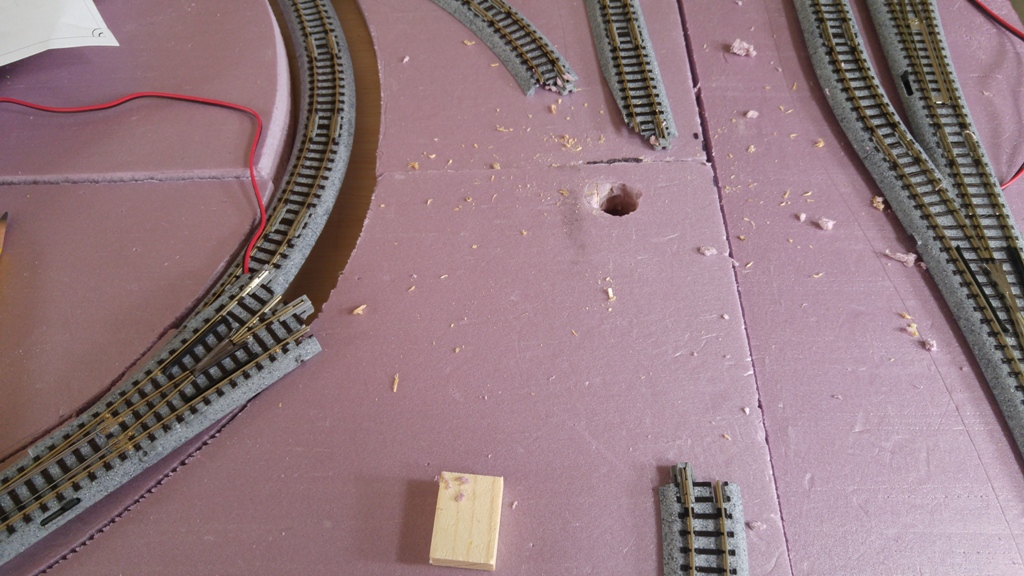
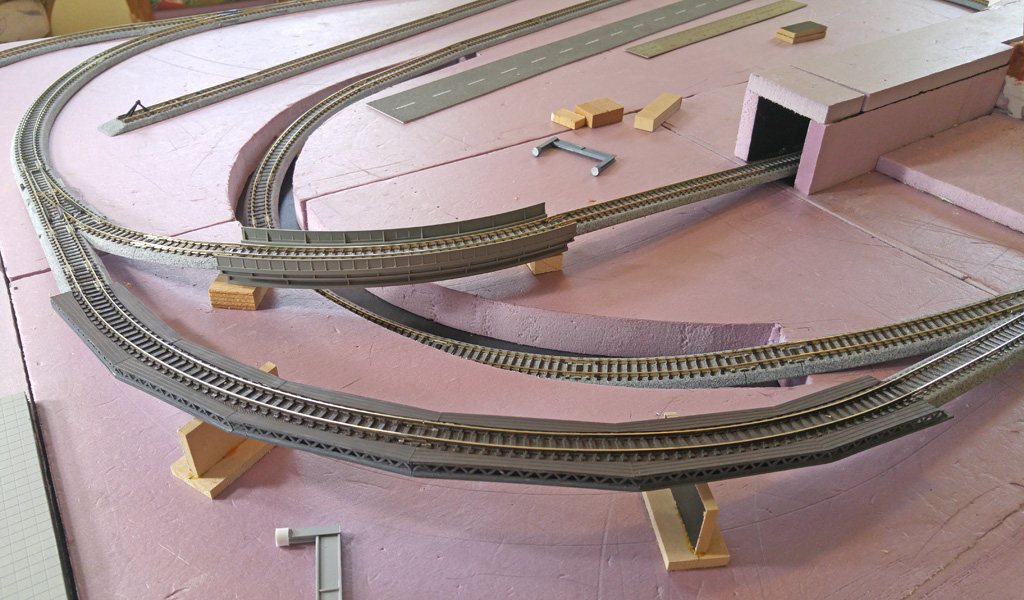
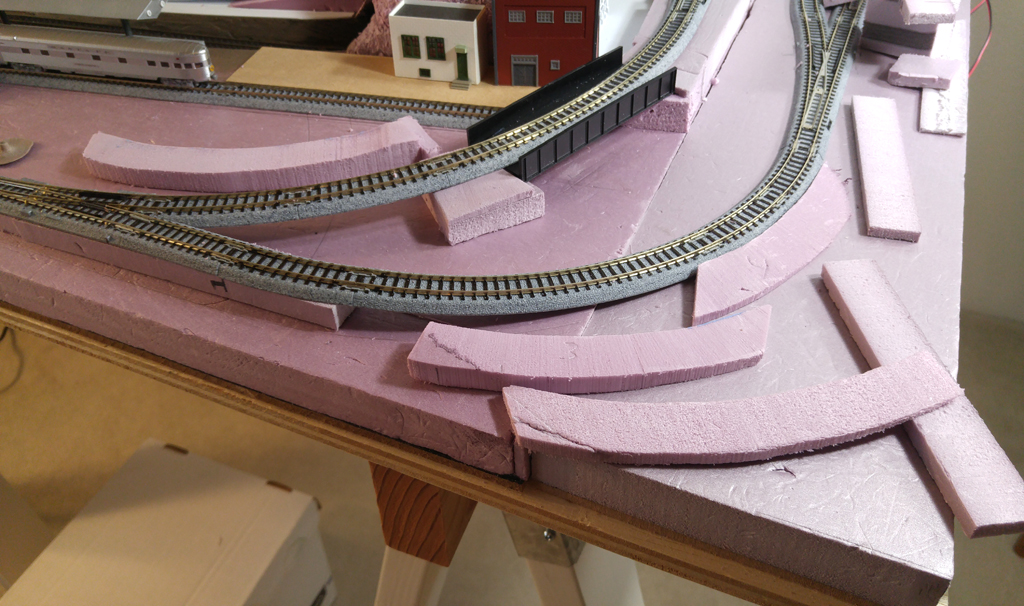
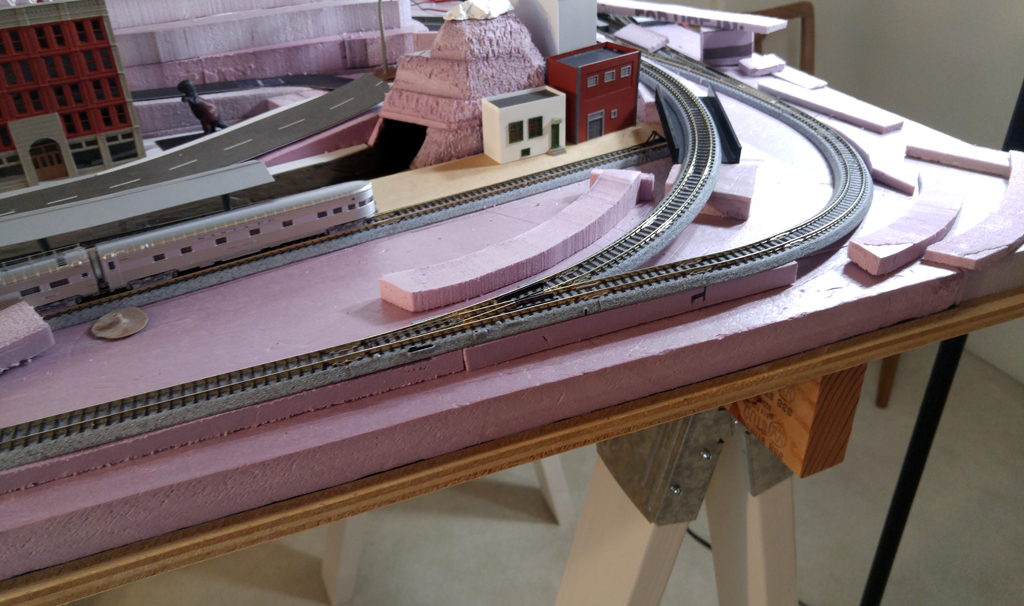
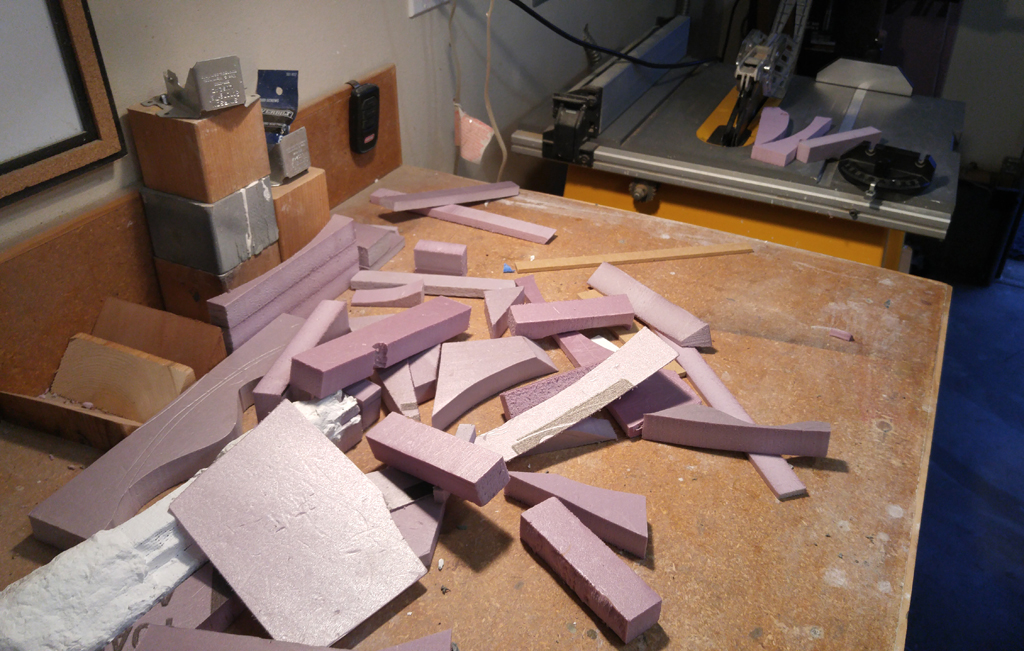
If you've read other sections of this site, you know how much I enjoy working with pink foam. It's cheap, readily available, easy to shape and lightweight. It glues relatively quickly (I use Gorilla Glue - don't use any kind of Super Glue). It can be covered with plastic or plaster products, or it can even be painted. I decided to use blocks of the foam to raise some of the track to its eventual level. After I used wood and foam spacers to determine the height and slope of my track, I used a band saw to cut and shape the foam. I kept most of it just wide enough for the track itself thinking that I would add terrain around it later on. |
|
|
|
Wiring After working on the Los Angeles section for a few months (Layout Details 13: California), I decided that this would be a good time to address the layout’s wiring, which, for this layout, is relatively simple. I had already started the process while working on other areas, but now that most of the buildings have been constructed and placed, this would be a good time to sort out the wiring for lights and switches. |
|
|
|
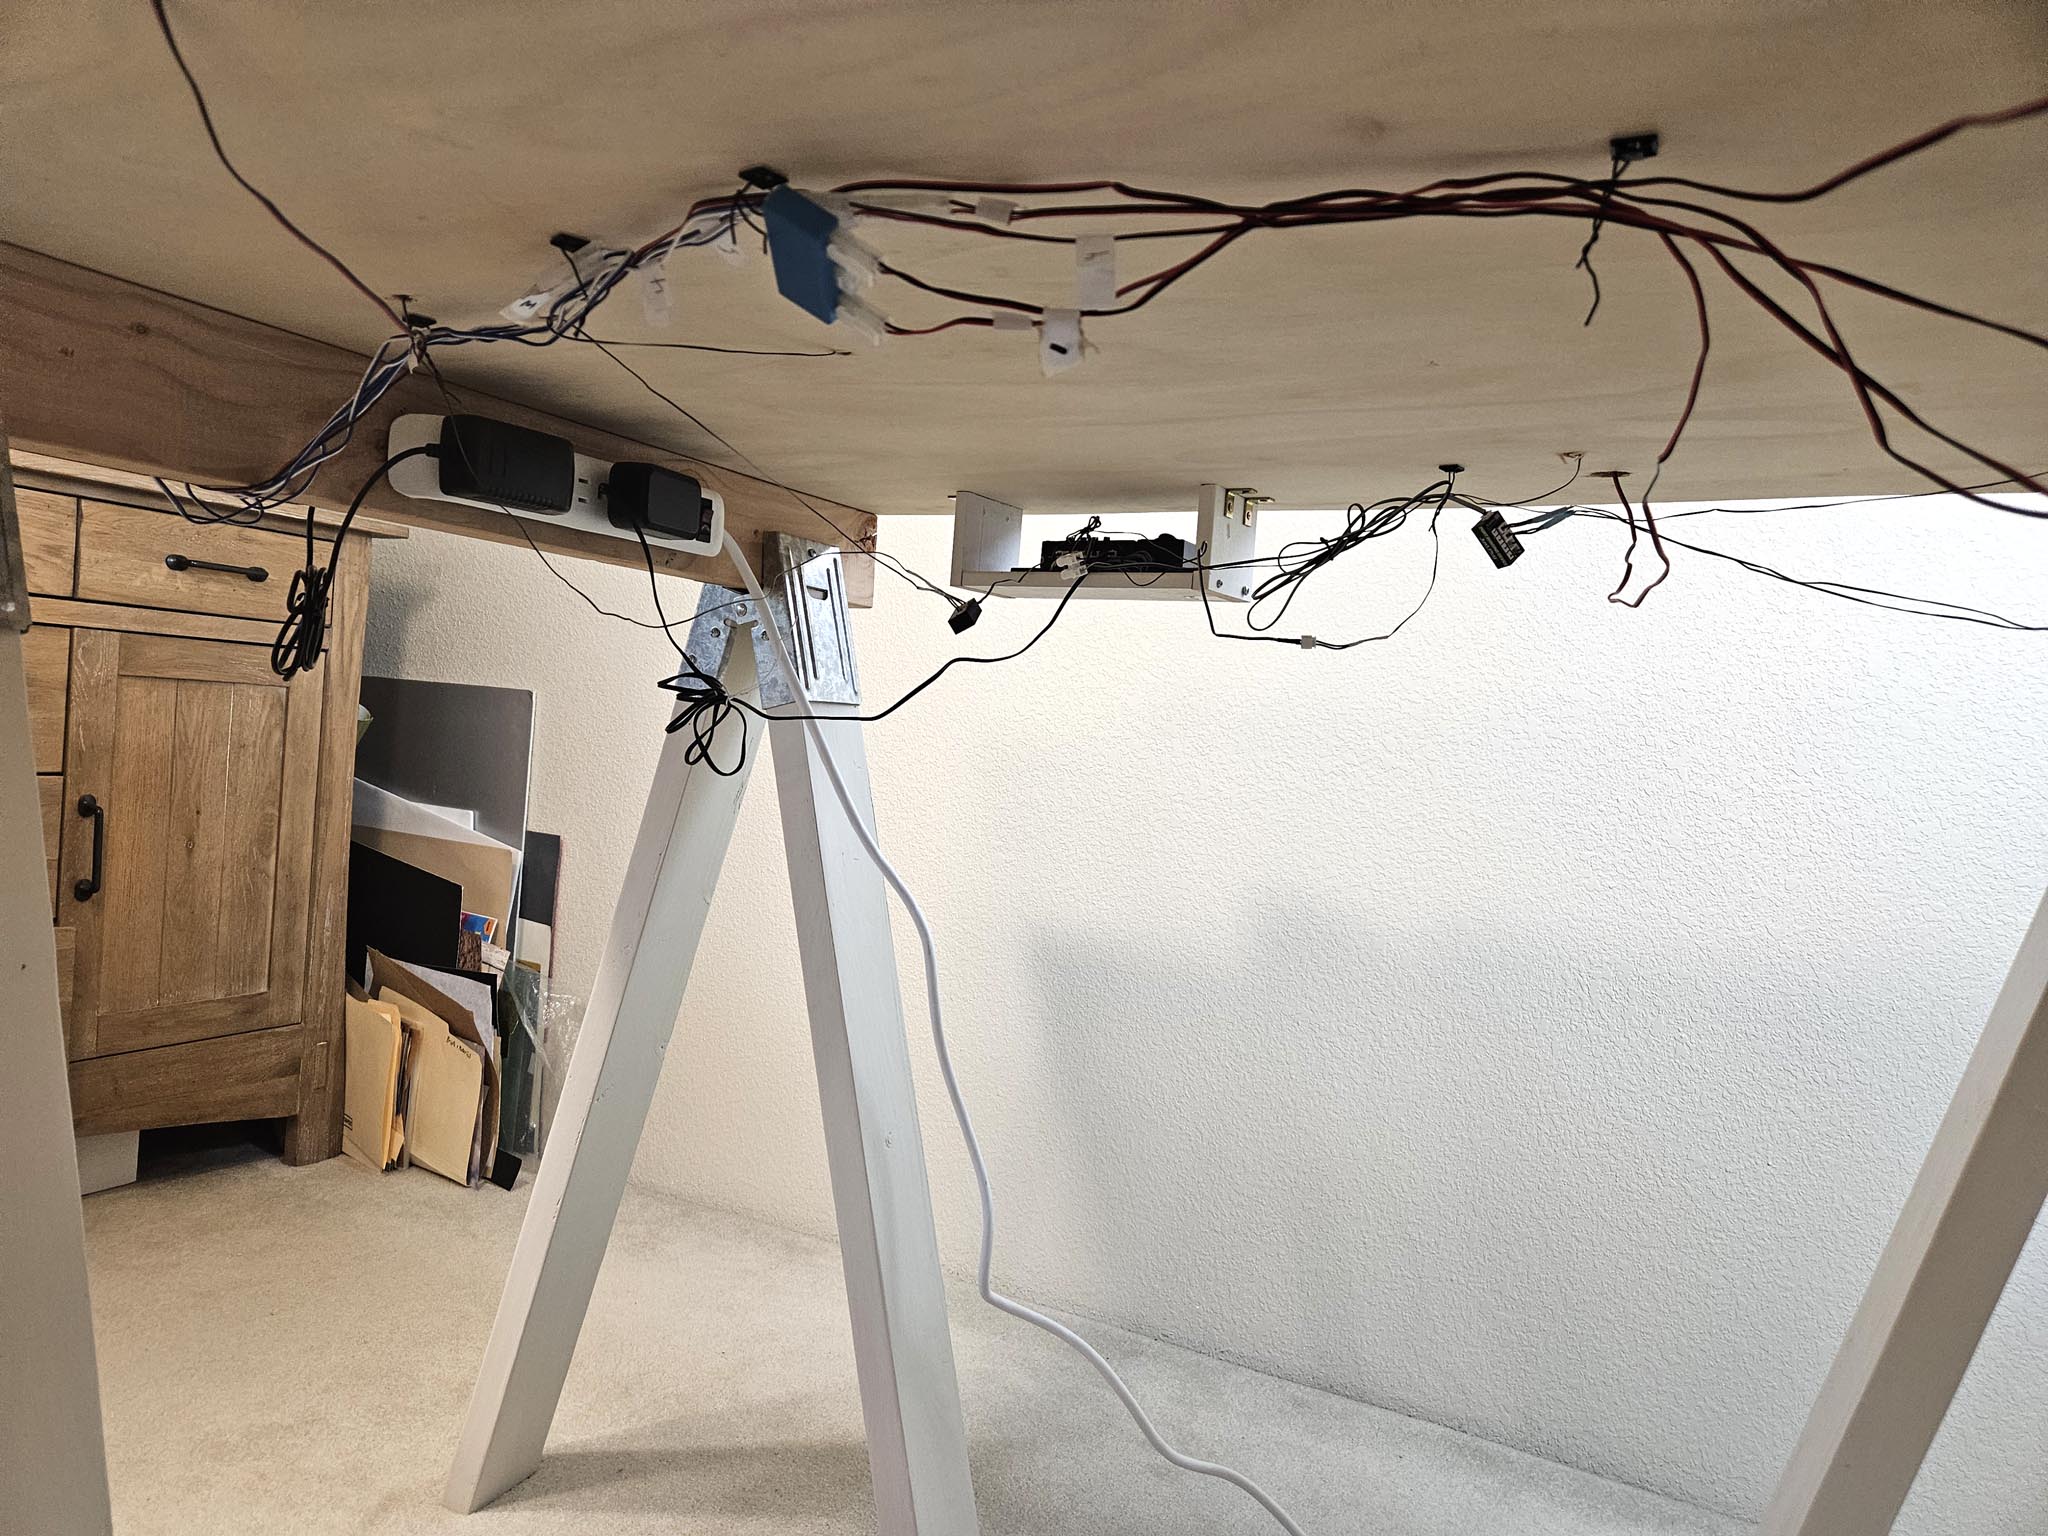
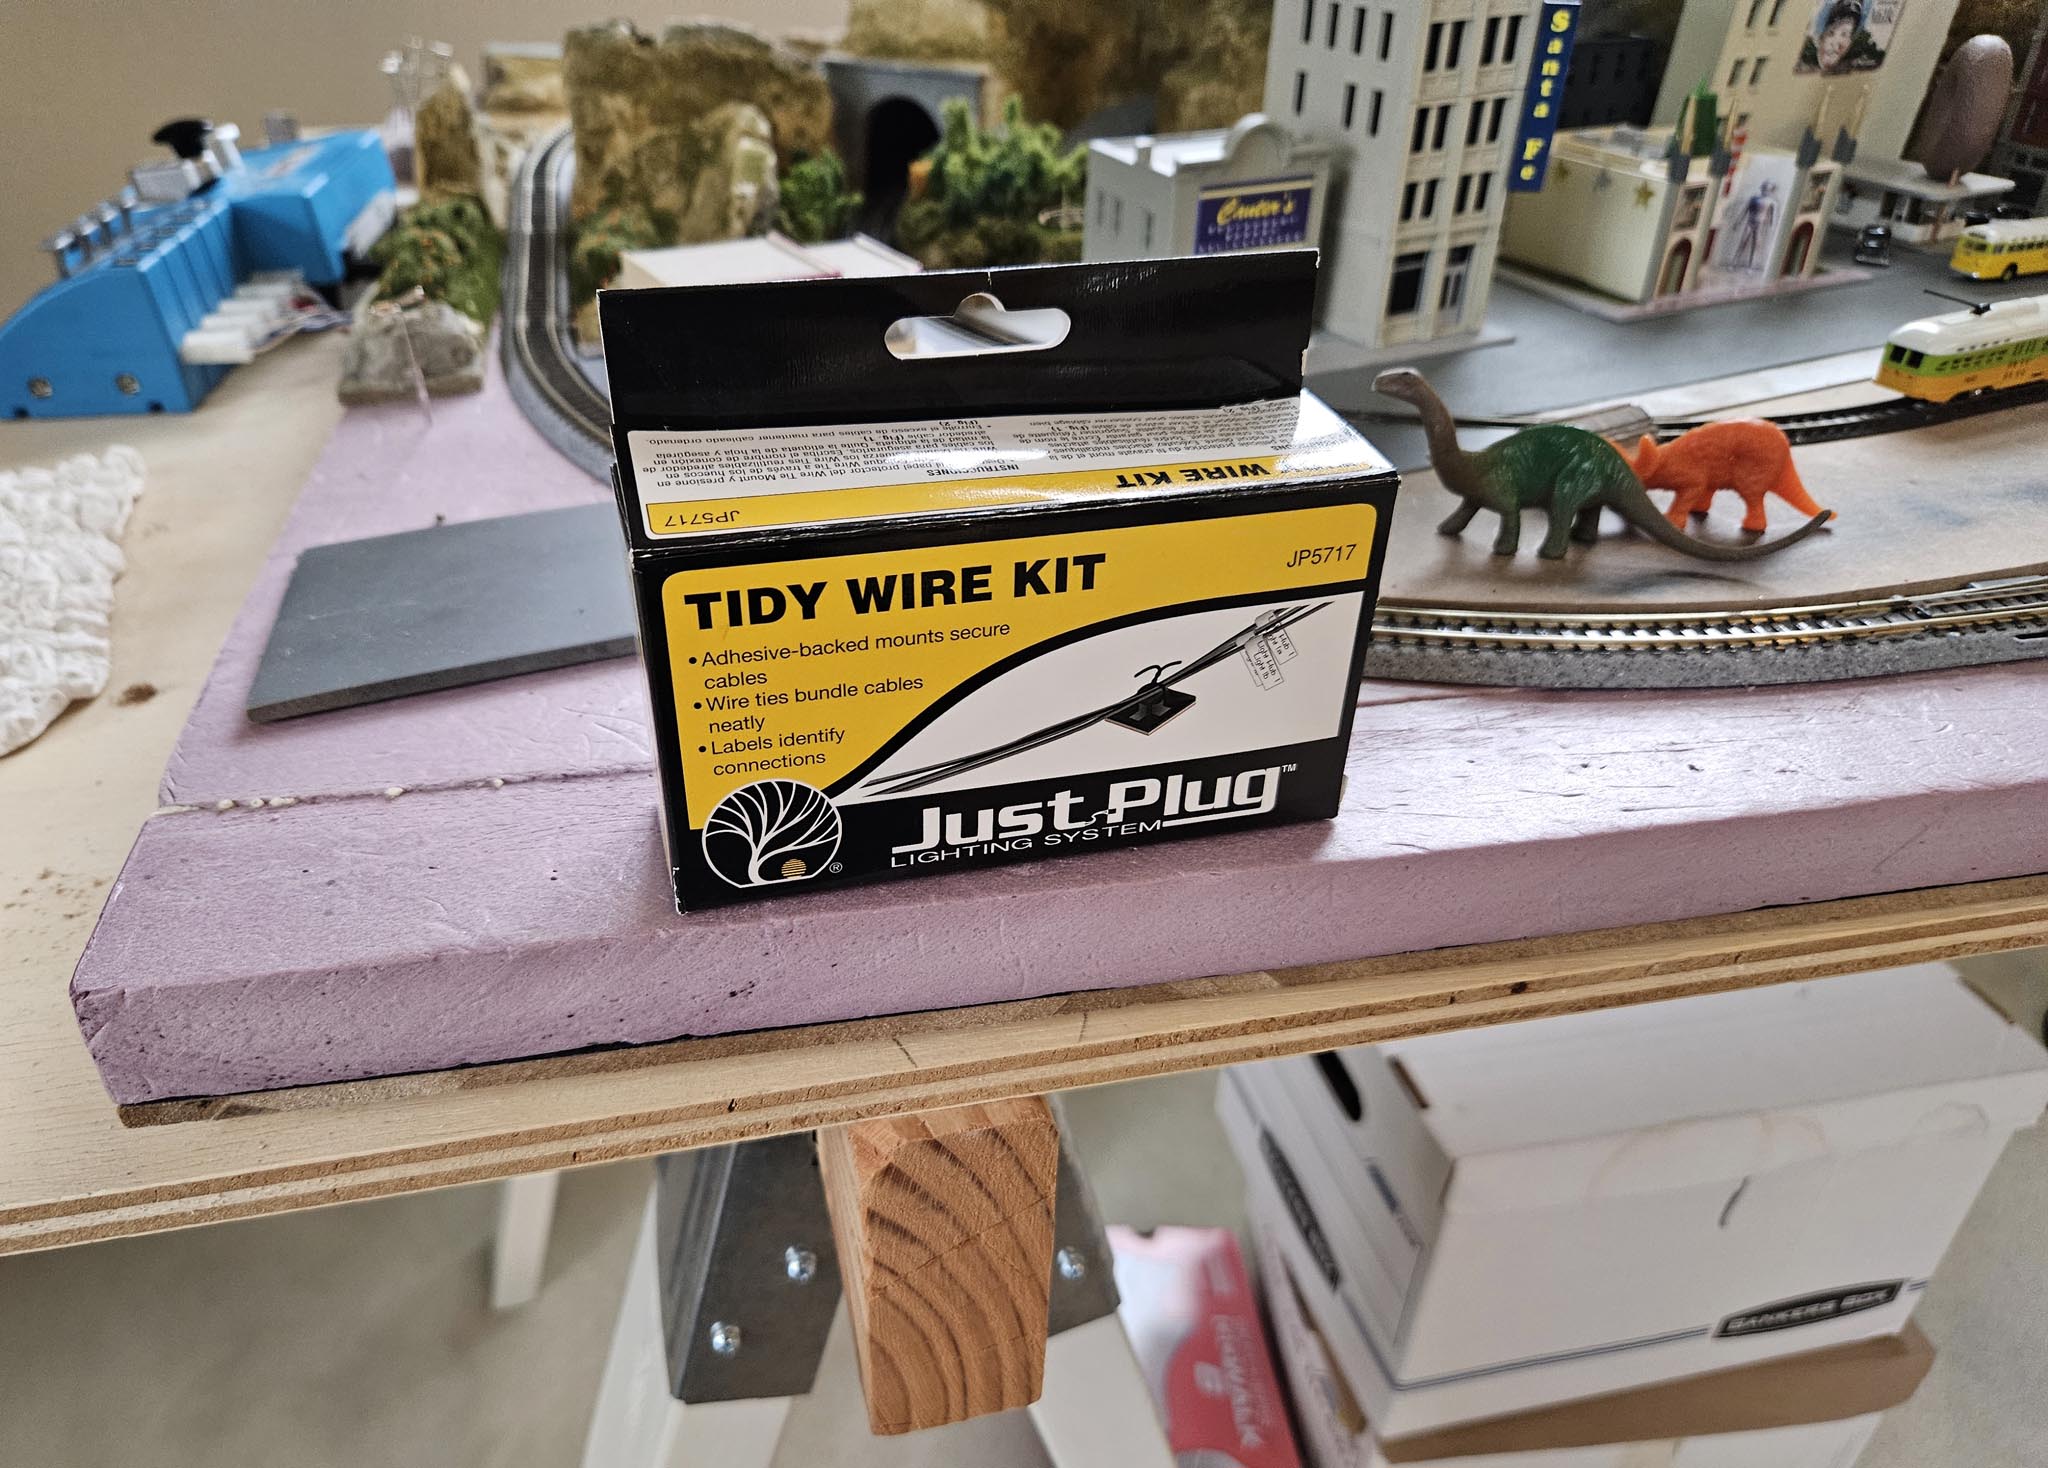
This probably won't be the final wiring configuration and installation, but I wanted to get everything functional. And since my kitty is strongly attracted to hanging wires, I’m hoping they are secured high enough. If not, I’ll have to come up with another strategy – perhaps a cover of some sort under the layout. A few more holes were drilled in various locations, and the wires for switches and building lights were affixed under the layout base using Woodland Scenics Just Plug Tidy Wire kit. Small, sticky pads are provided with loops to attached small wires which hold the wire against the wood. At first I was a little concerned that they may not stick to plywood very well, but so far, so good. (Plan B is little hooks which would have to be screwed in.) |
|
After all the wiring was connected, I successfully tested the lights and ran the trolley as well as the train.
The stuff below is part of the page template to help with future formating.
|
|
|
|
| |