11.
Chicago and the Blues Brothers
When I was planning to put the Super Chief on a shelf, Chicago was going to consist of a few small non-descript buildings way off in the distance at the far end. However when the plans changed to a larger layout "in the round" (a 360 degree view) I realized I needed to incorporate more detail, and in scale. The problem was that the only Chicago scenery that I was familiar with was what I saw in one of my favorite movies, "The Blues Brothers."
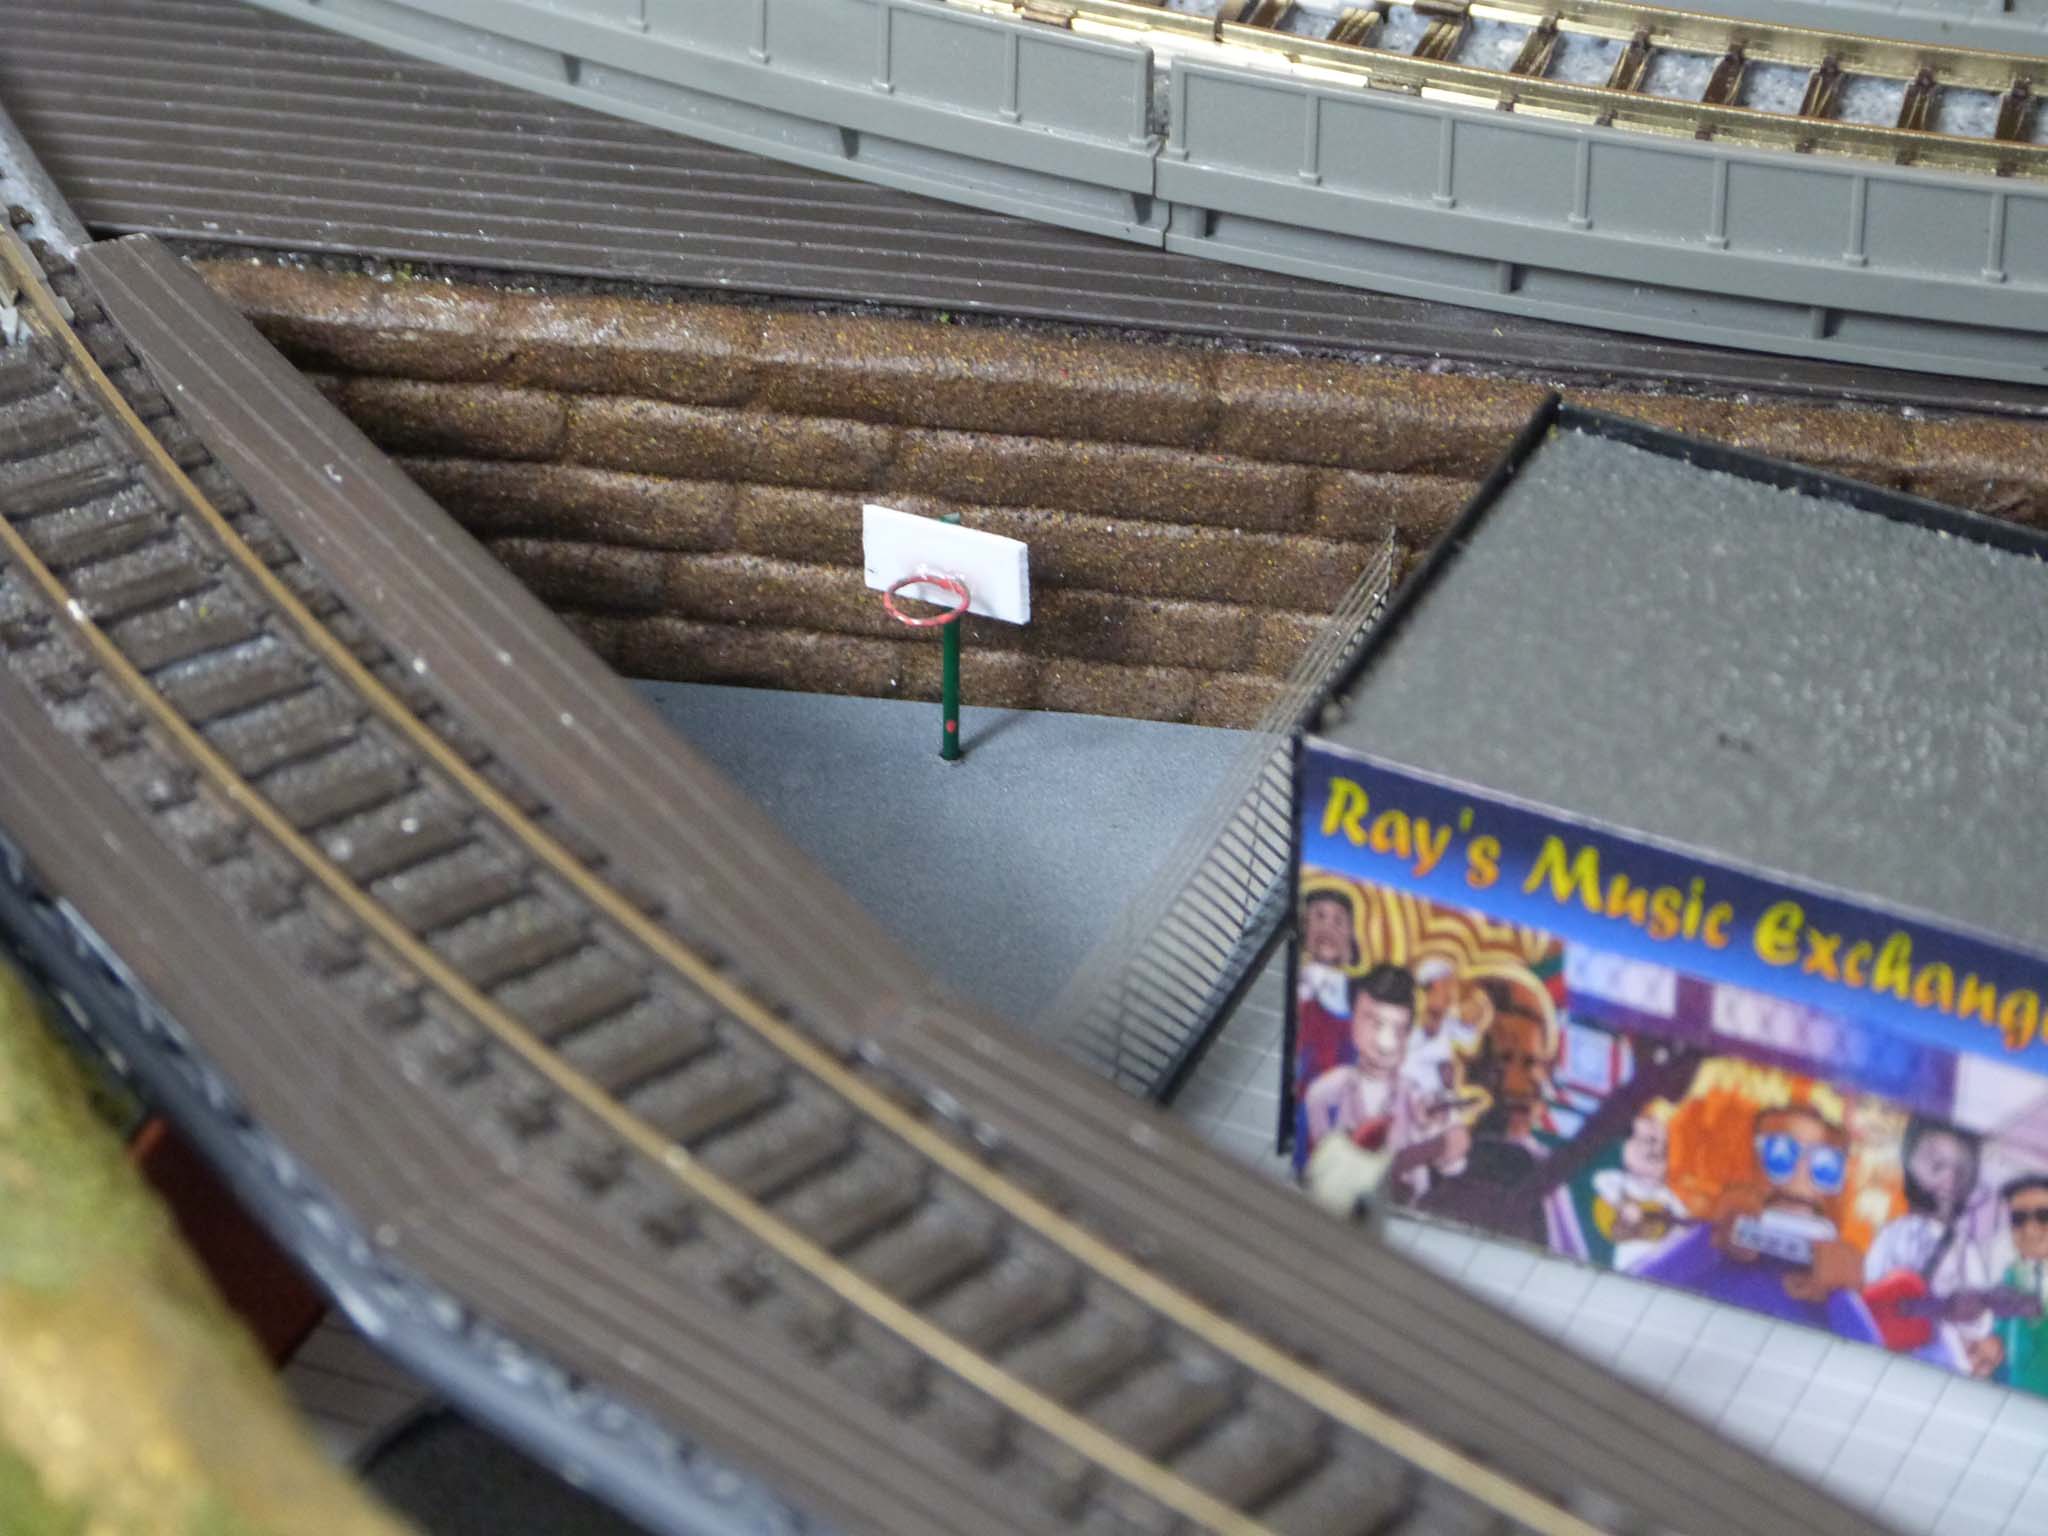
As with my Terminator-related diorama, I had the DVD and was able to watch the movie and take screen shots of potential layout subjects, including the Plymouth Hotel (with the elevated rail line running very close by), Ray's Music Exchange, the Curl Up and Dye beauty salon, a small church, a few police cars of varying condition and some other tidbits. (If you know those references, you probably like the movie as well.)
Ray's Music Exchange
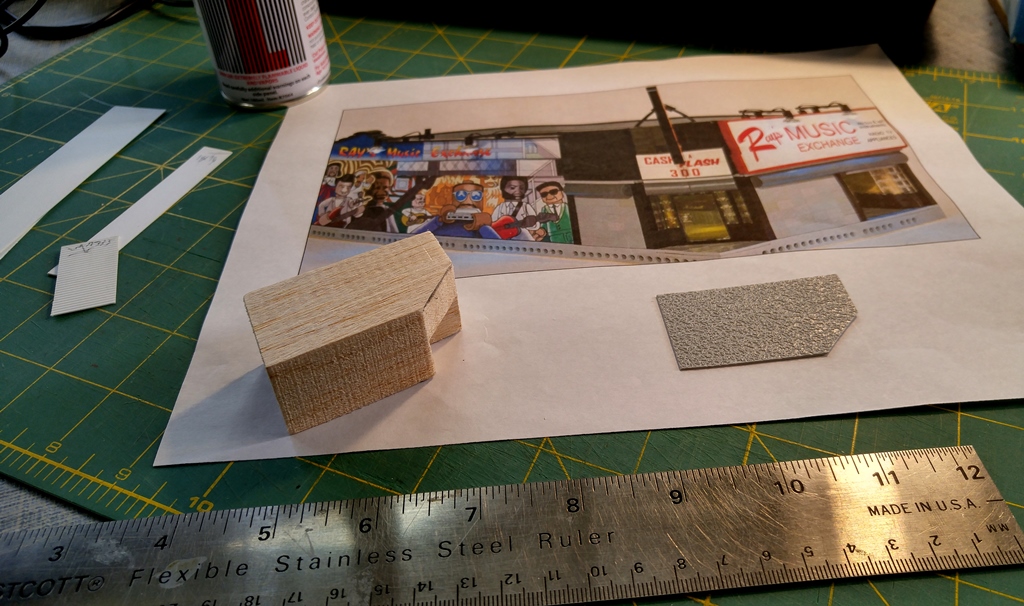
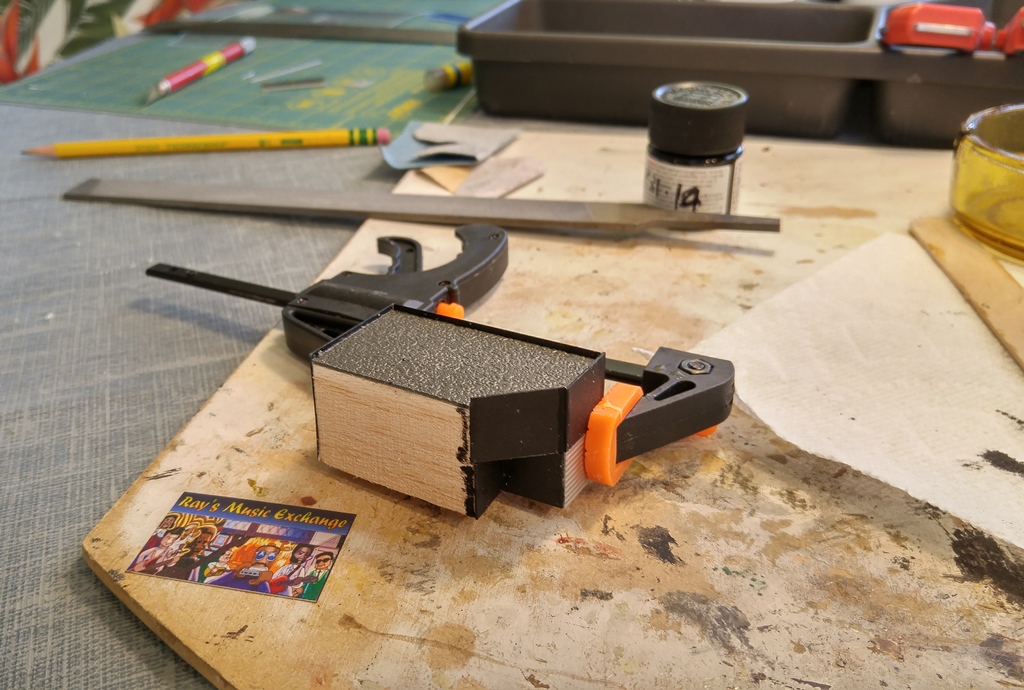
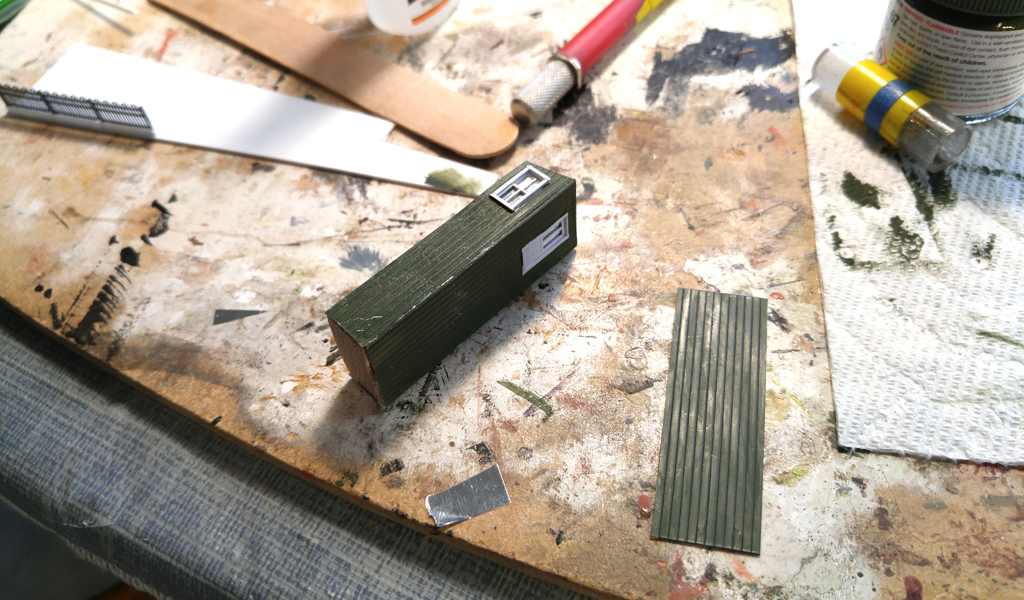
As always, I started the Chicago portion of the layout with building mock-ups, the first of which was Ray's Music Exchange. The little wood block turned out so well that I decided to make it the first building of the section.
With the screen shots I had taken, and other pictures on line (including an odd, but very helpful Lego version), I was able to design and build a decent looking N scale building.
|
|
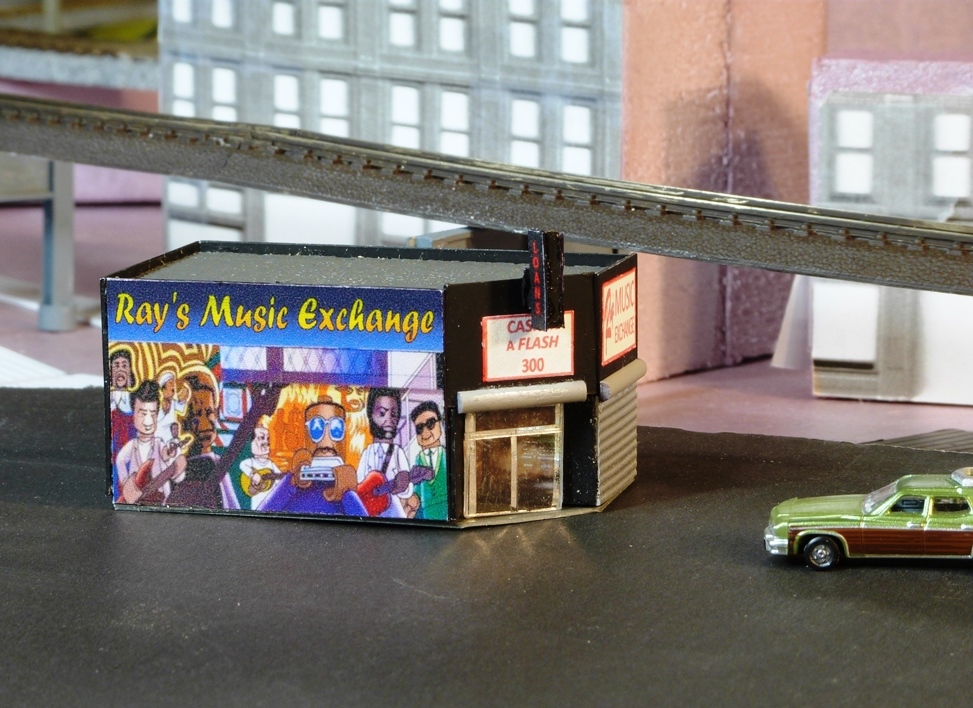
I cut the main structure from a piece of balsa wood so that I could easily carve out the entry way. The walls were covered with various pieces of painted styrene. The mural was from the Lego version mentioned above (which I thought would be very appropriate) and the other signs were made in Photoshop and Microsoft Word. I think it has some nice detail for its size, including a tiny picture of Ray himself in the window - not very visible in the above photo.
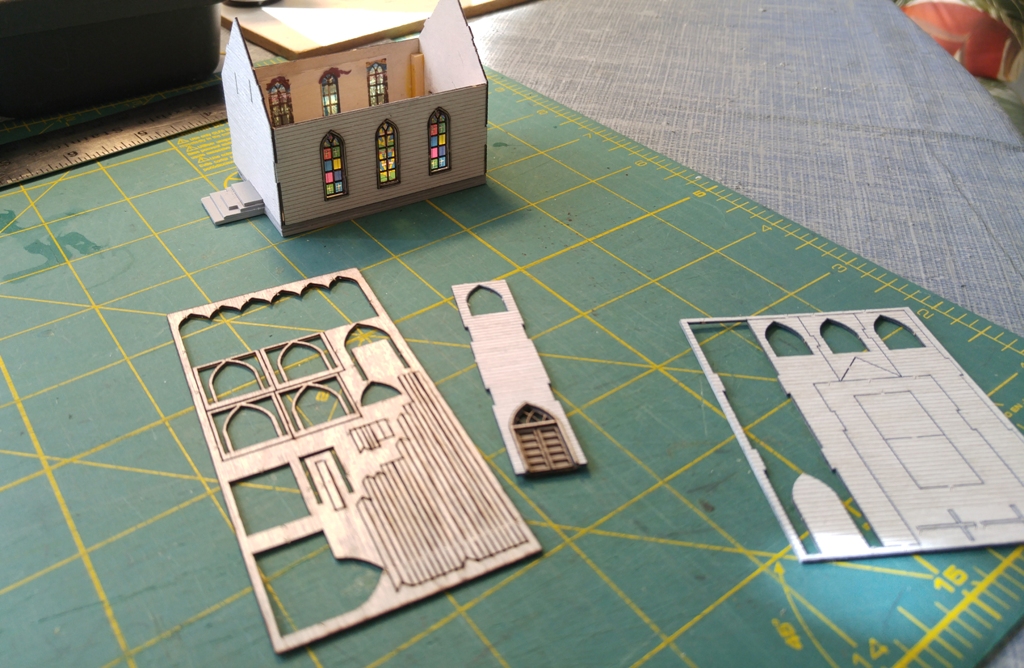
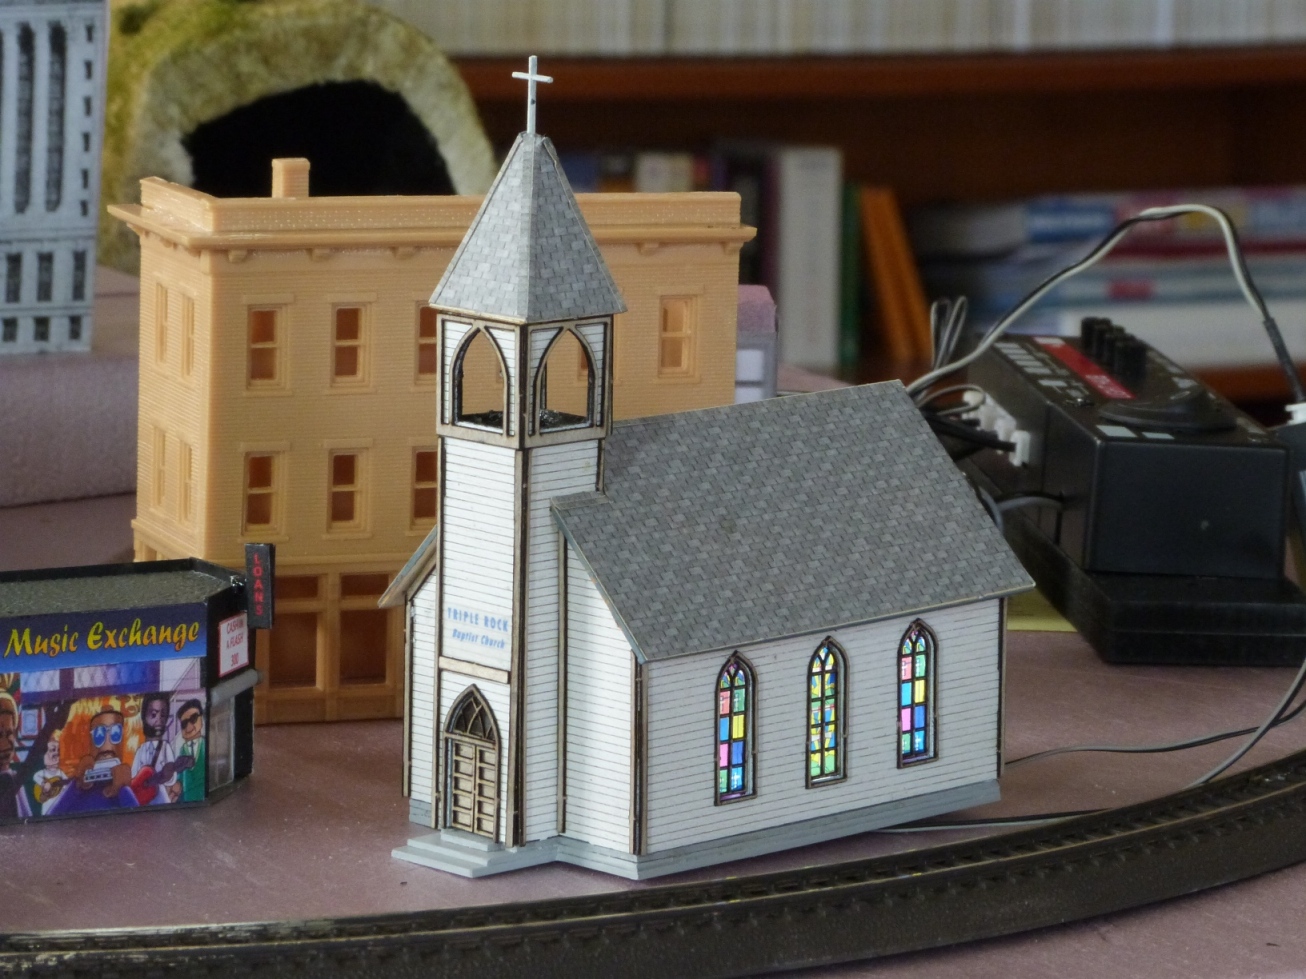
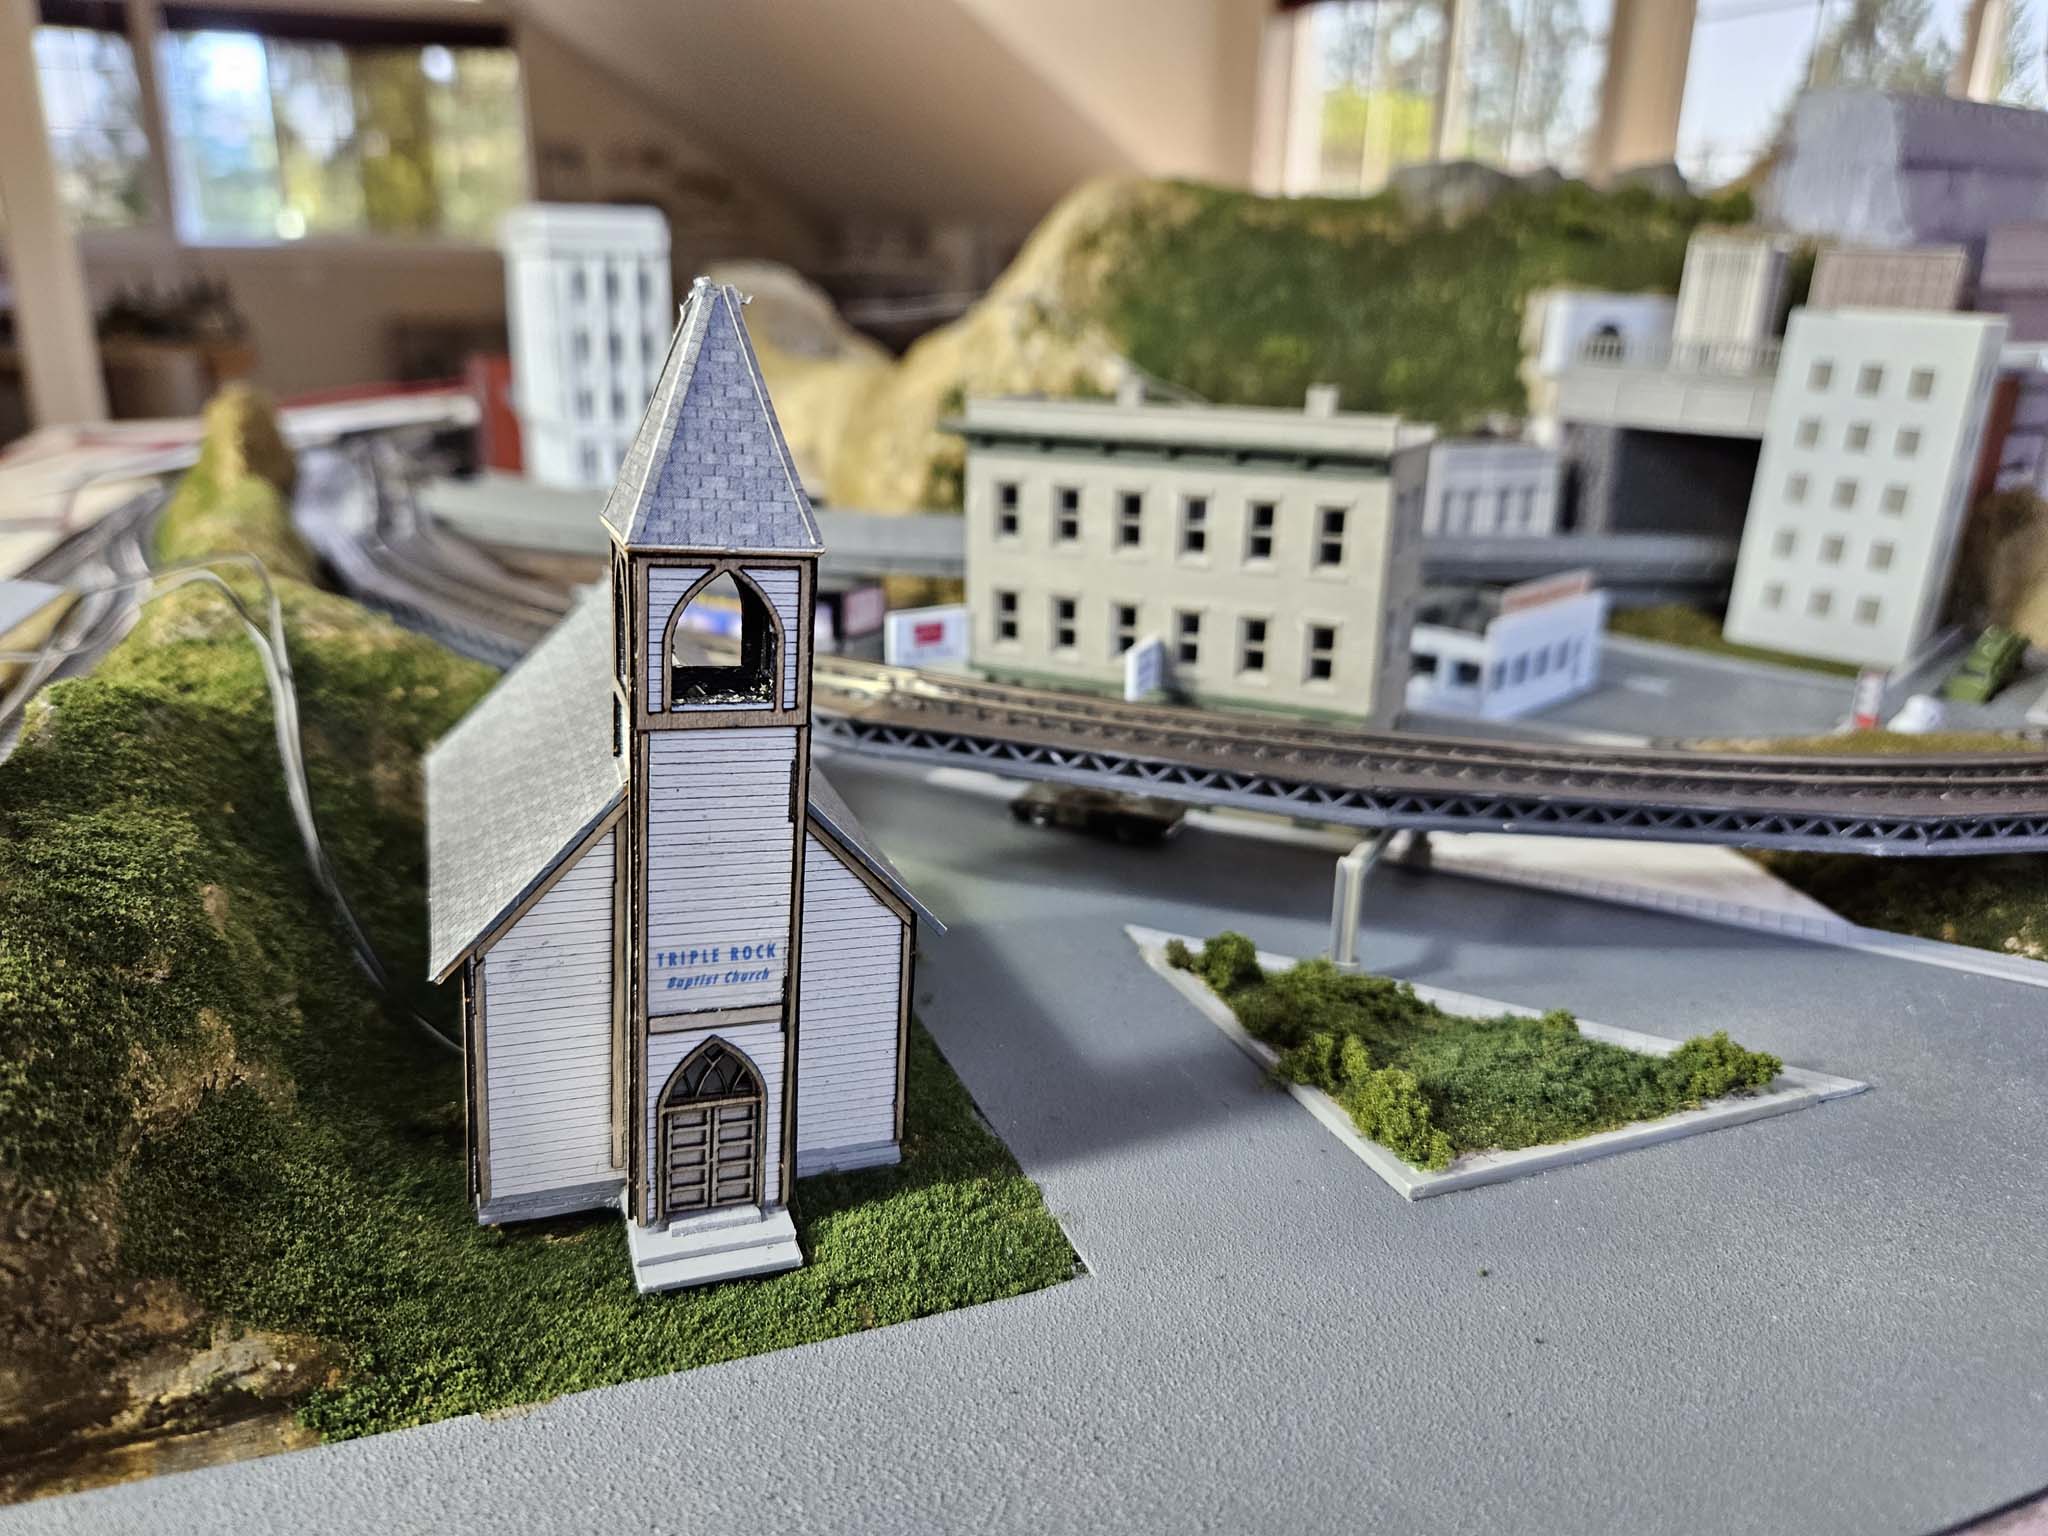
Triple Rock Baptist Church Anyone who is even remotely familiar with the movie knows what an important role the Triple Rock Baptist Church plays. Blair Line's n scale laser-cut church kit was a good choice. The kit's description indicates it is for "modelers of all skill levels," but I have to disagree. This kit requires a decent level of skill to put together as instructed. In fact, if this is the first laser cut kit someone undertakes, there is a good possibility they will never try another. That said, if one has several laser-cut kits under their belt (hopefully including an n scale project), this is a fantastic product. For such a small laser-cut kit, the high quality and details are impressive. The "stained glass" window glazing included was an unexpectedly neat touch just begging for interior lights - which I was happy to install. |
|
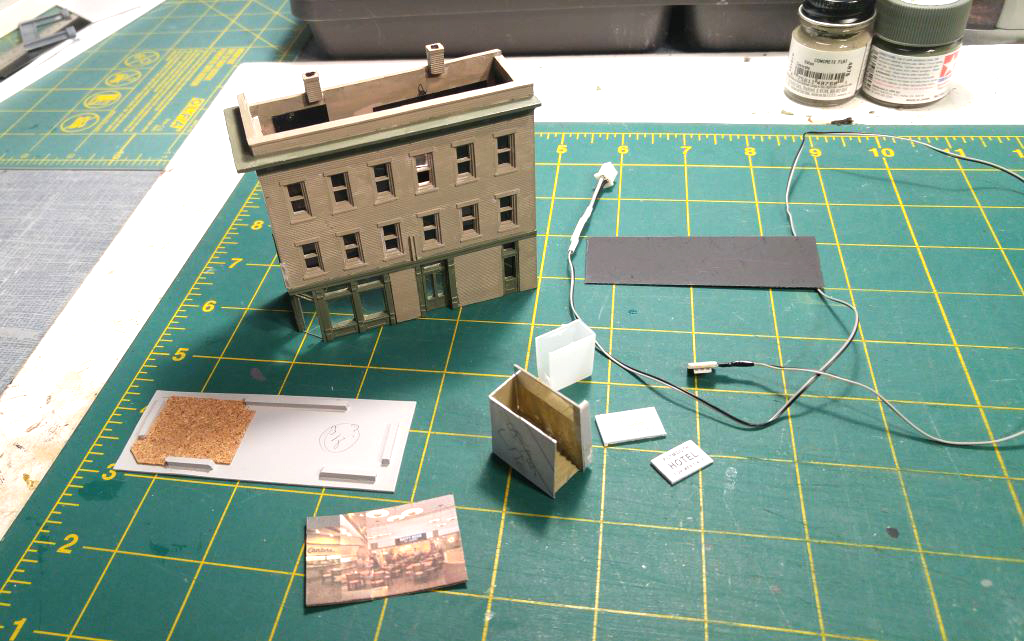
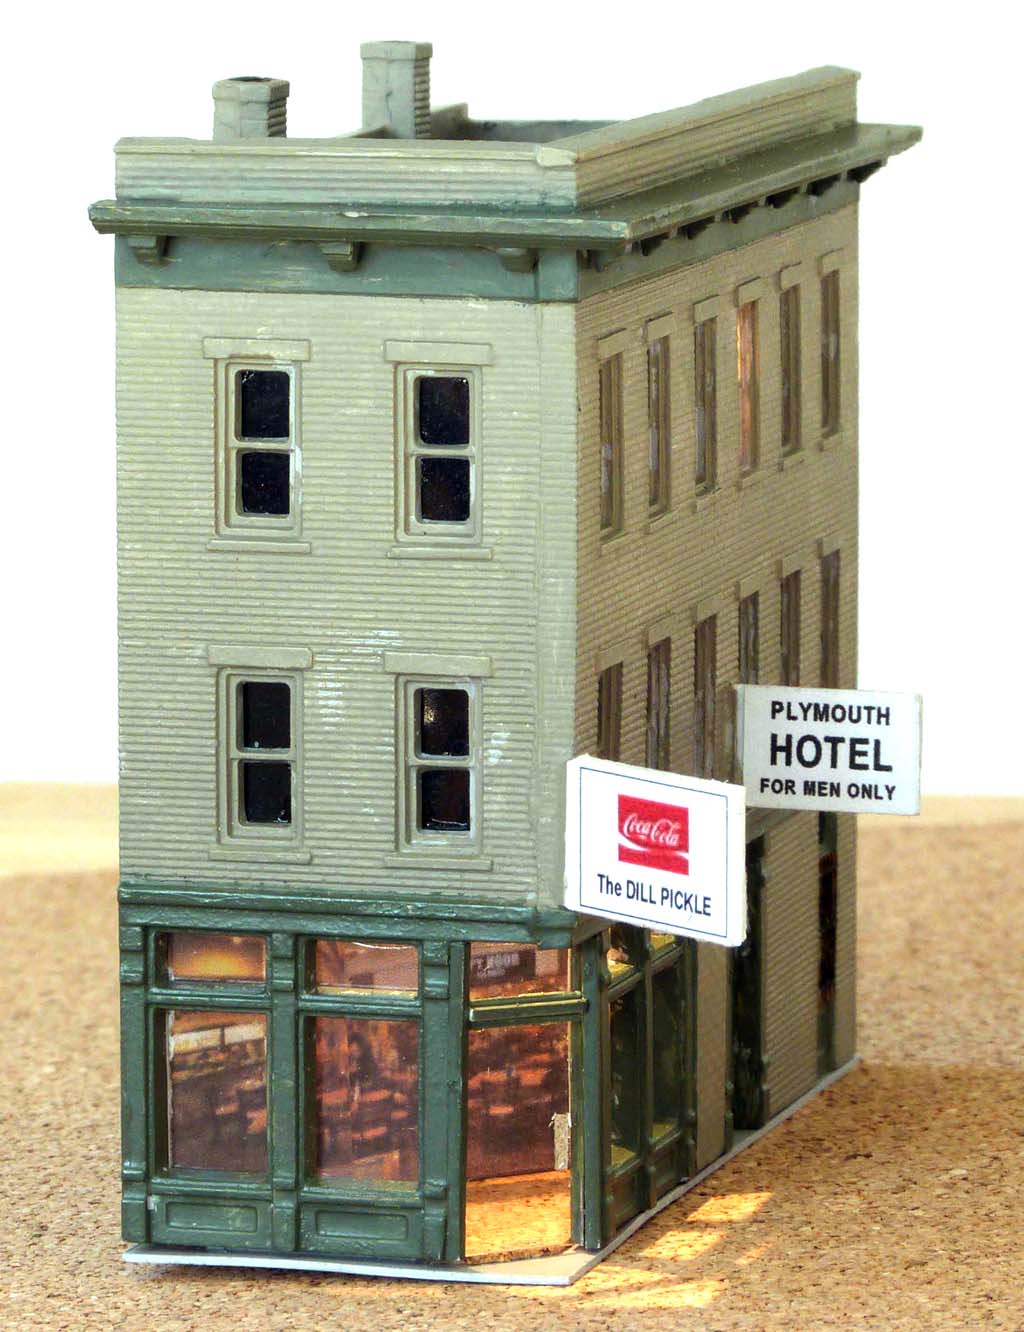
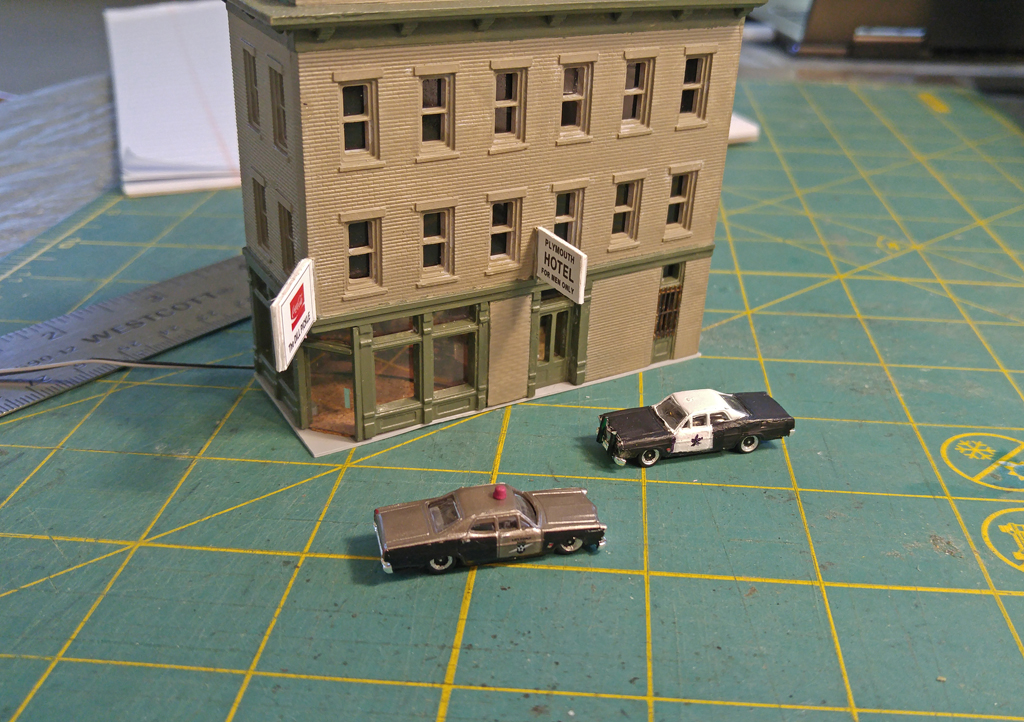
The Plymouth Hotel The hotel in which Elwood resided at the beginning of the movie was obviously a “must” to include. I mildly customized the Design Preservation Corner Apothecary kit, adding the Dill Pickle Deli at the corner (seen very briefly in the long version), a few interior bits, as well as the special garage (a Chicago elevated train power substation) in which the Bluesmobile was parked. By the way, as that scene was cut out of some versions of the movie, many people don’t know that it’s where the car got its super powers. I also lit part of the interior: the deli, stairway and Elwood’s room.
|
|
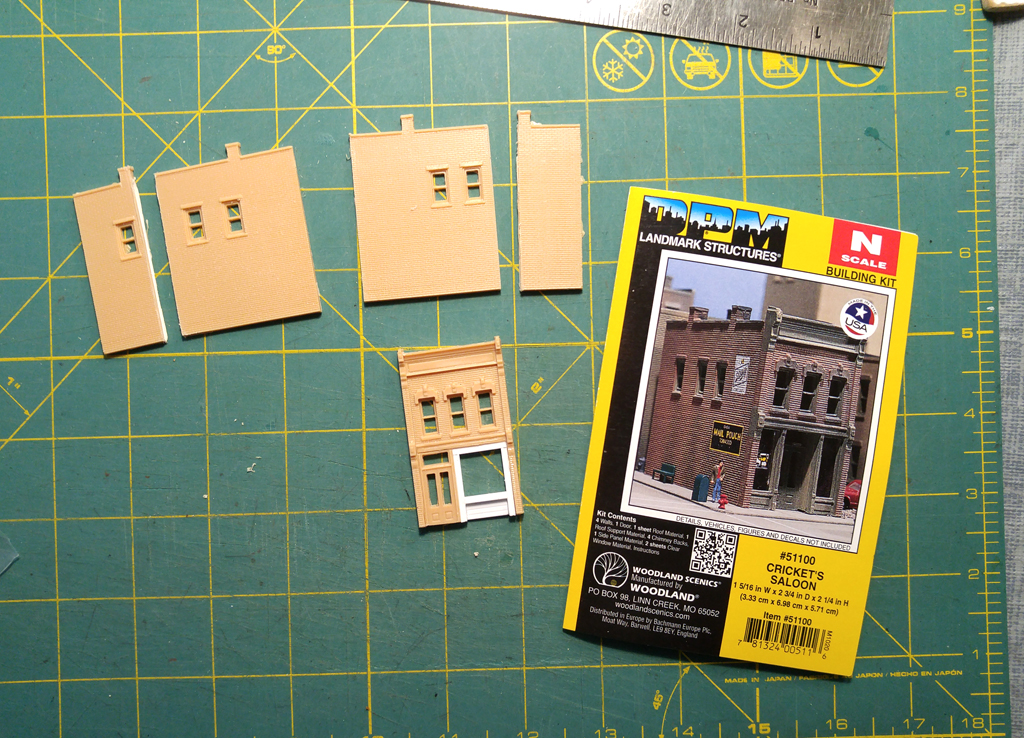
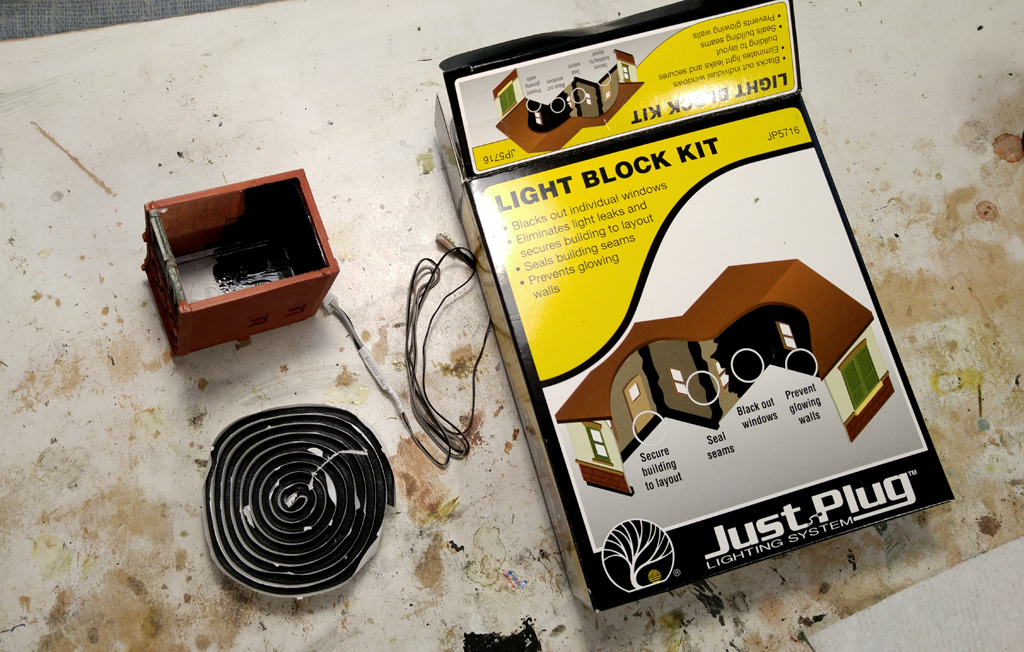
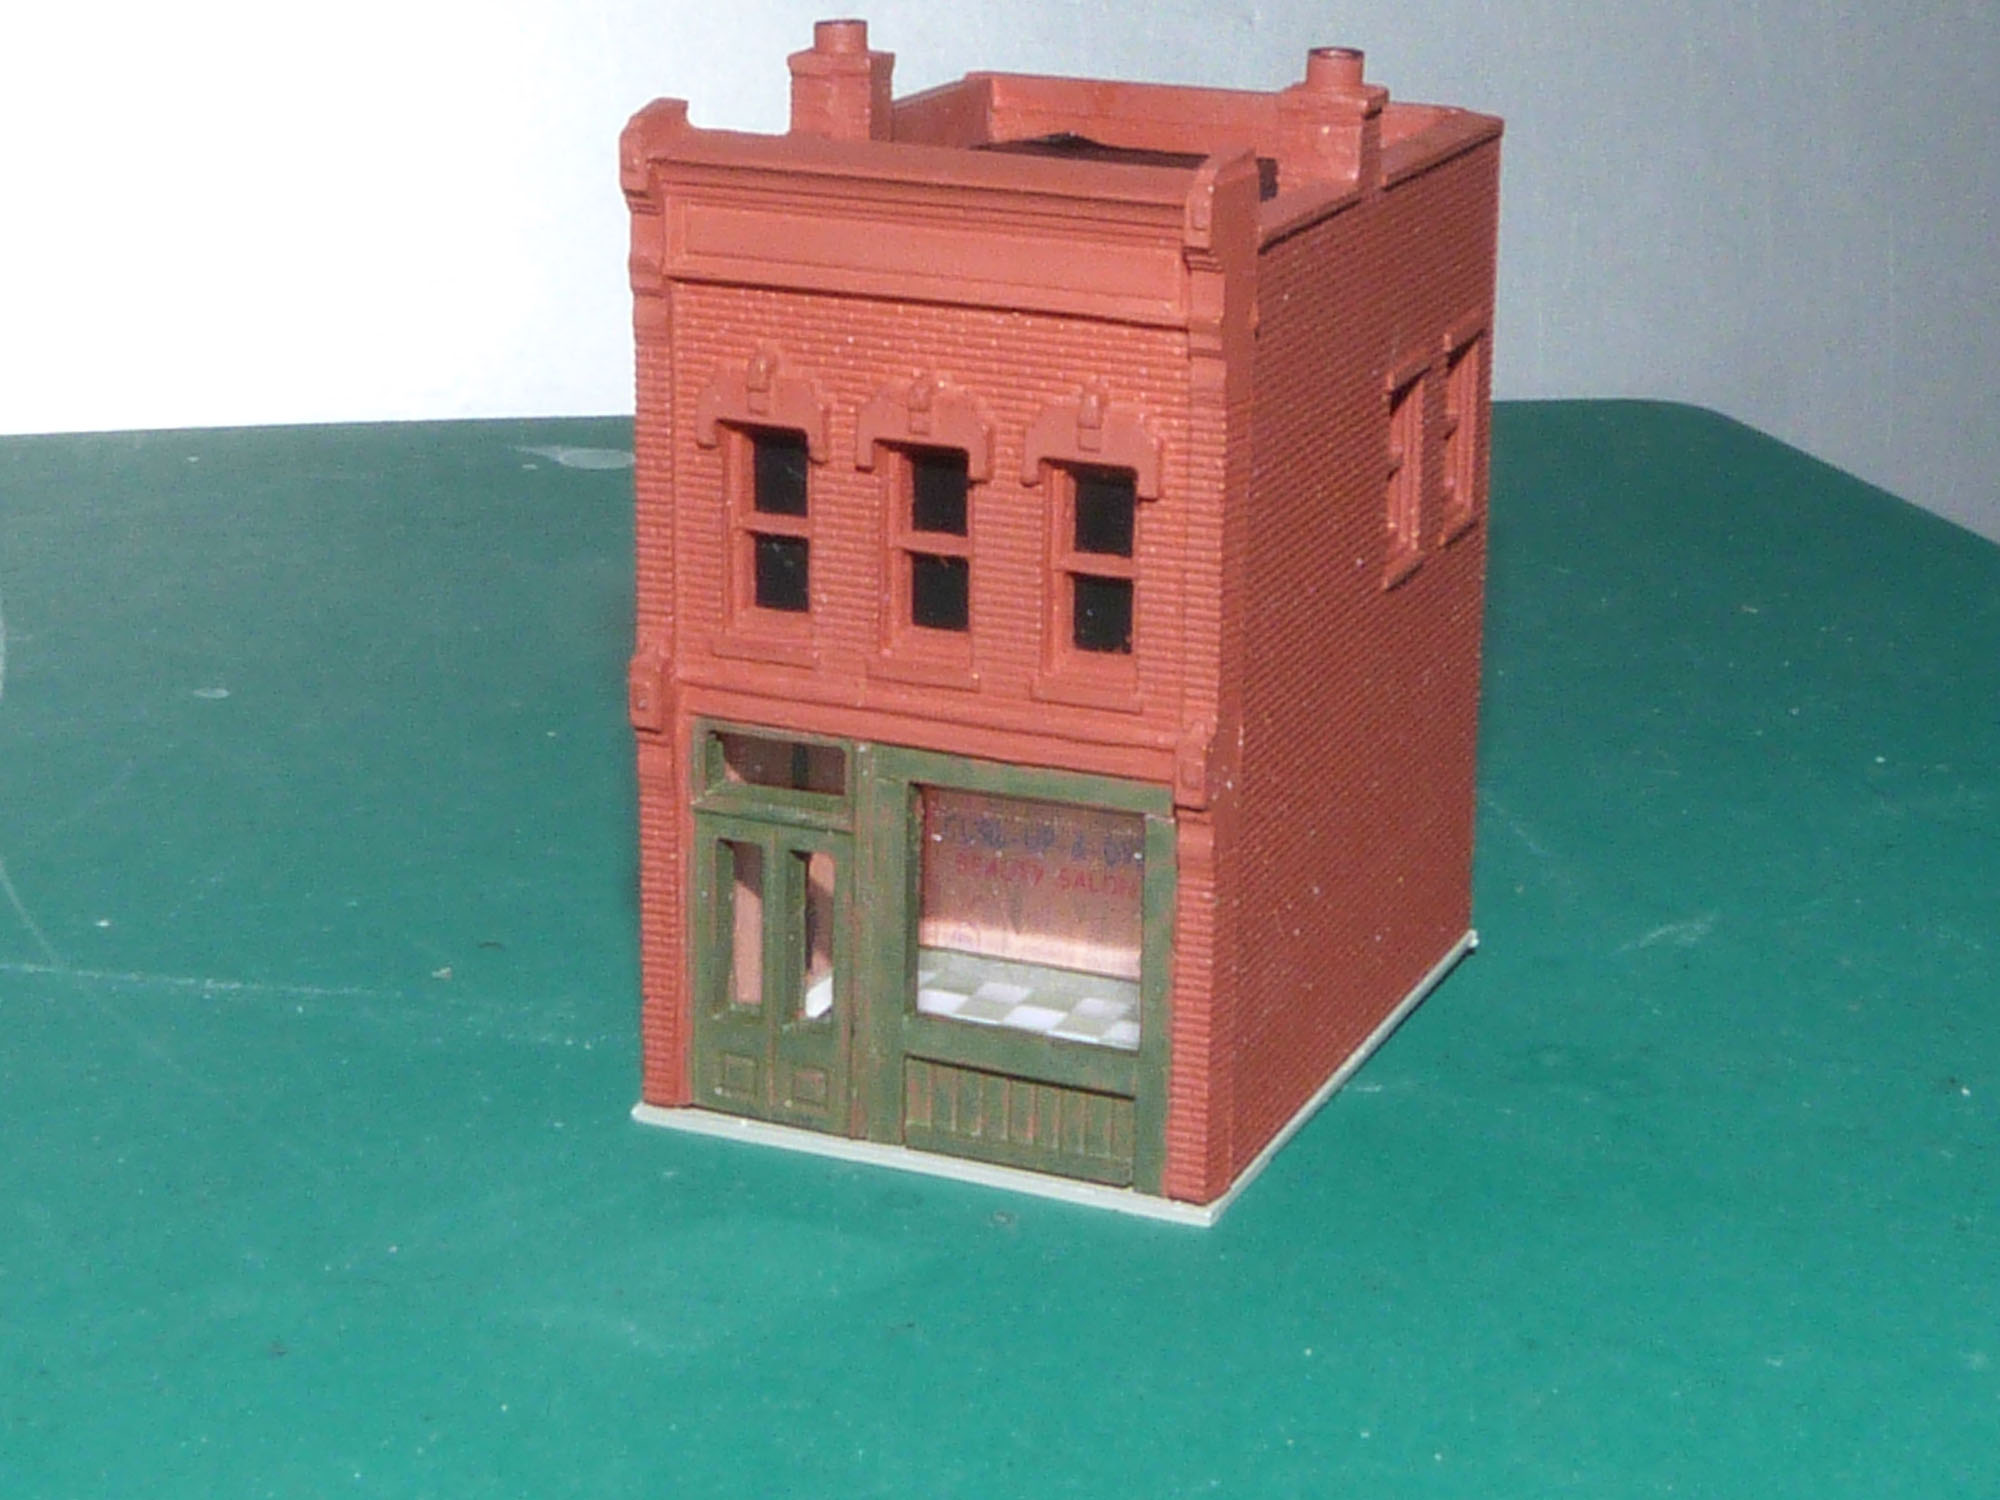
Curl Up & Dye Some fans of the Blues Brothers movie never picked up on the name of Carrie Fisher’s business. It was only visible for a few seconds before she is seen planning the flamethrower scene. (I already have a propane tank and phone booth.) The Curl Up & Dye Beauty Salon has taken its place on the layout. It is essentially the DPM “Cricket’s Saloon” kit, moderately modified to look more like the building in the movie. I’ve added a floor and paneling that seemed appropriate, lighting, and I’ve got an N scale sitting woman. A chair and desk are on order. Hardly visible in the picture is the “Curl Up & Dye” decal on the window. Other than that, I intentionally kept it pretty plain (and even a bit dull) as only the front of the building was visible in the movie - I wanted to keep that focus. Lighting just the inside of the closed salon would help. I knew from my previous lit building that I should lightproof the building so that the light doesn't shine through seems and cracks. WS Just Plug Light Block Kit provides a thick, black paint as well as a roll of thick, sticky goo that goes down like tape but can be molded into corners. It looks messy, but being out of sight, serves its purpose nicely. |
|
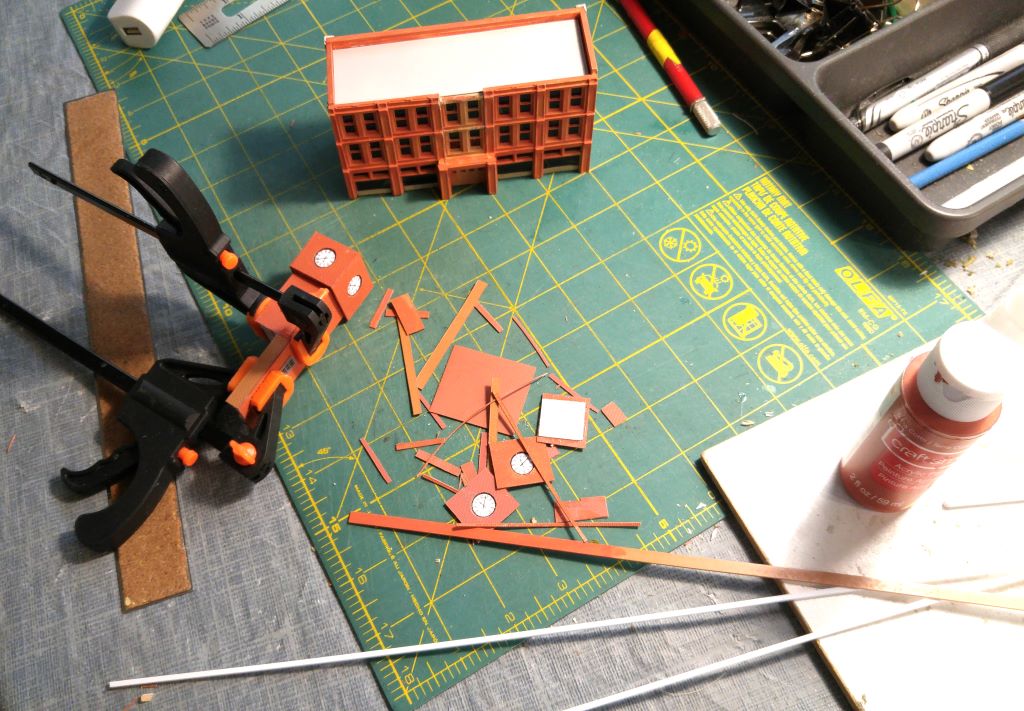
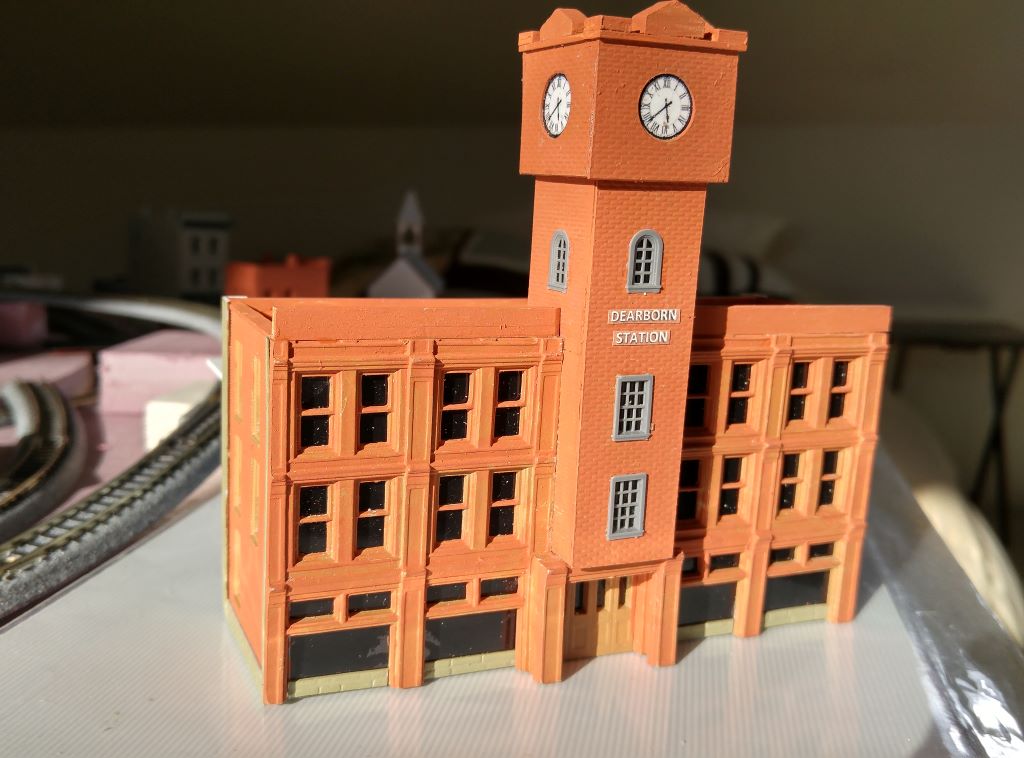
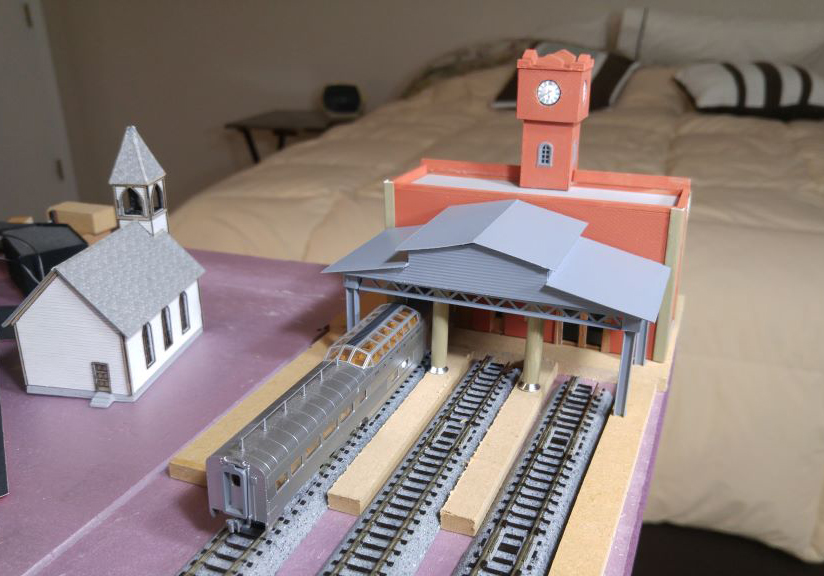
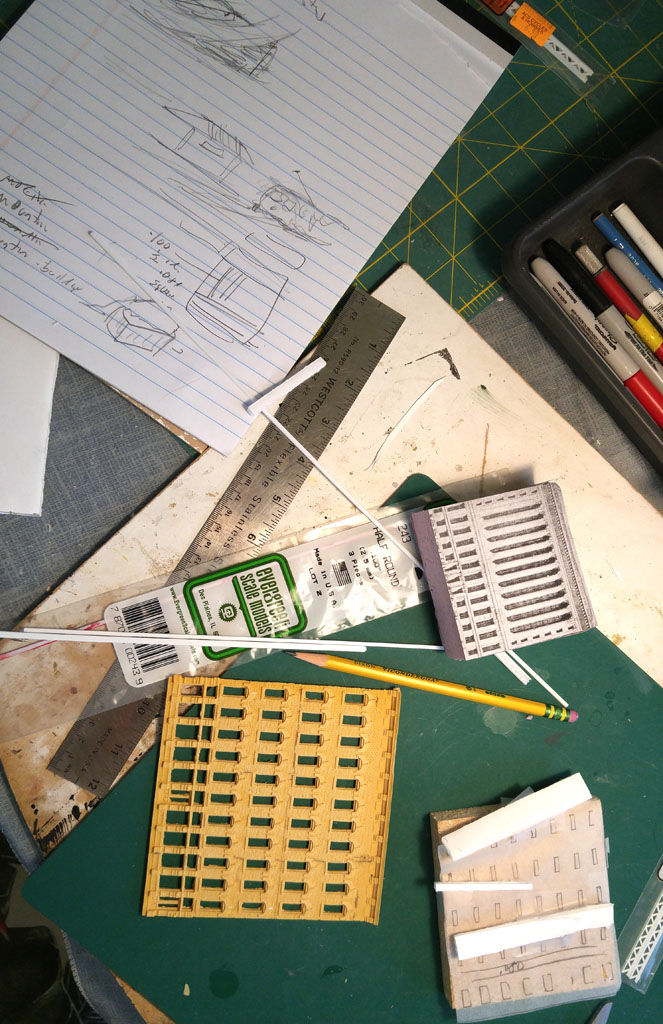
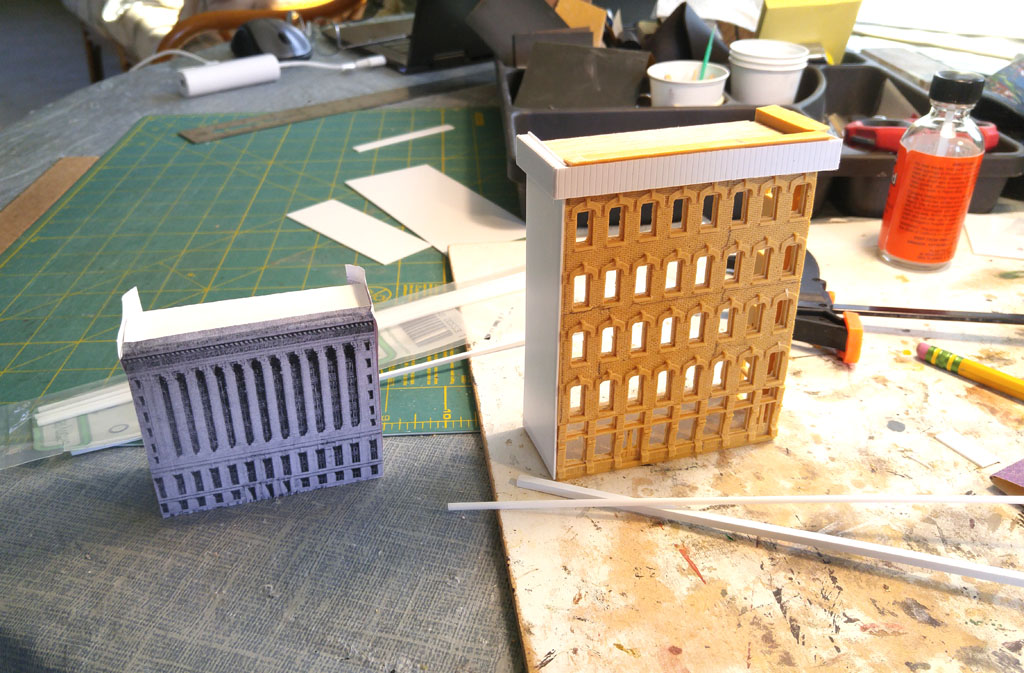
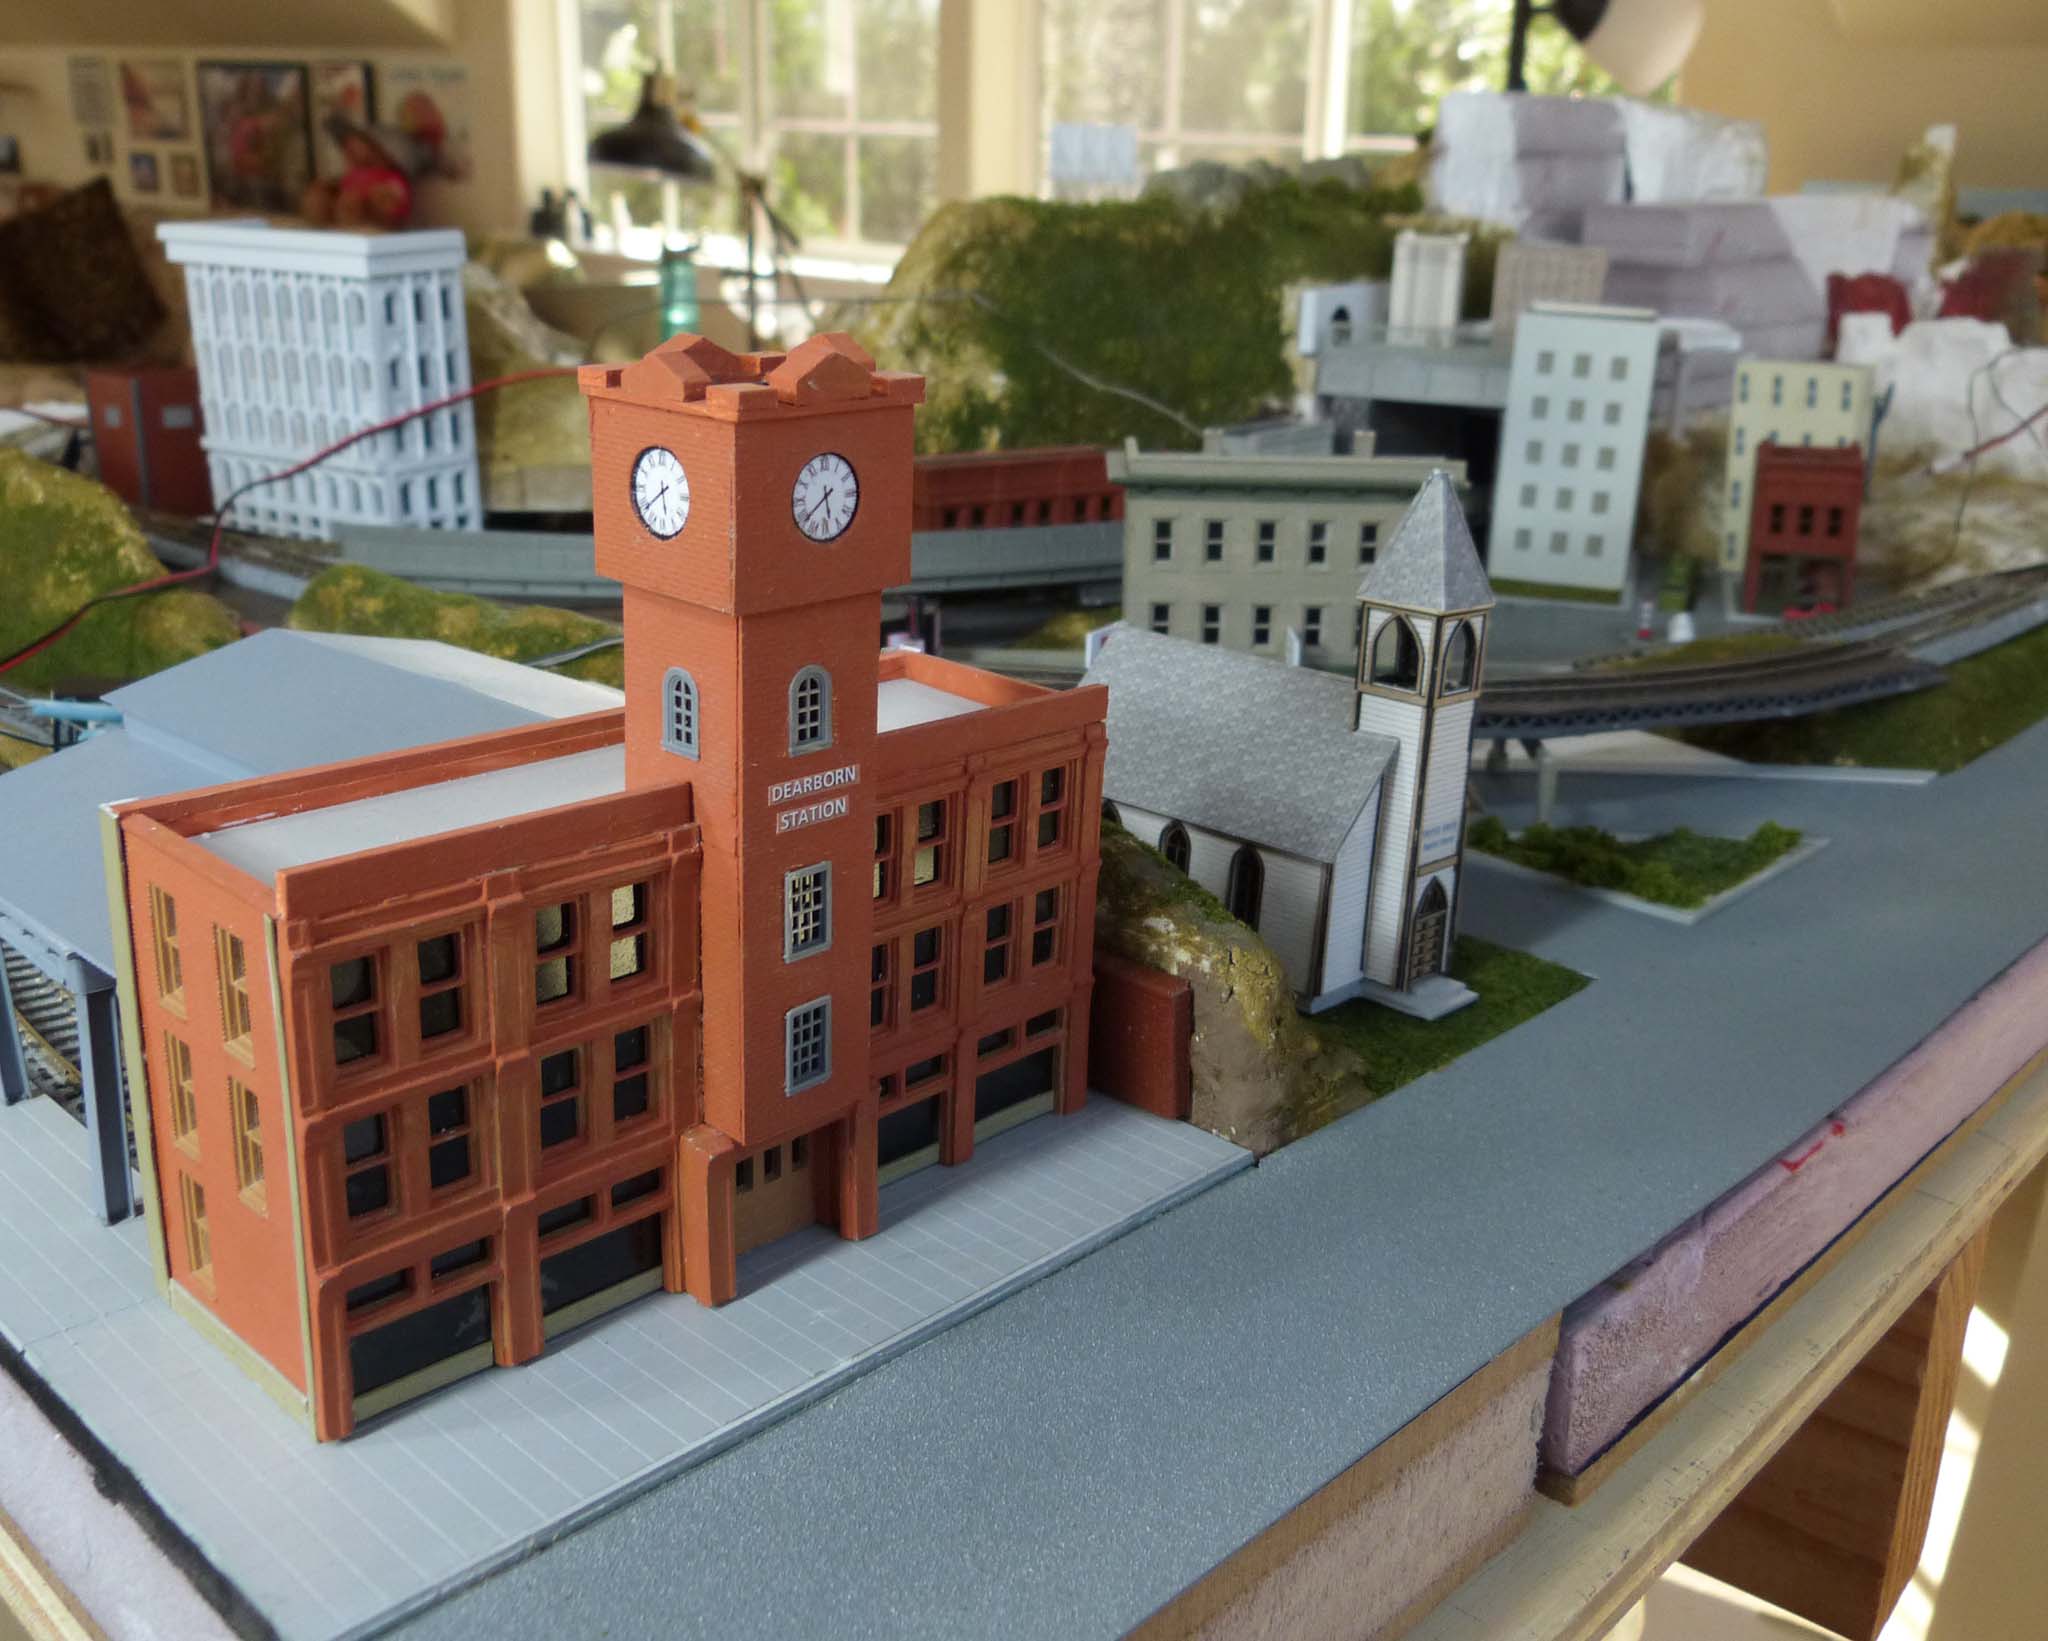
Dearborn Station To be honest, I didn't initially envision creating Dearborn station. But while working on the Chicago section, I quickly realized its importance on the layout – and what a perfect space I had for it. I don't know why I didn't see it sooner, but the space in which I was going to build a park with Santa Fe cars on display, became Dearborn Station with the same purpose. I was familiar with the station's basic looks from pictures in books and magazines. But unlike LA's Union Station, I never had an emotional attachment to this place. I perused the Internet looking at more photos of the real structure as well as models that others had made. Since no one who would ever see this layout would likely know what the real station looked like, I took substantial liberties in the design while maintaining a similar overall look in a very small footprint. Modifying leftover building parts that I had – and creating many new pieces – I scratch-built the walls and affixed them to a wooden block, placing clear styrene (painted black on the back) behind all the window openings – a simple but effective technique. Surprisingly this turned out to be one of the most involved structures I've made. First of all, even in its simplest (compressed) form, it’s a relatively complex building that includes a clock tower and a number of design elements. In fact, the clock tower was a large project in itself requiring scratch-built walls with windows of various shapes. I estimate I used at least 100 pieces in the terminal – probably every one of them was created from scratch or modified from something else. (Admittedly, there was a bit of "trial and error" involved.) |
|
|
|
|
|
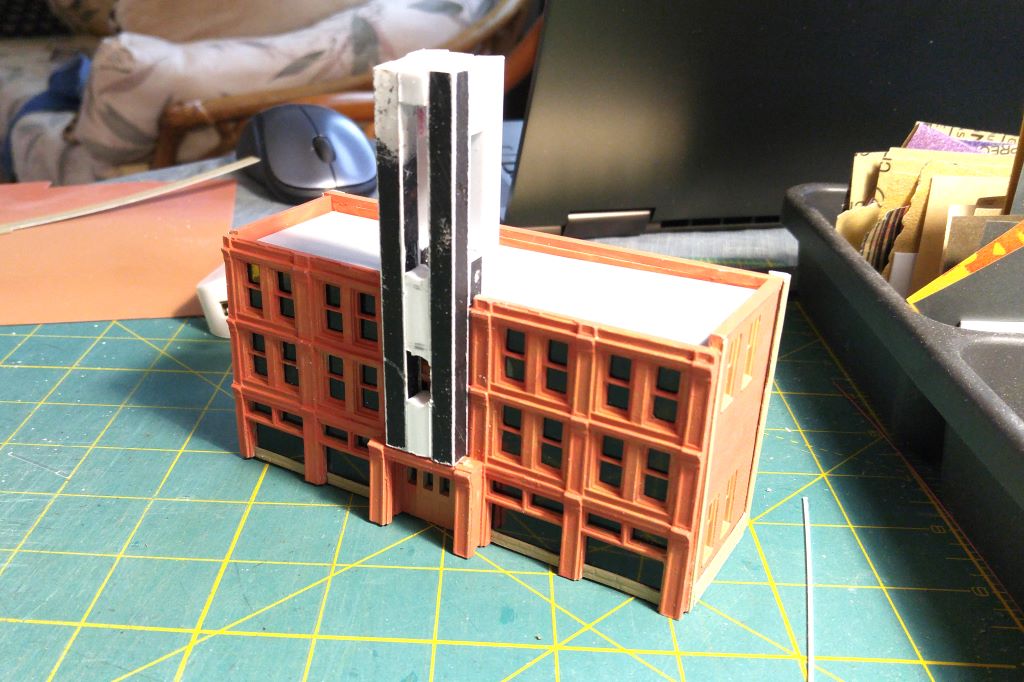
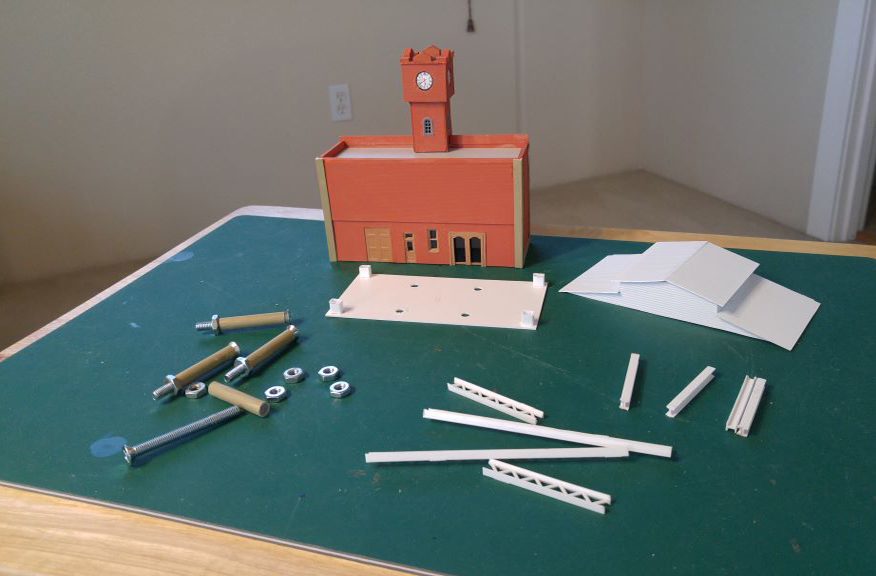
The clock tower was constructed as a separate piece and was joined to the main structure towards the end of production. The clock faces were created in Photoshop. The station sign was created in Word. The actual train shed at Dearborn Station was enormous. Built to scale, even in N, it would no doubt take up the entire layout. I decided to make sort of a small, 3D image of it, something that looks like a picture in a book.
|
|
|
|
|
|
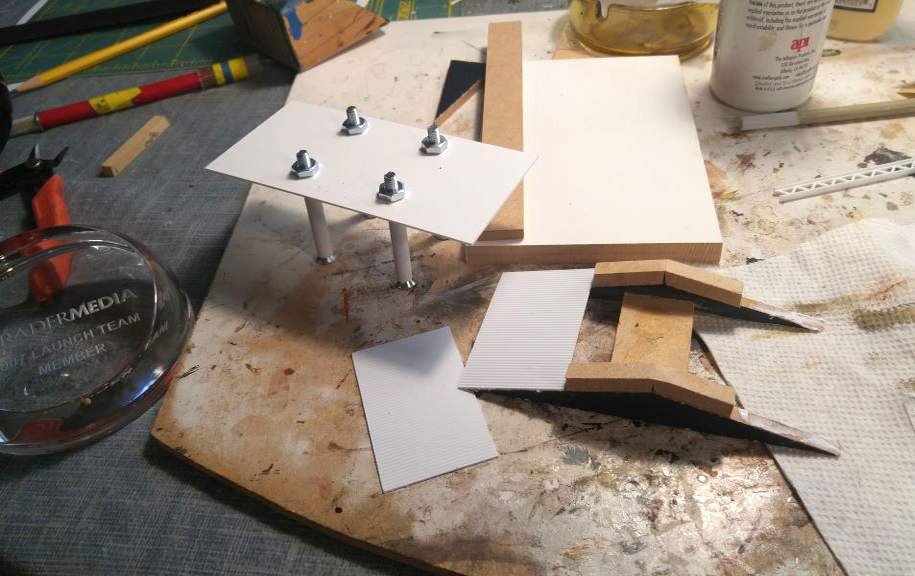
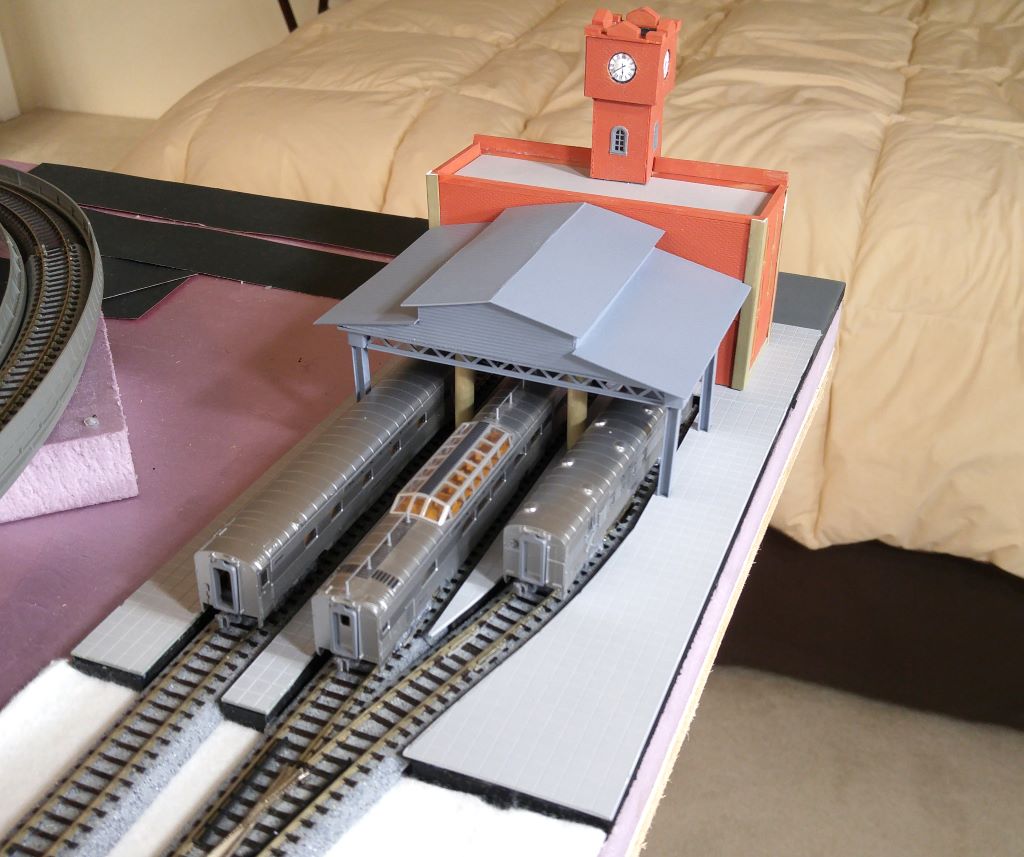
This was a fun project. I came up with a basic design, and with a few pieces of MDF and some styrene, I created a small shelter that would reside adjacent to the terminal. This was like designing my own kit, making the parts, and then painting and assembling it. At first, I didn't know if my upright girders would be strong enough to support the structure, so I came up with the idea to use machine screws inside a styrene tube - very strong and it looked like a concrete column. Although it came out great, it turned out the way I affixed the girders was sufficiently robust. I used Evergreen 3/16" square sidewalks for the platforms. |
|
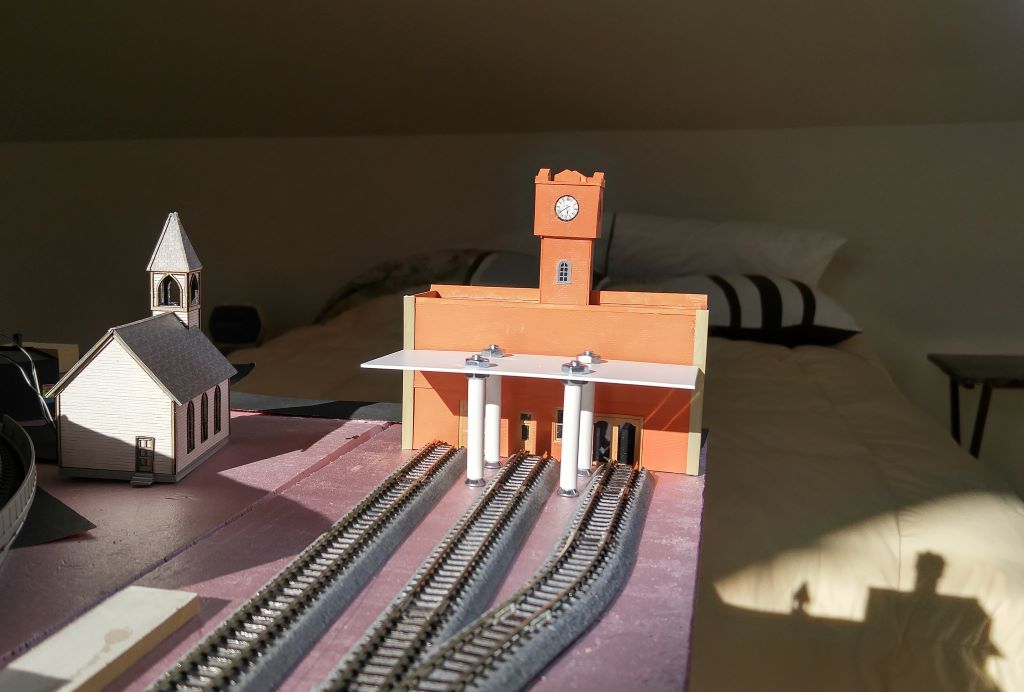
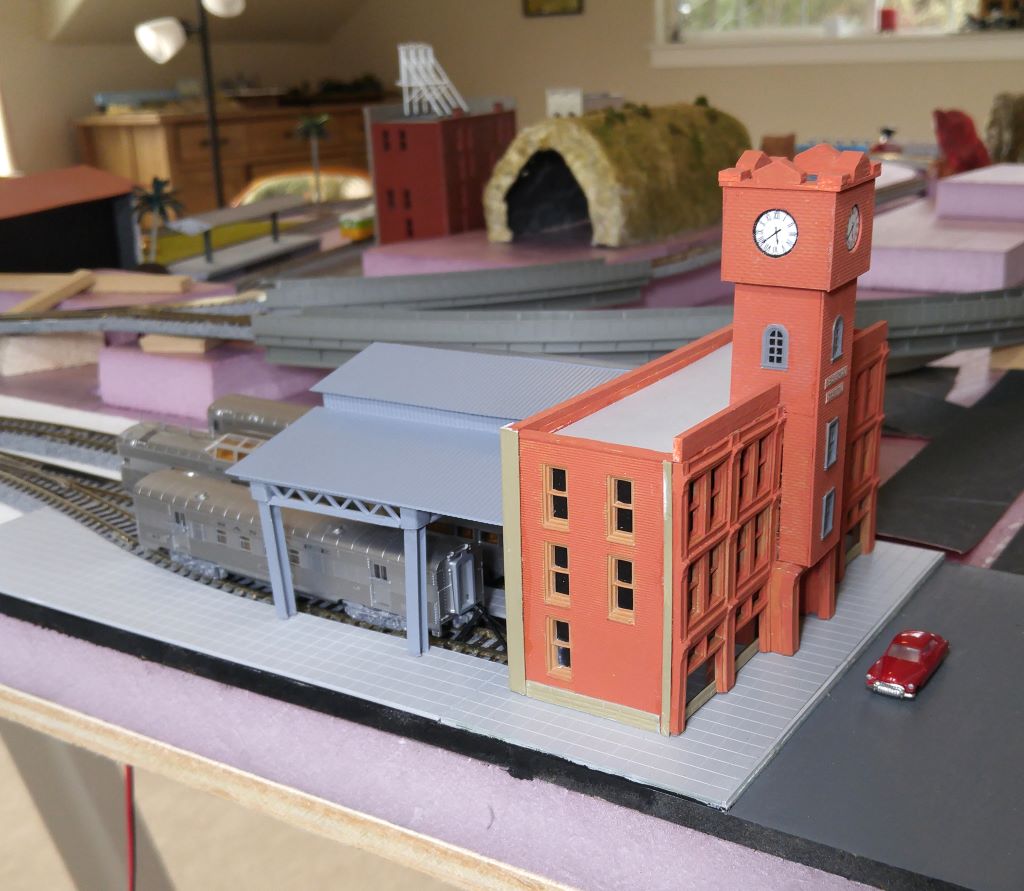
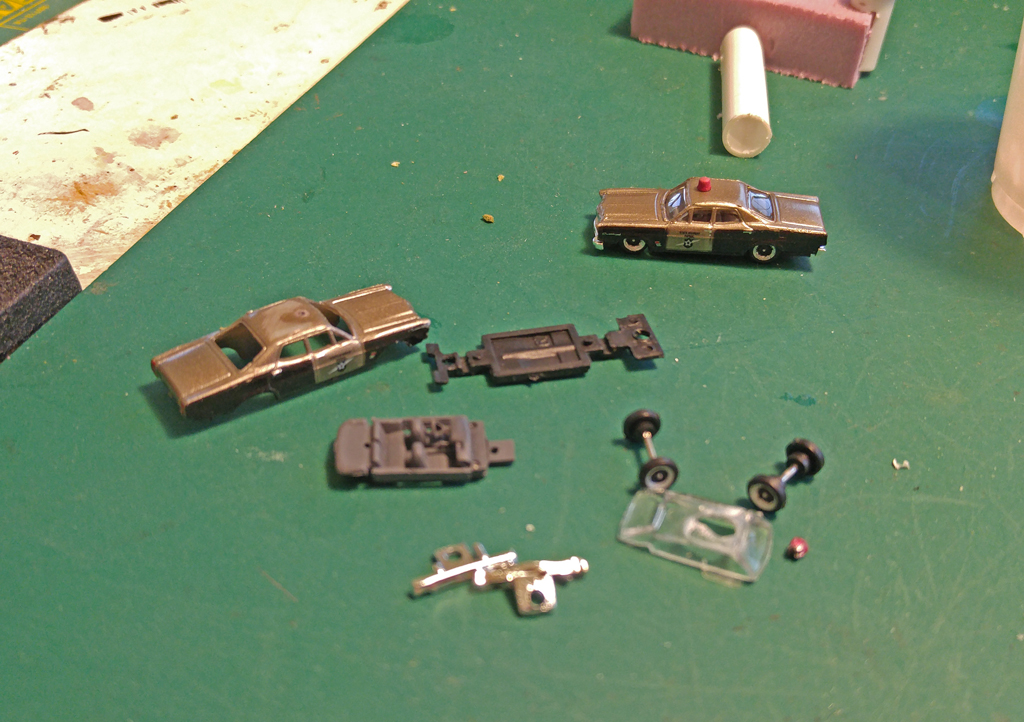
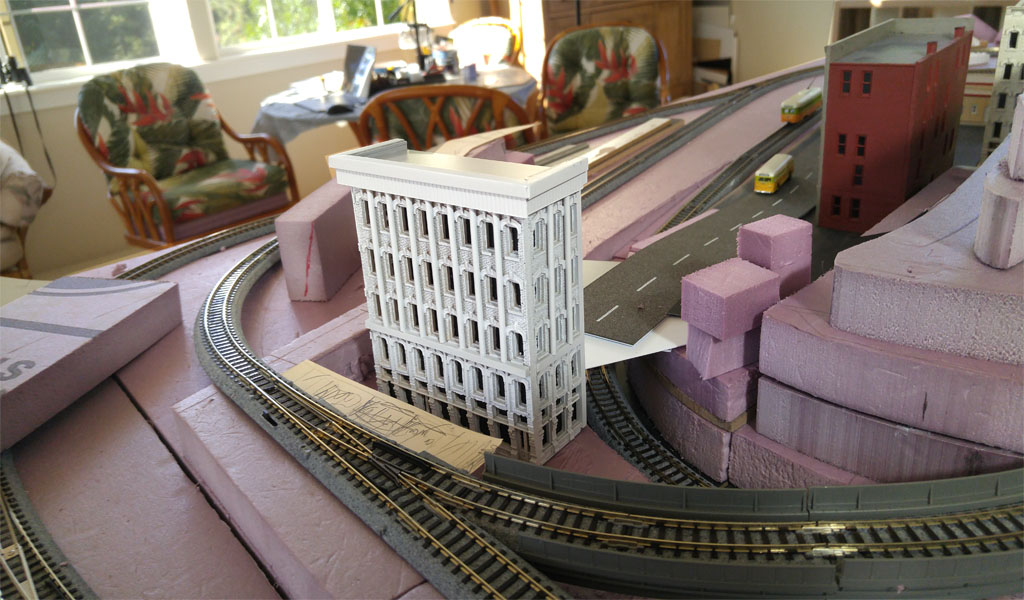
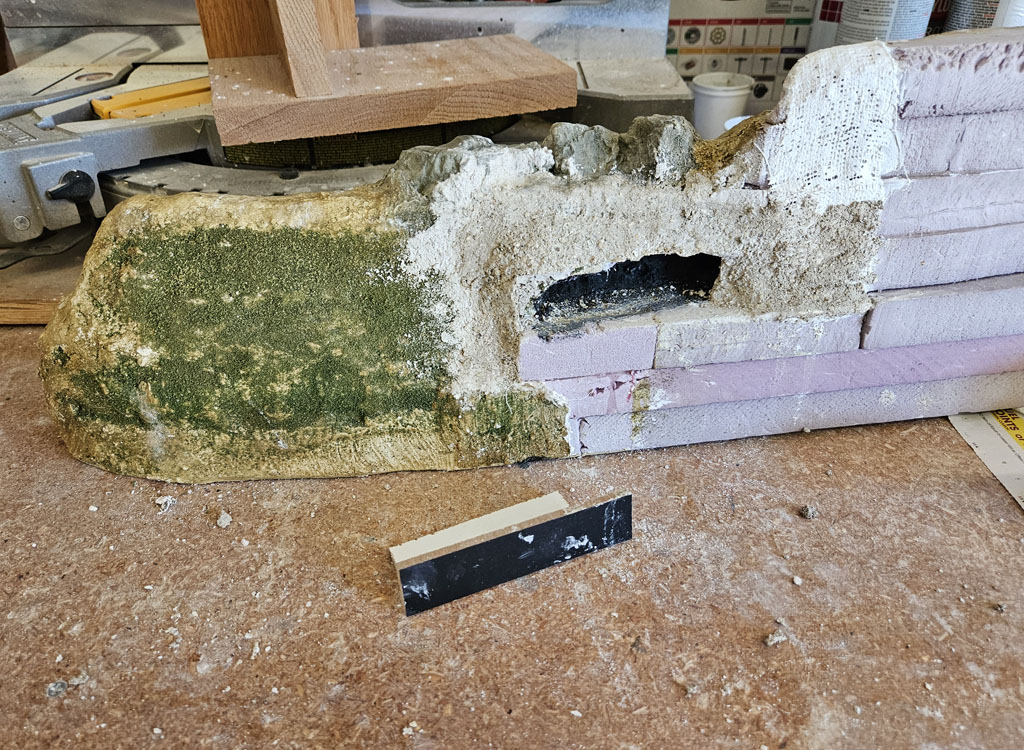
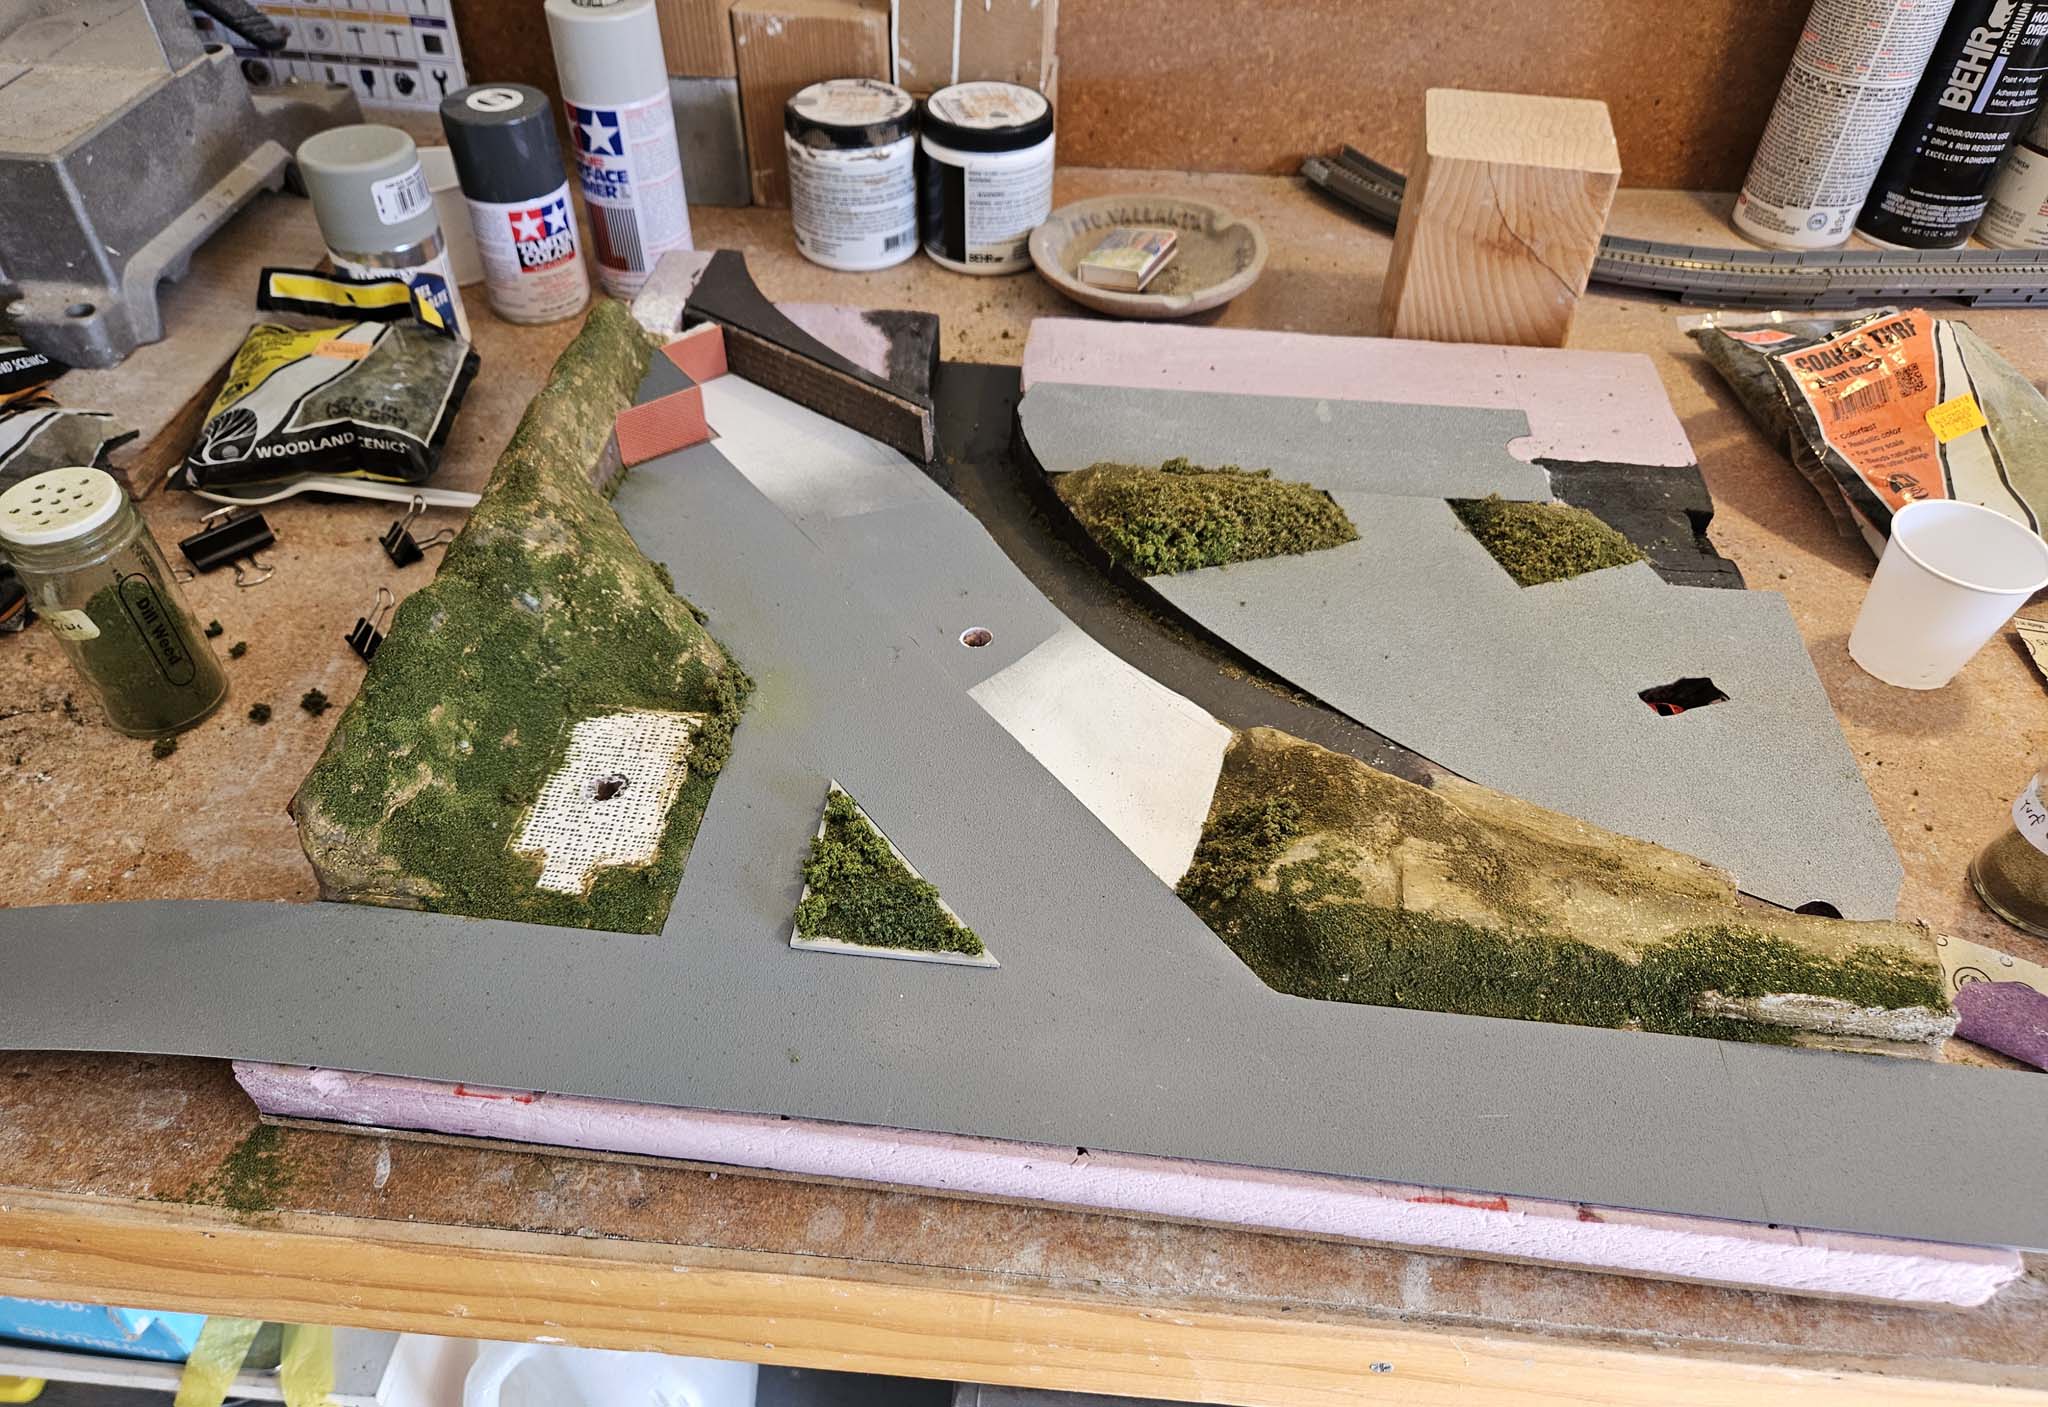
Even though it's comically small, I think my Dearborn Station turned out very nicely and represents an important landmark quite well. I'm still undecided as to how I'm going to landscape the surrounding area, but I've placed a piece of WS Shaper Sheet and will probably experiment with Sculptamold and grass. The Bluesmobile I knew it needed to be included. It took a while, but I finally tracked down a few n-scale police cars. I disassembled one of them and painted it to look like the Bluesmobile (even though it's a Ford, not a Dodge). |
|
|
|
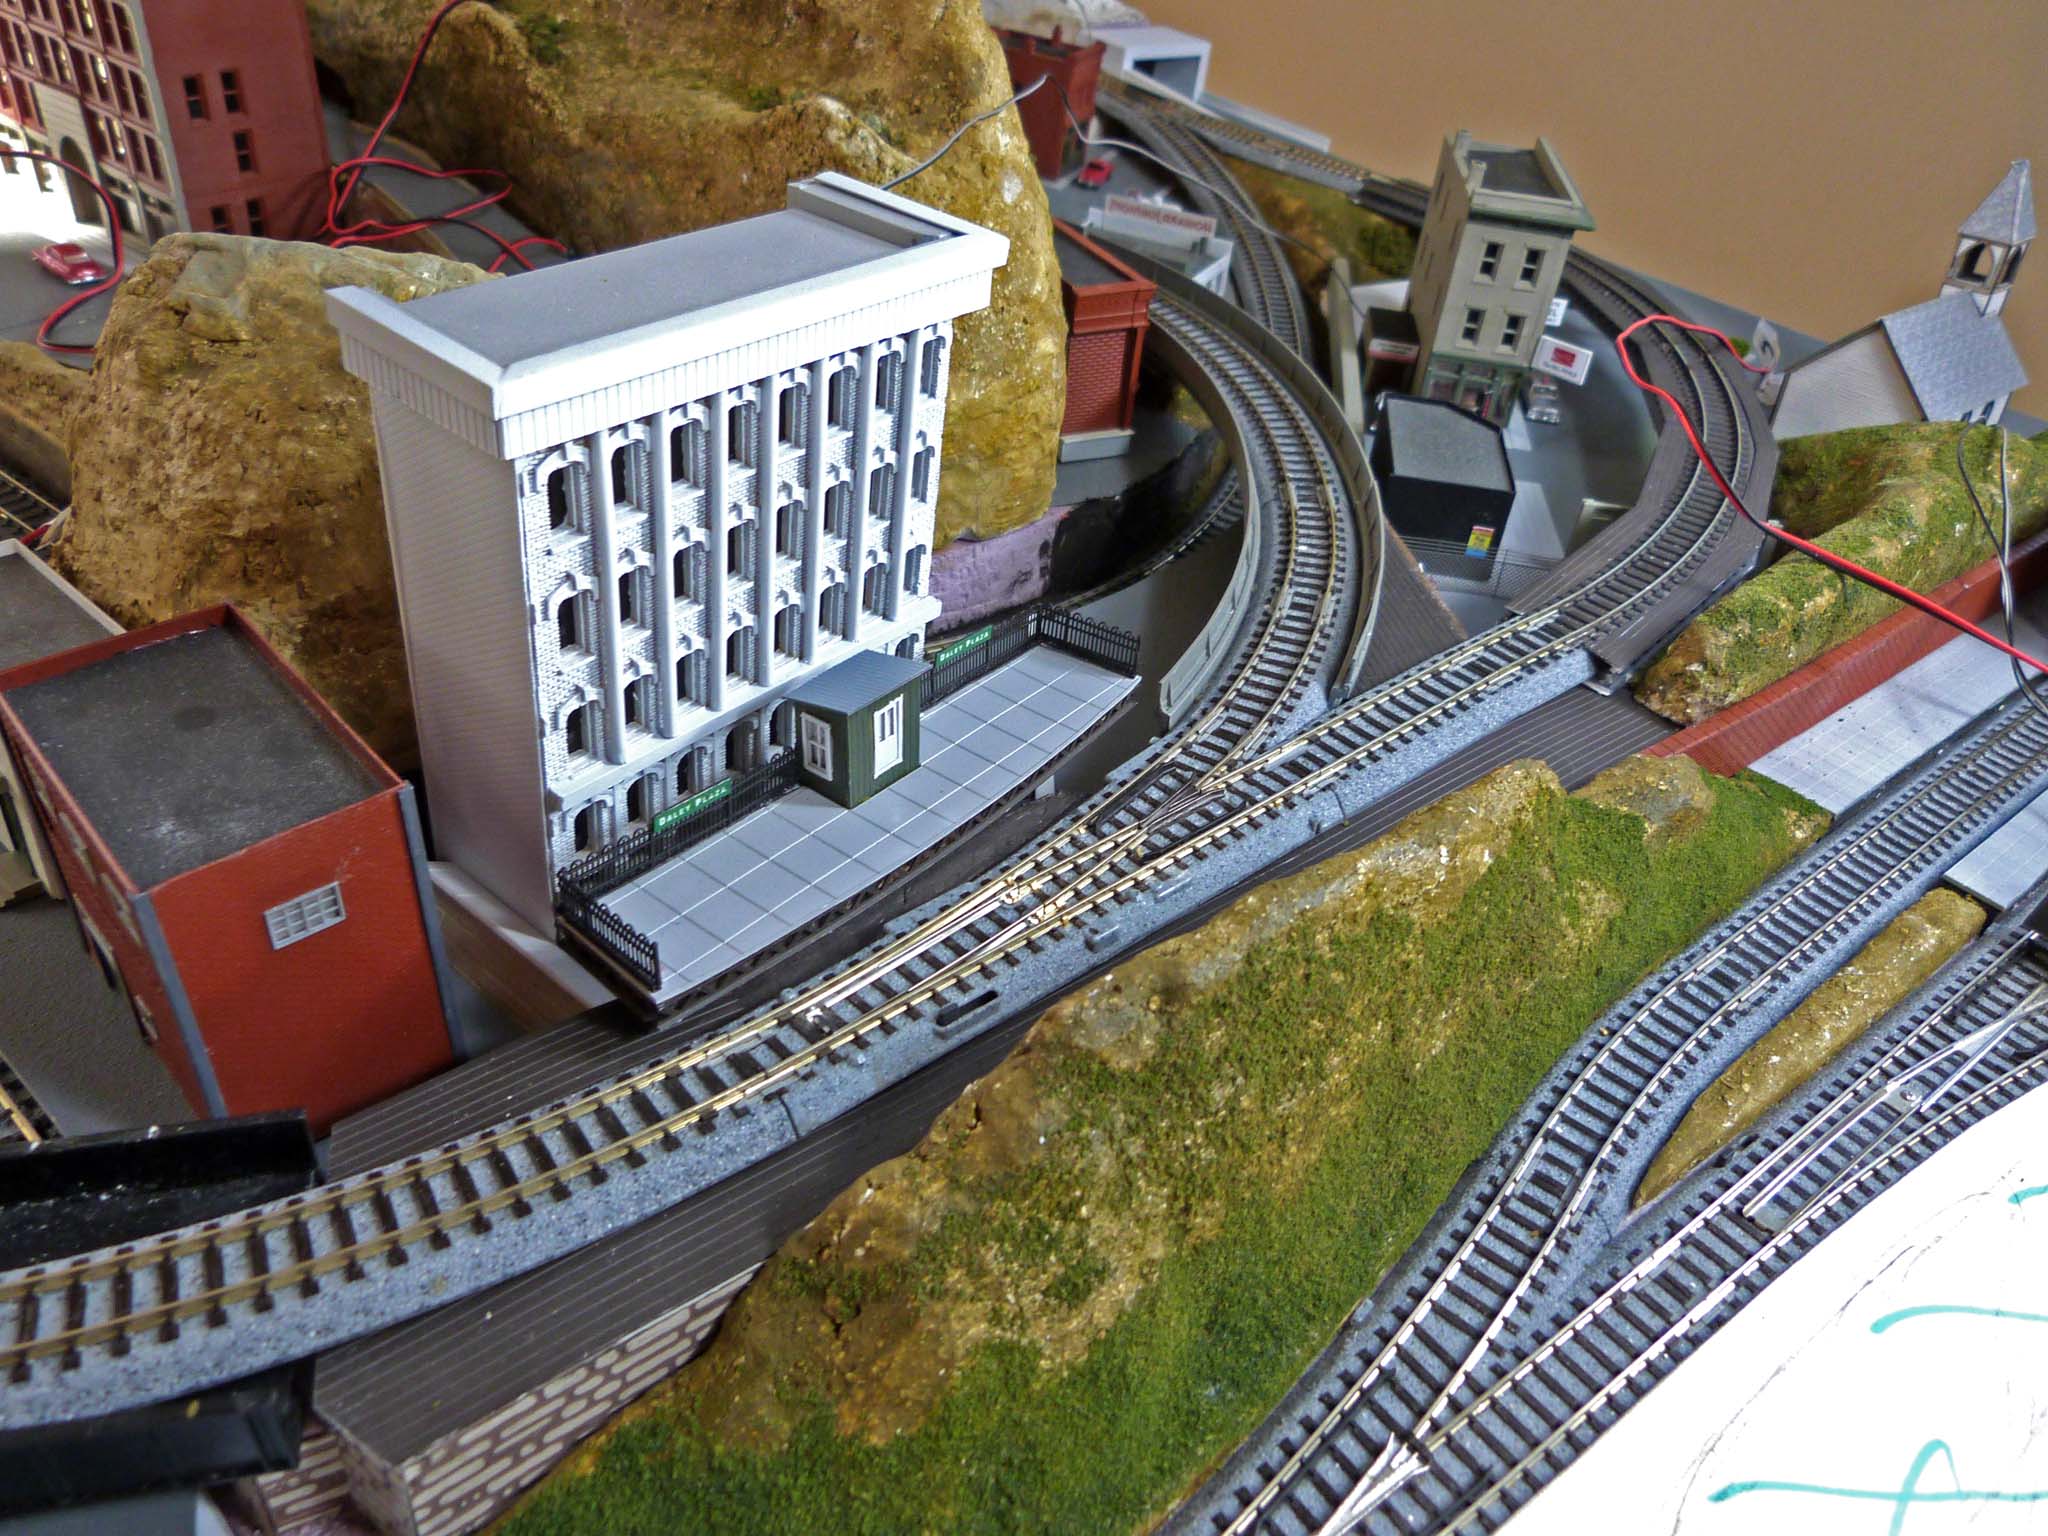
City Hall Once I realized I had the space, I just had to add City Hall where Jake and Elwood paid the taxes. (Did you know the clerk was a young Steven Spielberg?) I was fortunate to have one side of a similar-looking building left over from some kit-bashing. I used it to scratch-build the structure, adding some decorative parts to make it look more like the actual building. I also plan a small trolley stop in front above street level. (It will hide the fact that there isn't really a street down there.) |
|
|
|
I decided to add a small trolley station to represent the Chicago "L" and the famous Loop. |
|
|
|
I could not ascertain whether a real Daley Plaza station exists, but I thought it was a good name, considering it is in front of City Hall, and, according to Jake Blues, "That's where they have that Picasso." The Picasso there is an abstract of a dog – but since I'm a cat daddy, I have other plans.
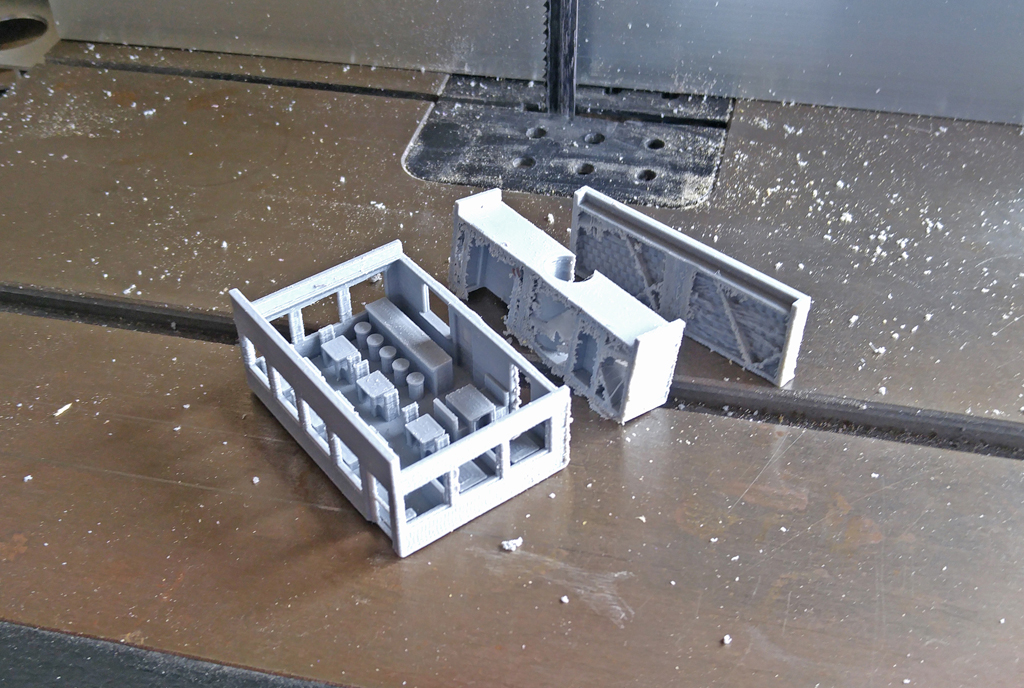
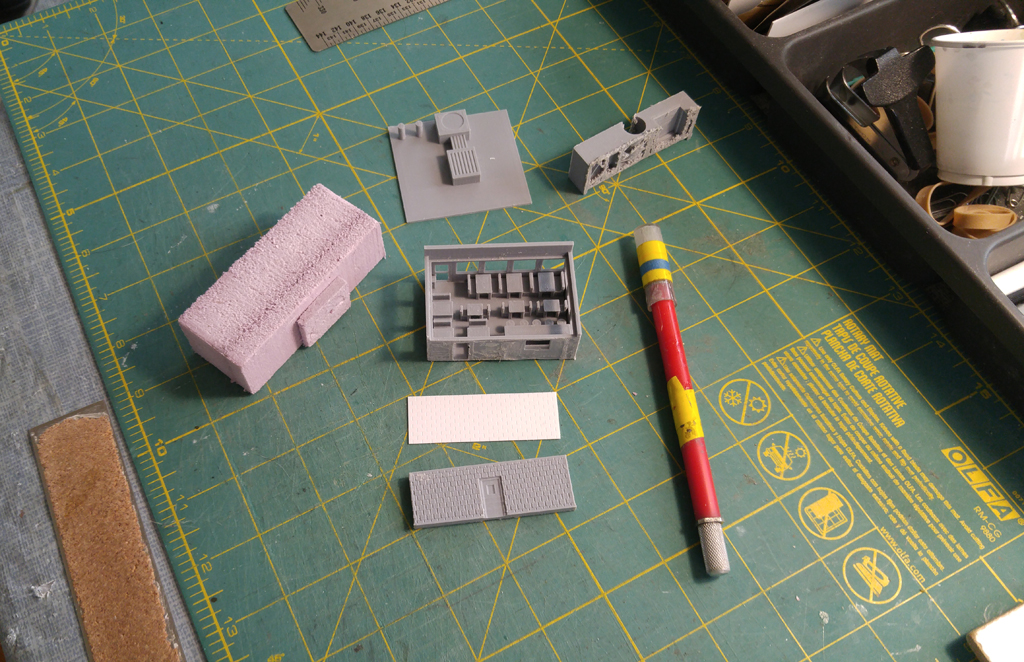
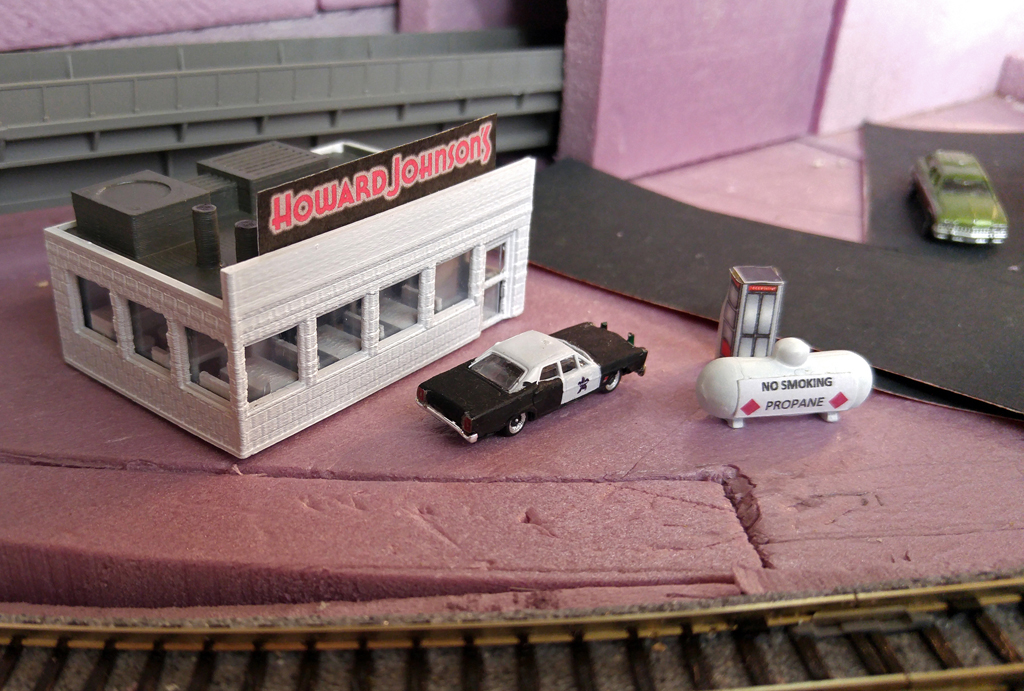
Howard Johnson's Fans of the Blues Brothers movie might agree that one of the funniest scenes occurred in a phone booth in the parking lot of a Howard Johnson's, so I knew I had to find or make a small restaurant. Fortunately, I found a great n-scale building called "Pearl's Diner" that was 3D printed by SmallTown 3d Models. My space was limited so I had to cut a section out of the building, which was very easy using a band saw. I had previously found an appropriate phone booth and propane tank. I even found an N-scale 3d printed Pontiac Grand Prix on ETSY, similar to the one Carrie Fisher drove in the movie. A bit of paint was all it needed, and it will be parked in front of Carrie's "Curl Up and Dye" salon.
|
|
|
|
|
|
|
|
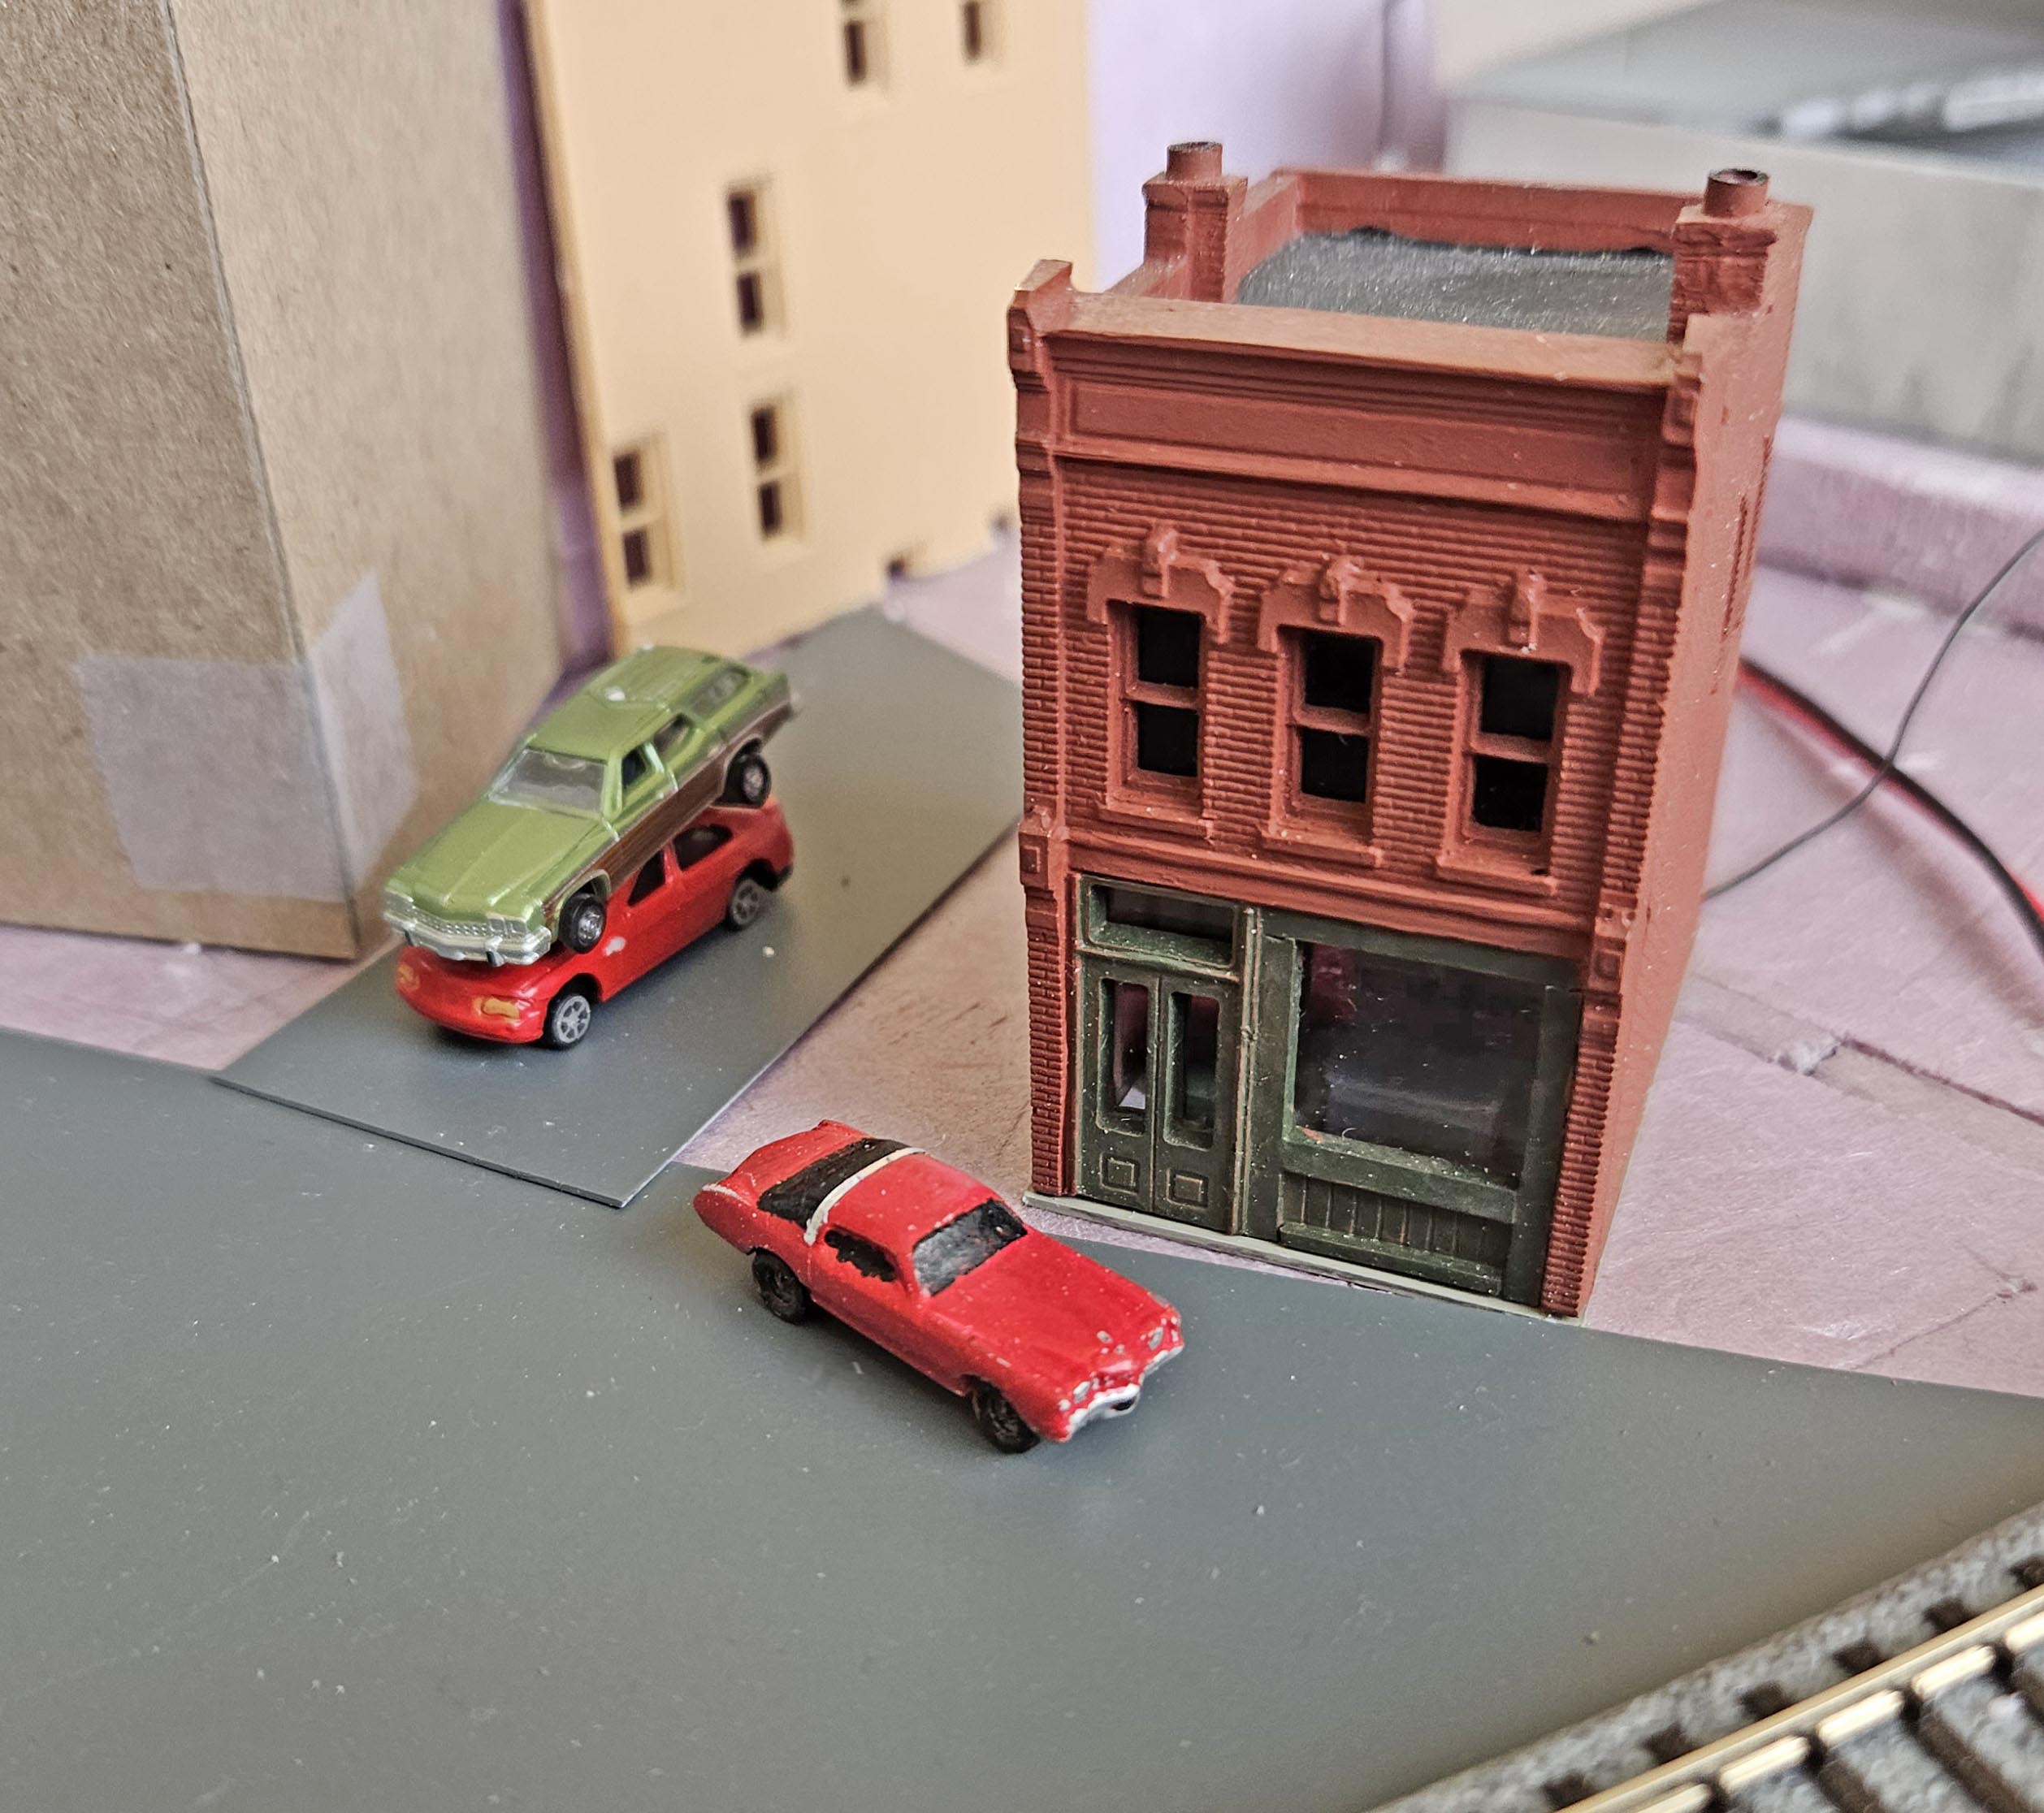
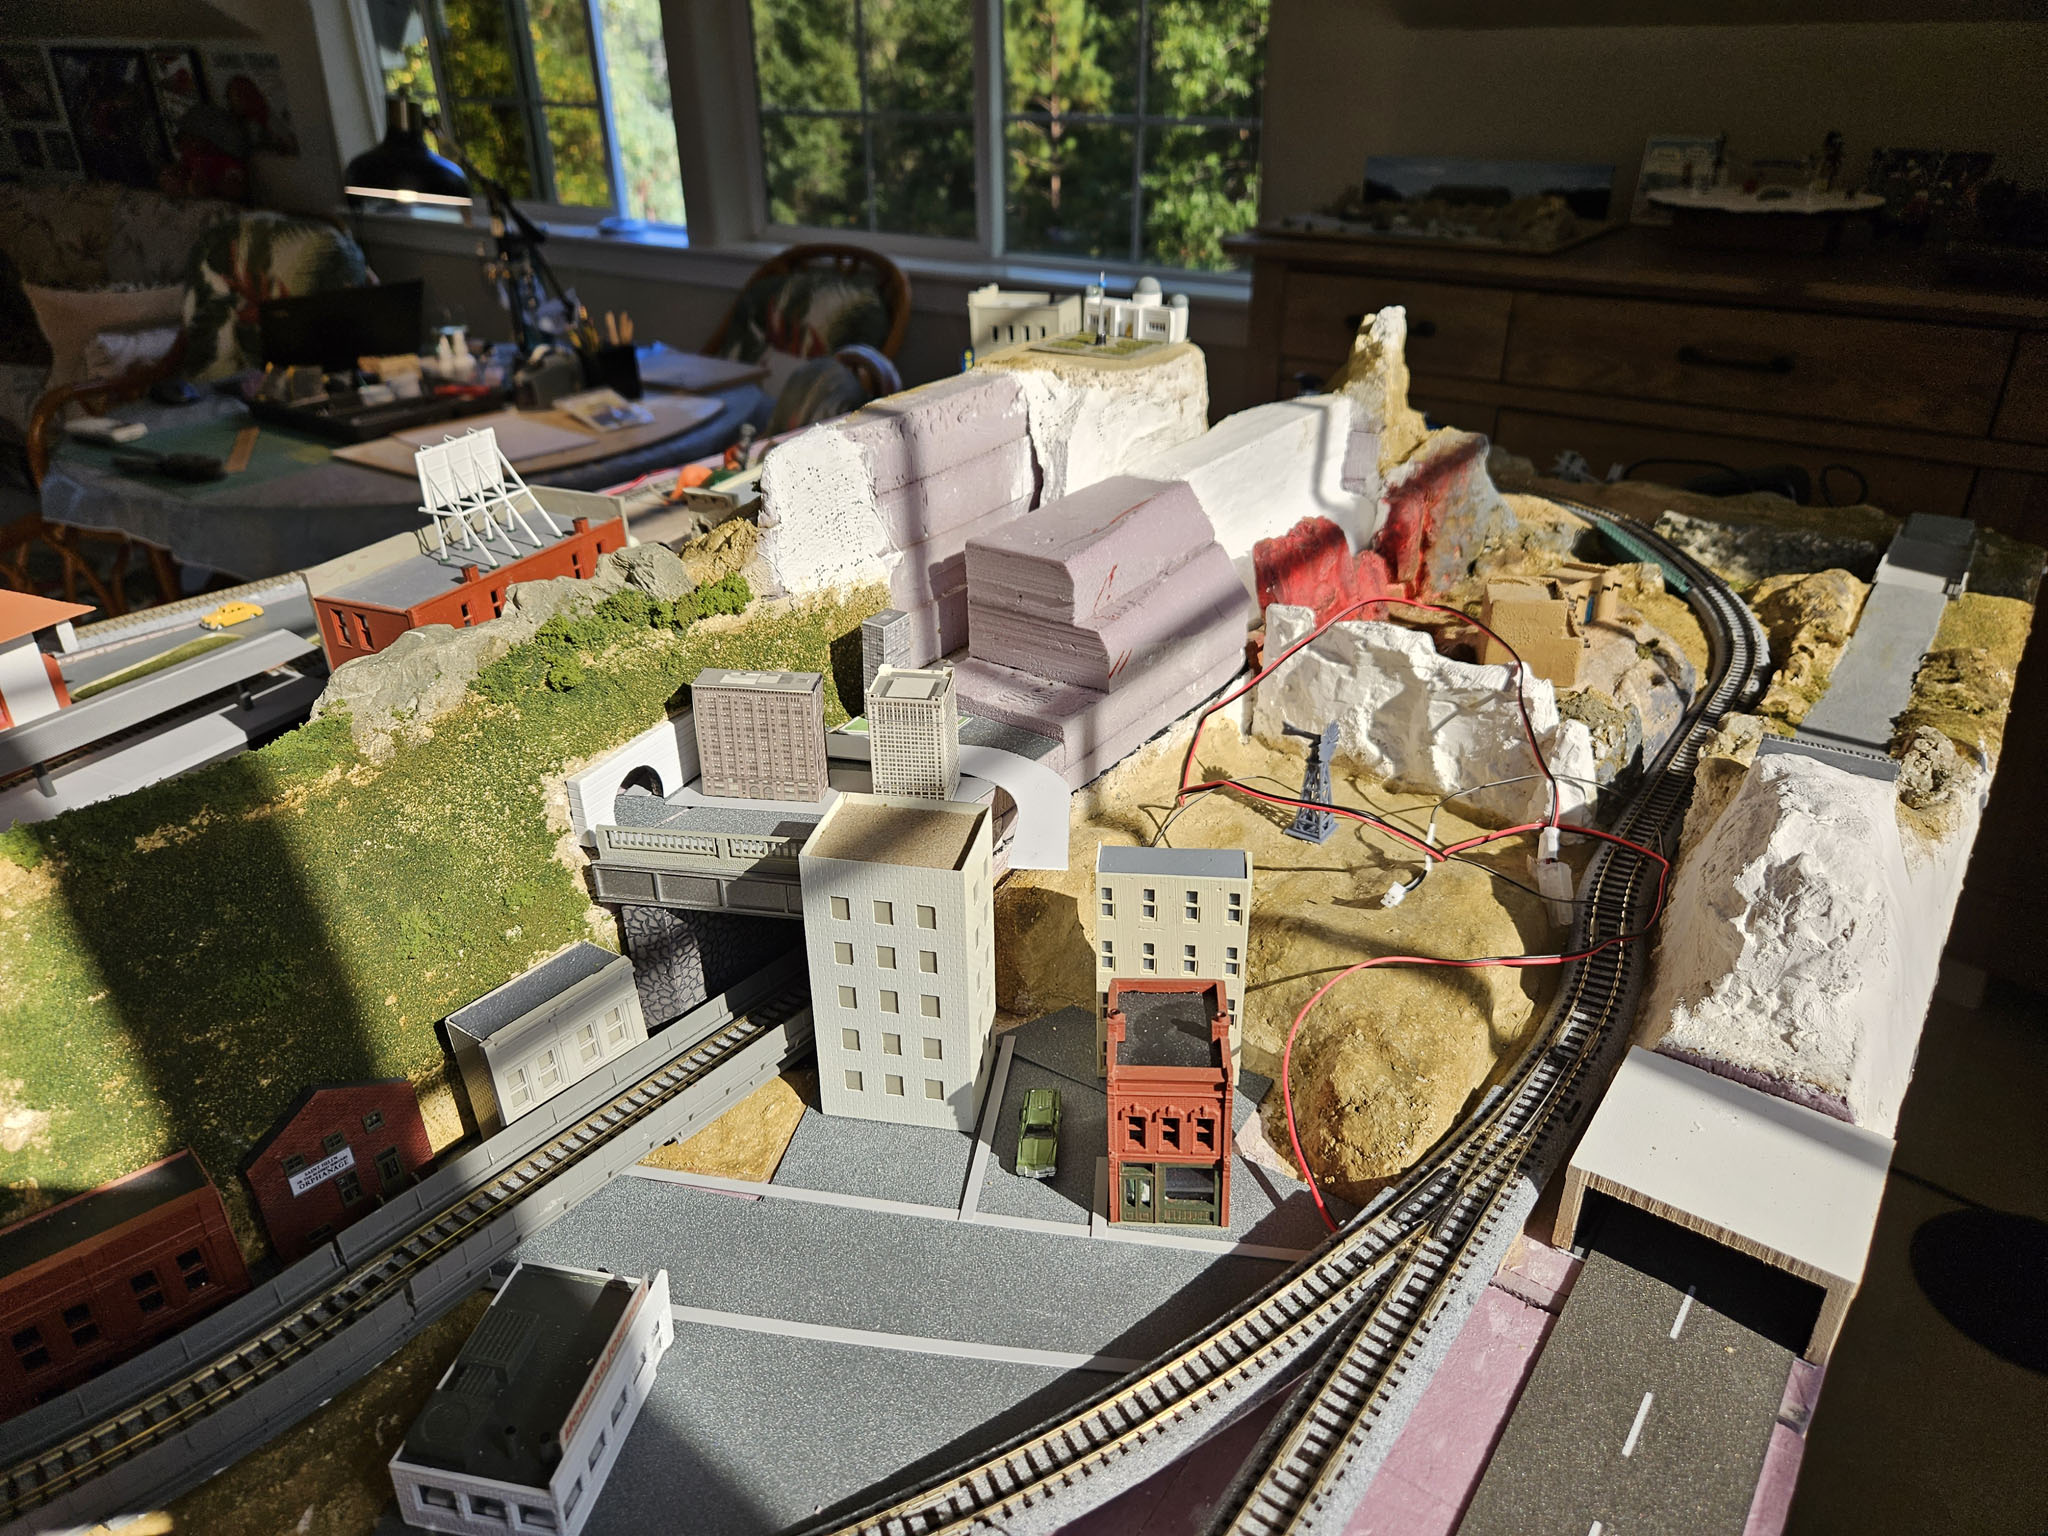
I've had a productive few weeks and have essentially finalized the major components of the Chicago section. I also spent quite a bit of time constructing a number of details like a small basketball court, a hole in the middle of the street containing several vehicles, adding a phone booth and an adjacent propane tank. (Only fans of the movie will understand.) I had originally planned to leave the major street a separate piece because it covered three separate sections, but I didn't like the way it looked butted up against the other streets so I figured out a way to let it overlap the other sections and I decided to glue all the roads down and fill the seams. Obviously this required repainting the roads. I used Micro Mark PSA (Pressure Sensitive Adhesive) to affix the sidewalk strips. I've mentioned this glue before. It's a bit tricky to get used to, but in the right application (like sticking down small pieces) it excels because there is no ooze. A small piece of styrene acts like an adhesive label.
|
|
|
|
|
|
|
|
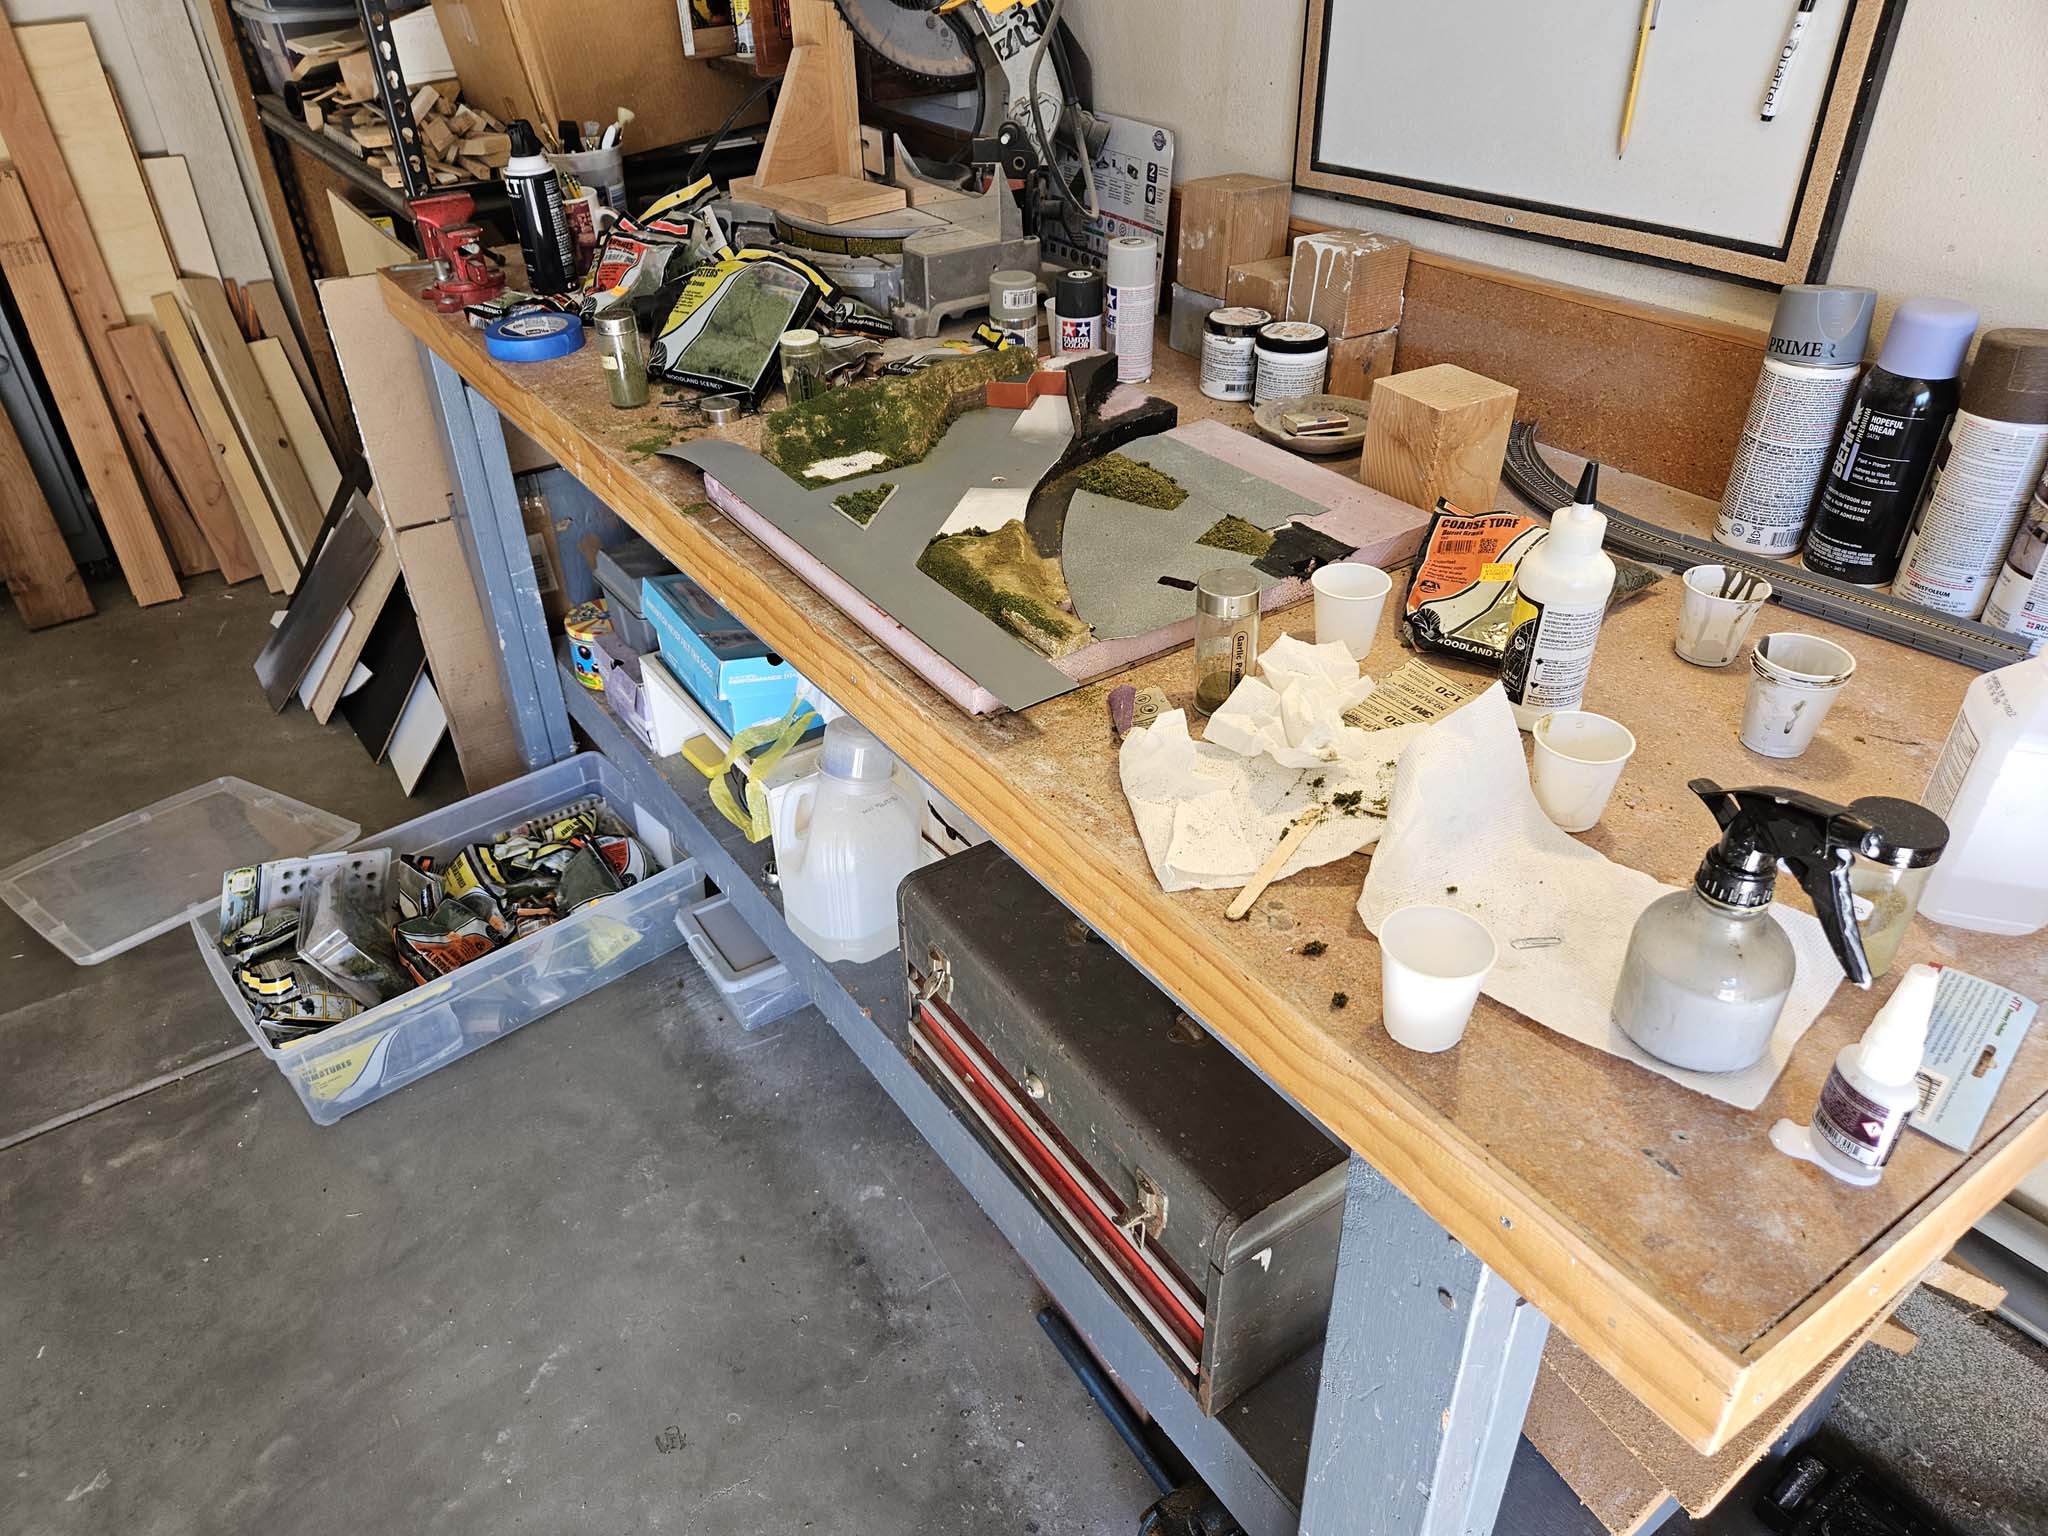
If you've perused this site, you know that I build my layouts using a "modular" approach to simplify construction and aid in mobility. (This layout will consist of five modules.) As you can see from the picture above, this phase is a great example of the benefits of doing so. Working with plaster, putty and various scenic material created quite the mess in the garage. Doing this work in the house would have been very difficult.
More to come soon...stay tuned!
Note: That extra space below is part of the template I used for this page and will accommodate additional information.
|
|
|
|
|
..2
| |