13.
Los Angeles
Union Station
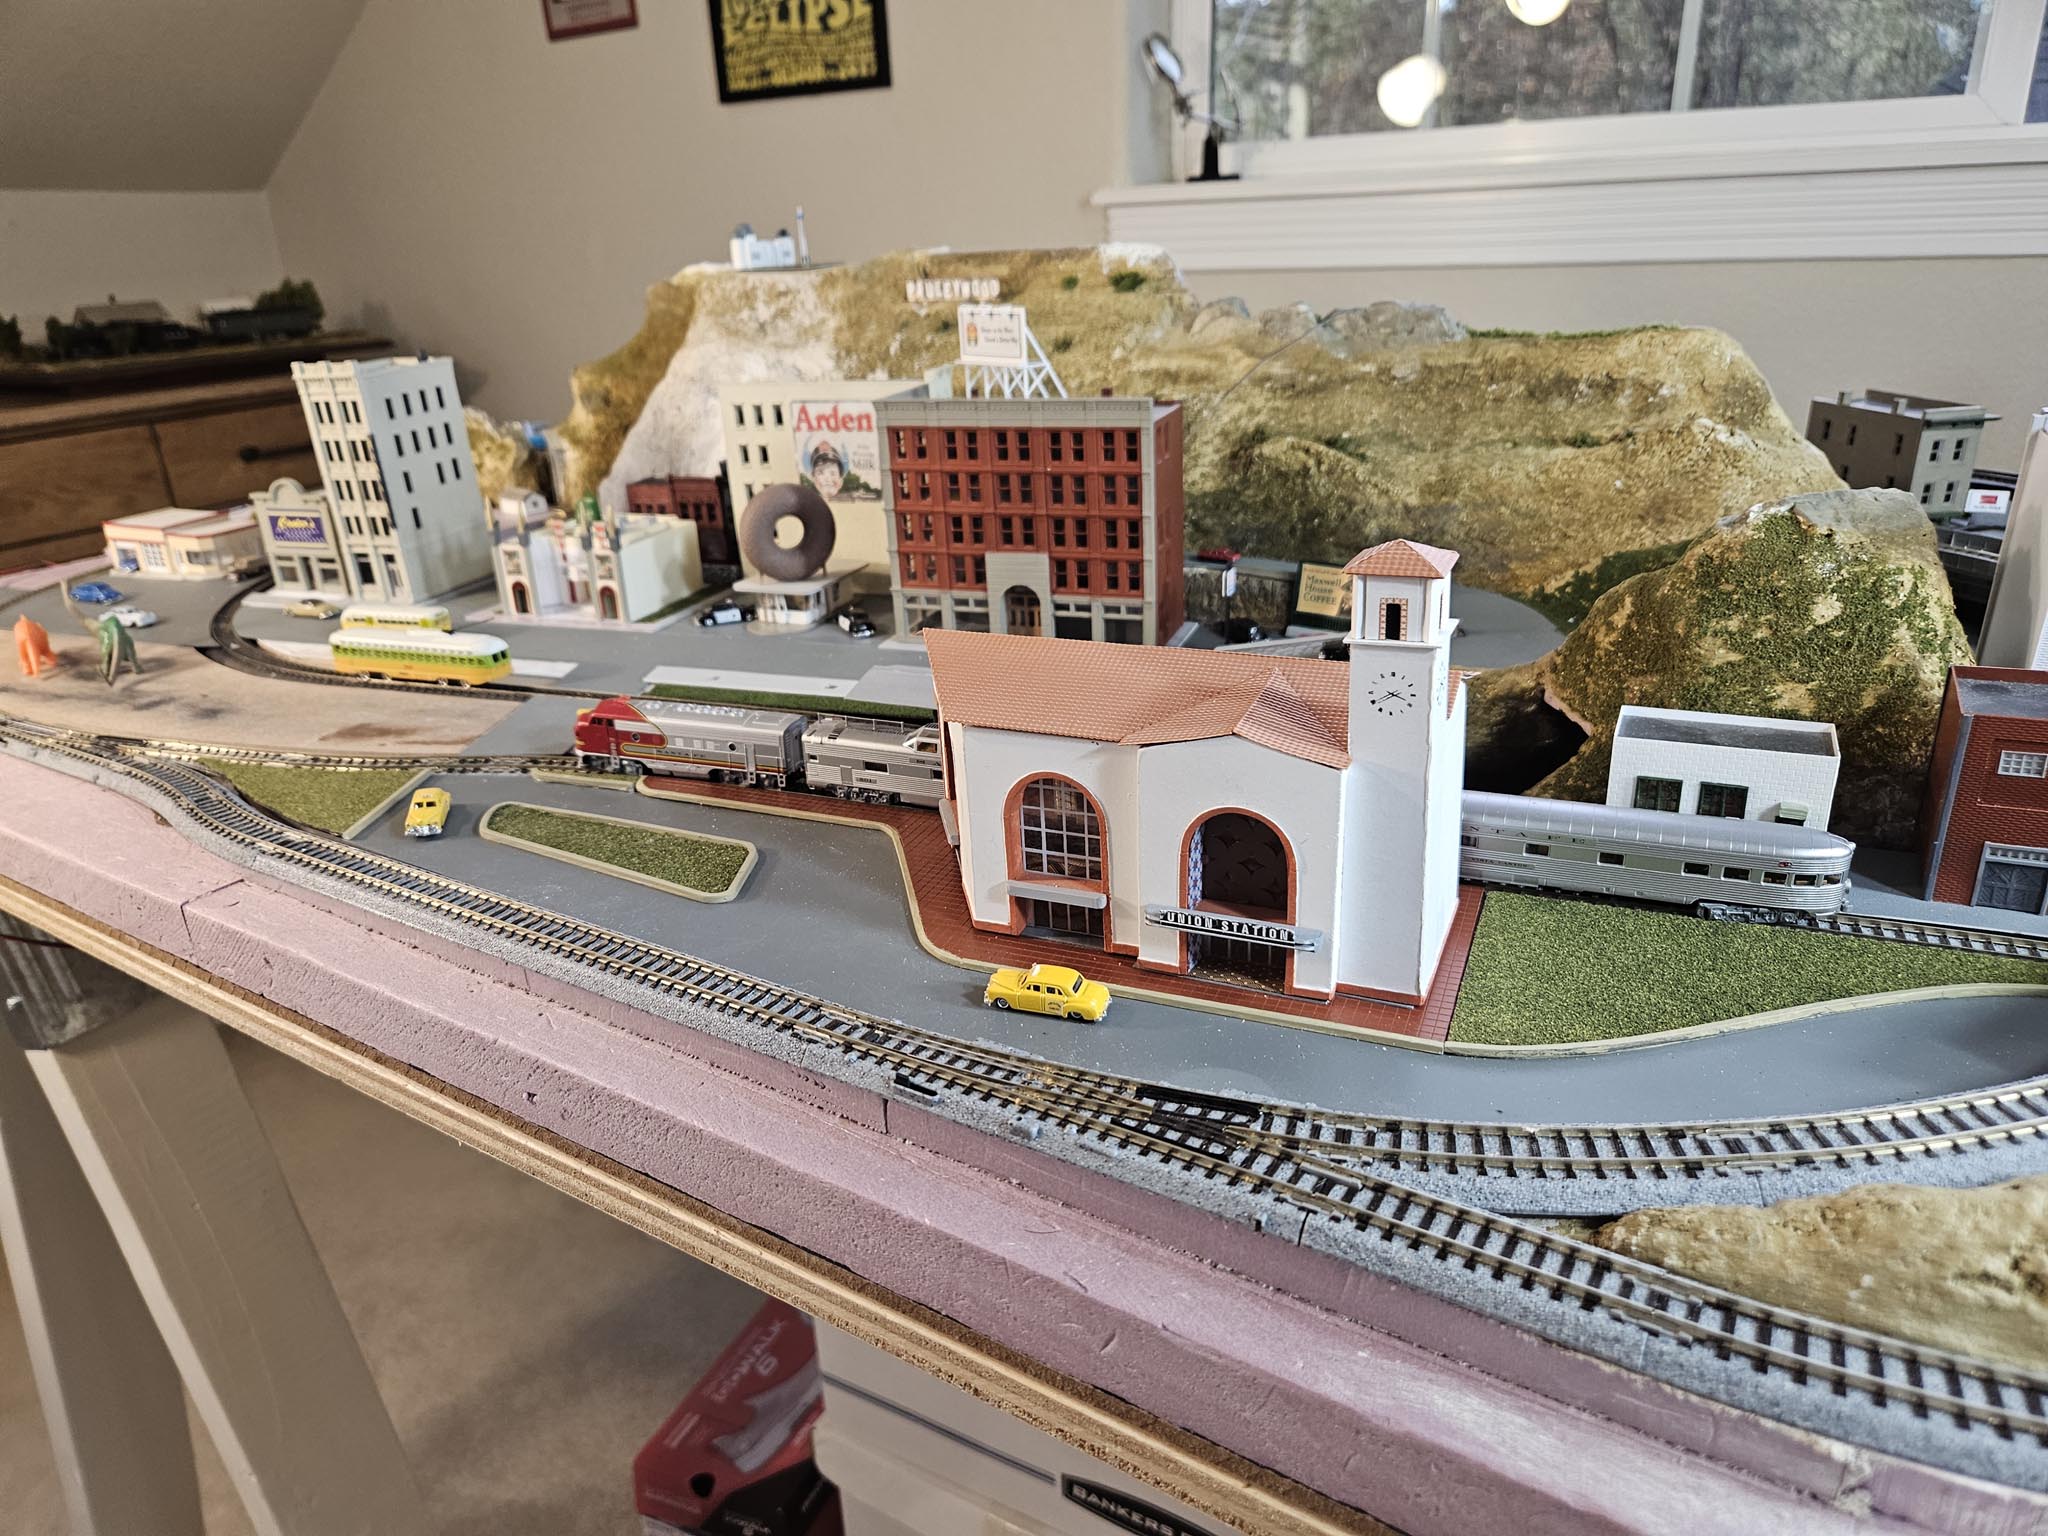
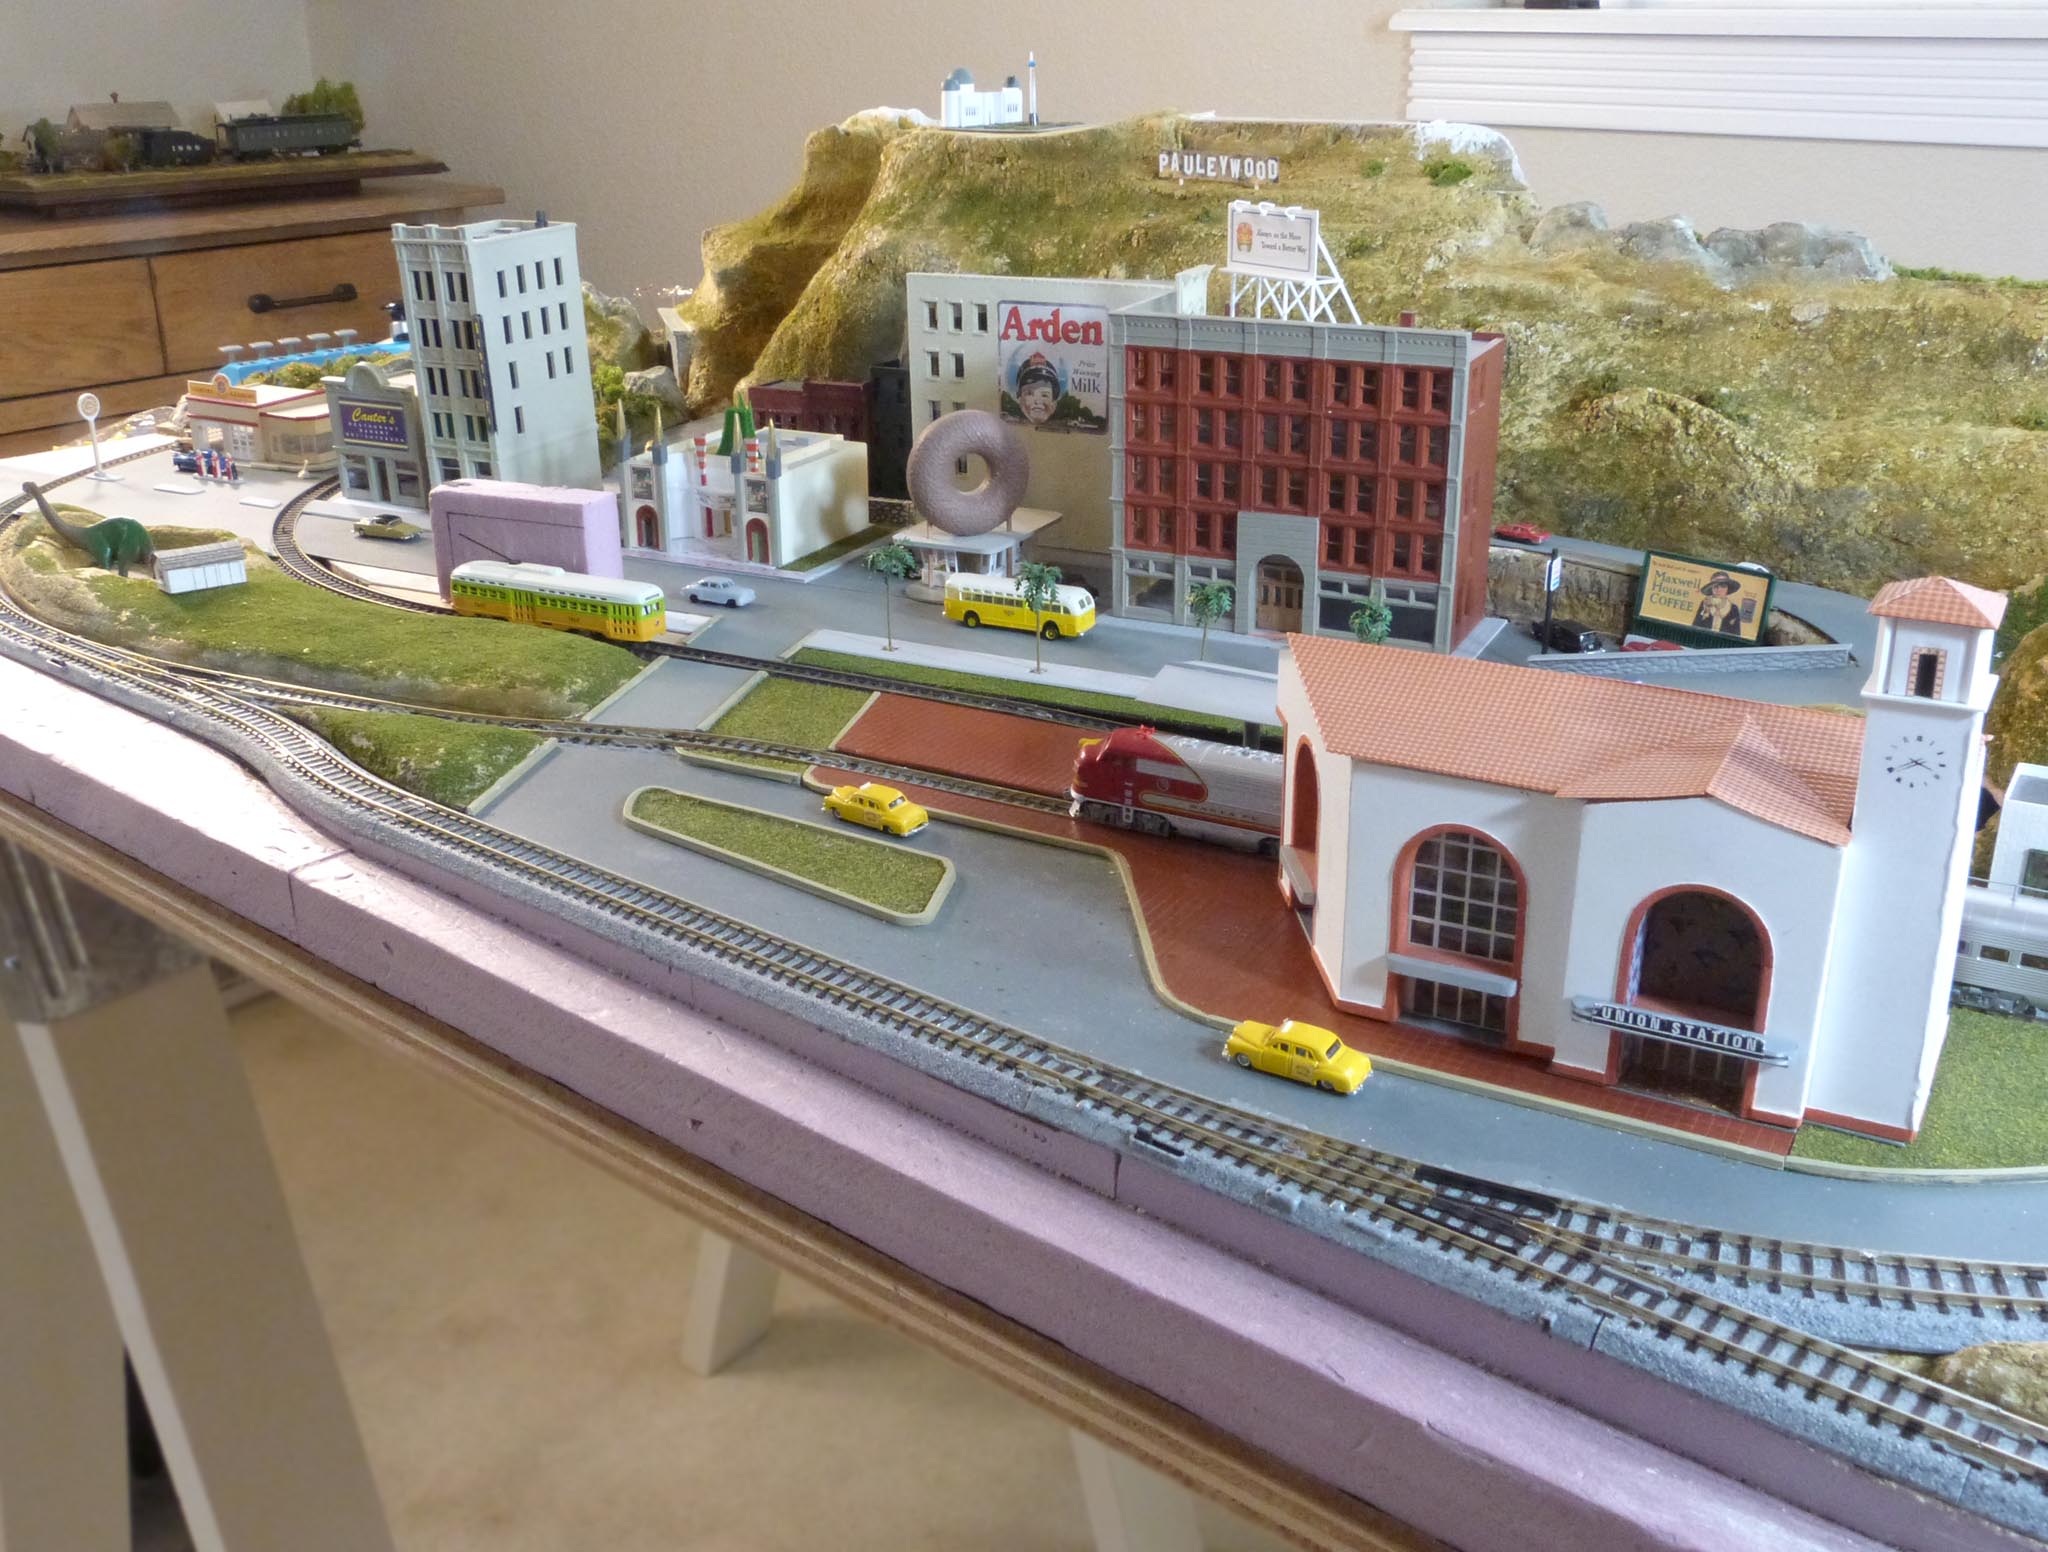
As I mentioned on page 10 of my Layout Details, I had originally intended to build the Super Chief diorama on a shelf. By the time it evolved into a full layout, I had already constructed a few buildings, one of them being Union Station in Los Angeles. Although it's sort of a funny shape (designed for a 12" wide shelf), it will work fine on the final layout.
It's 1951 in my Los Angeles. Because LA was a bright, shiny city in the early 50's, I had a specific look in mind for the landscape around Union Station. I hope it came through.
|
|
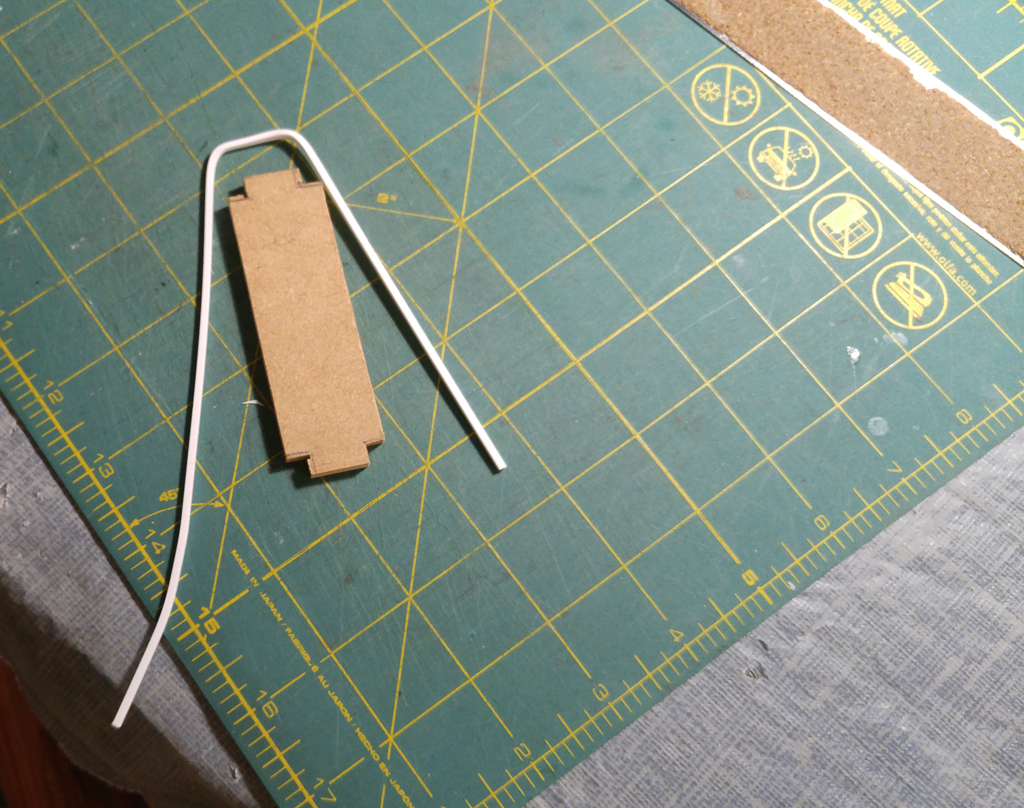
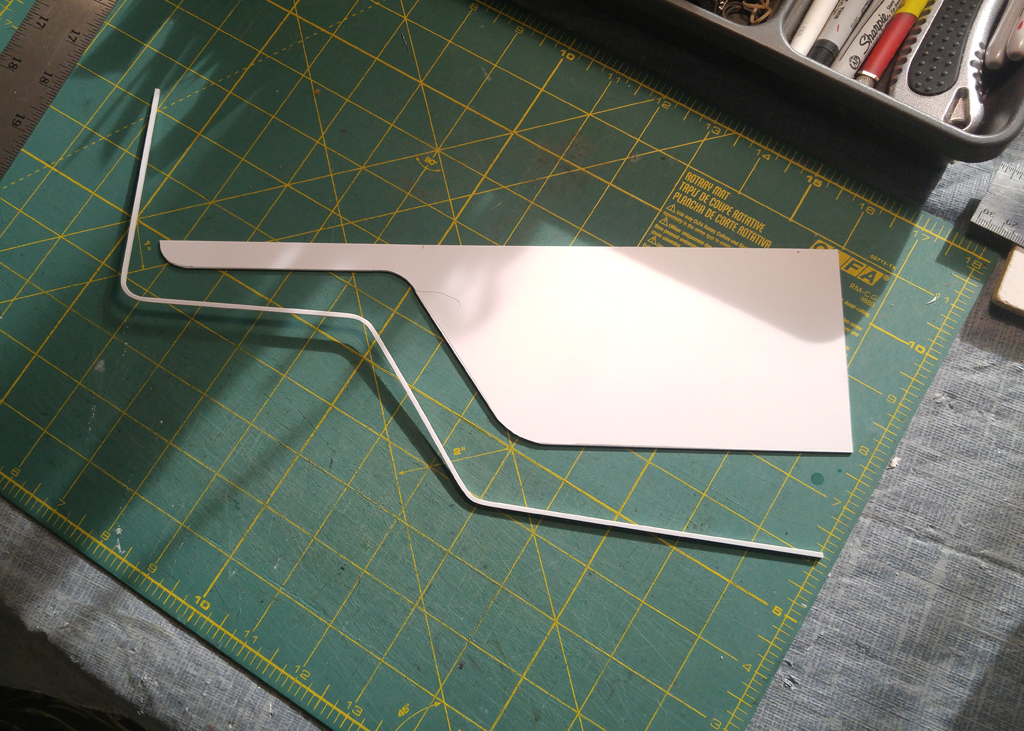
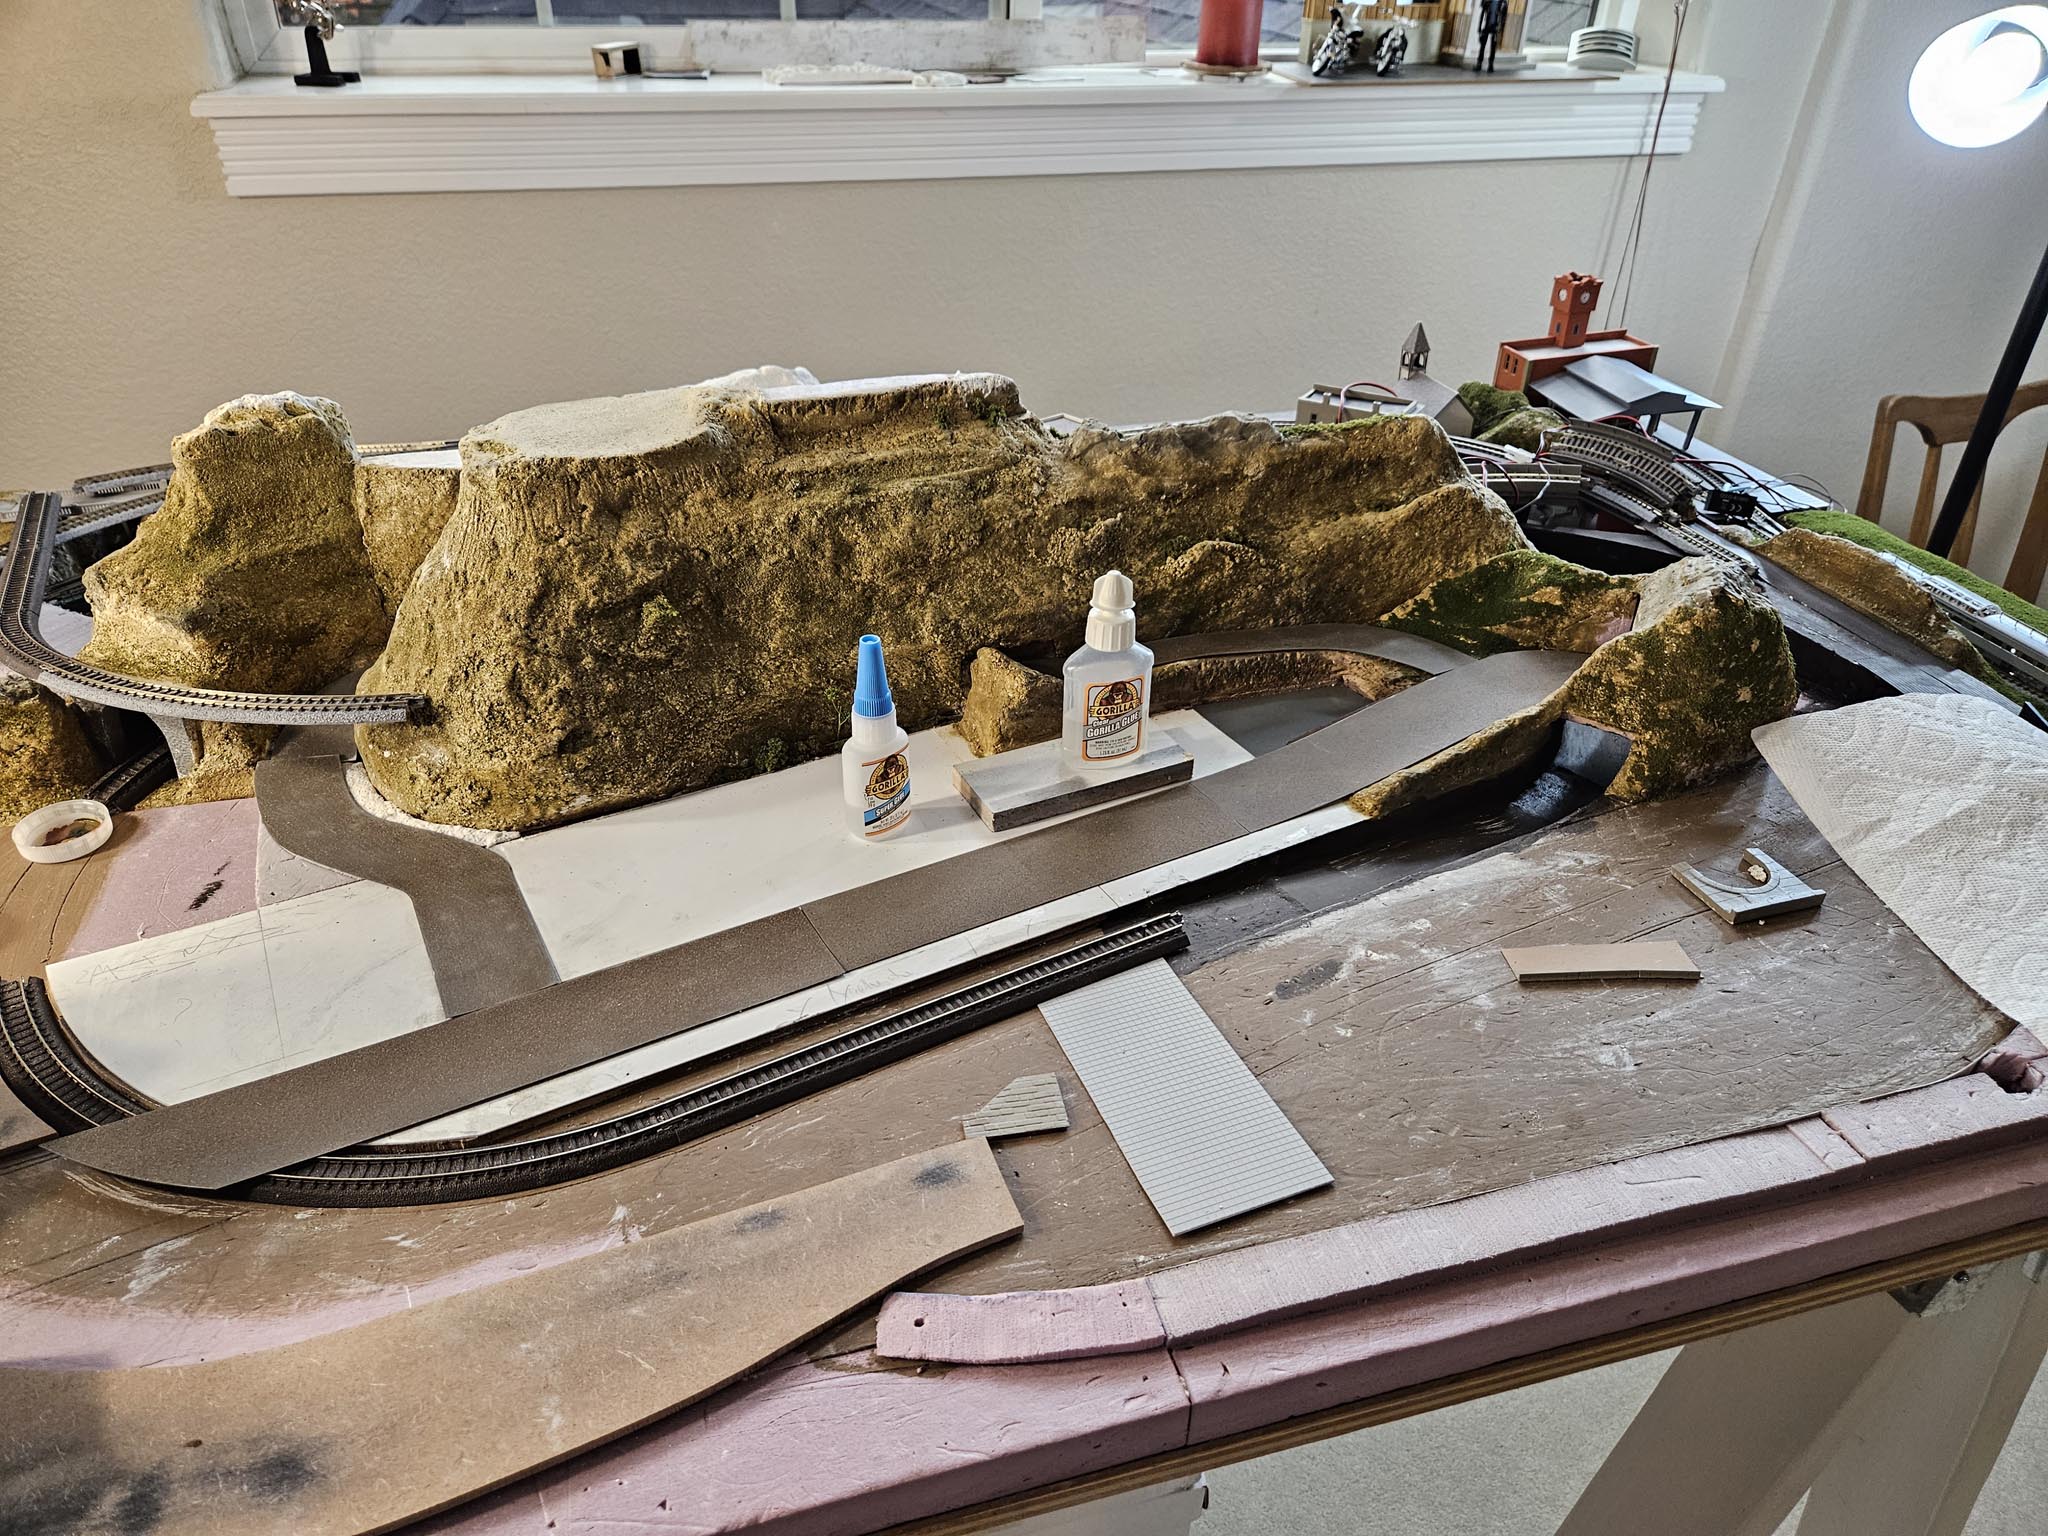
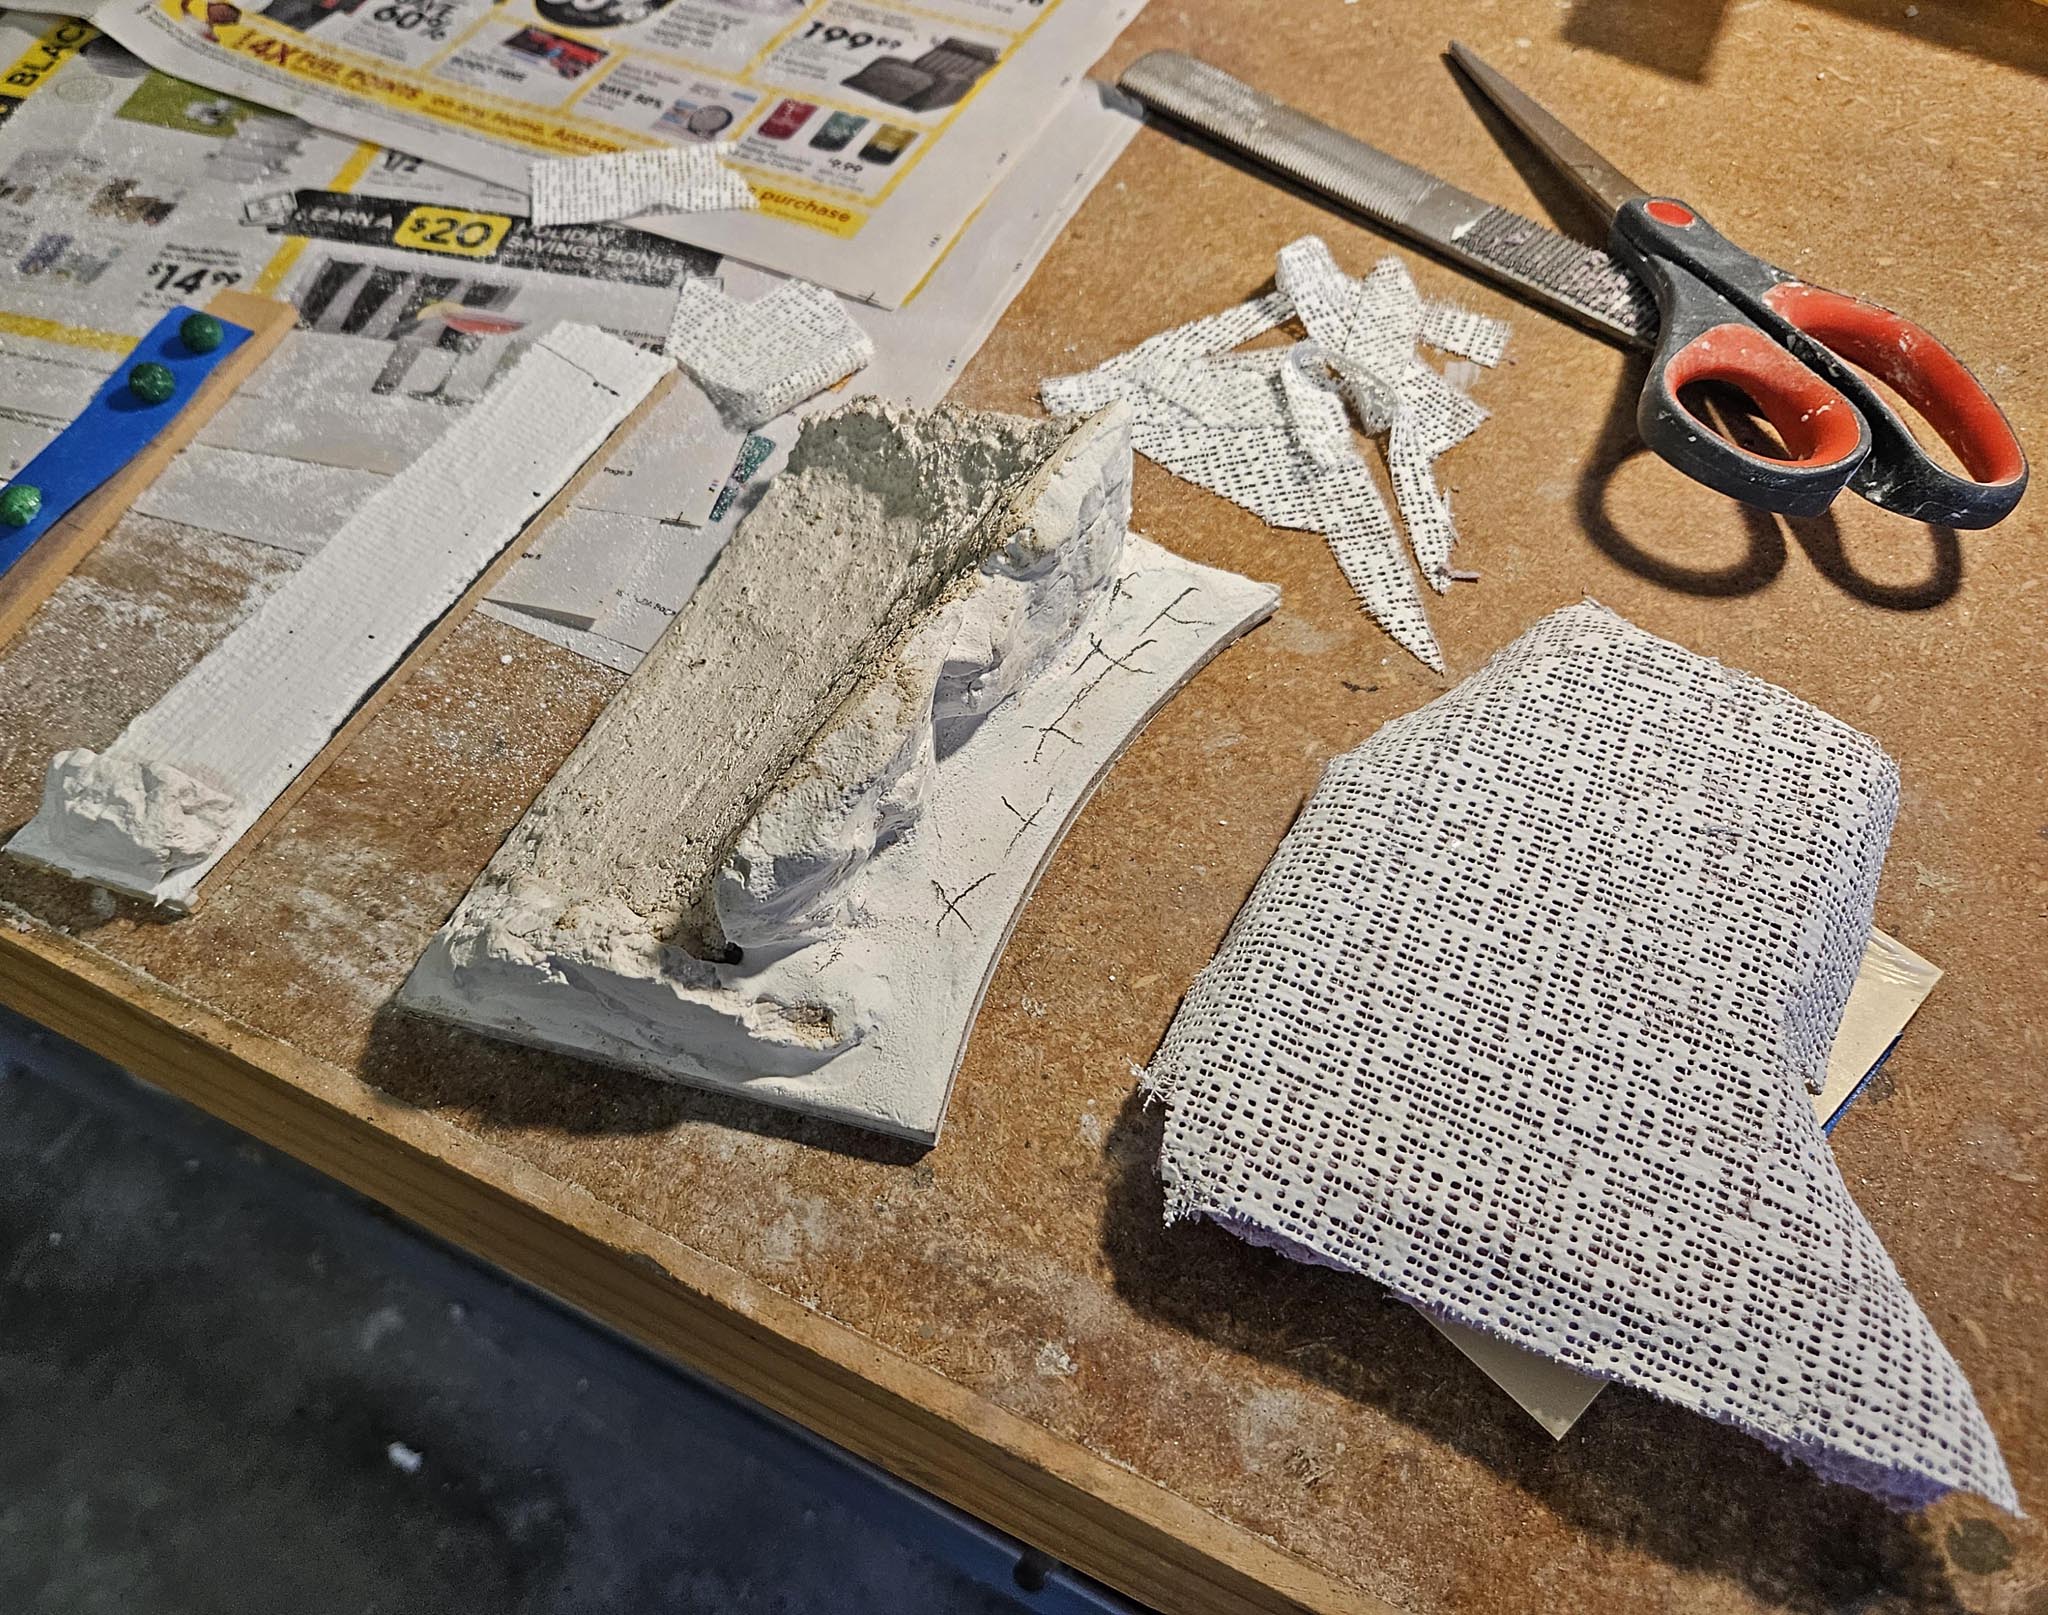
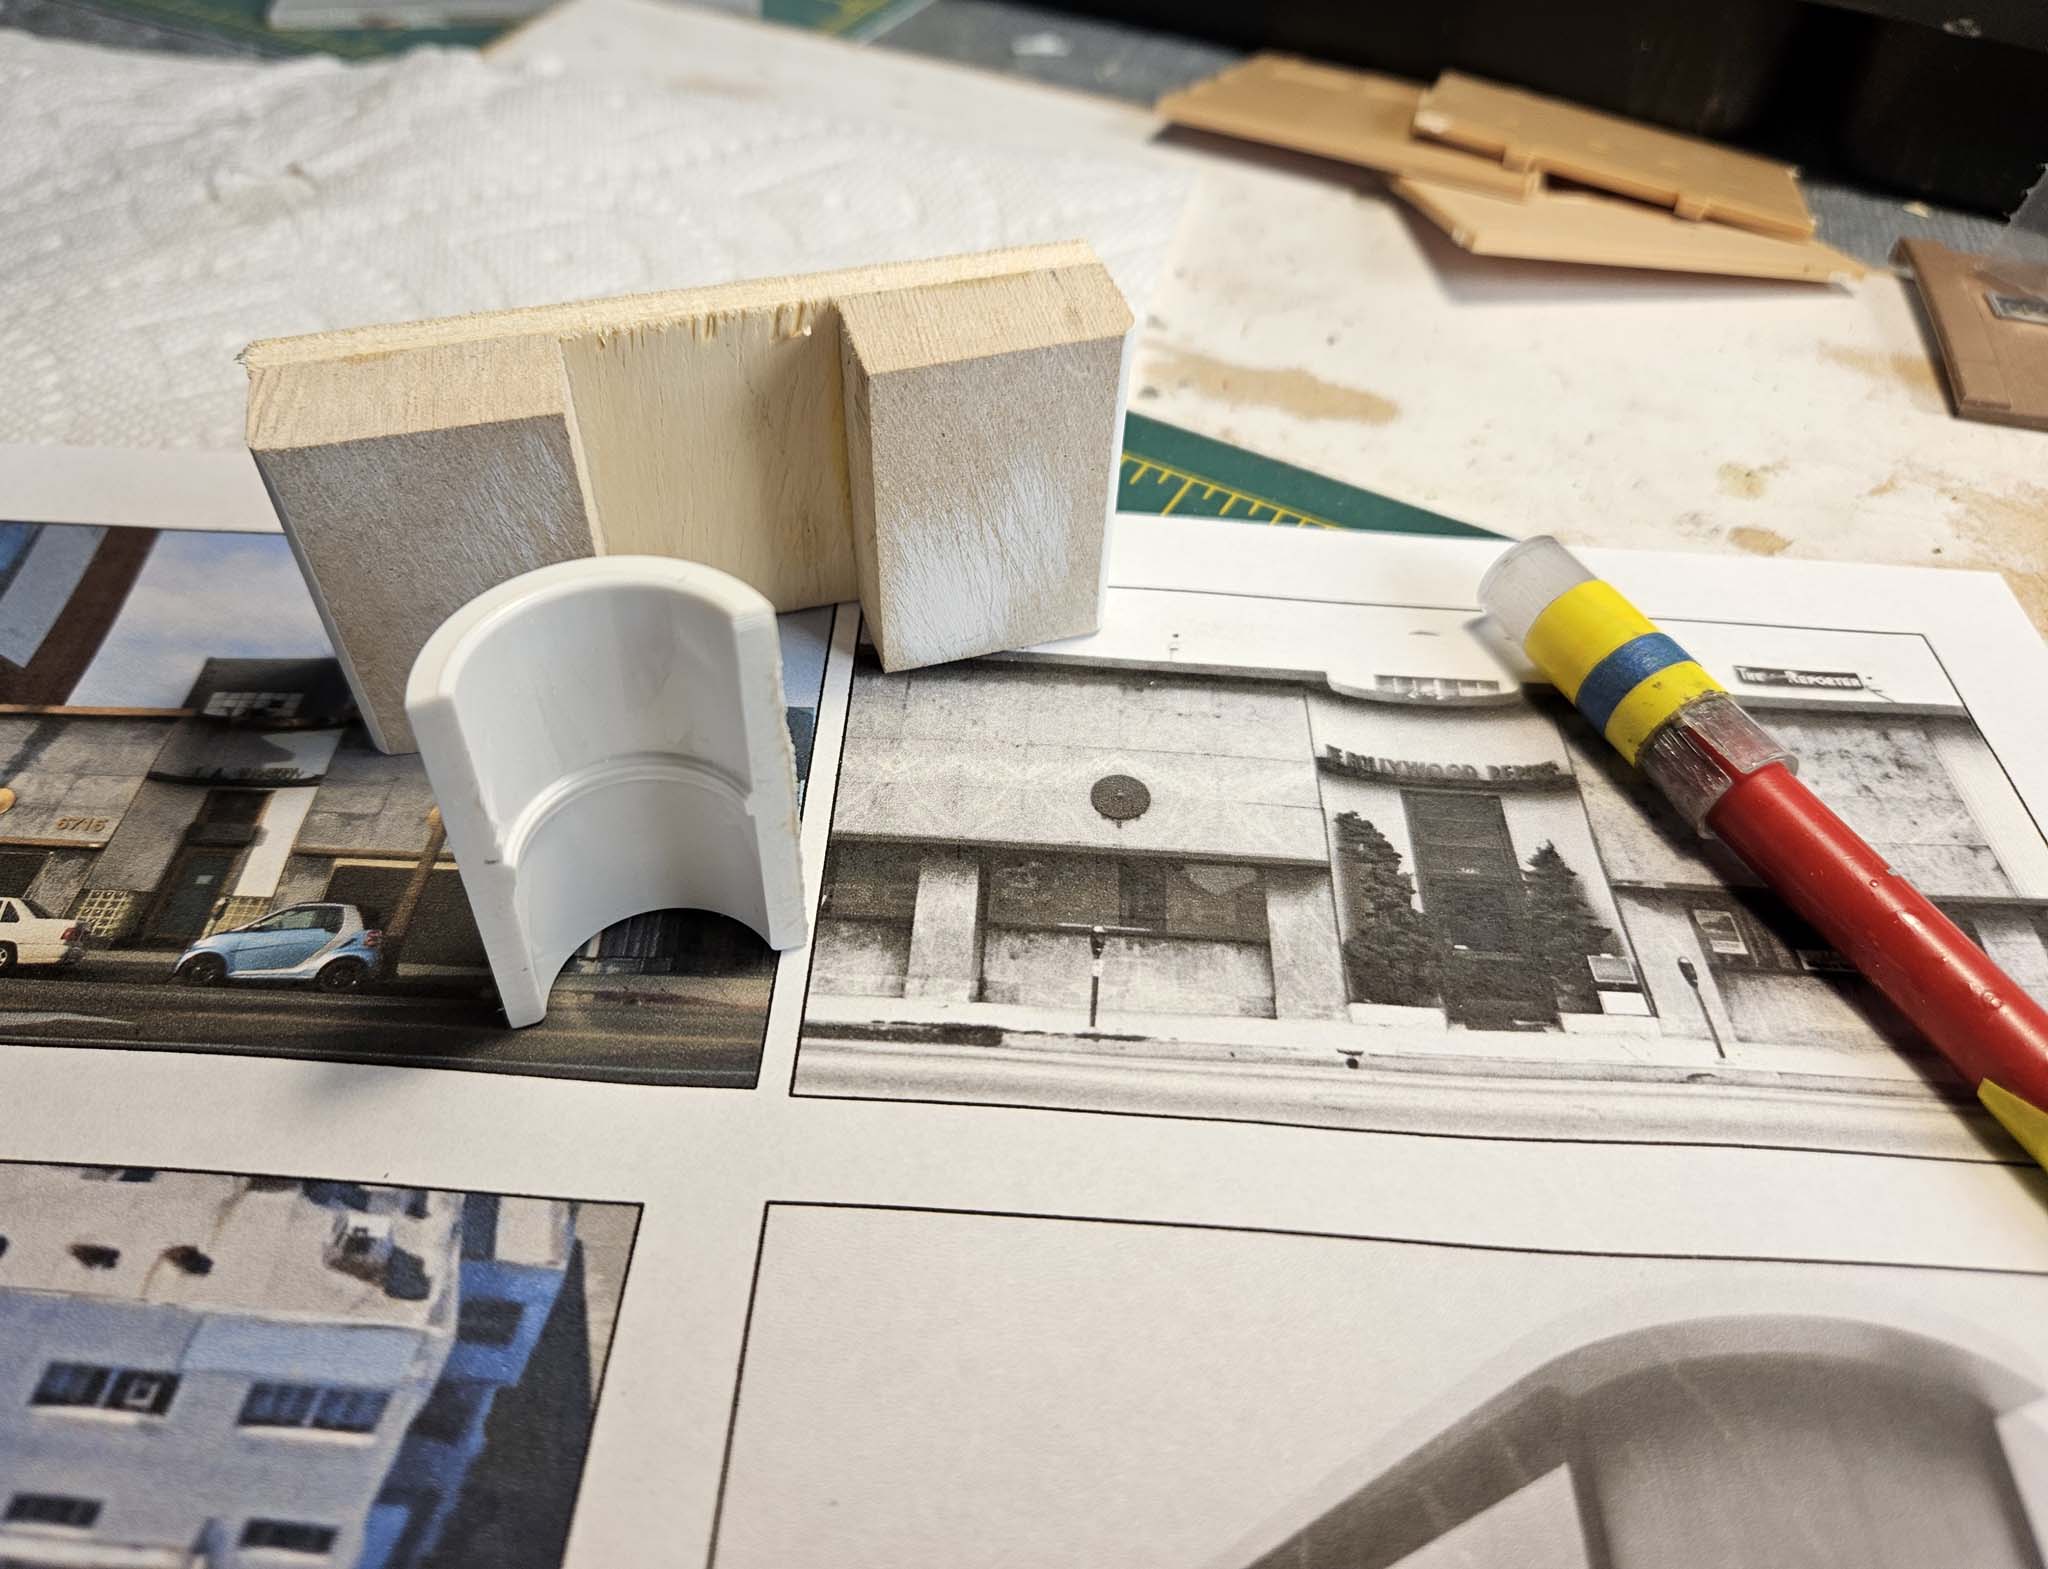
The sidewalk around the terminal building consists of two pieces of .040" styrene, the bottom one is plain, the top has a pattern of tiles. Because the curb had to be rounded at the corners, I cut small "bucks" out of medium density fiberboard (MDF), taped .080"x.080" strips of styrene to the form, and used a heat gun to shape the strips to simplify gluing. |
|
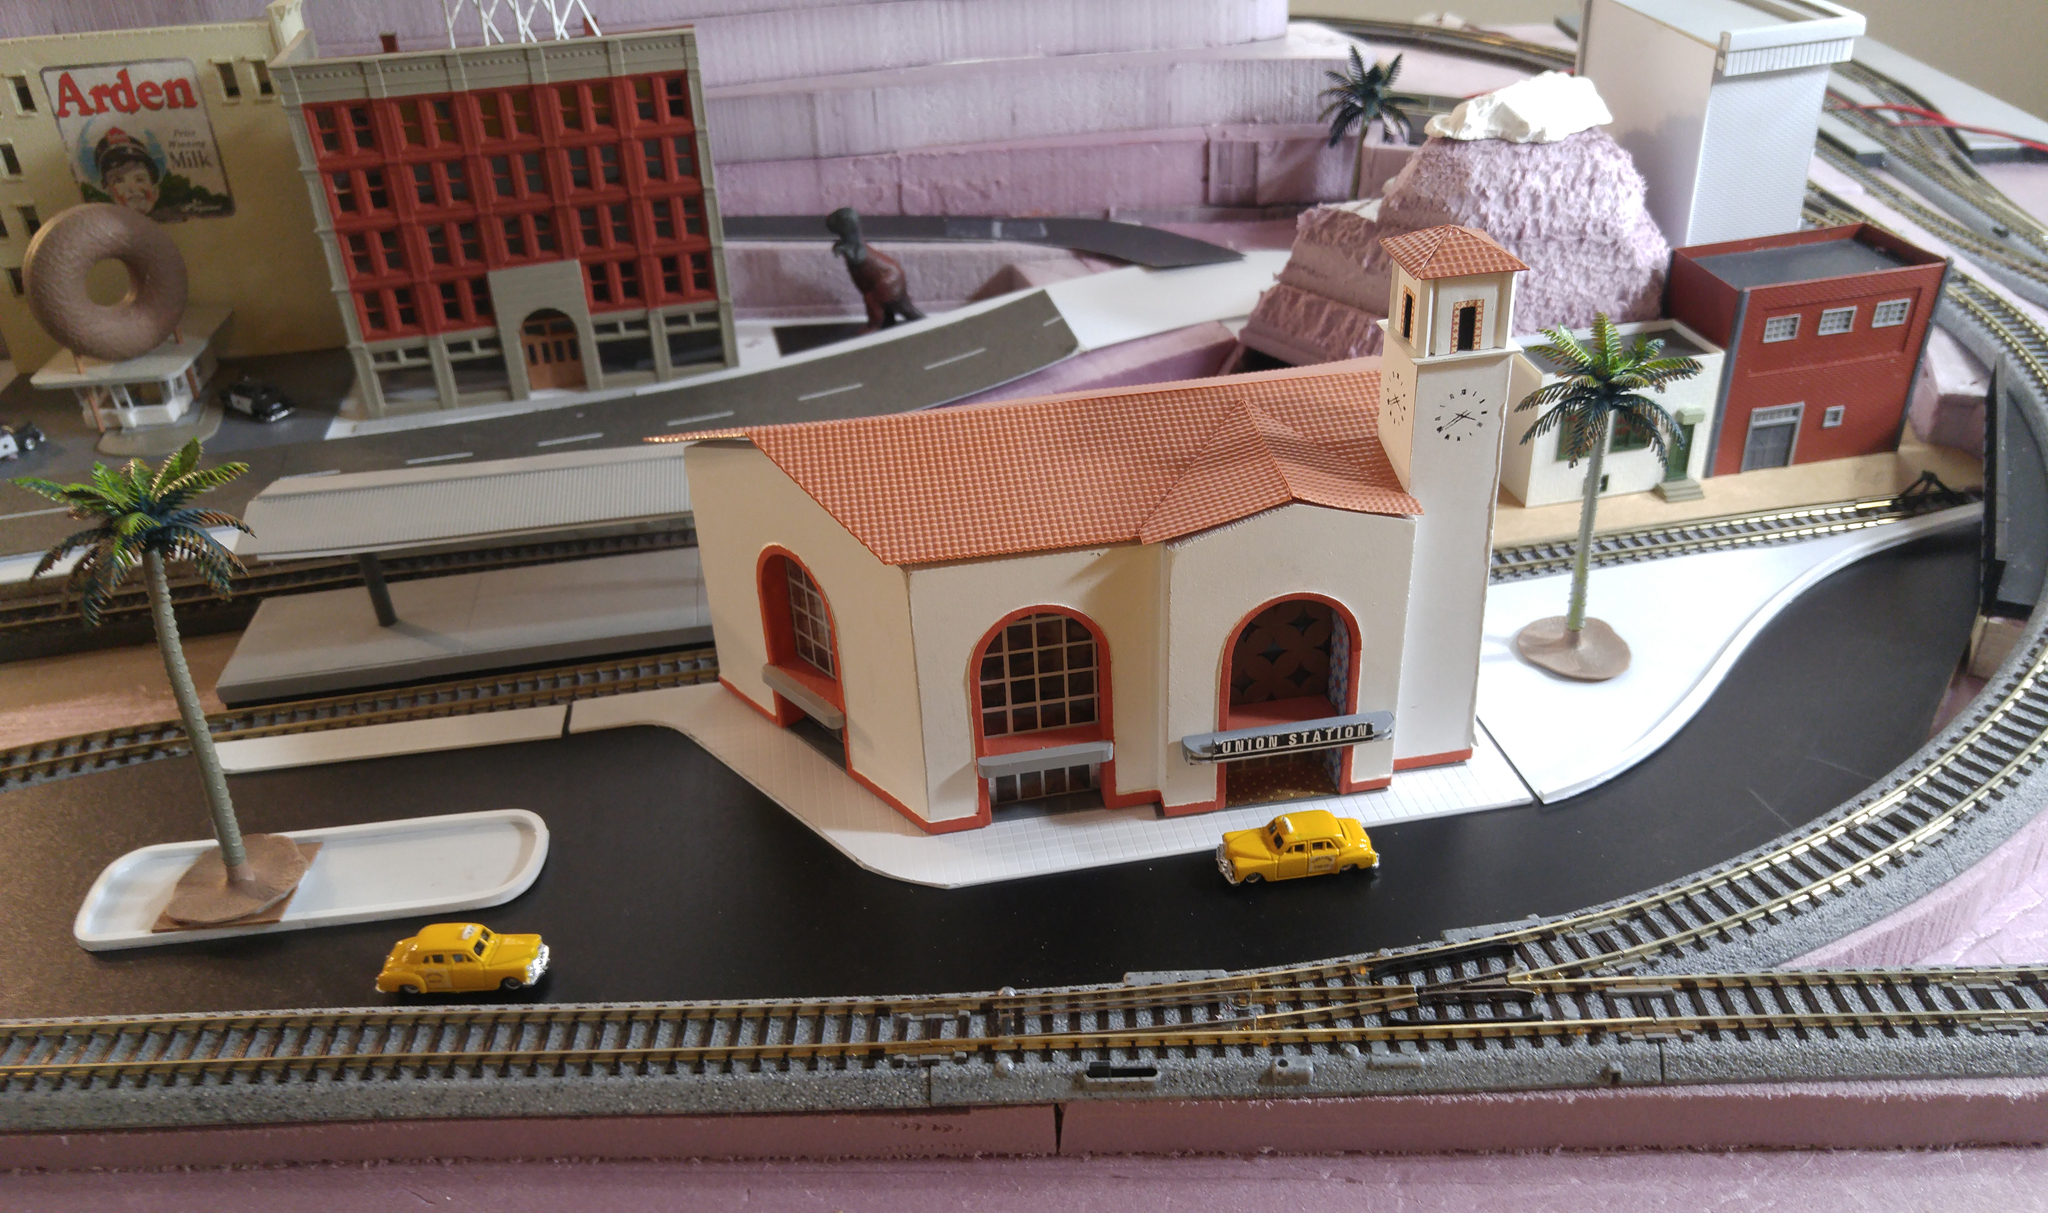
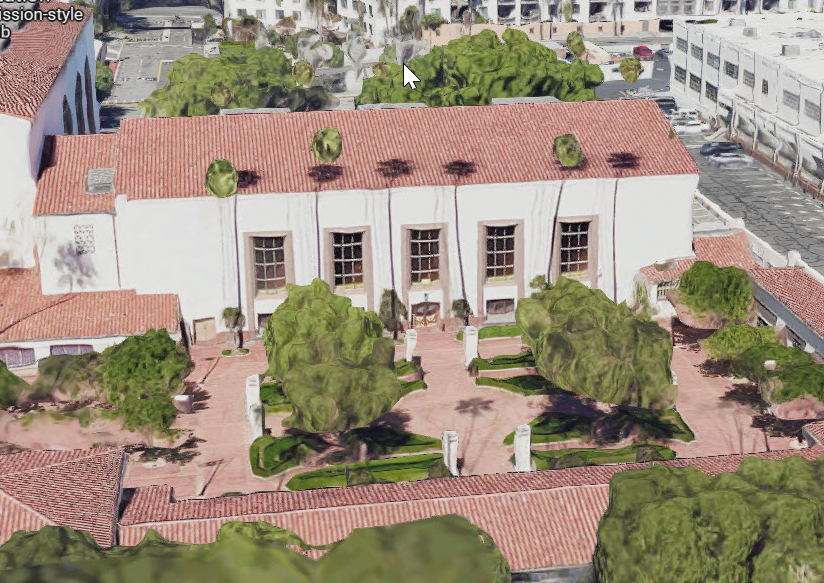
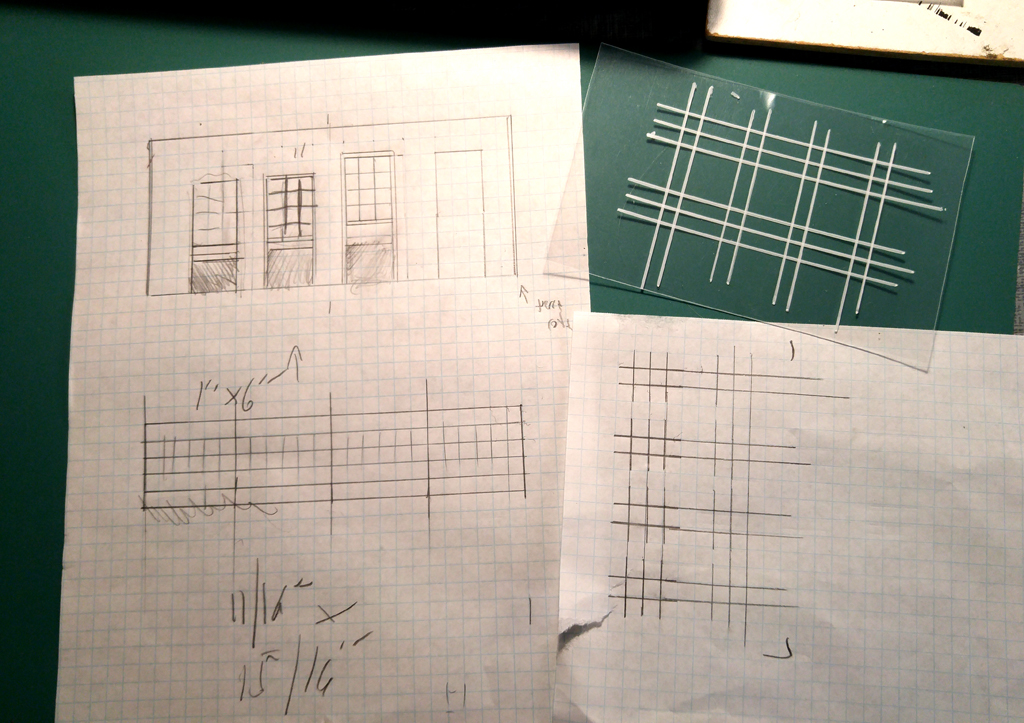
At this point, I'm not sure if I'm going to permanently affix the track or not. Each has its own benefits. It would be much easier to make any desired changes later on if the track was removable. On the other hand, I could make it look more realistic if it were permanently attached. We'll see. Because of its position as an island surrounded by track, I decided to make the Union Terminal station section its own (removeable) module. As it was originally intended to be placed on a shelf, my previously-built Union Station did not have a back. But now that the rear of the building would be visible, I needed to remodel. The new rear portion wasn't going to be in a highly visible location, so I wanted to keep it simple. But I also didn't want it to look like an afterthought. To get some ideas, I looked at the real Union Station using Google Maps, and found one view that I used as a "prototype" of sorts. |
|
|
|
|
|
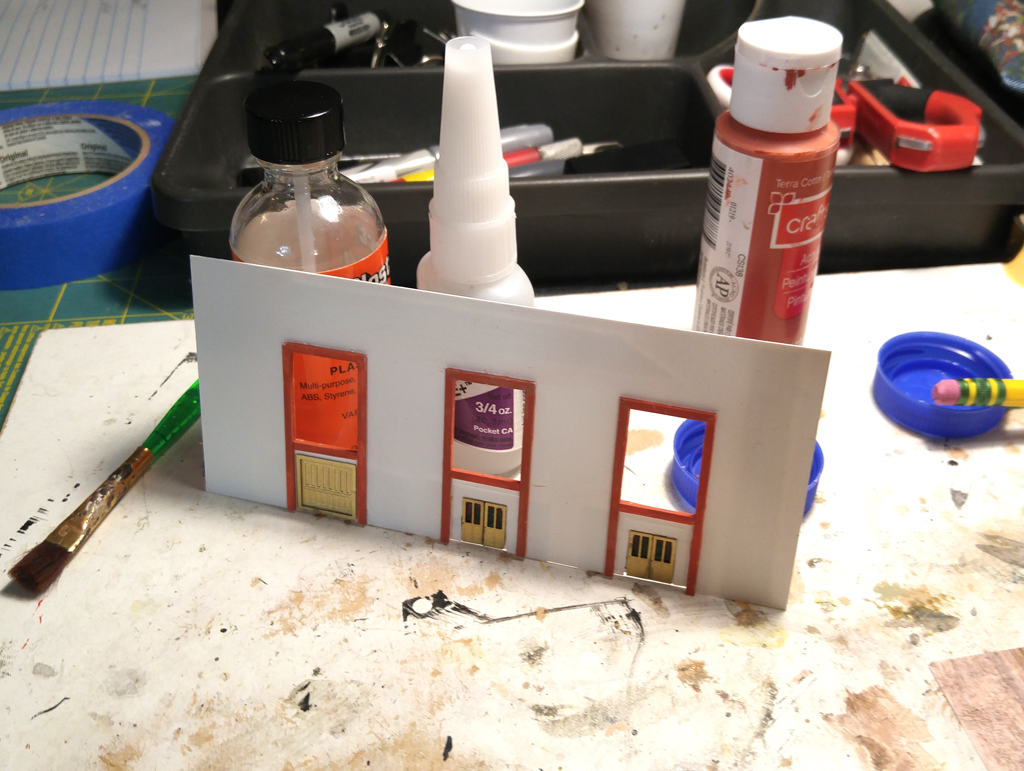
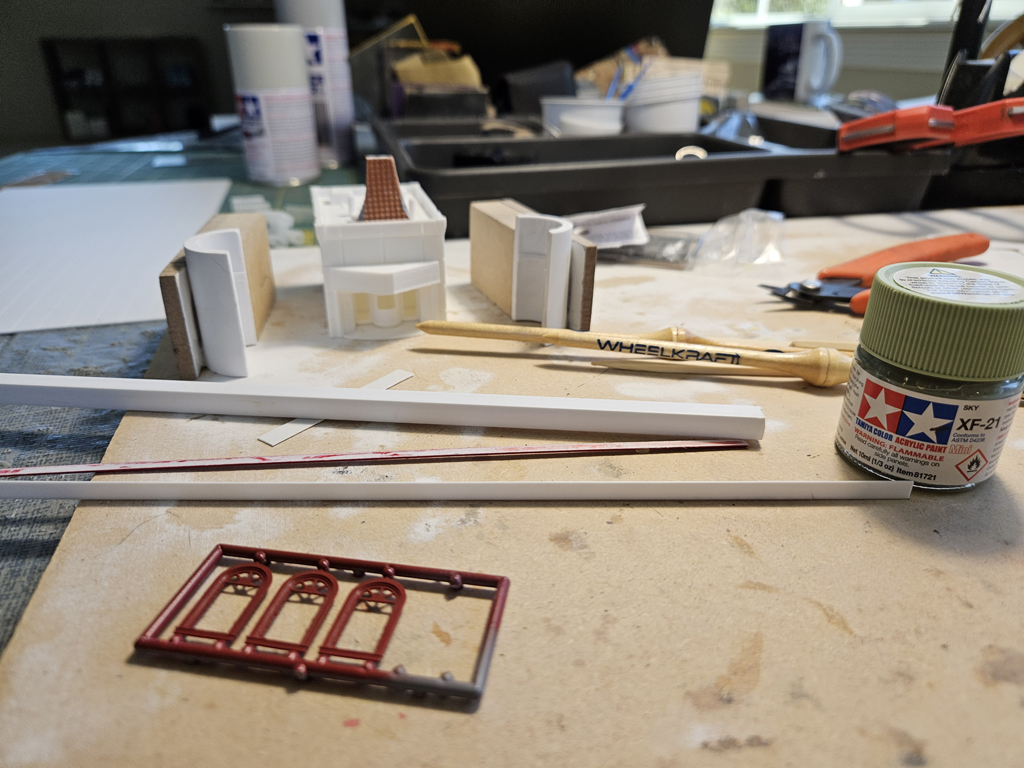
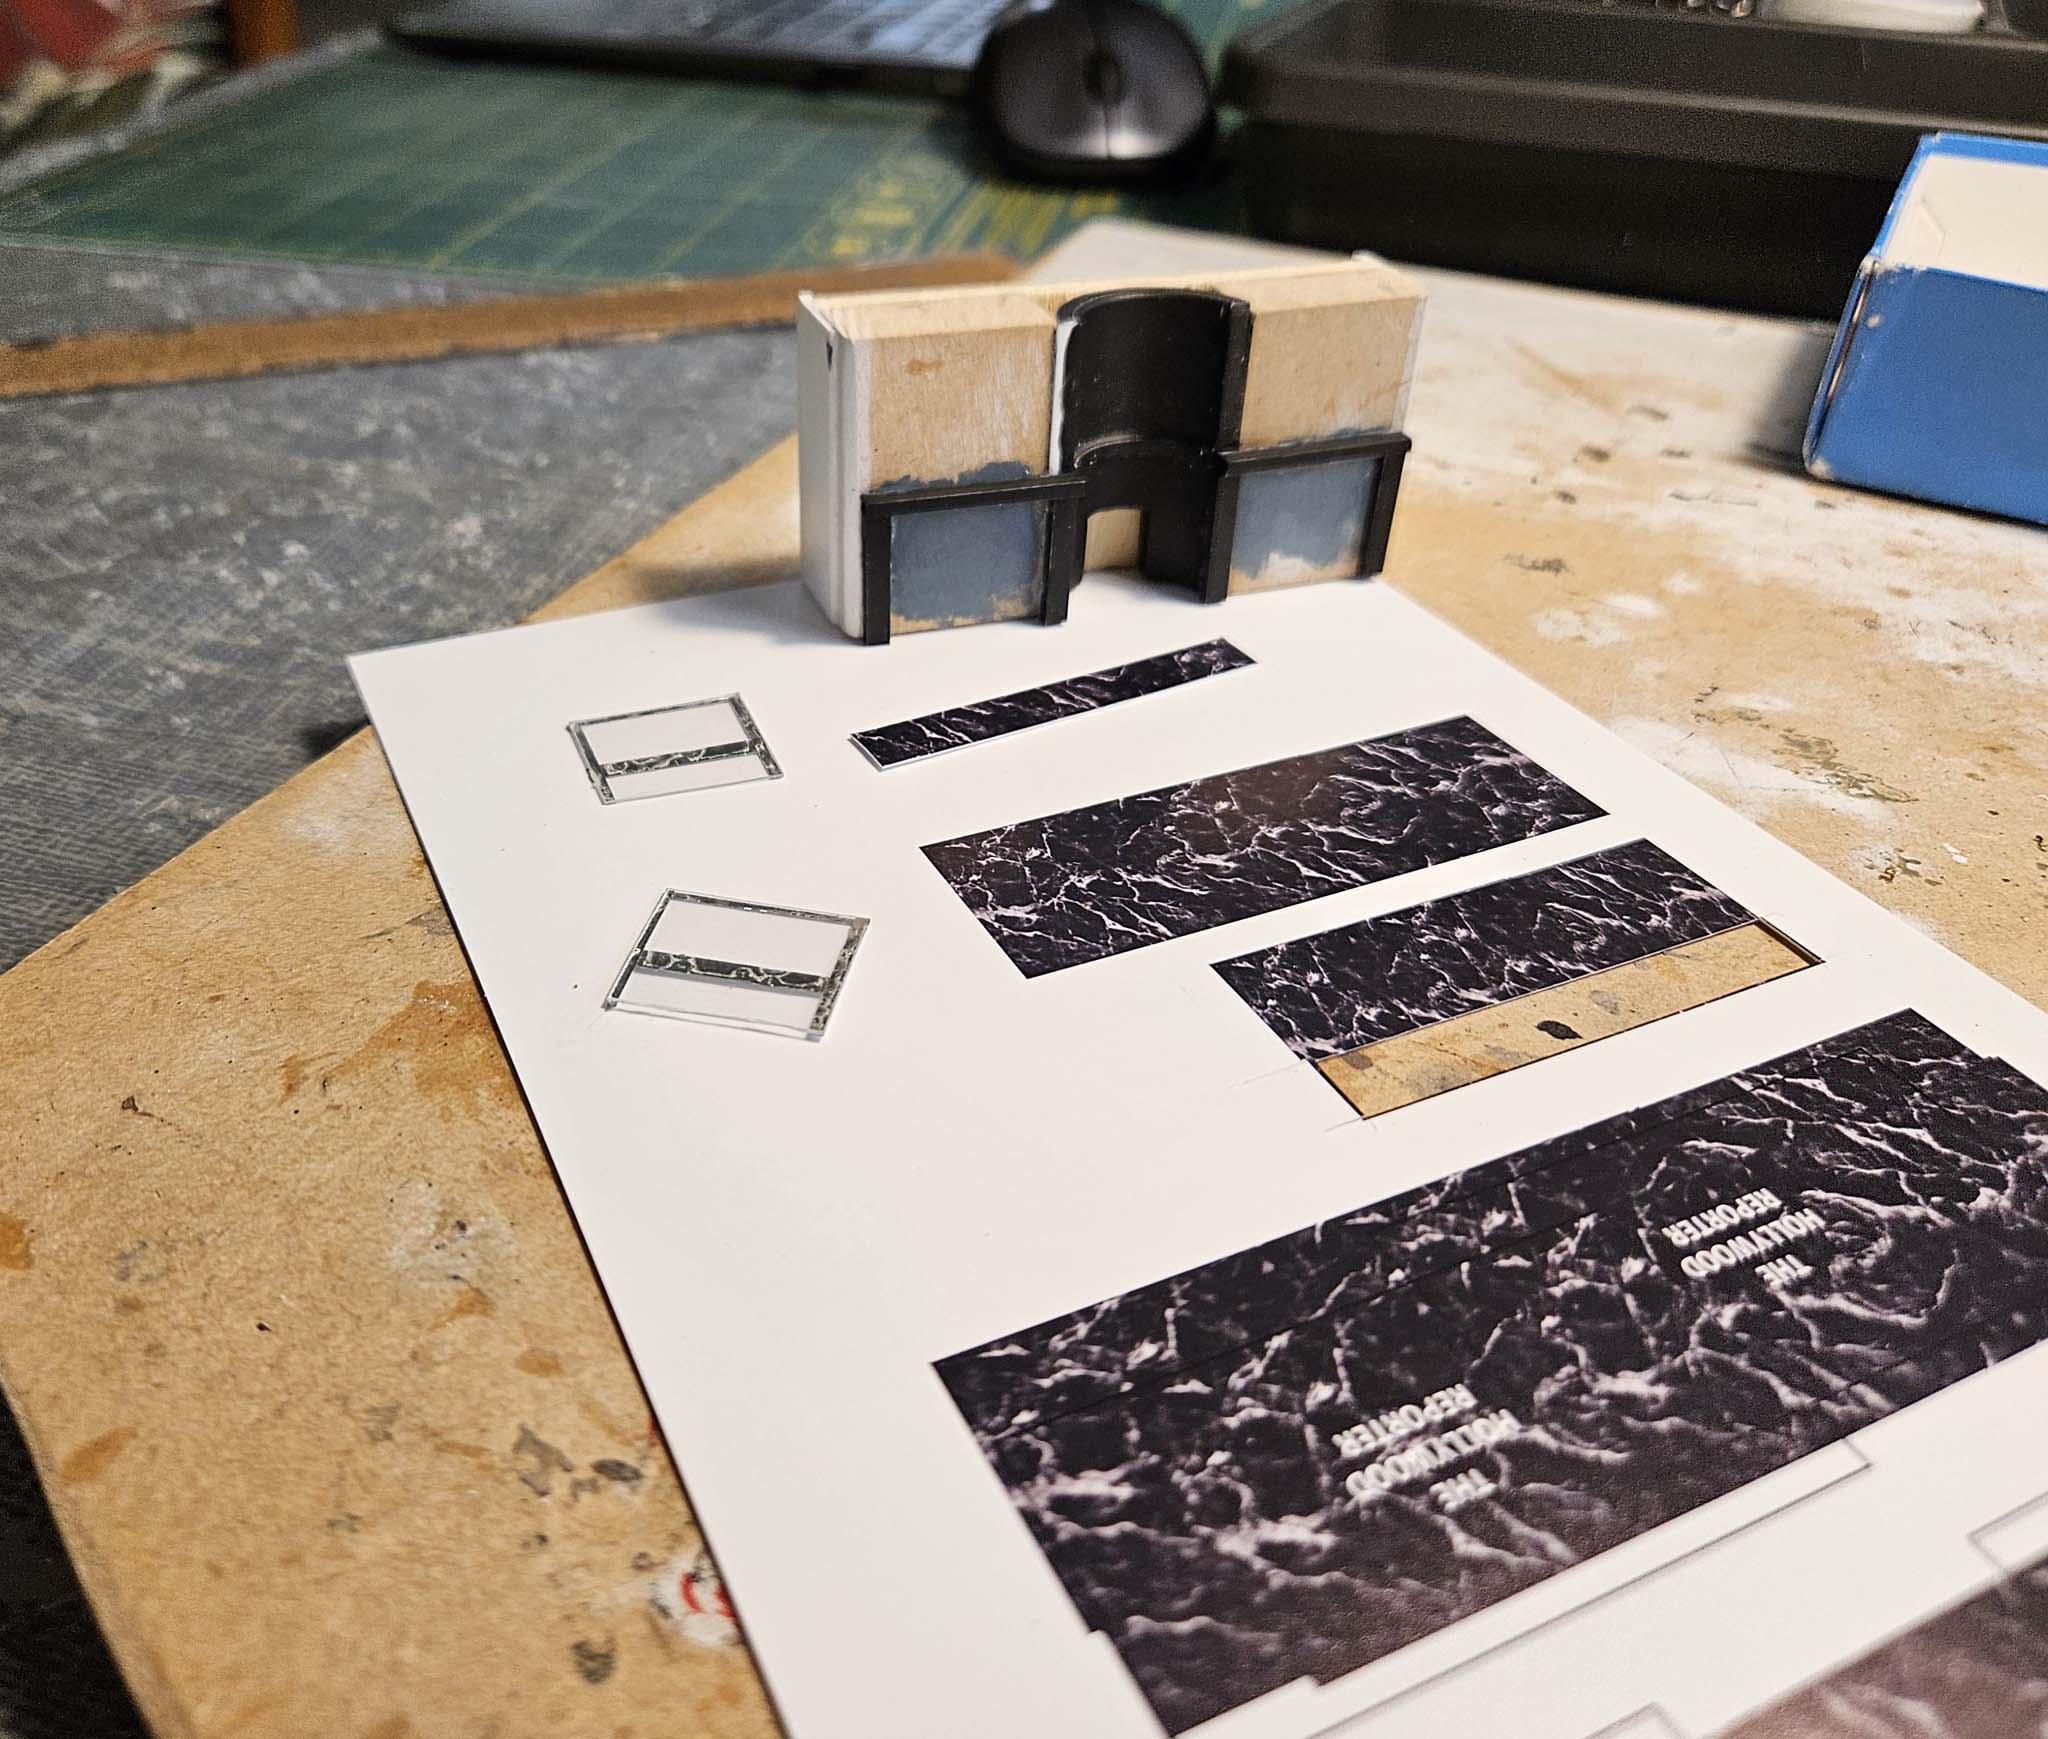
I cut windows and doors into a 6" x 2.5" piece of .020" styrene, used some n-scale doors that I had, and created three large windows that are similar to those in front. Using a white paint marker, I drew the window panes onto some clear styrene and glued them on. For a bit of interest, I also added an art-deco print behind the new windows. I might decide to change the print – the back is removeable. (The front windows are transparent as there is somewhat of an interior.) |
|
|
|
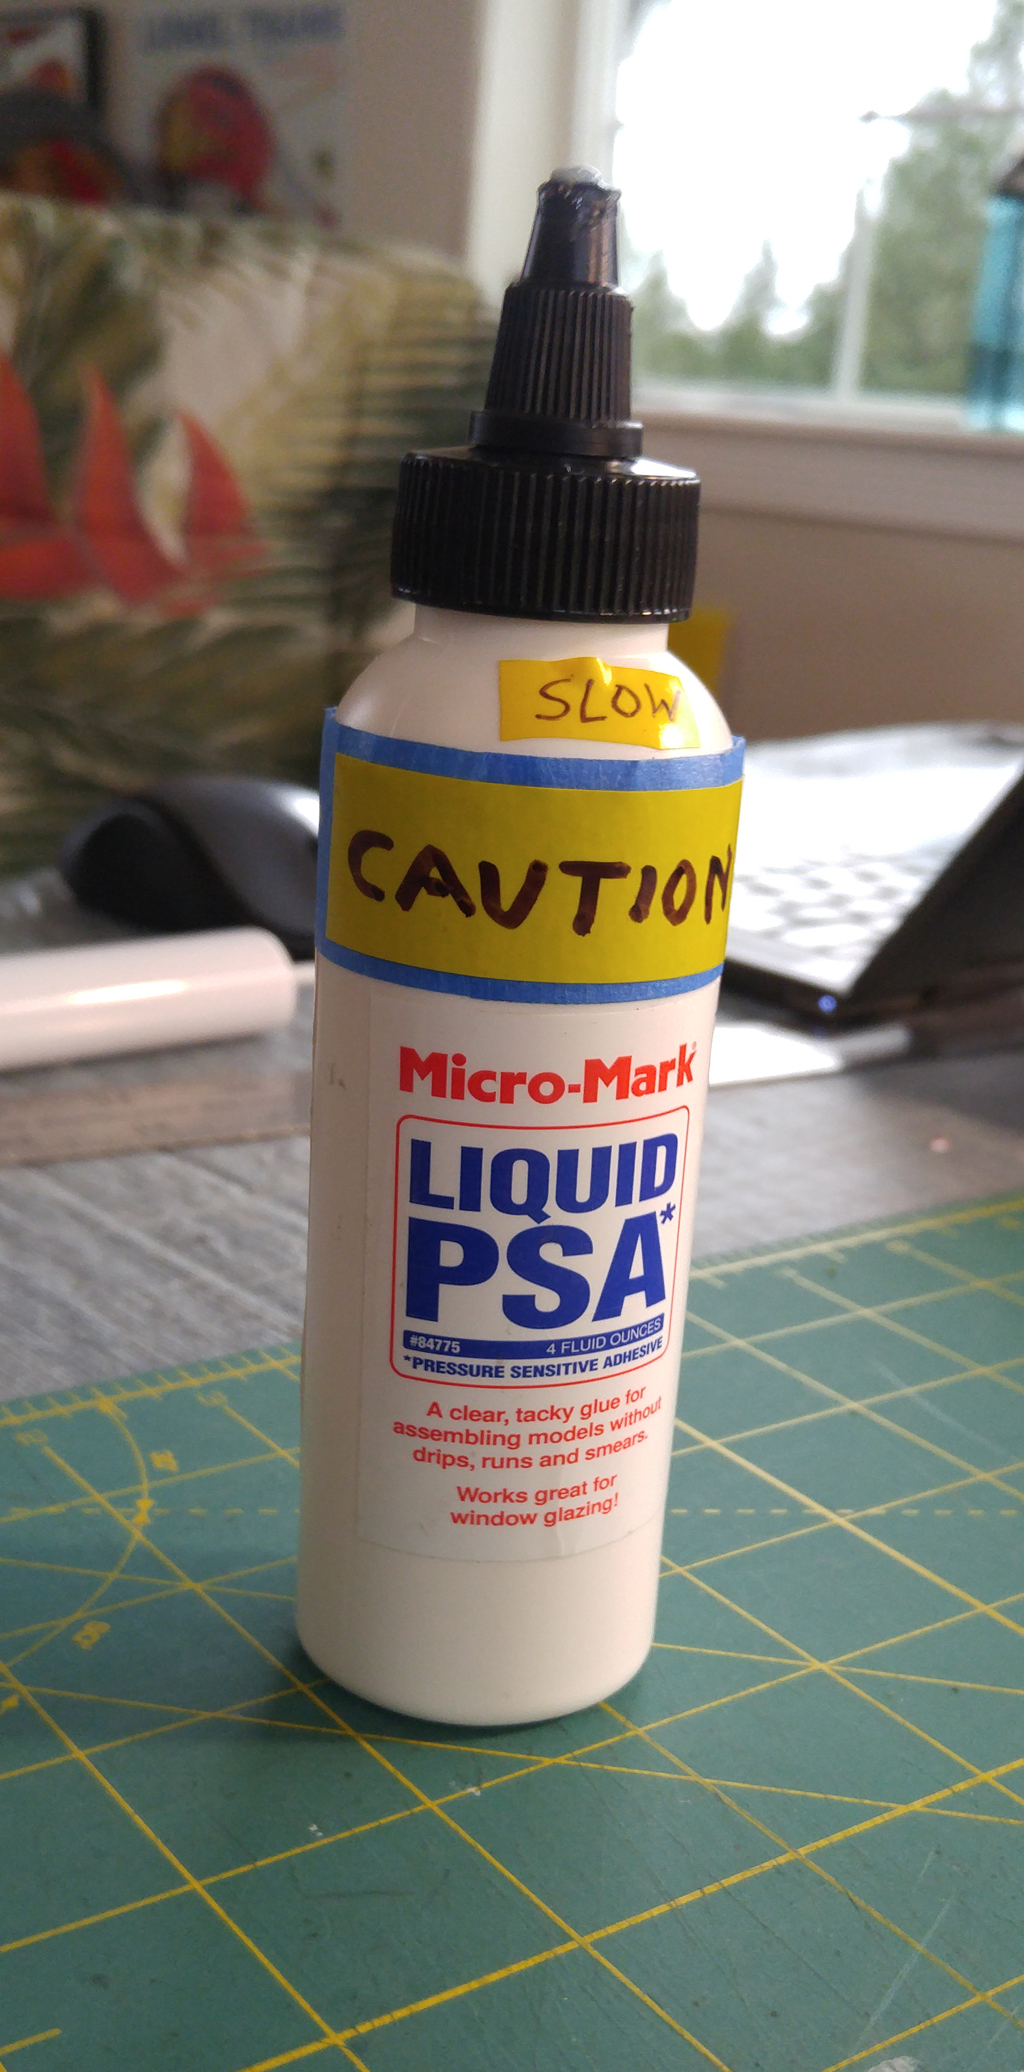
By the way, I found a glue that is ideal for affixing clear windows: Liquid PSA (Pressure Sensitive Adhesive) from Micro-Mark. PSA goes on somewhat like white glue and stays tacky after it's dry. As soon as it is, the window can be pressed into place. Since there is no liquid, there is no ooze. Also, the window can be somewhat repositioned - for a while. It's probably not as strong-bonding as other glues, but for windows, it doesn't really need to be. (The note you see on my bottle warns me that it comes out very fast. I learned the hard way. Be careful.) To match the trim on the rest of the building, I added thin styrene strips painted in Terra Cotta. I also got a bit of warm(ish), dry(ish) weather (it's winter in Oregon after all) and was able to sand and paint the base section primer gray. It's an interesting technique that eliminates the need to build roads. Any area left uncovered became part of the driveway or road. They are not as realistic as using Woodland Scenics Smooth-It, but in my abstract world, it works fine.
|
|
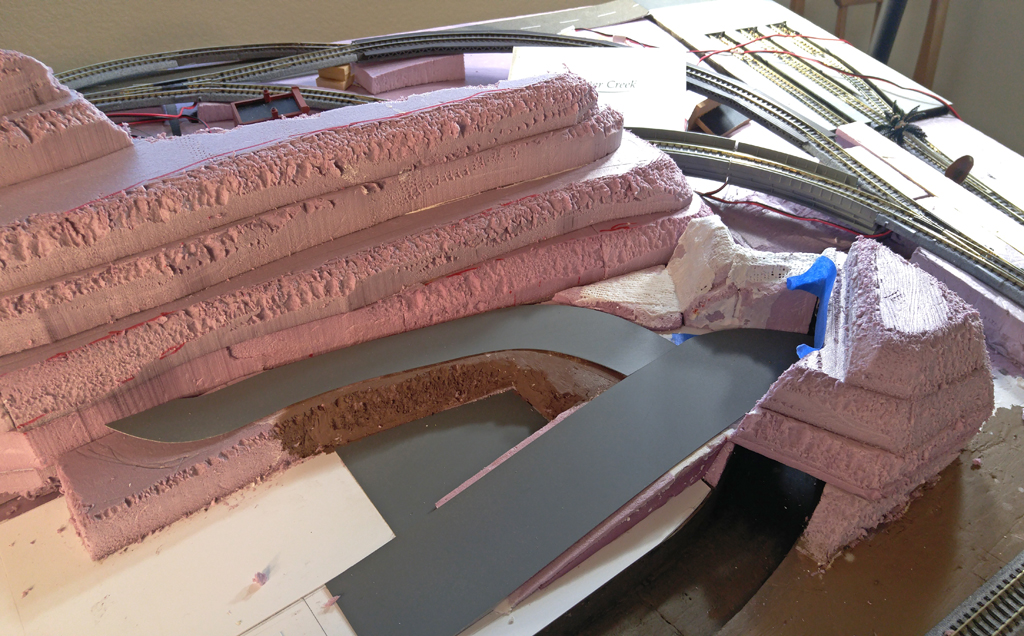
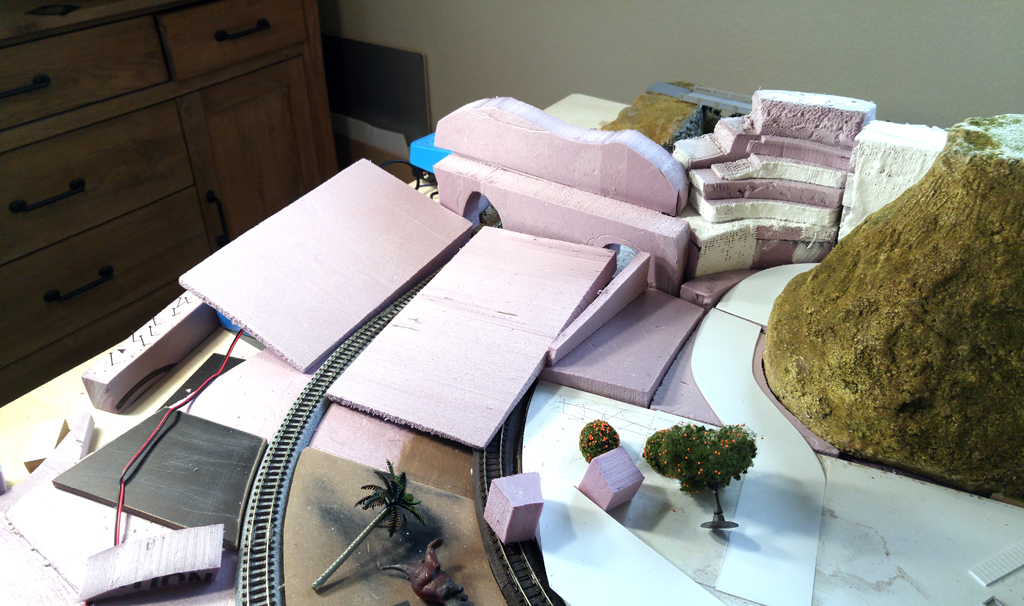
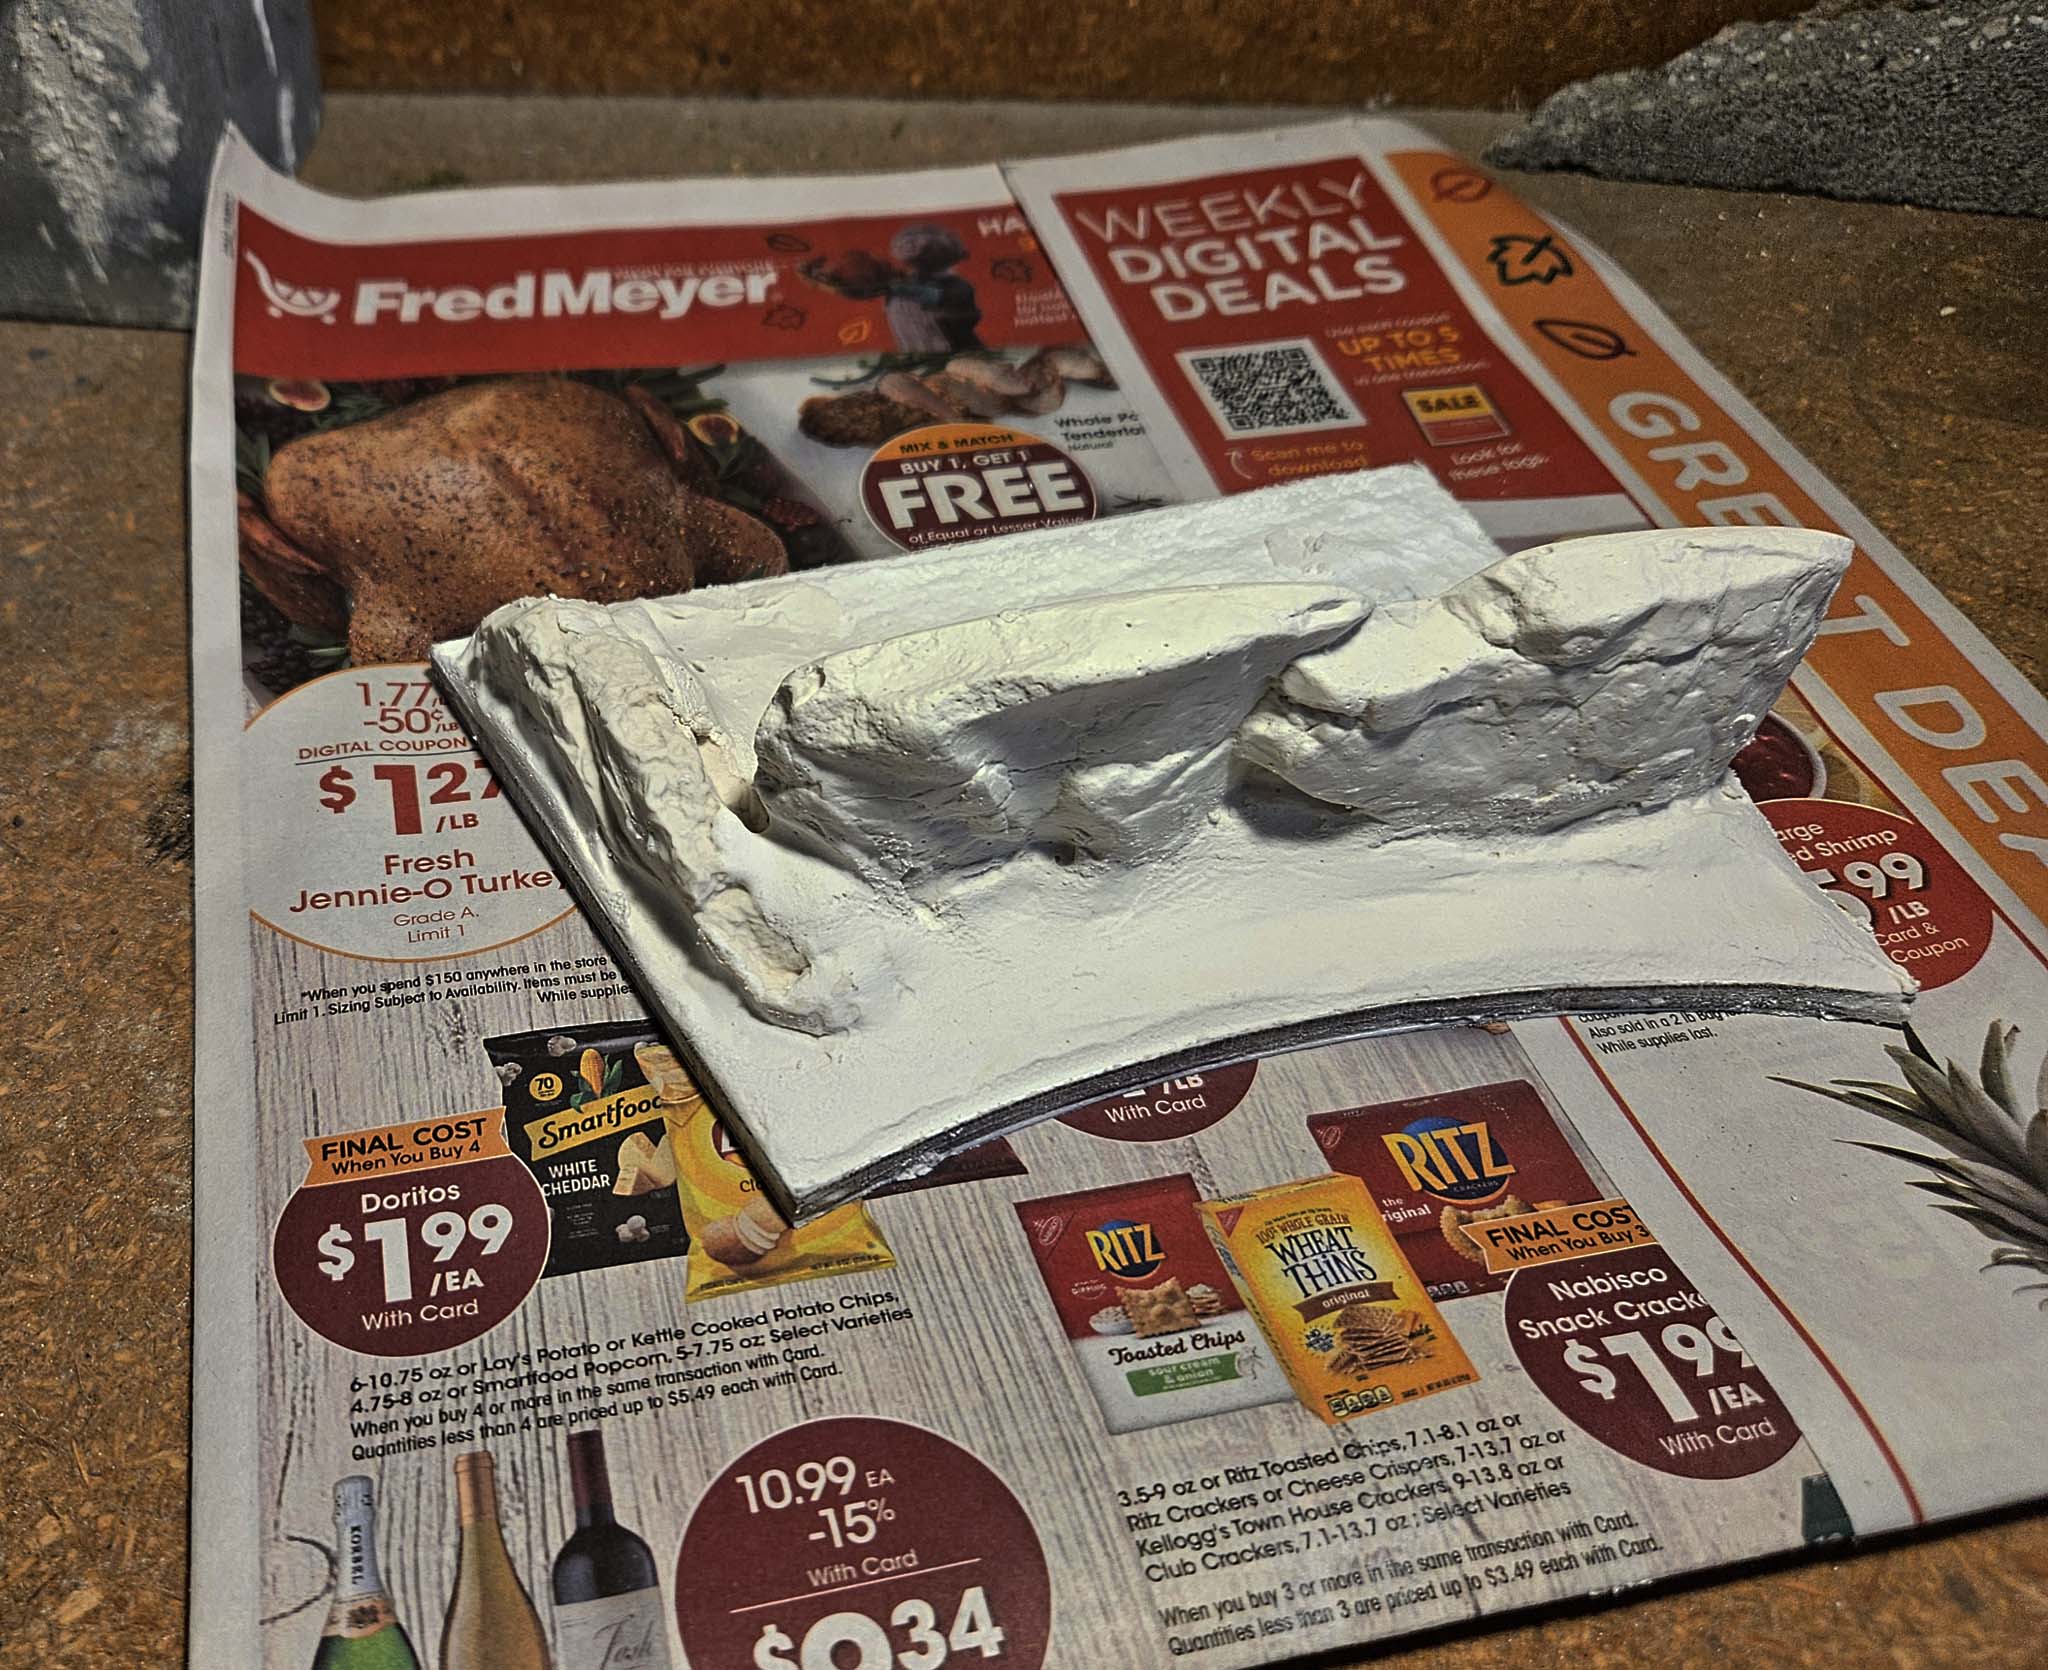
I'll be adding more detail (i.e.; foliage) when I get closer to finalizing the layout. The Streets of Los Angeles Moving on, I spent some time finalizing the look of the small hills. For the first time ever, I added some plaster (actually Mold -A-Scene) to the layout while it was inside of the house. I've avoided doing that in the past because of the potential mess – but I did a lot of preparation and was very careful. Then I took the removable center mountain down to the garage and covered the Los Angeles facing part with Plaster Cloth and some more Mold-A-Scene. |
|
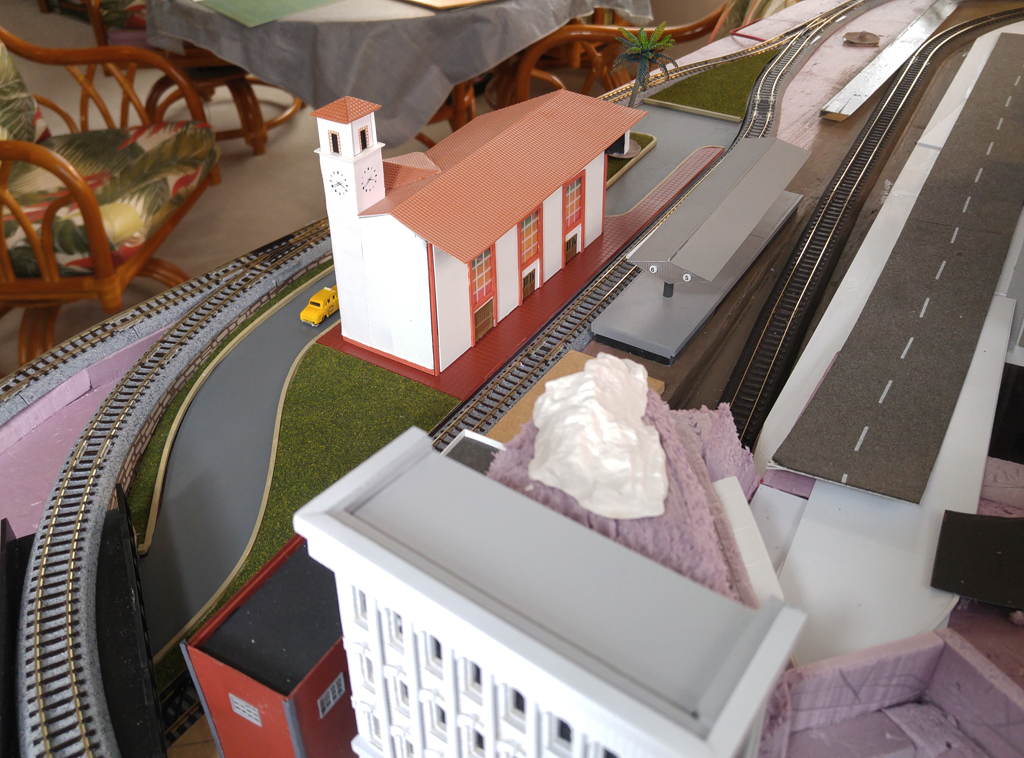
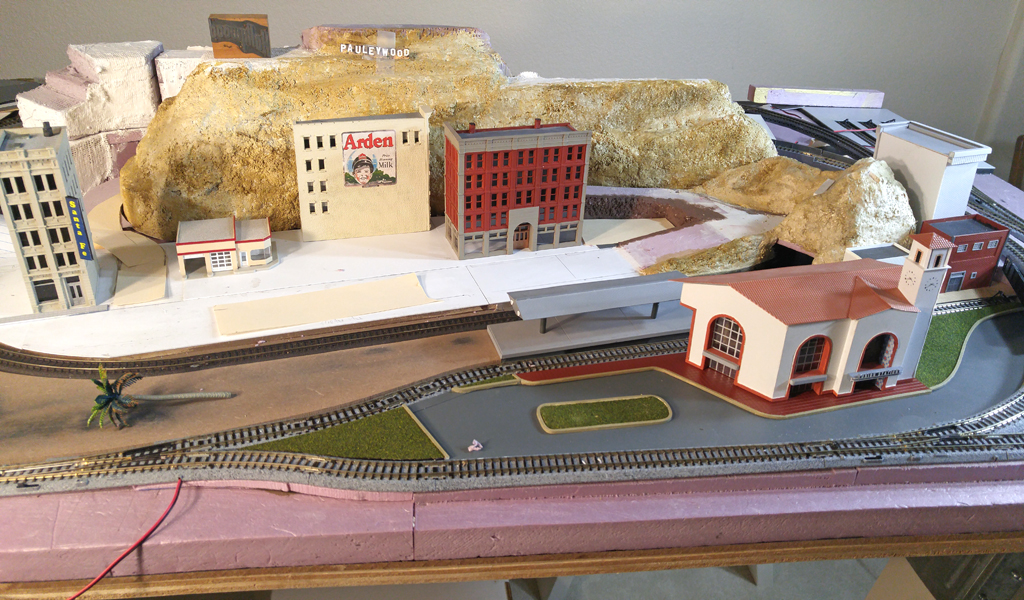
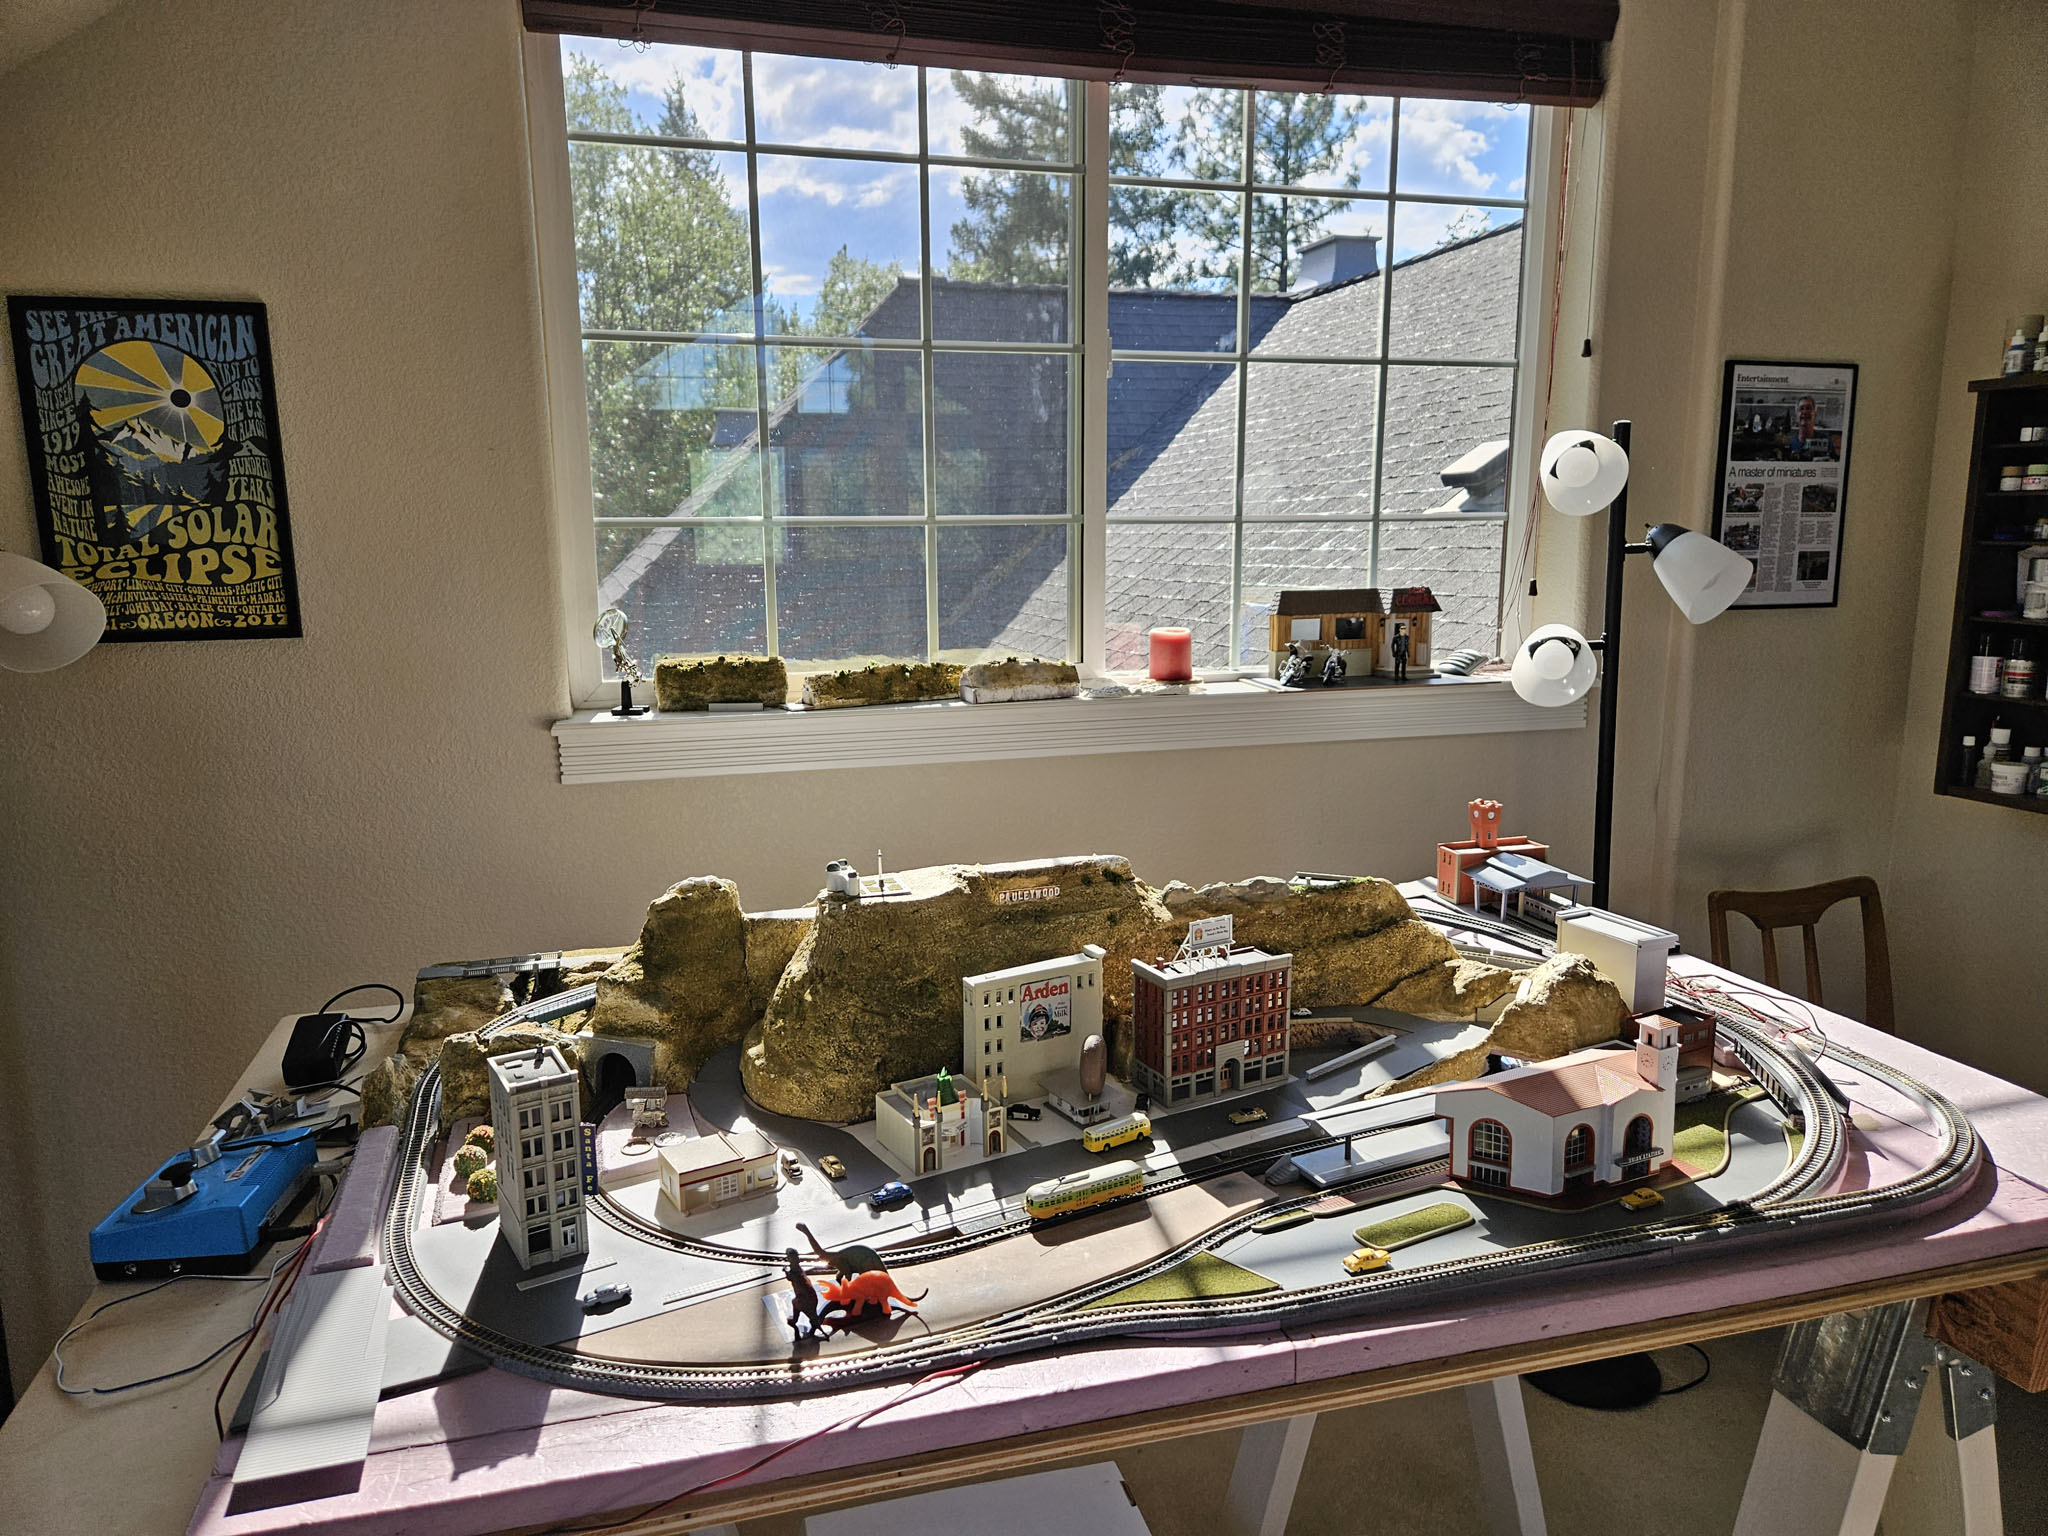
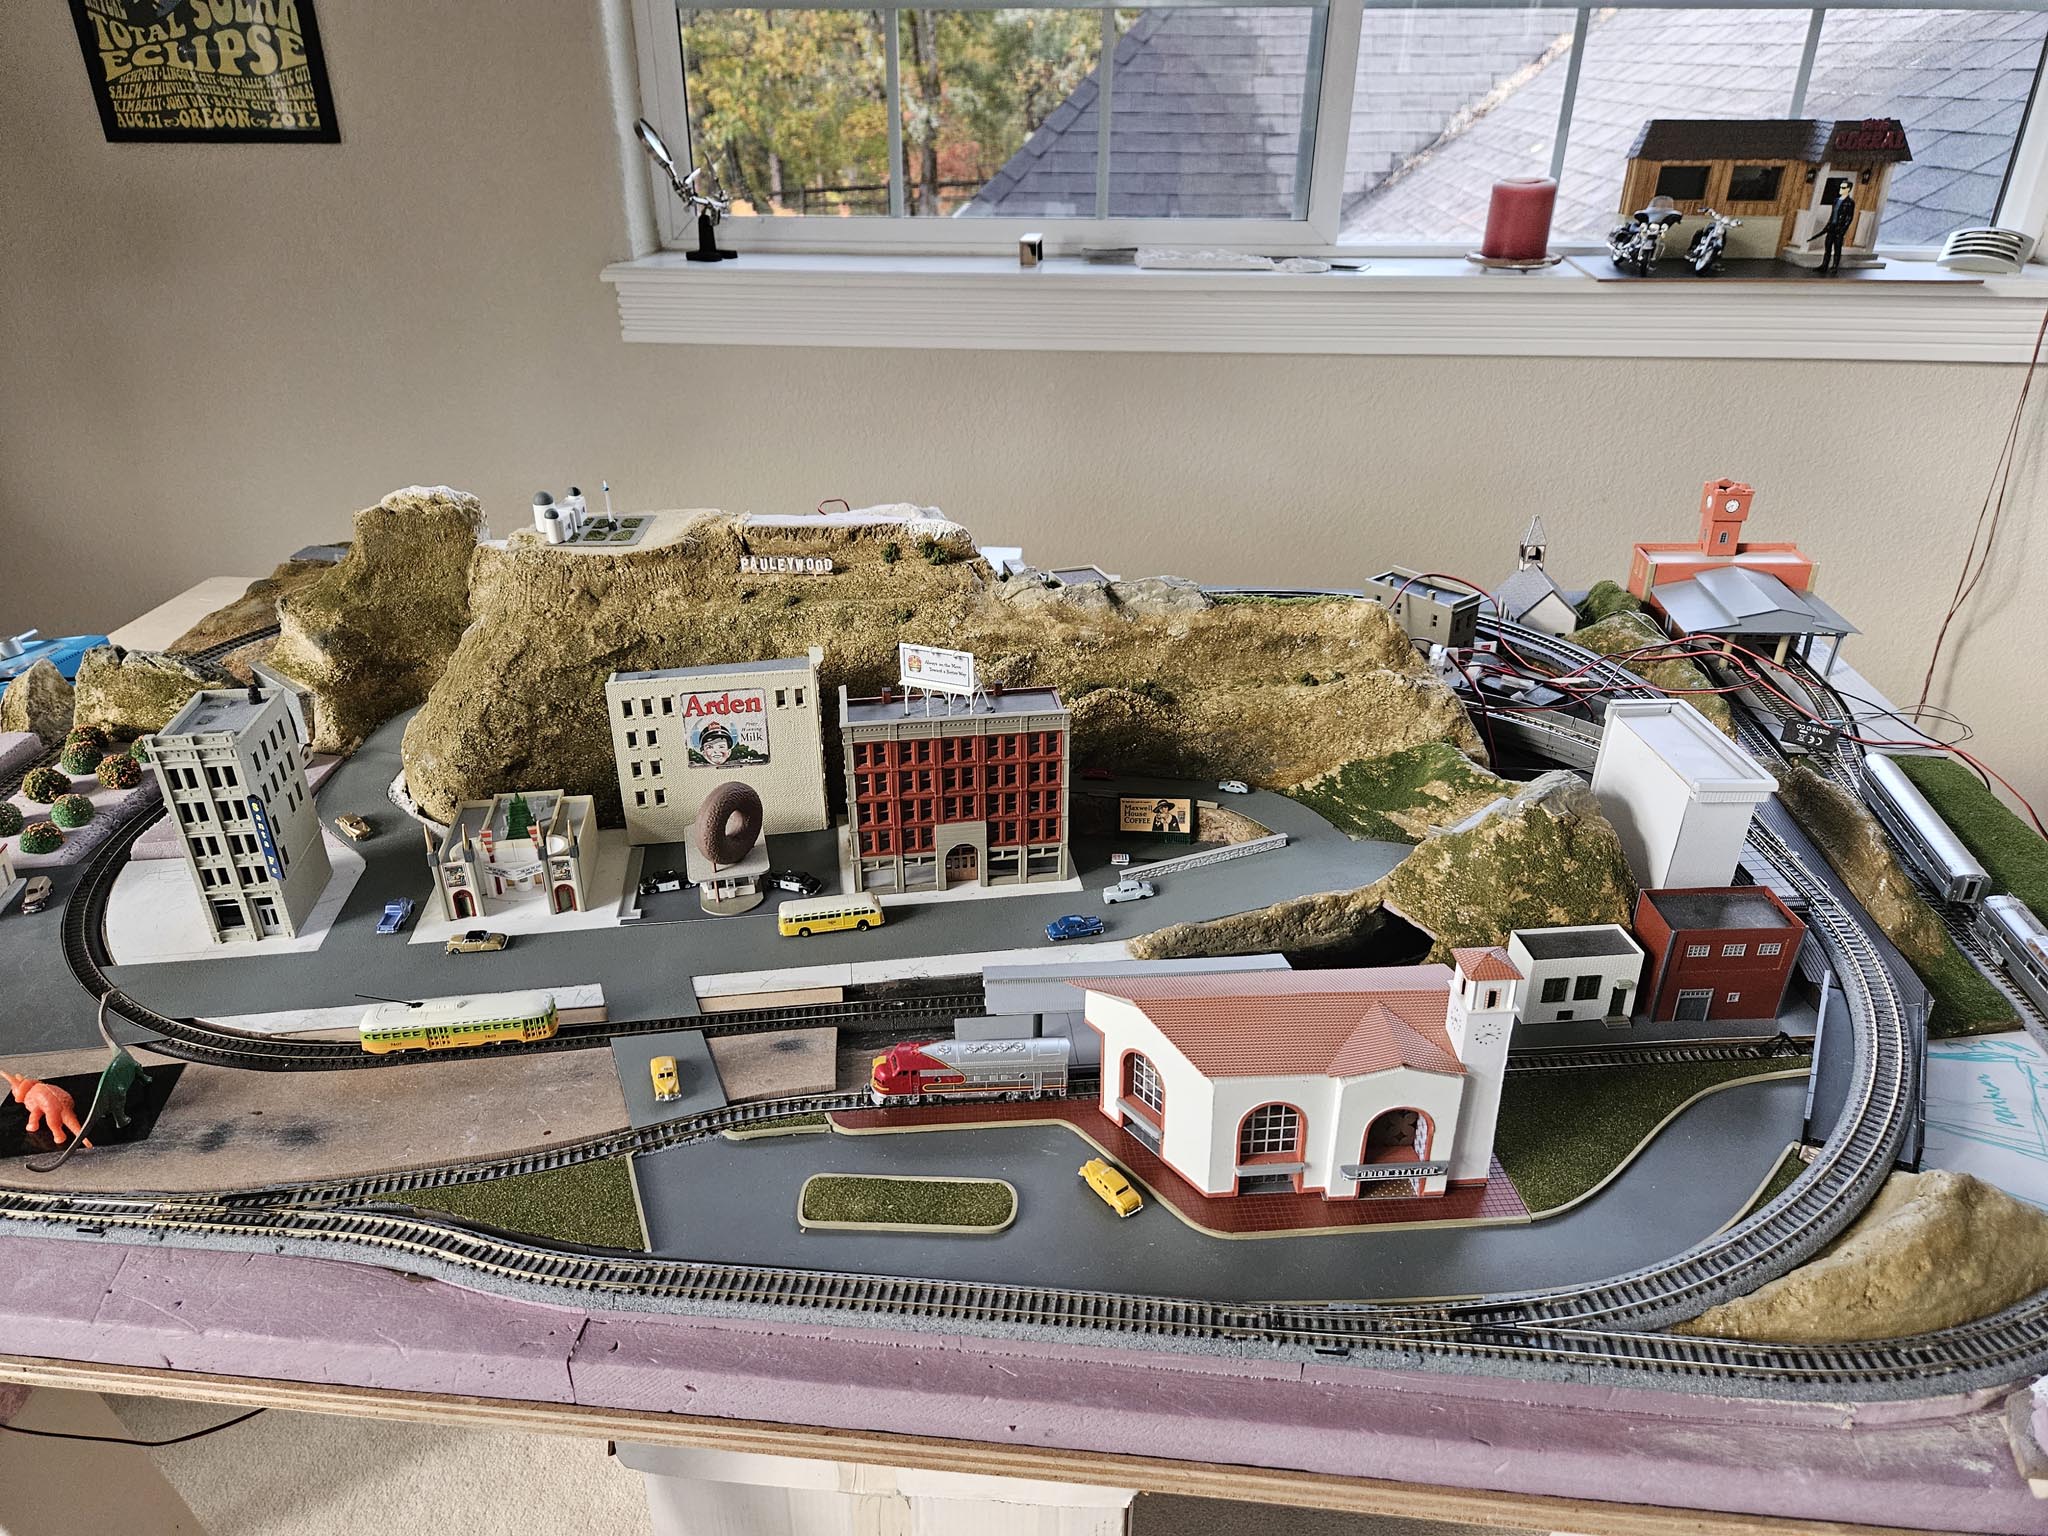
Now that the mountains are getting close to receiving paint and foliage, I decided to have another dress rehearsal (placing many of the structures and vehicles on the layout) to help me determine how best to cover the terrain. |
|
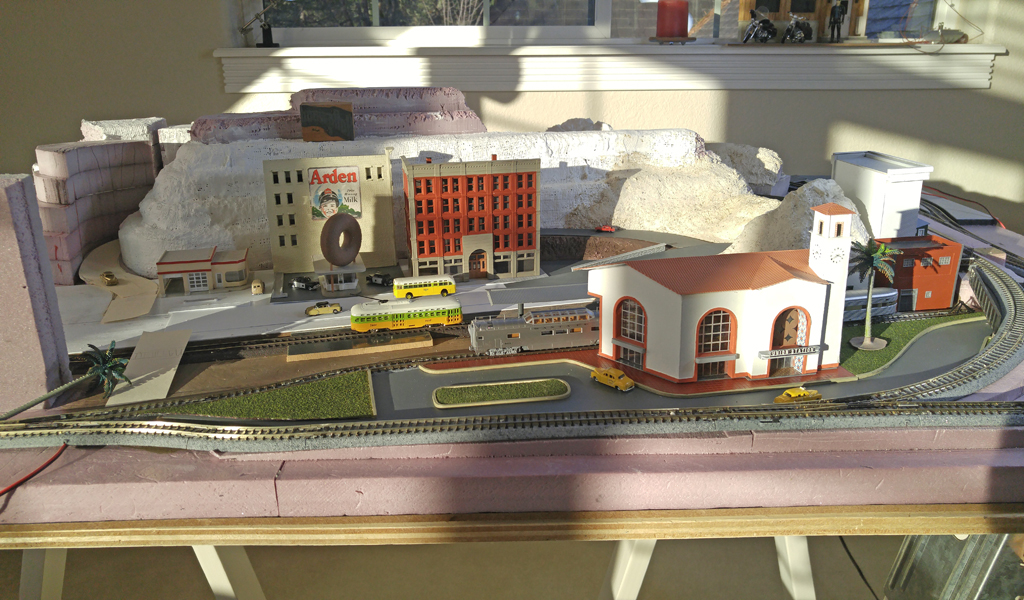
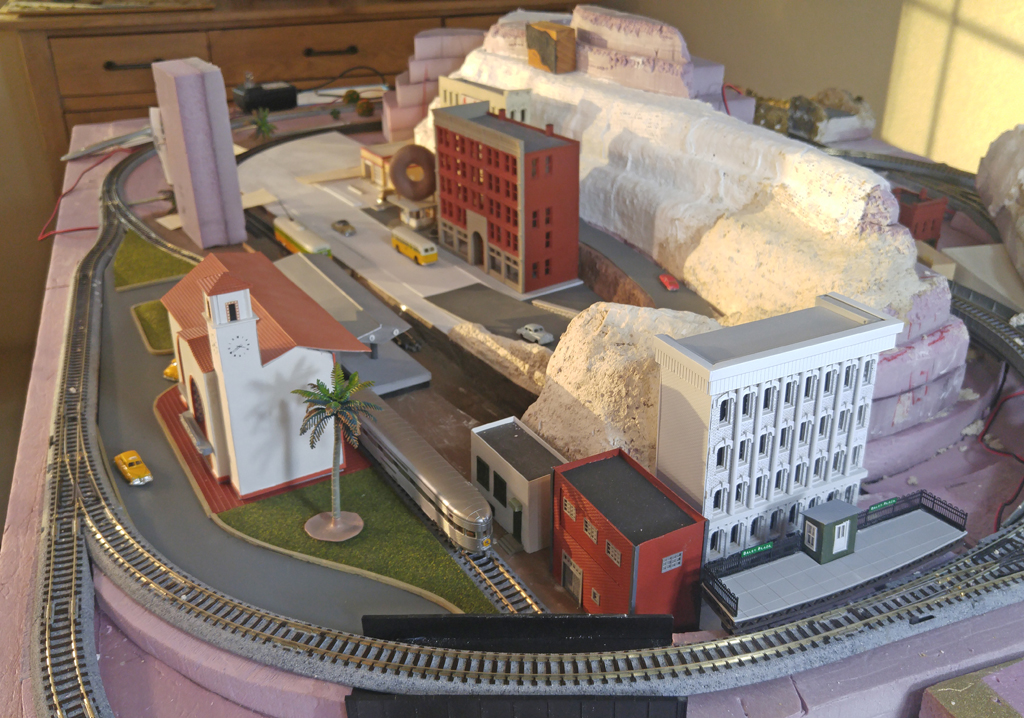
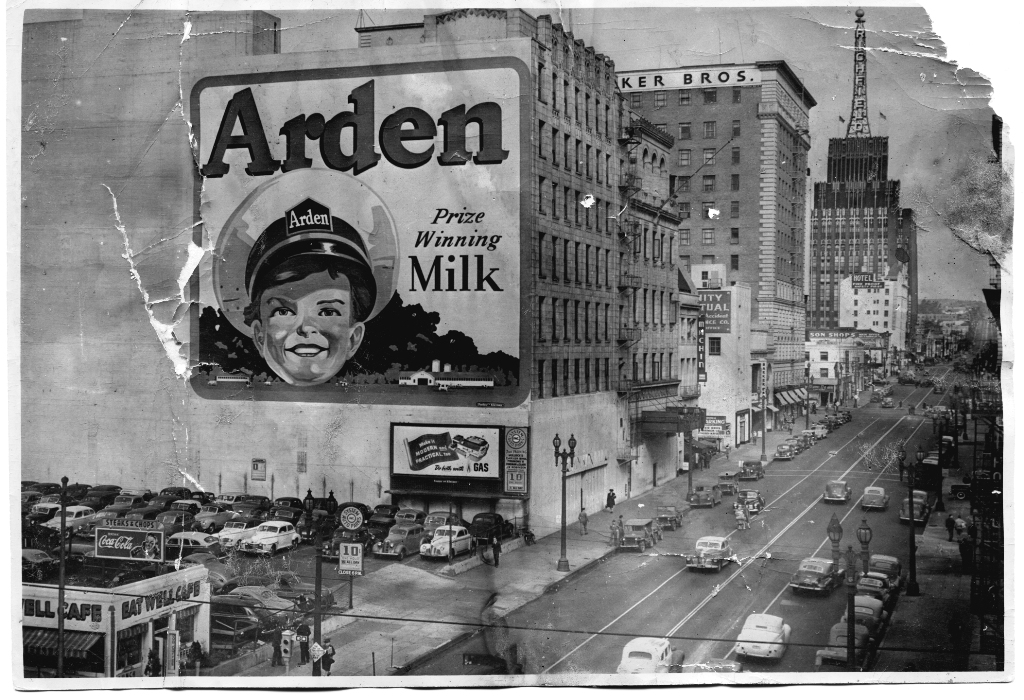
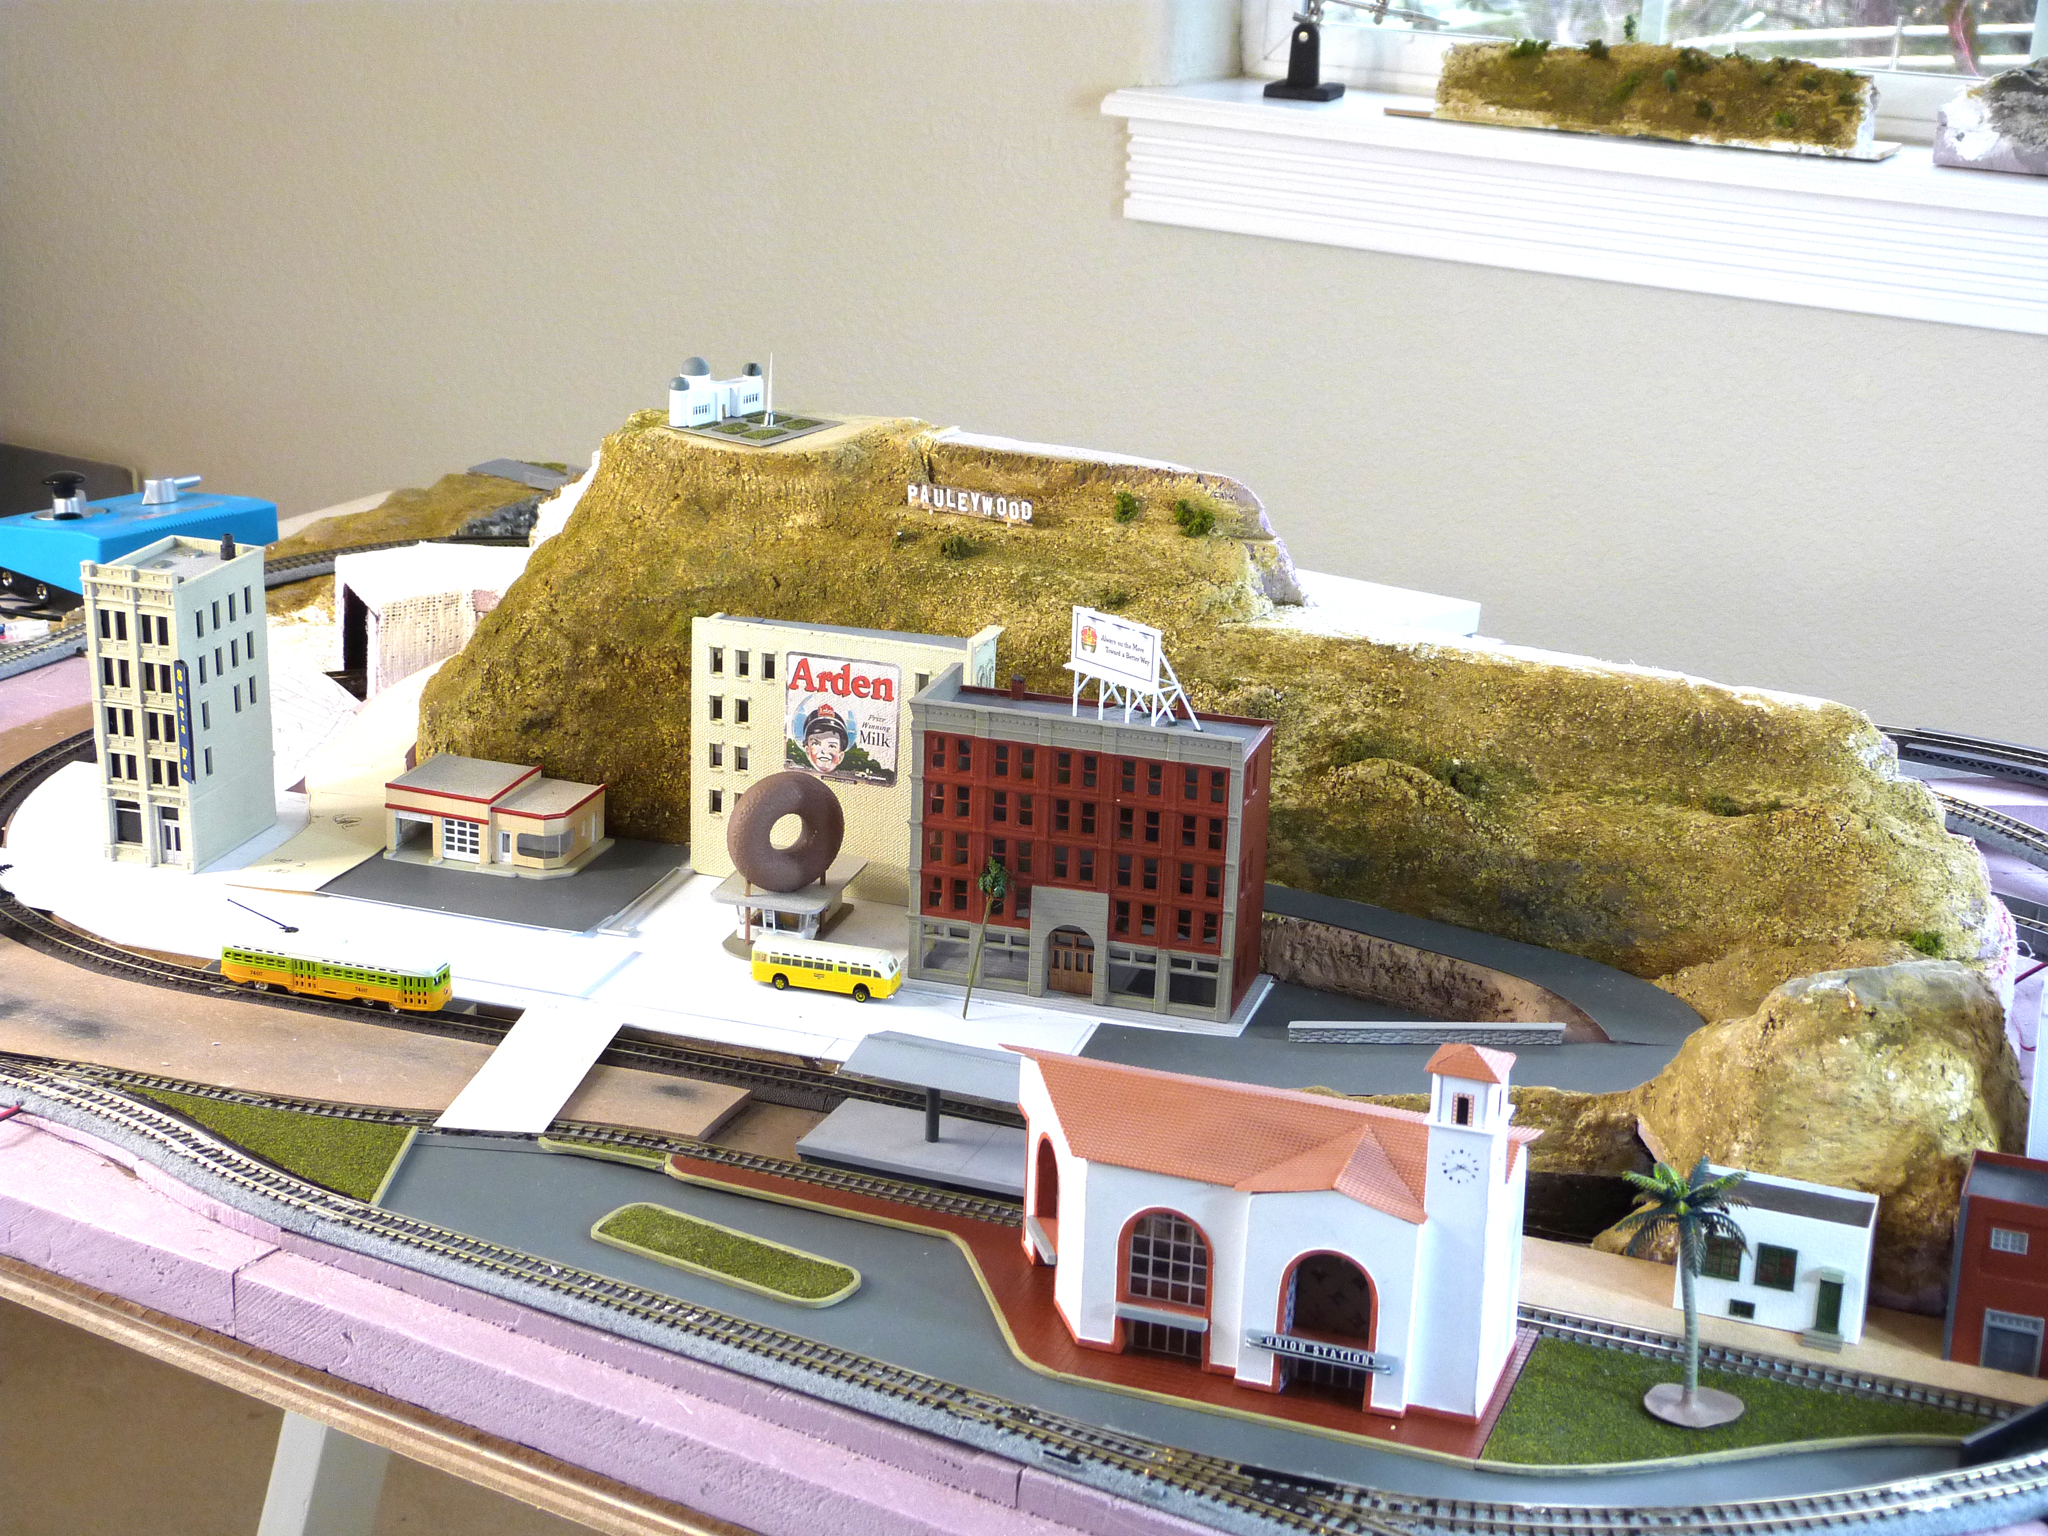
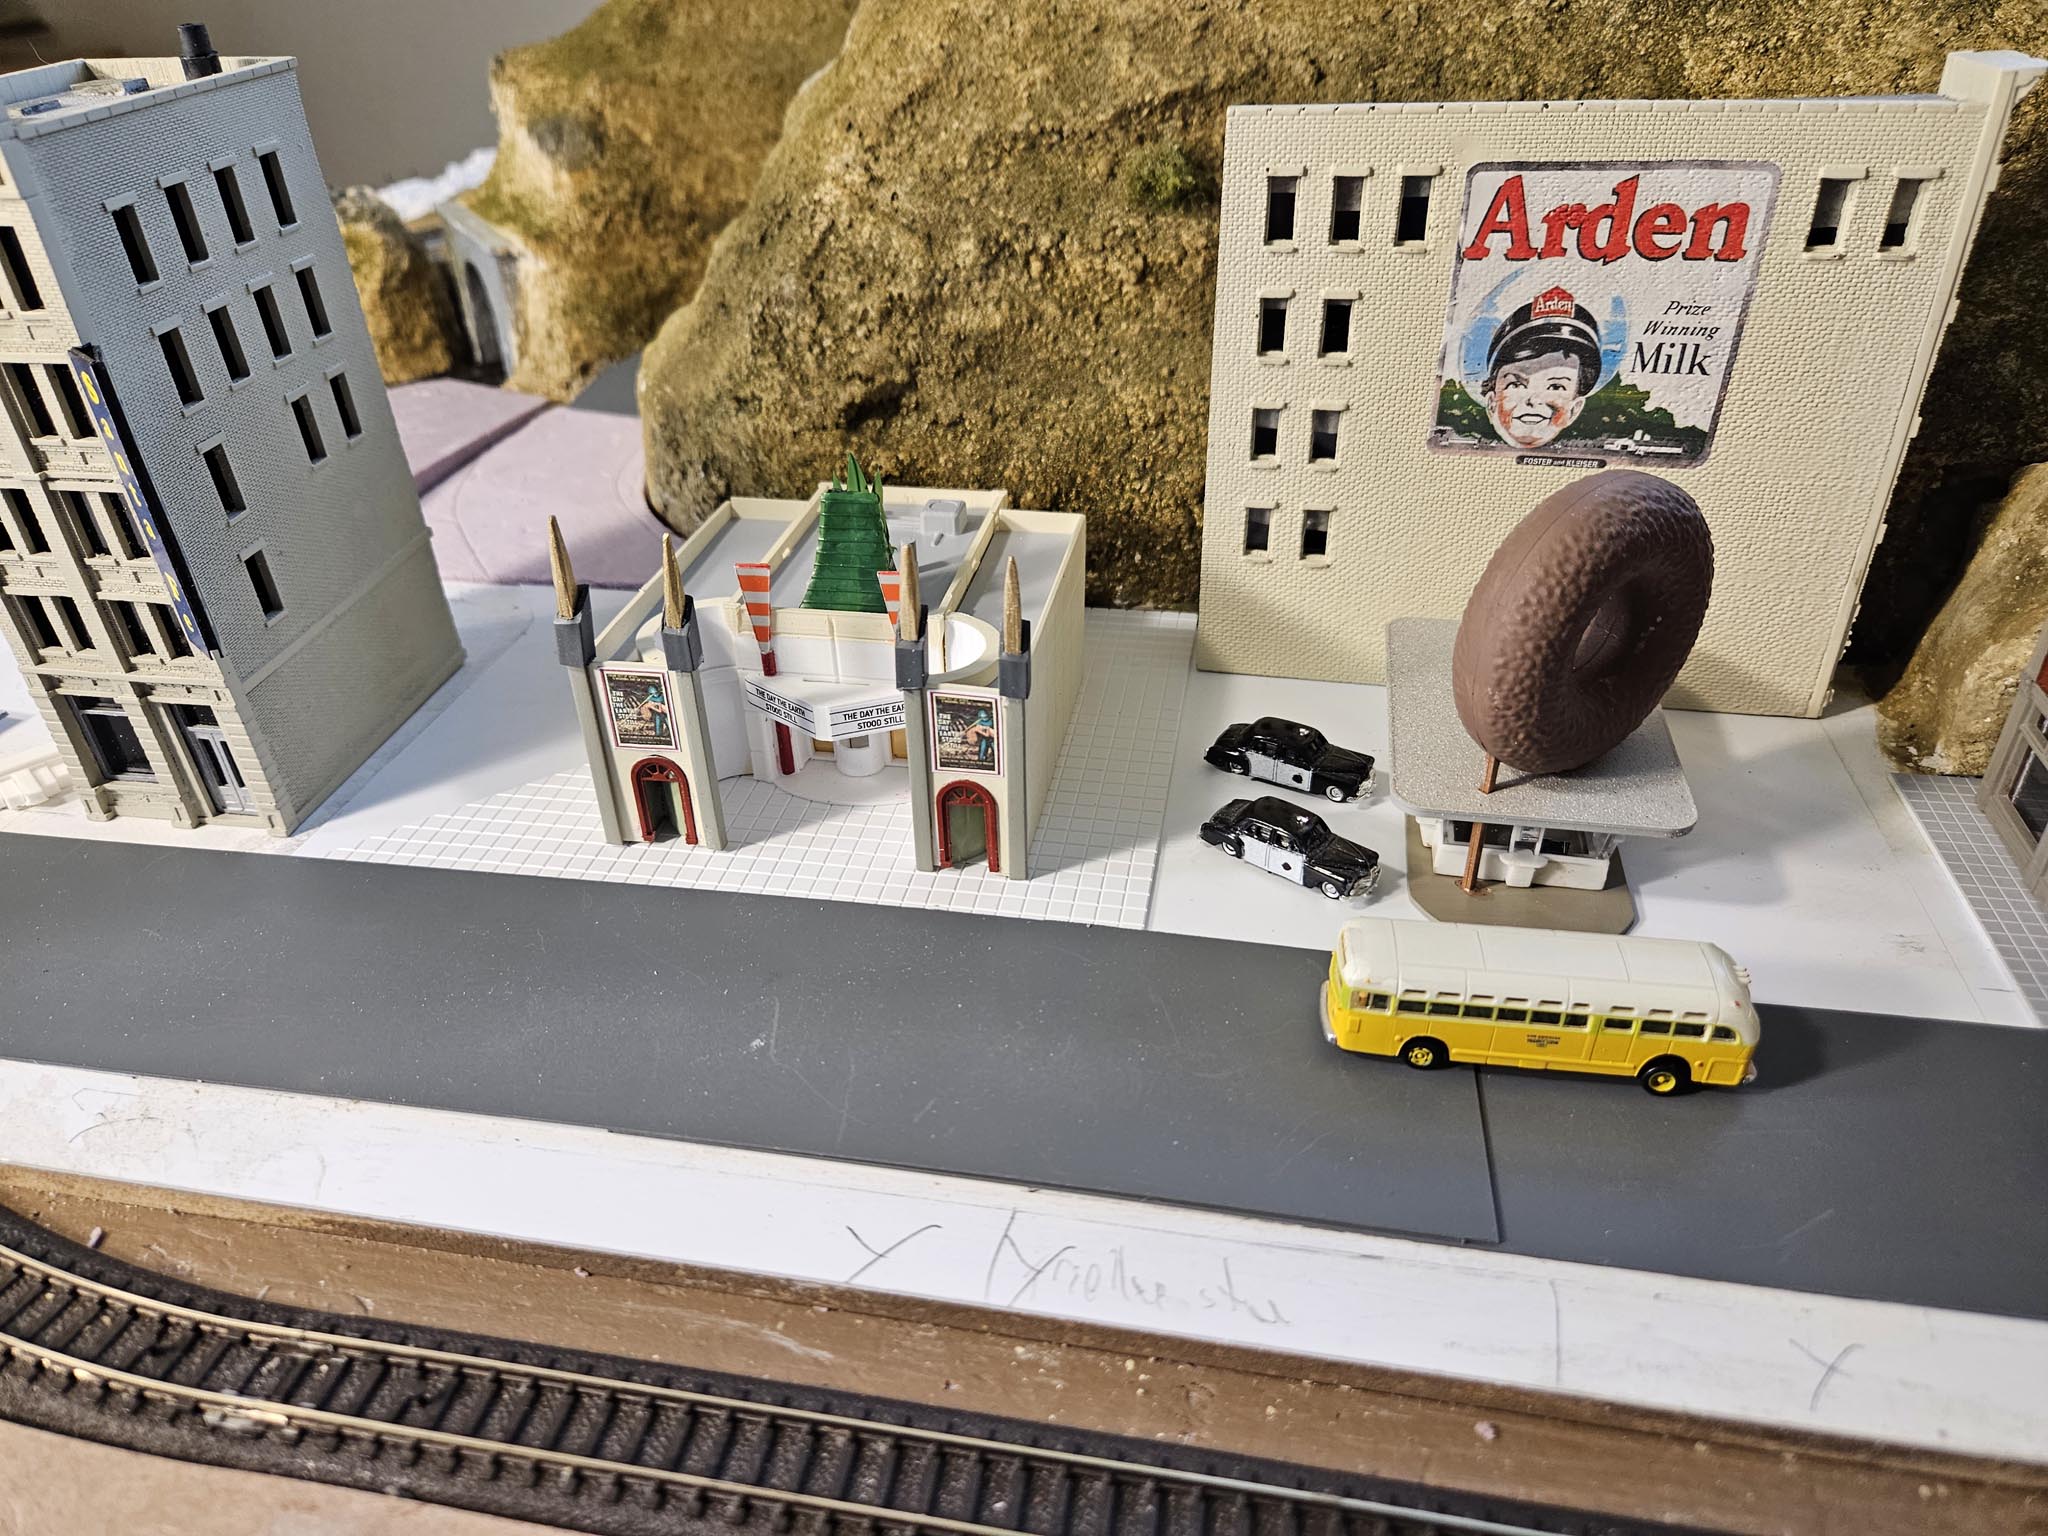
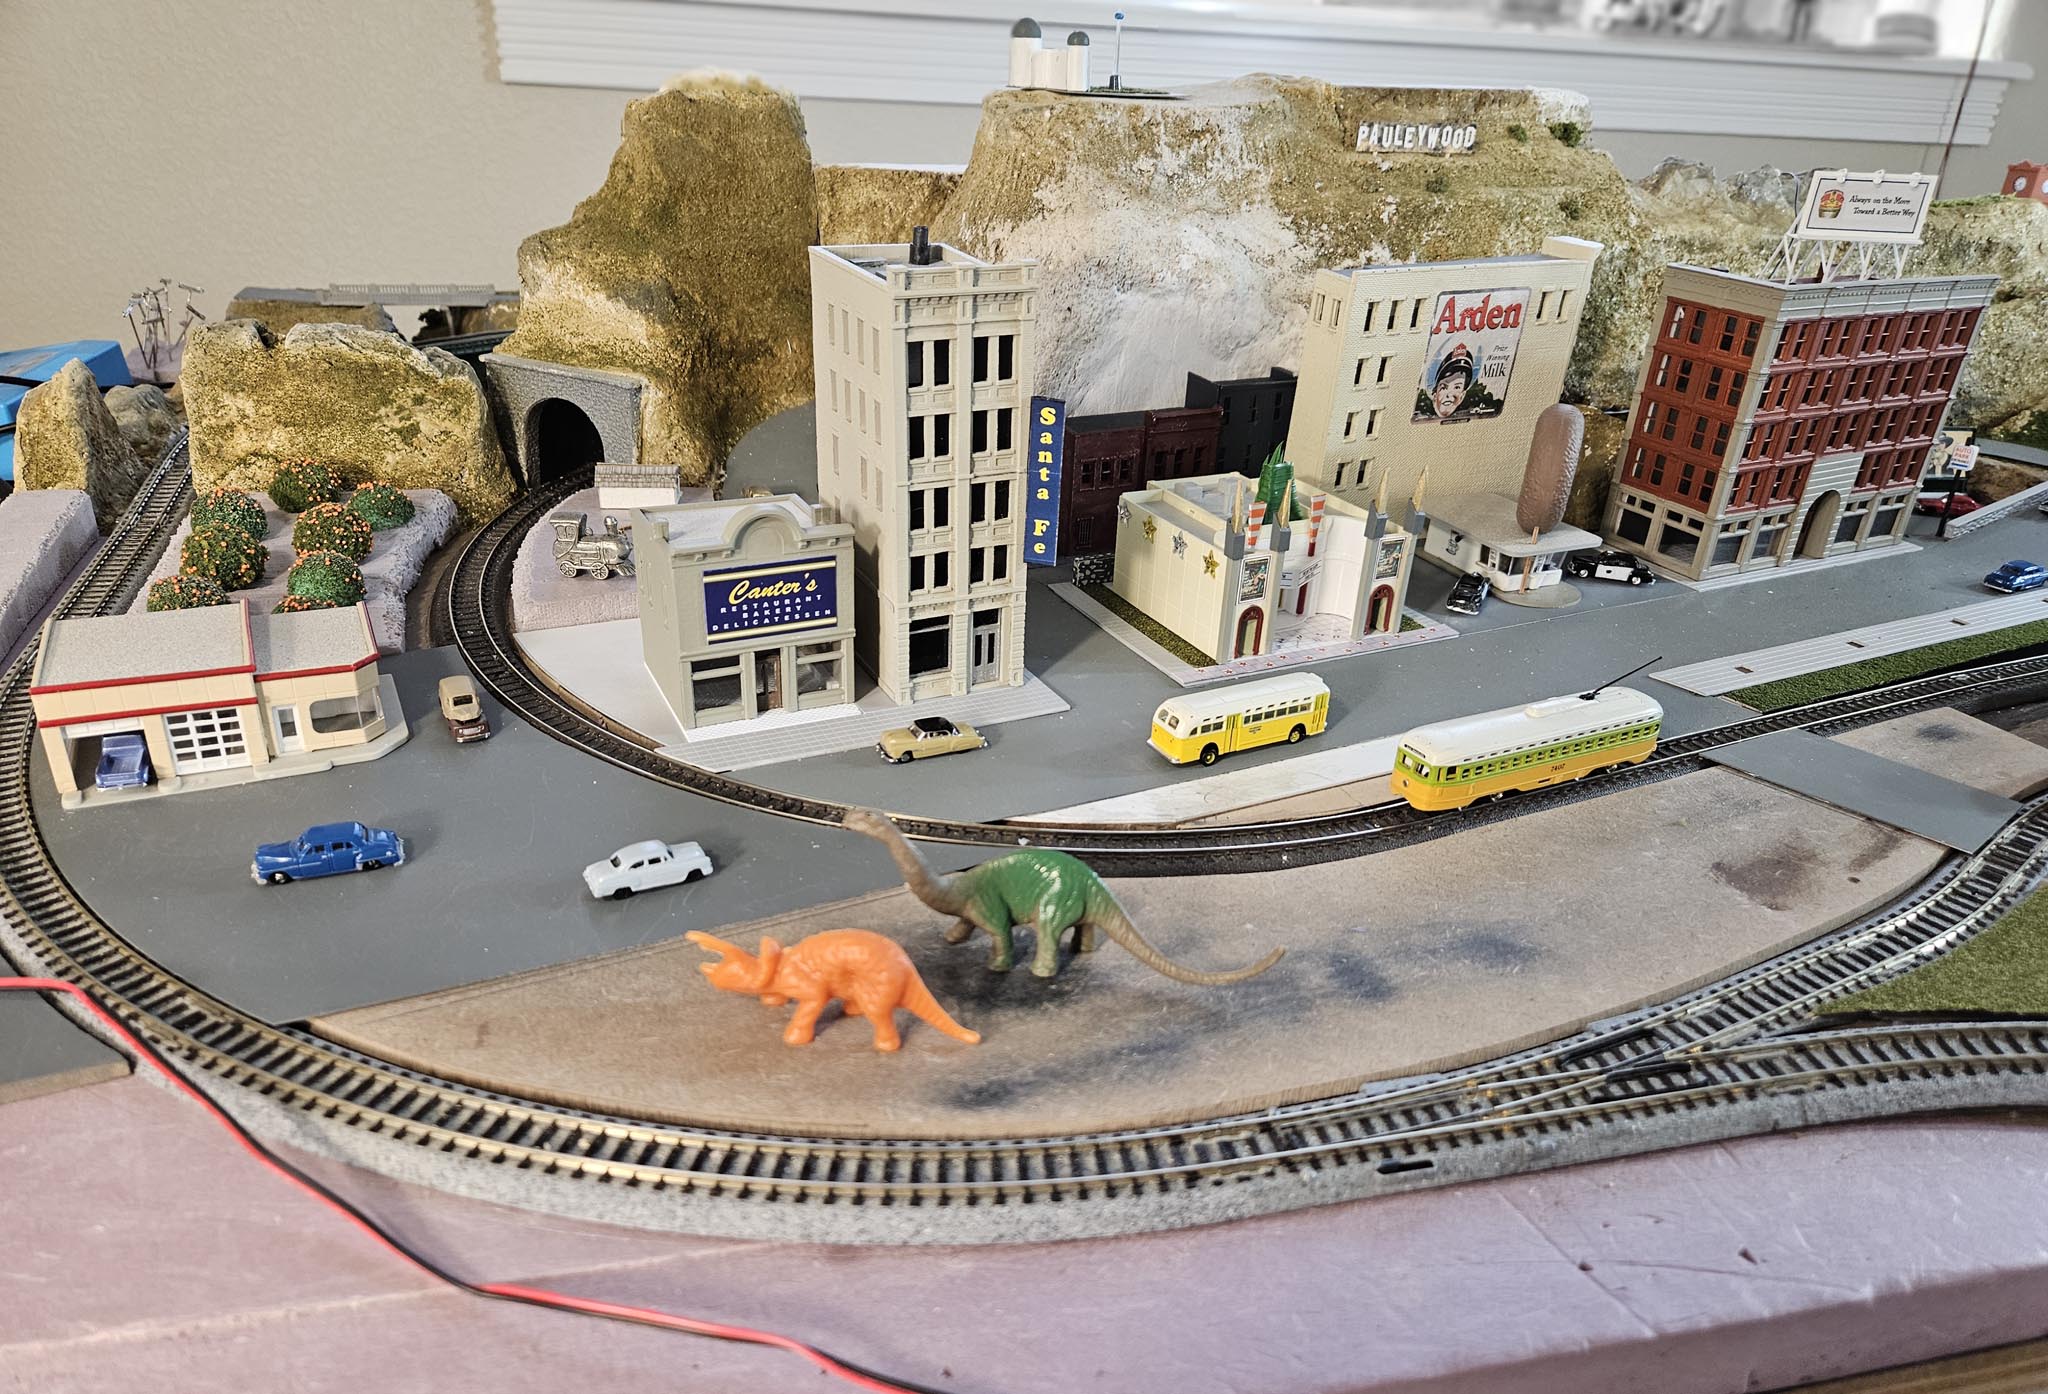
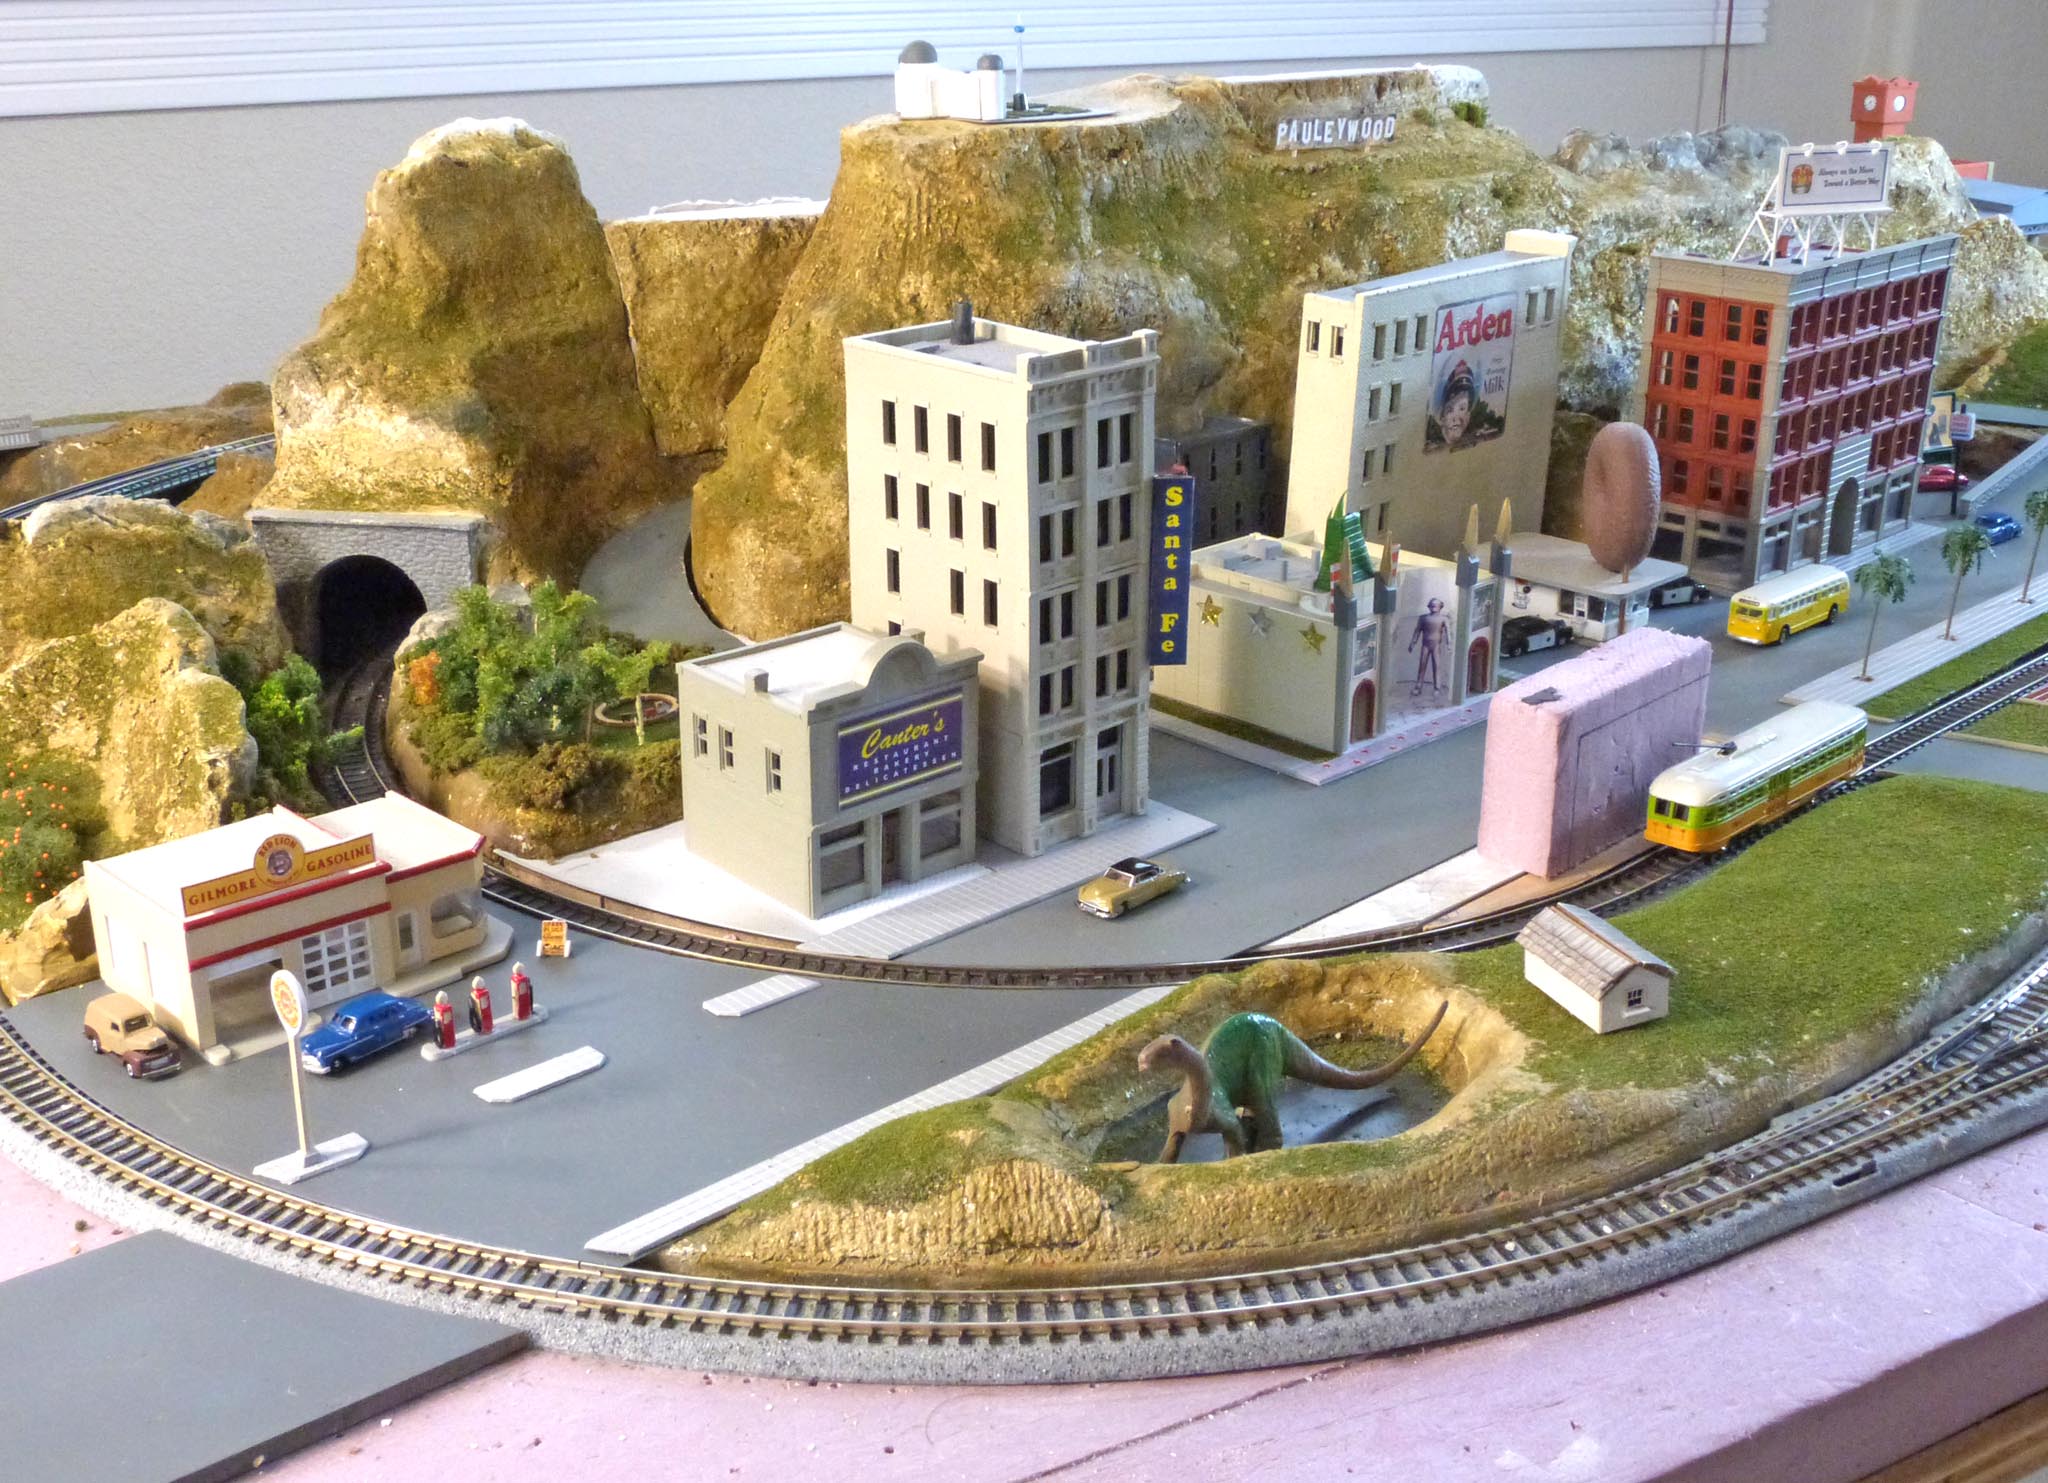
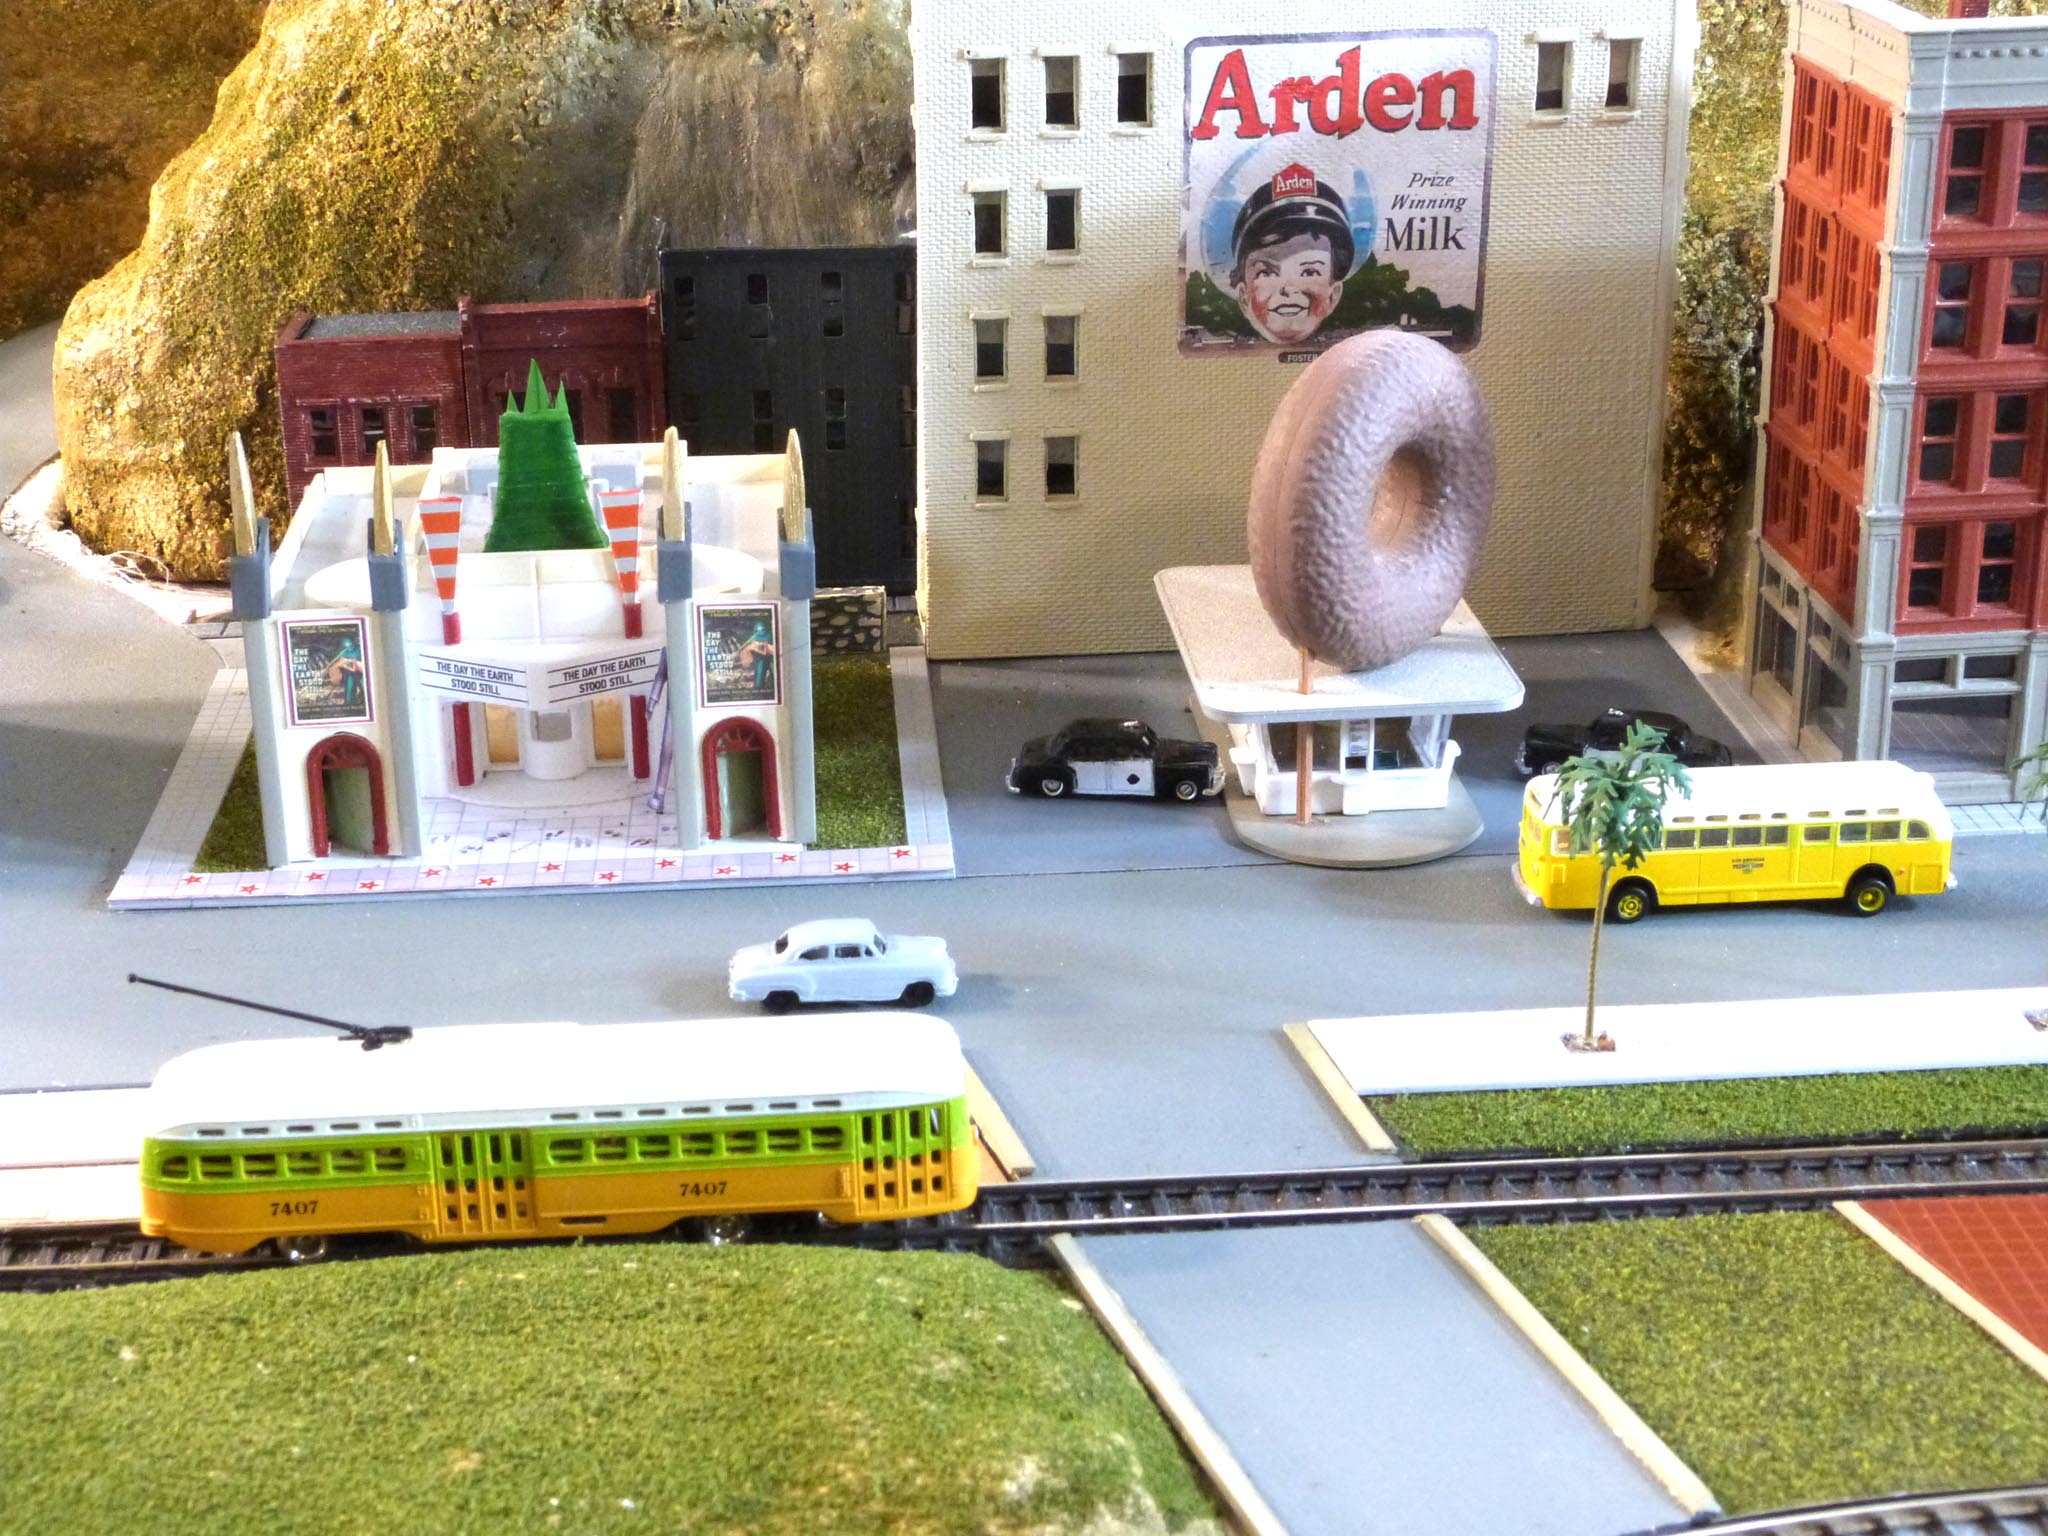
With the completion of the Union Station area, and a good idea of the overall layout plan of the street, it was time to move on. A Family Connection Here's a great story: Mrs. Pauley's father, Earl (a.k.a. Slick) was a sign painter back in the late '40s and early '50s. We have an old picture of a giant Arden Milk sign he had painted. In the background you can see the Barker Bros. building, a Los Angeles landmark. |
|
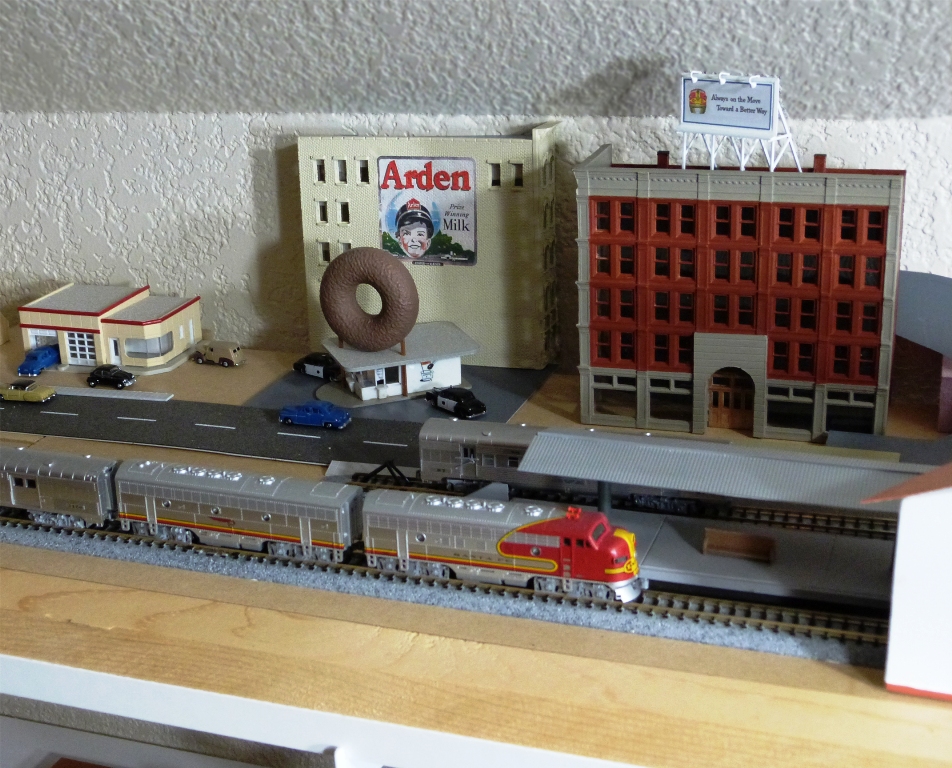
Well, it turned out that many years later, Mrs. Pauley had an office in that building. So when I wanted to put a couple of structures in the scene, the family tie-in was wonderful. I found a model that resembled the building (note the billboard on the roof) and I colorized the Arden Milk sign using colors I found on similar signs and logos. (Wow. I wound up "painting" his sign.) In addition to all that, because Slick worked for Foster and Kleiser the Santa Fe's vendor for outdoor advertising in Los Angeles, he very likely painted a few of their billboards - perhaps even the one on top of the building in which Mrs. Pauley had an office! Isn't that neat?
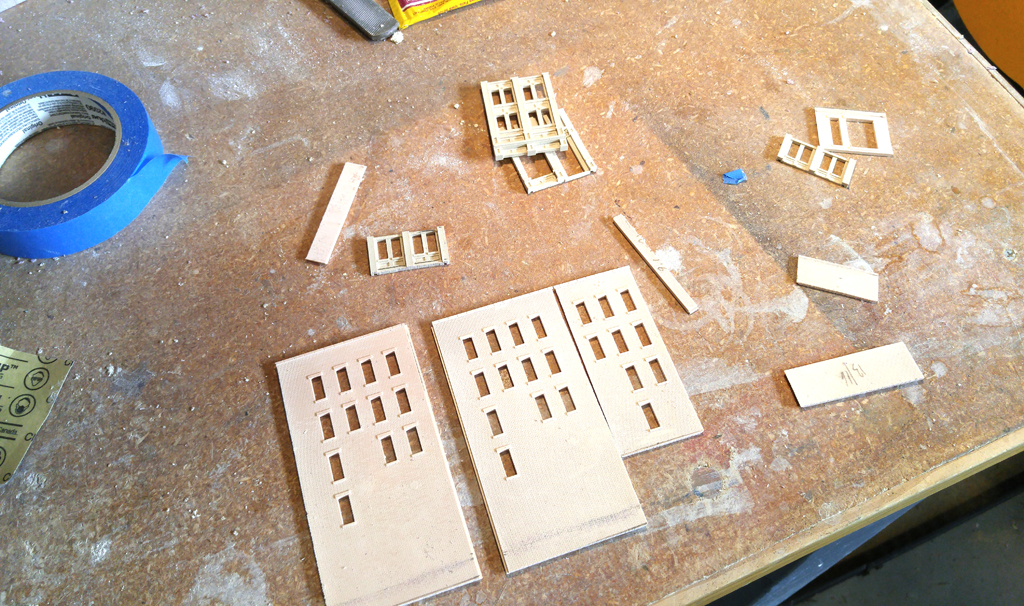
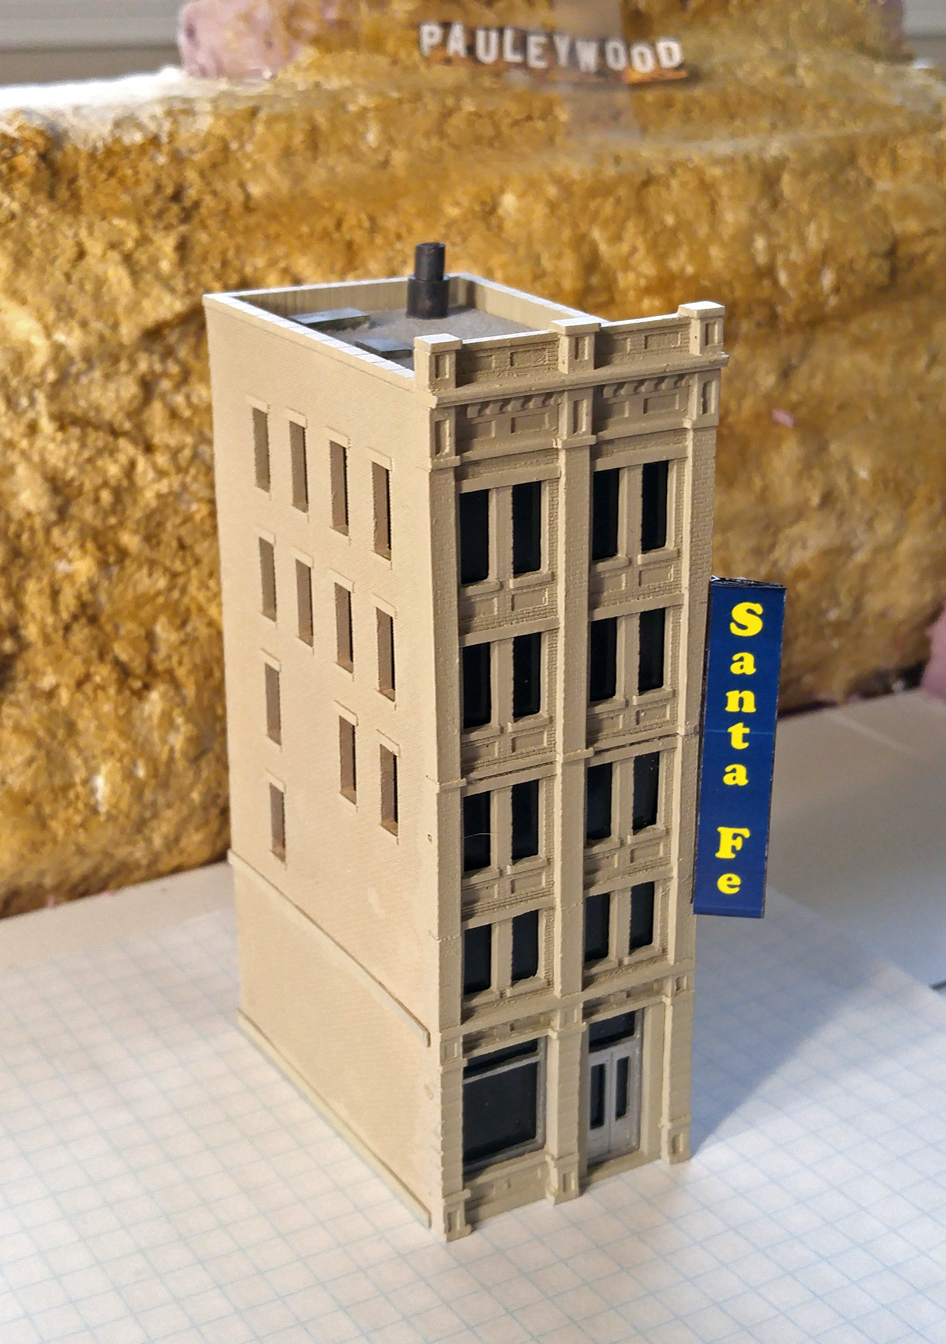
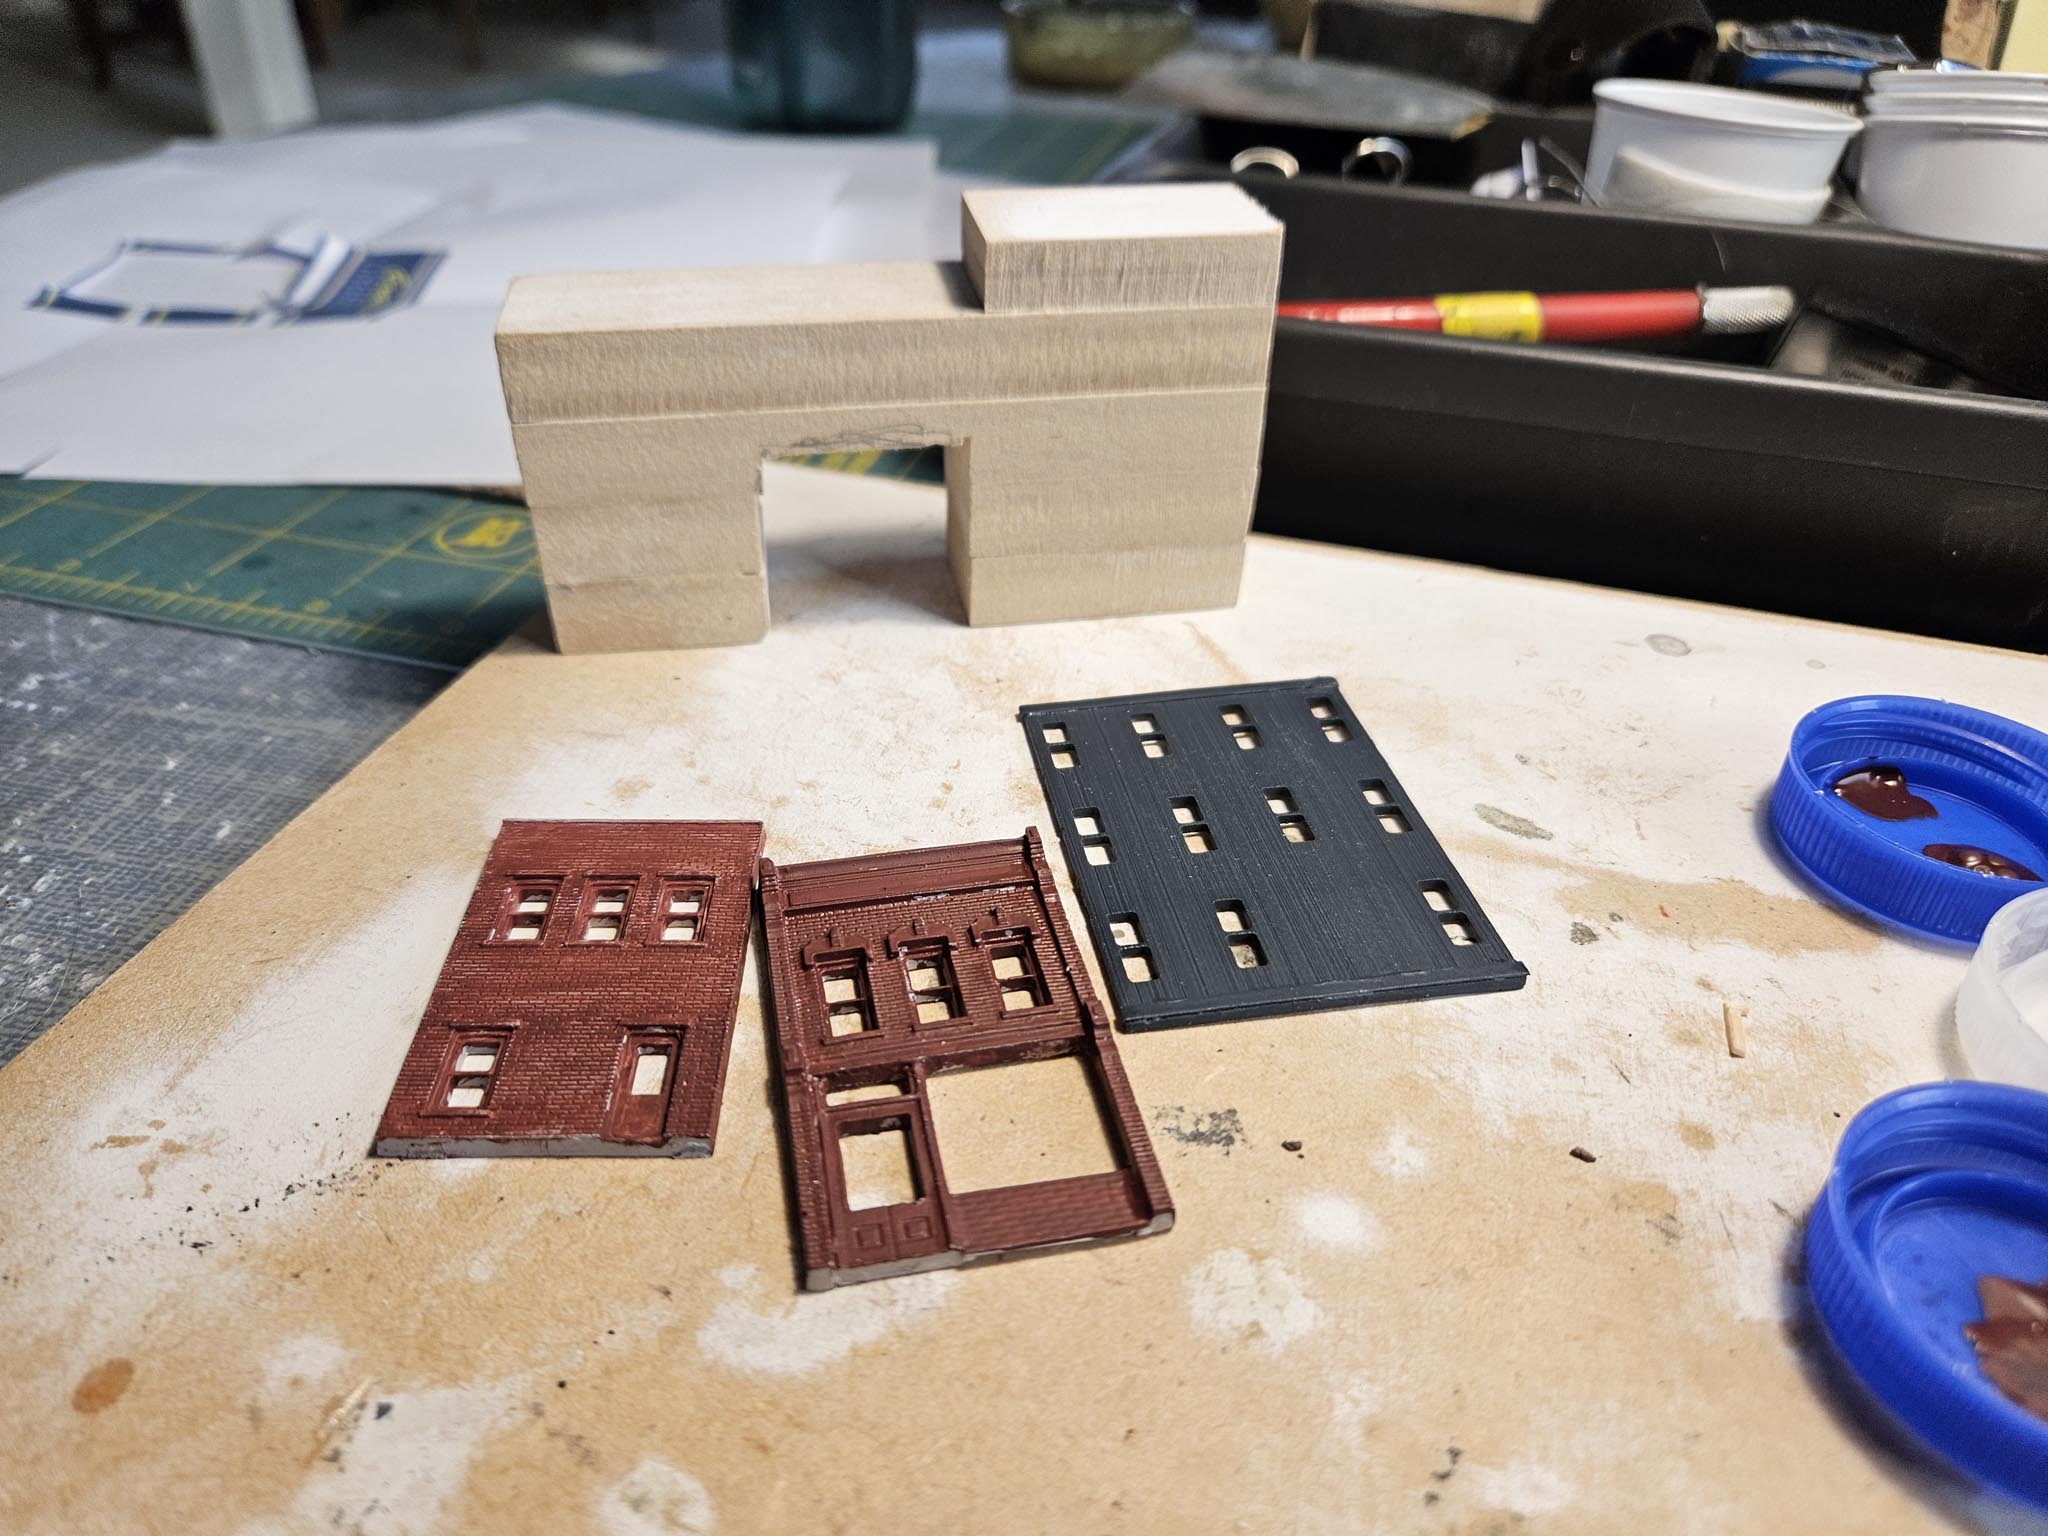
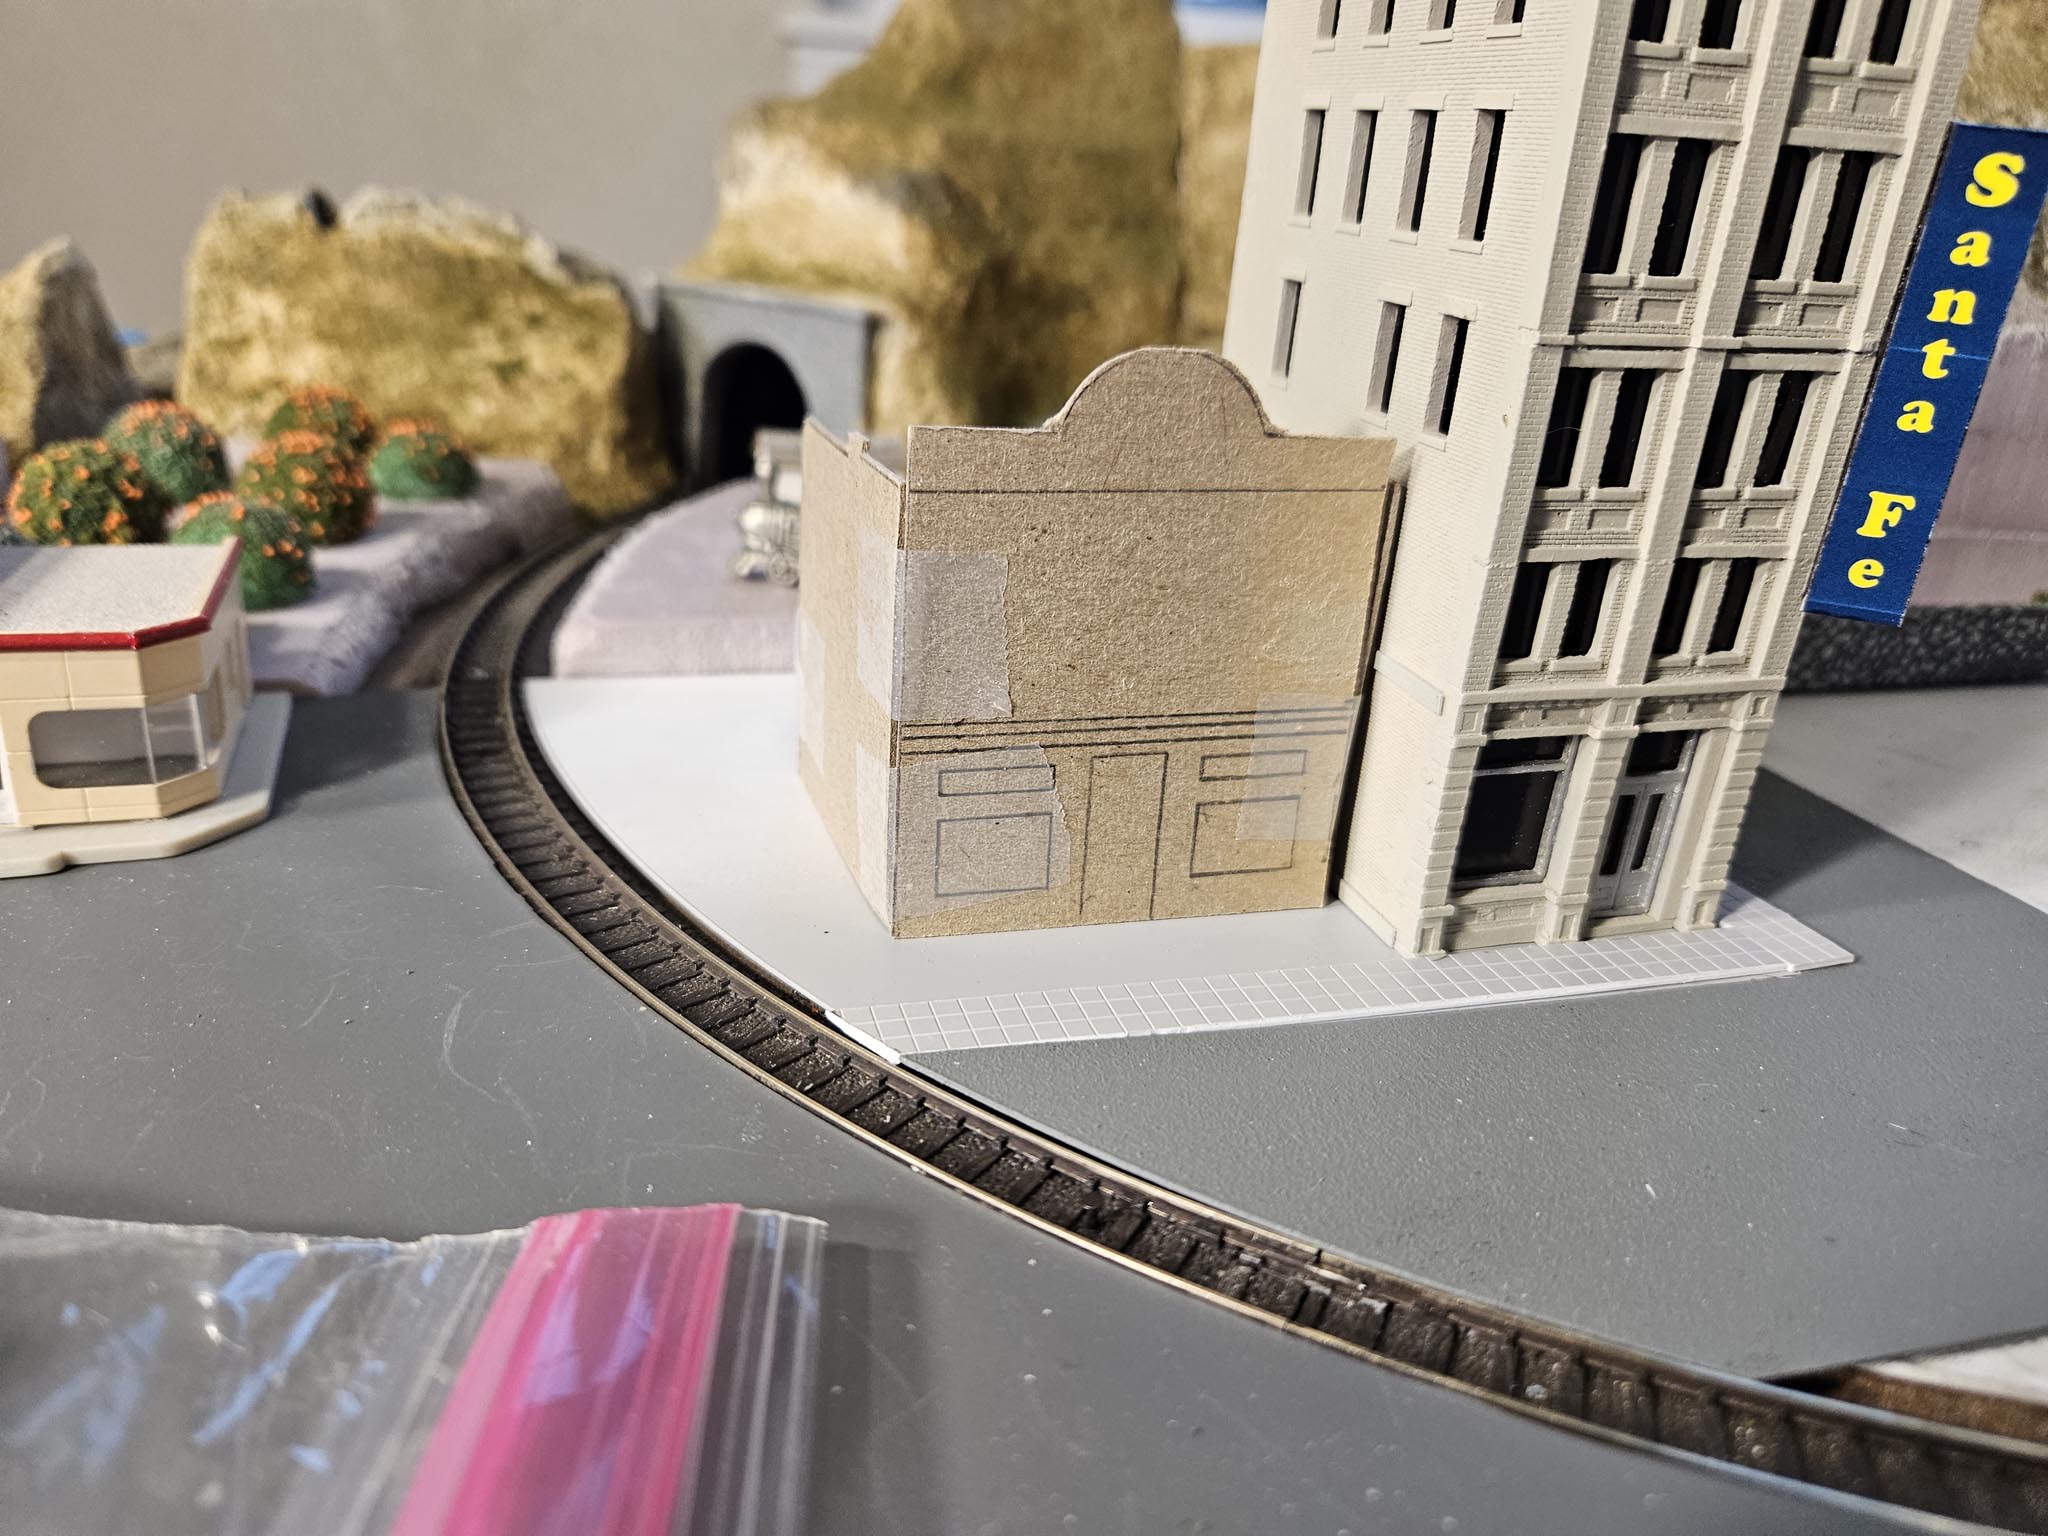
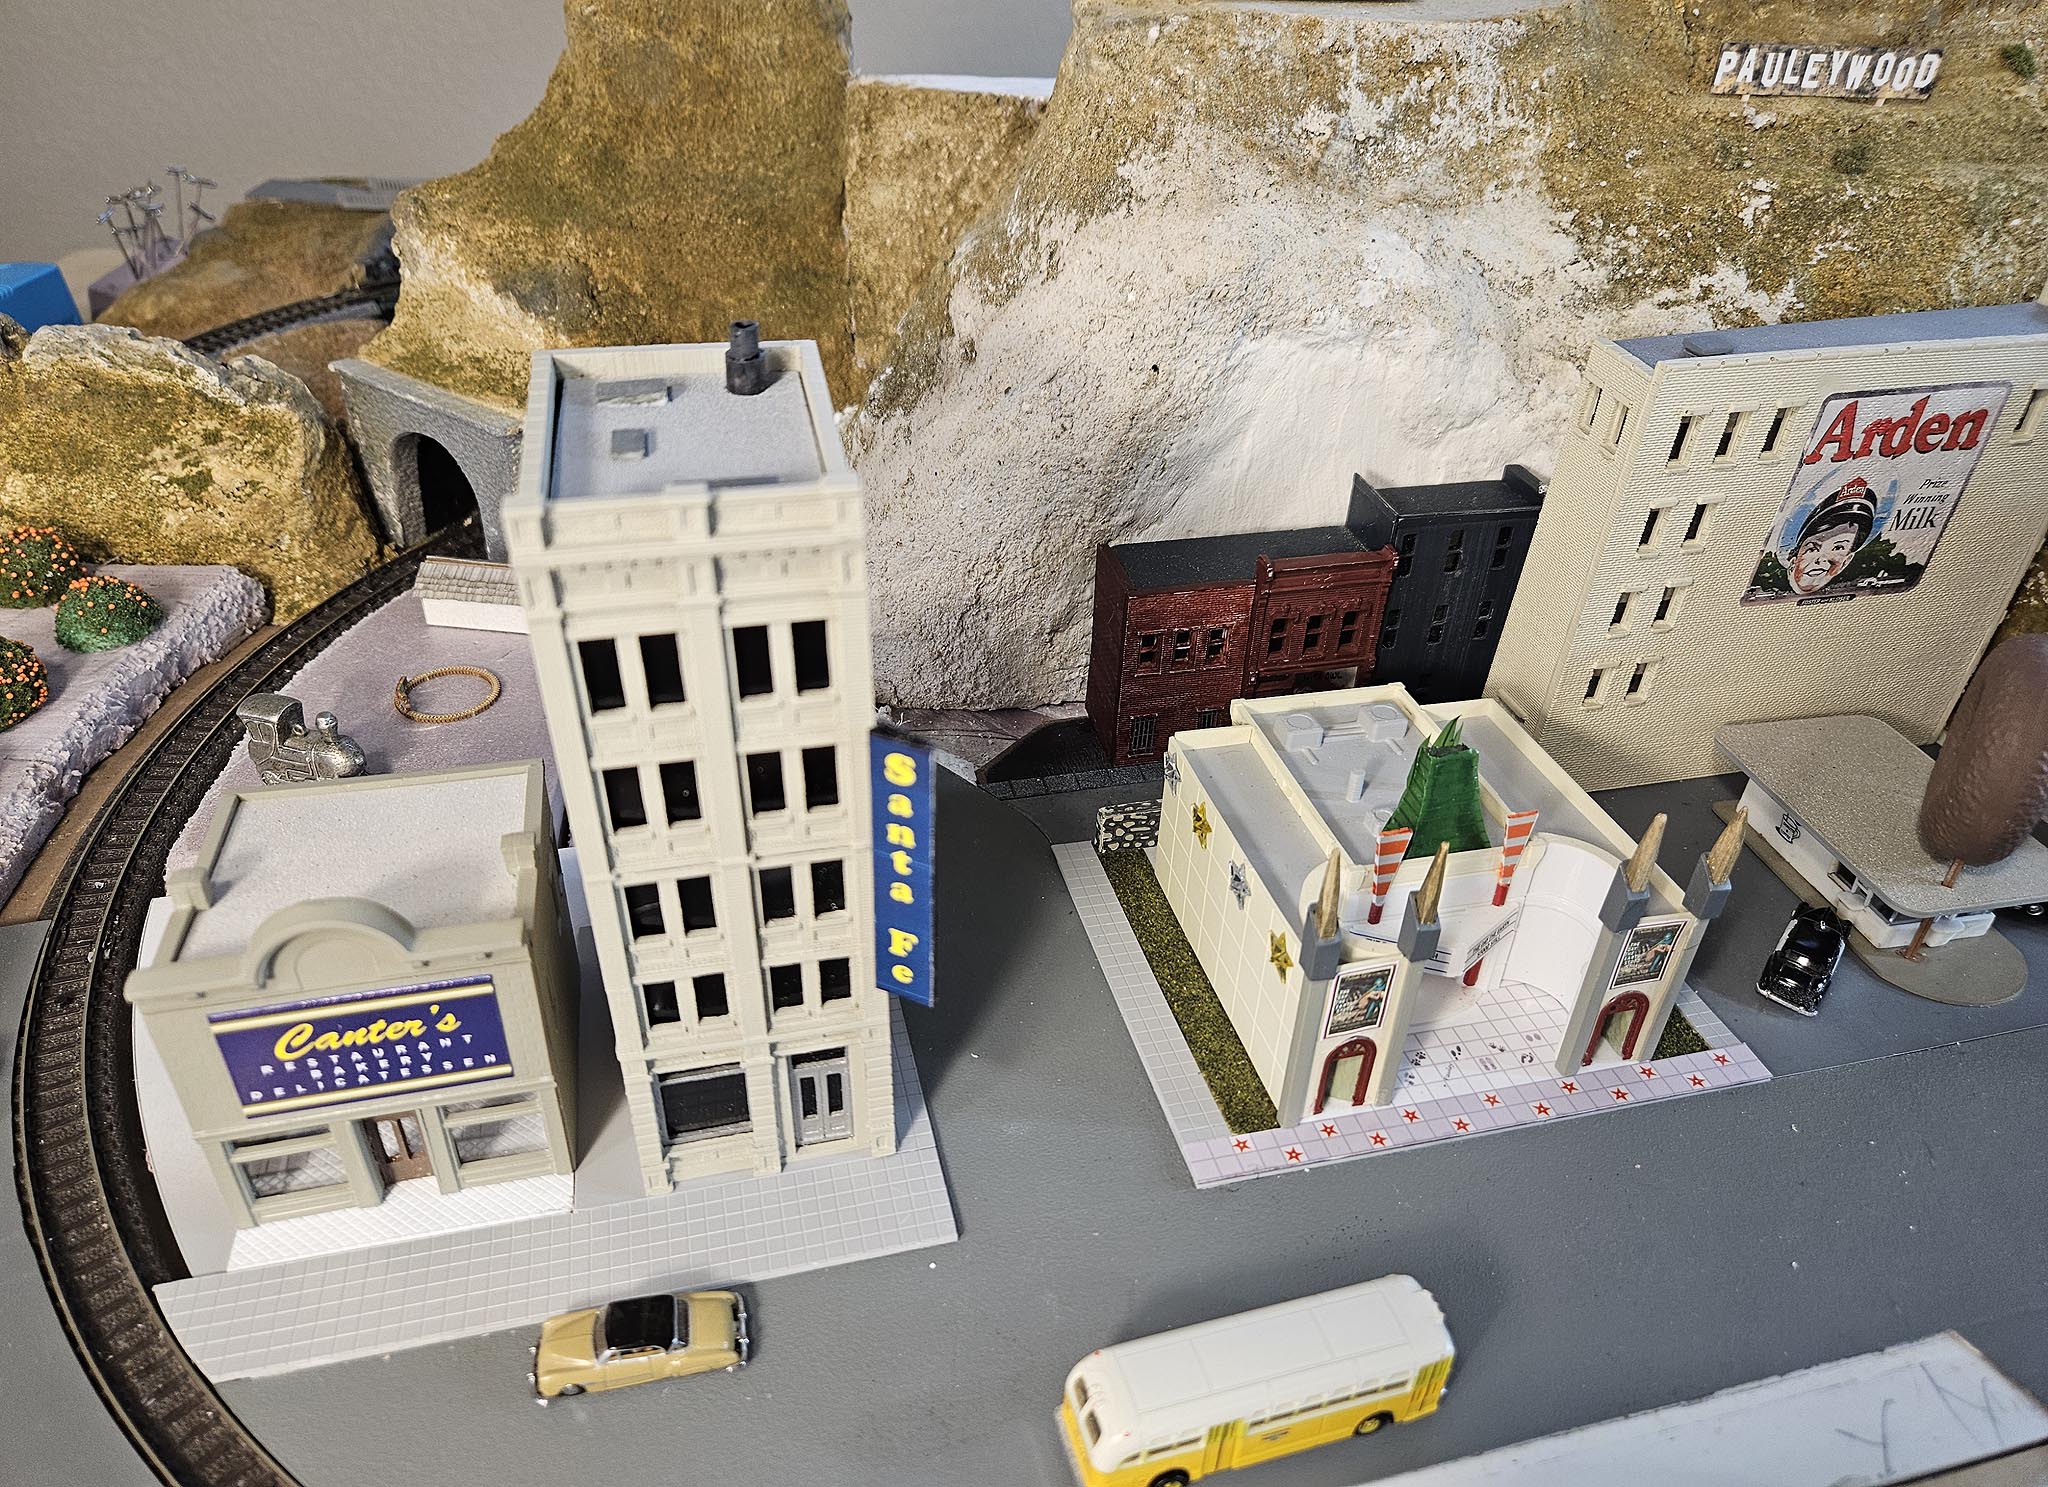
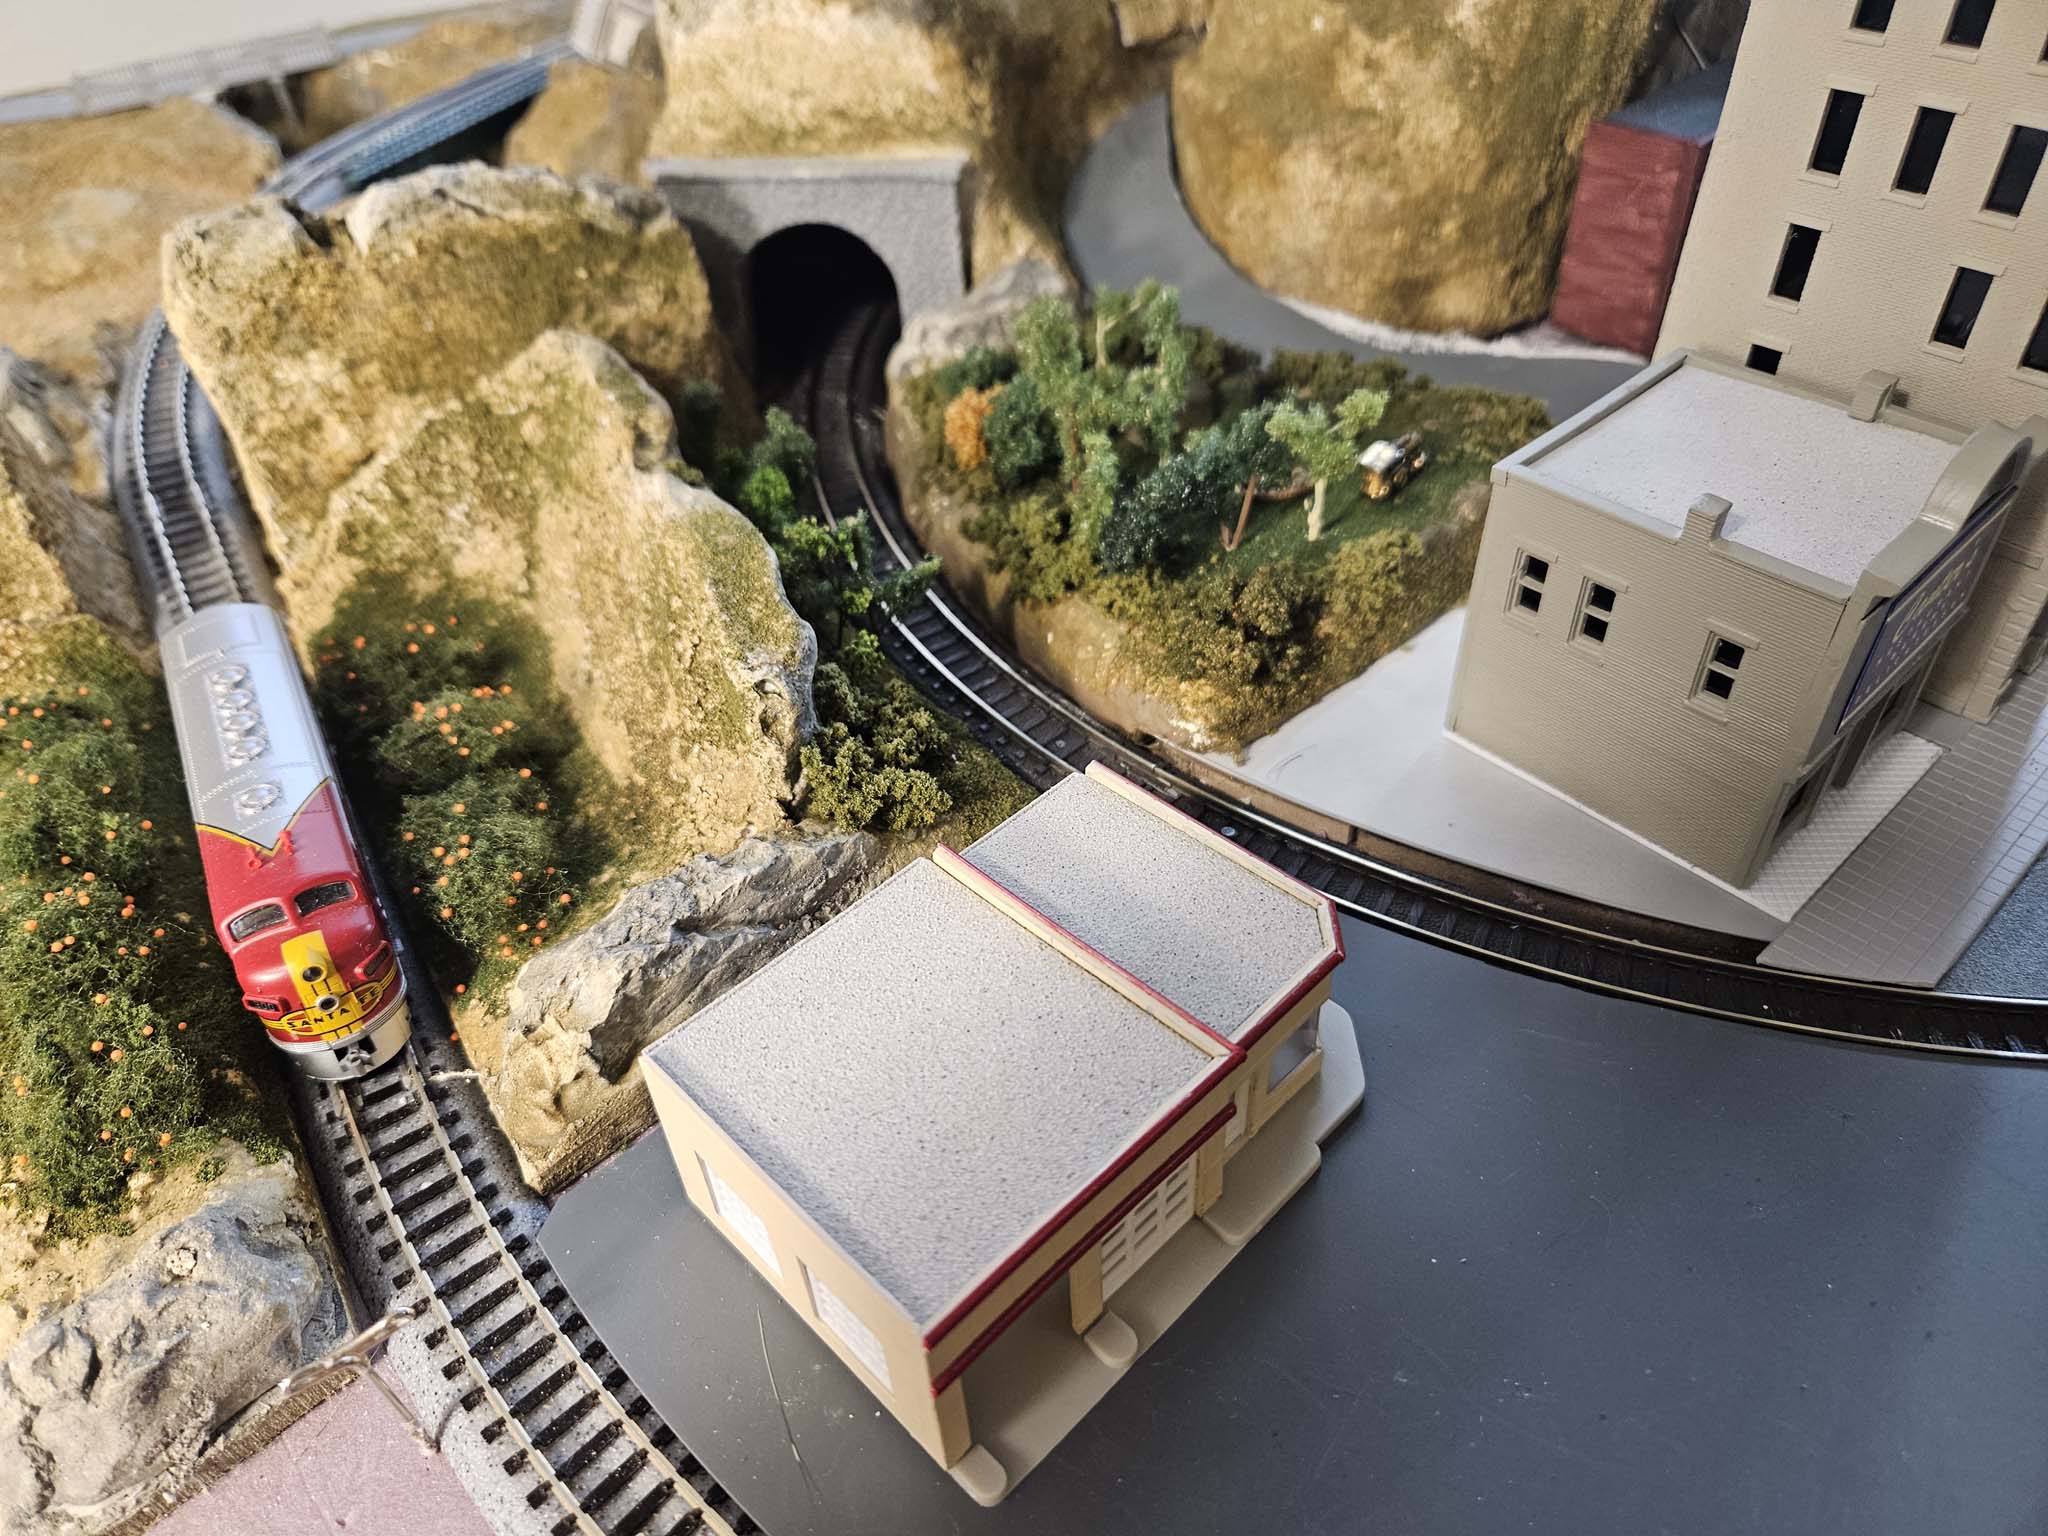
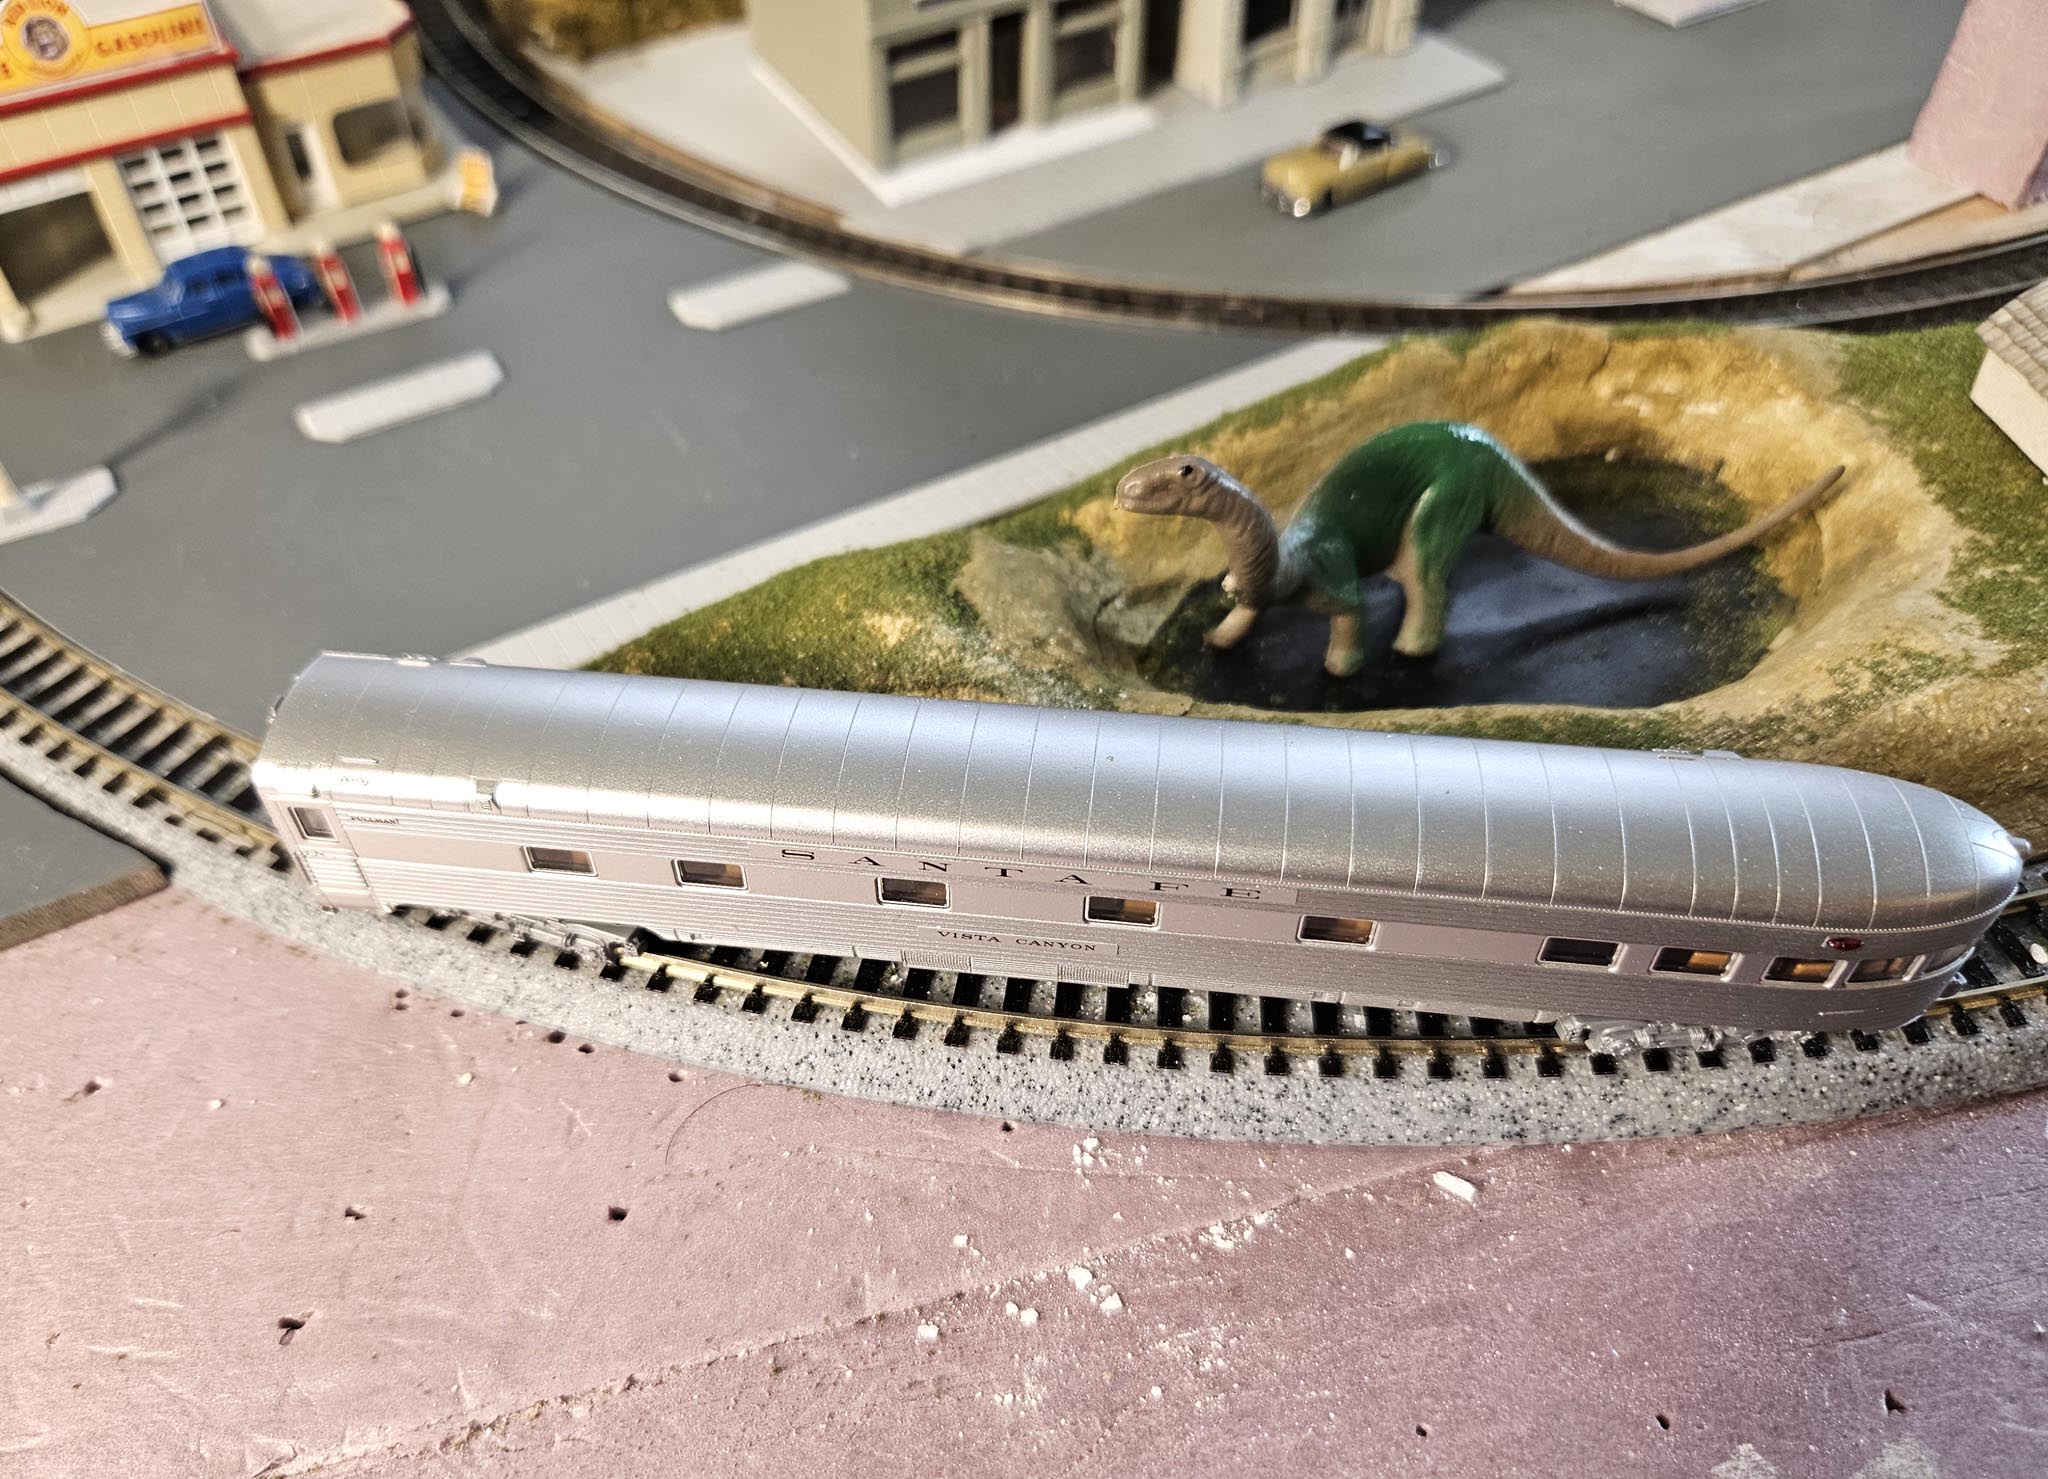
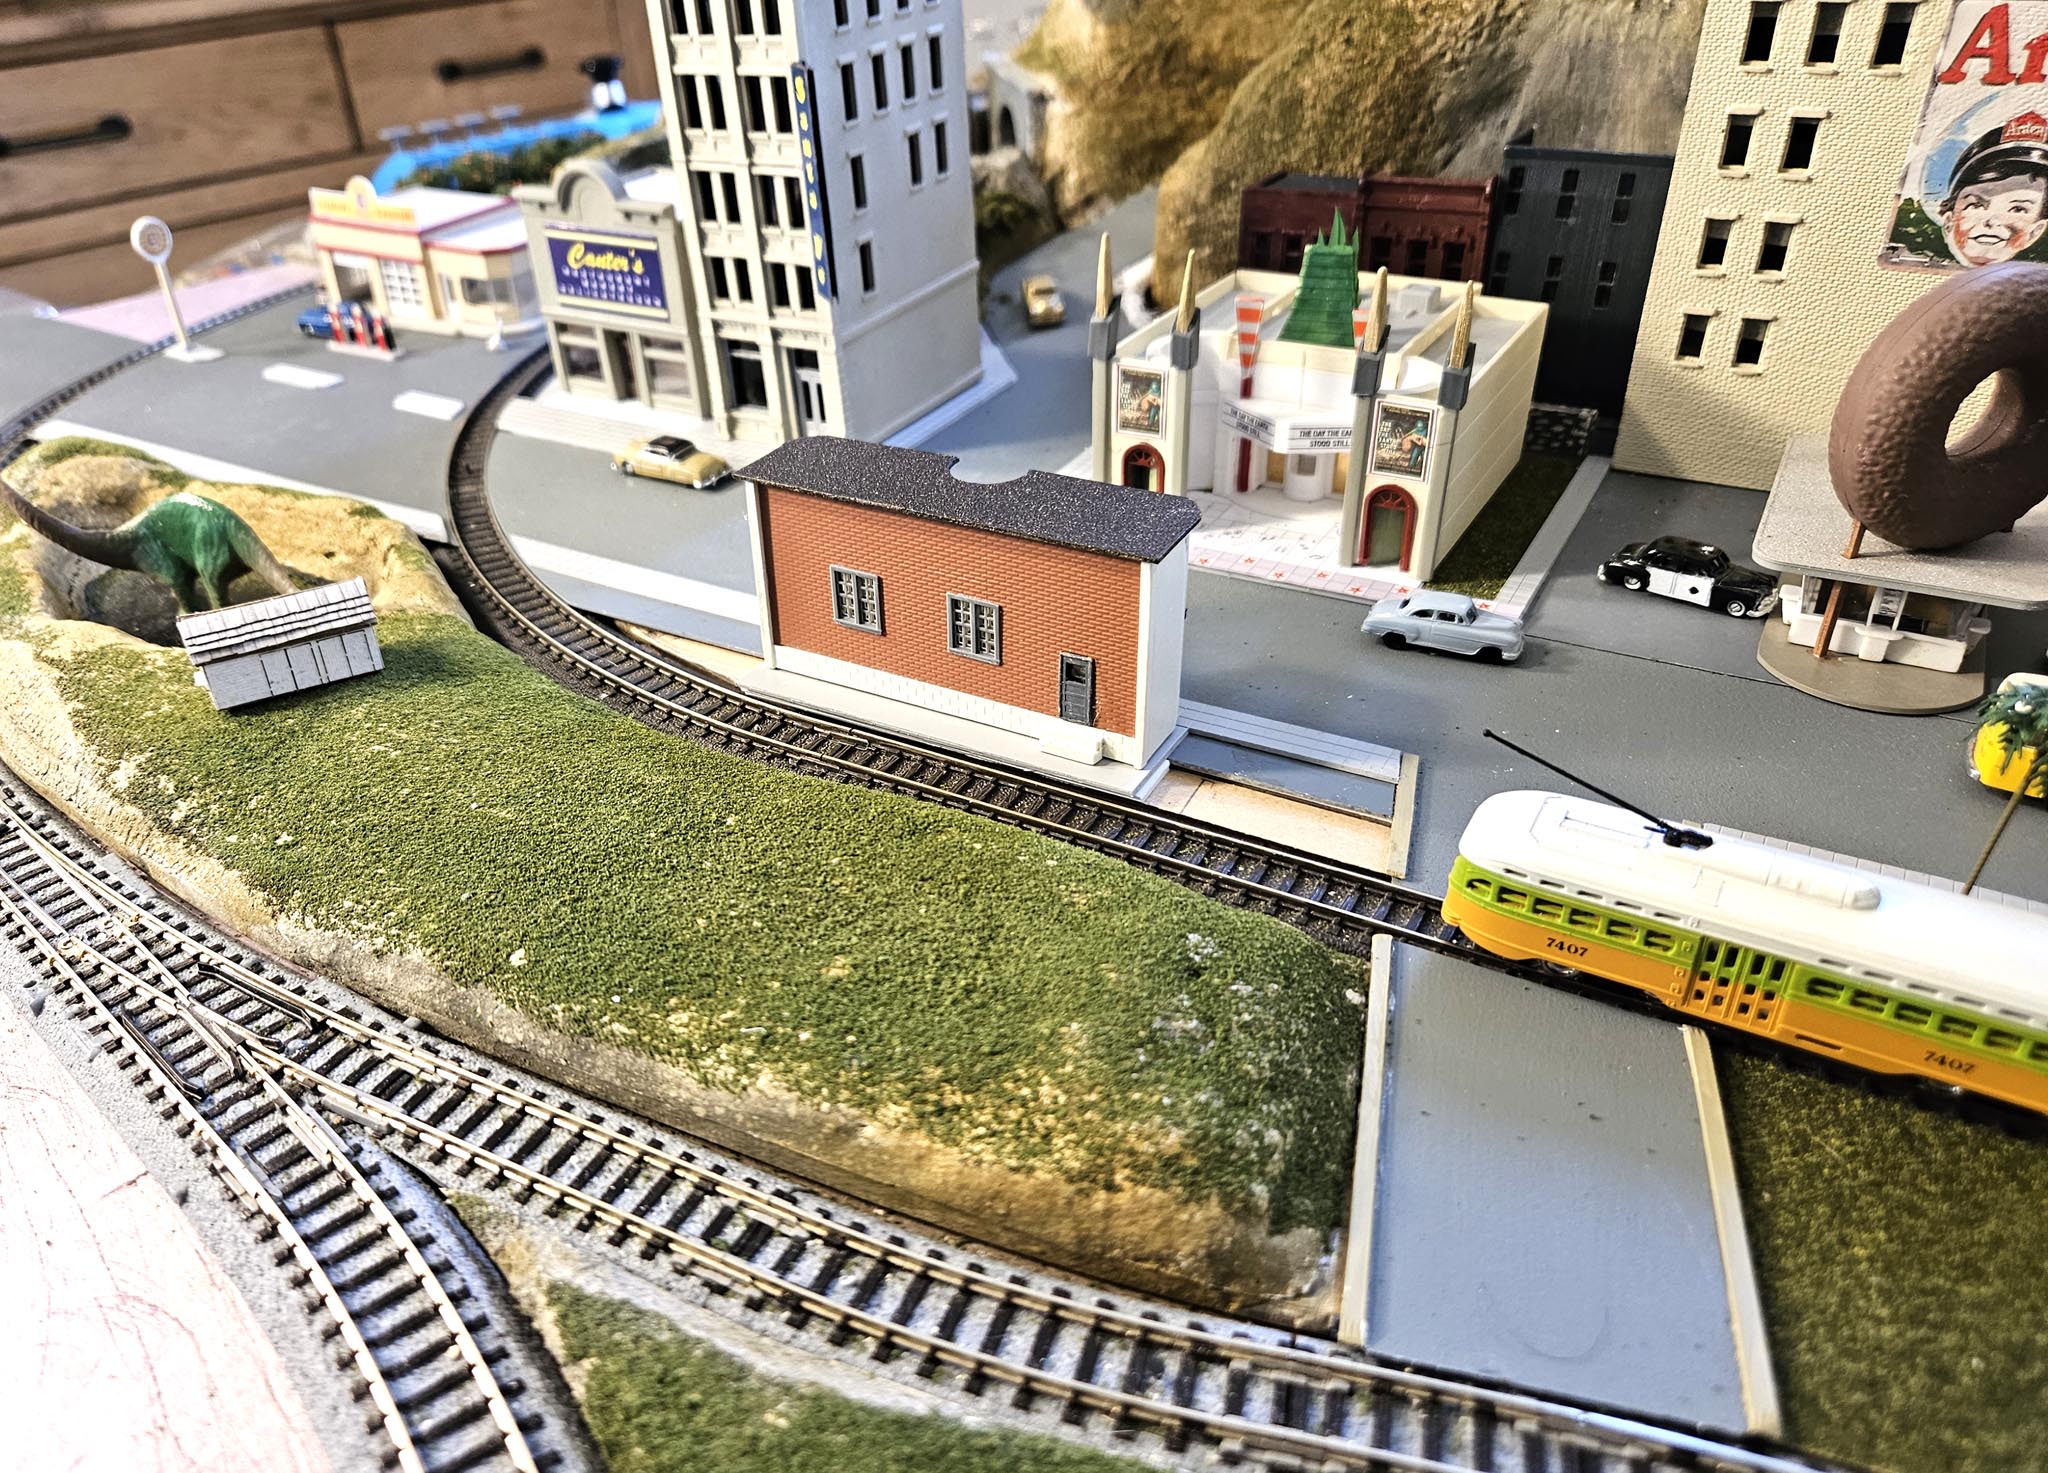
The Santa Fe Building Watching some videos on YouTube as research, I discovered that the Santa Fe Railroad had a building in Los Angeles. (It's still there – now apartments and lofts.) The only similar building kit I could find was a little too tall, so I cut out one of the floors and added the sign. It's a simple structure with no interior (and blacked-out windows). |
|
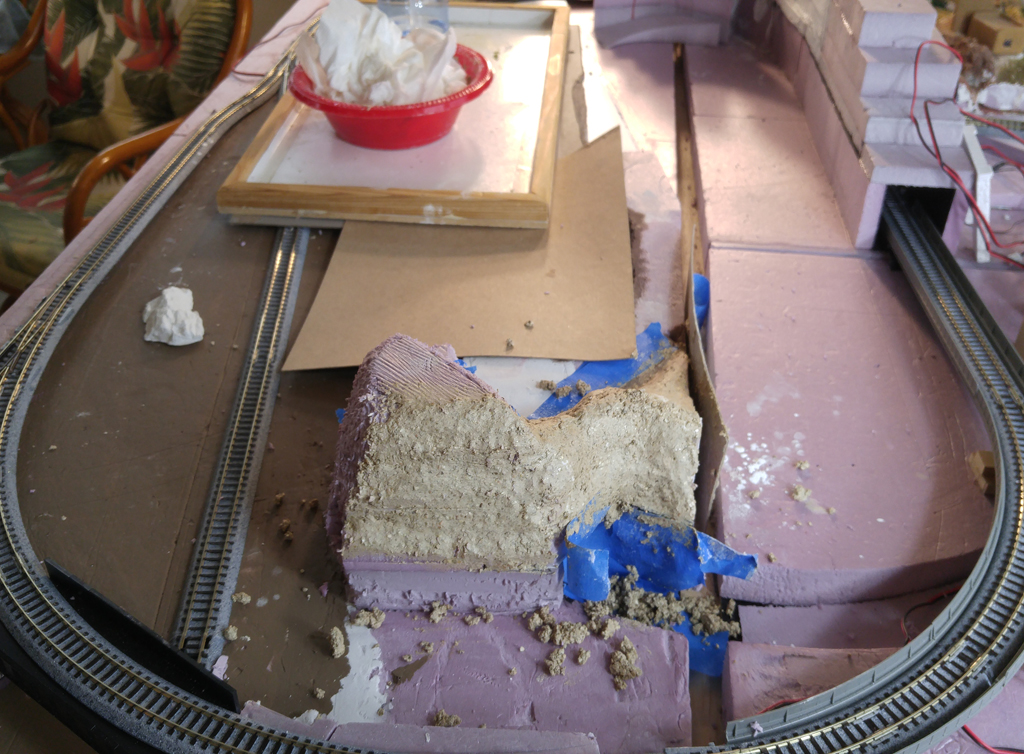
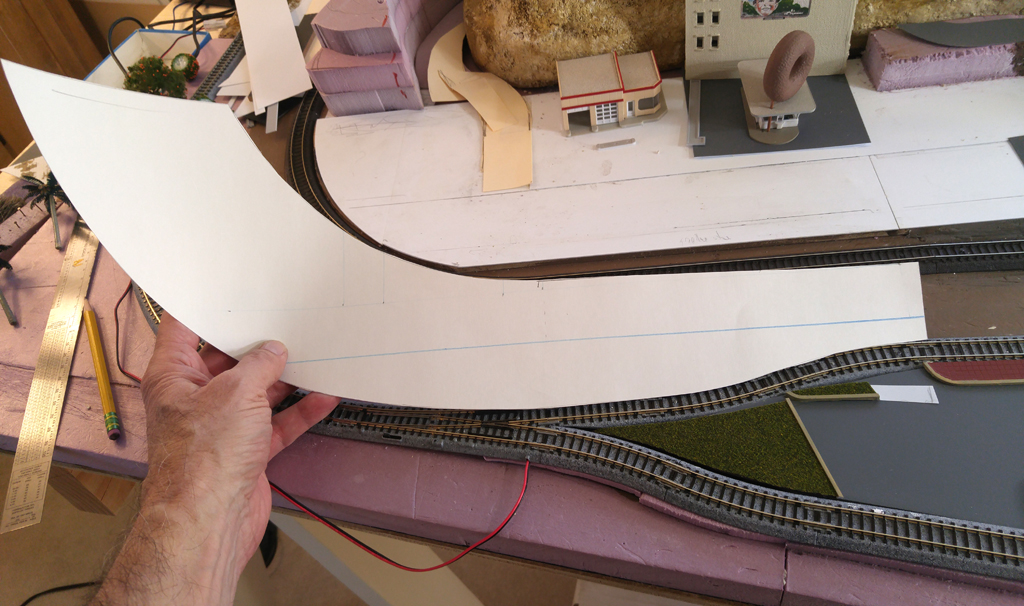
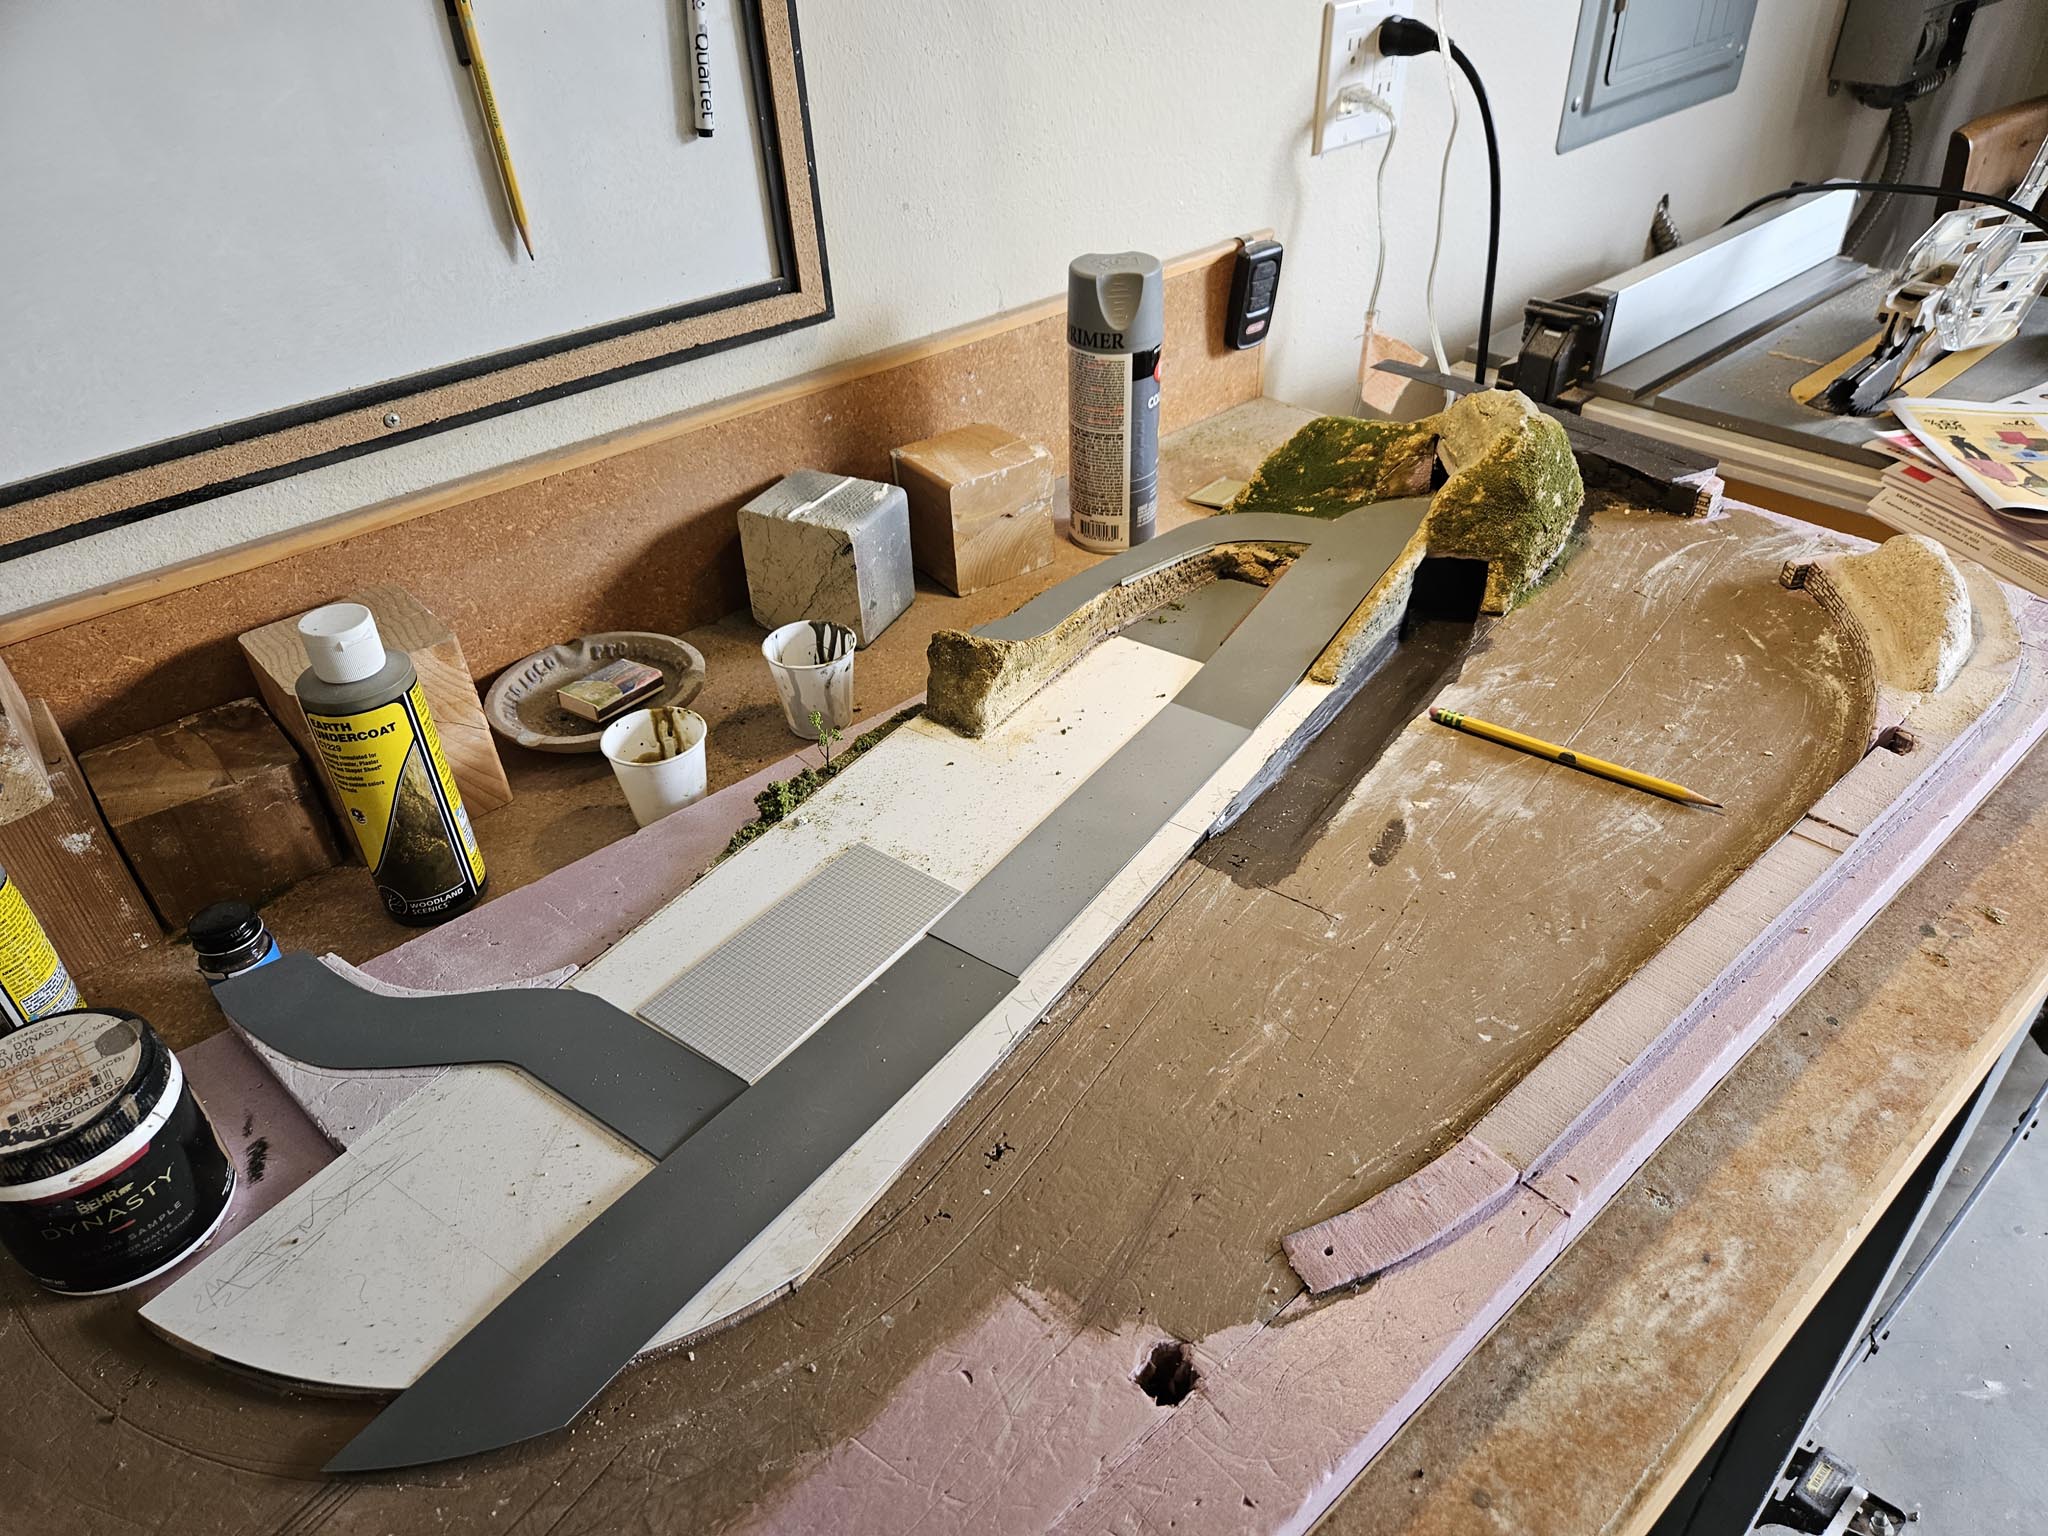
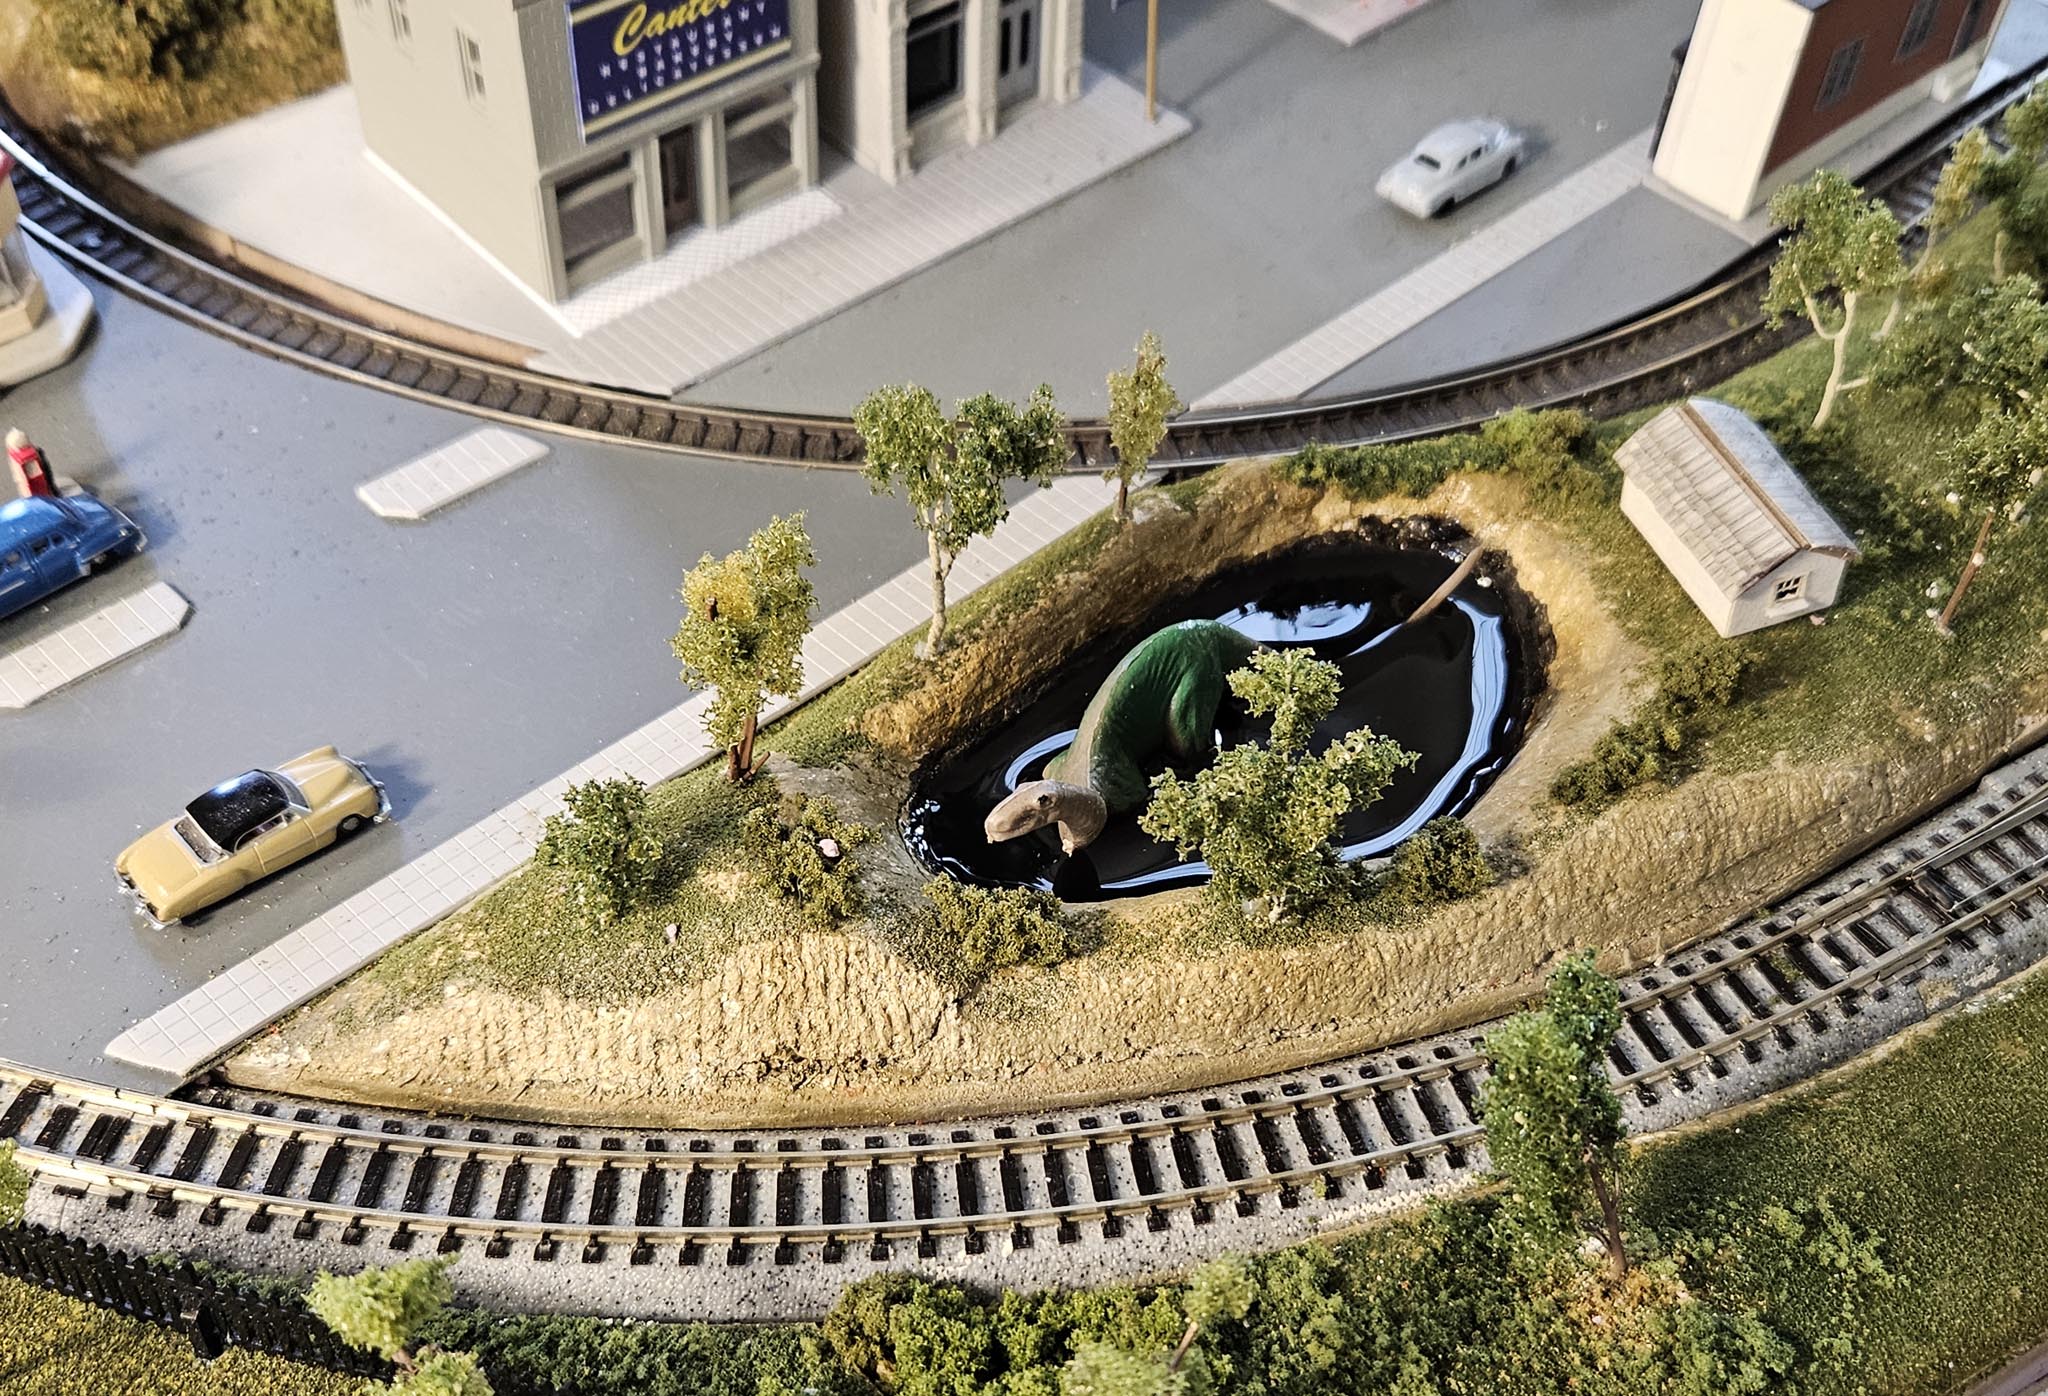
I'm going to include the La Brea Tar Pits, mainly because I found some little dinosaurs at the hobby store. This area will also be the home of a little park. As with the station area I decide to put this section on piece of MDF as a base, so the first thing I did was create a cardboard template of the track shape. Then I cut and placed the MDF. |
|
I gave the Mold-a-Scene mountains a thin, base layer of Earth Undercoat. Some foliage and perhaps some additional colors will come soon.
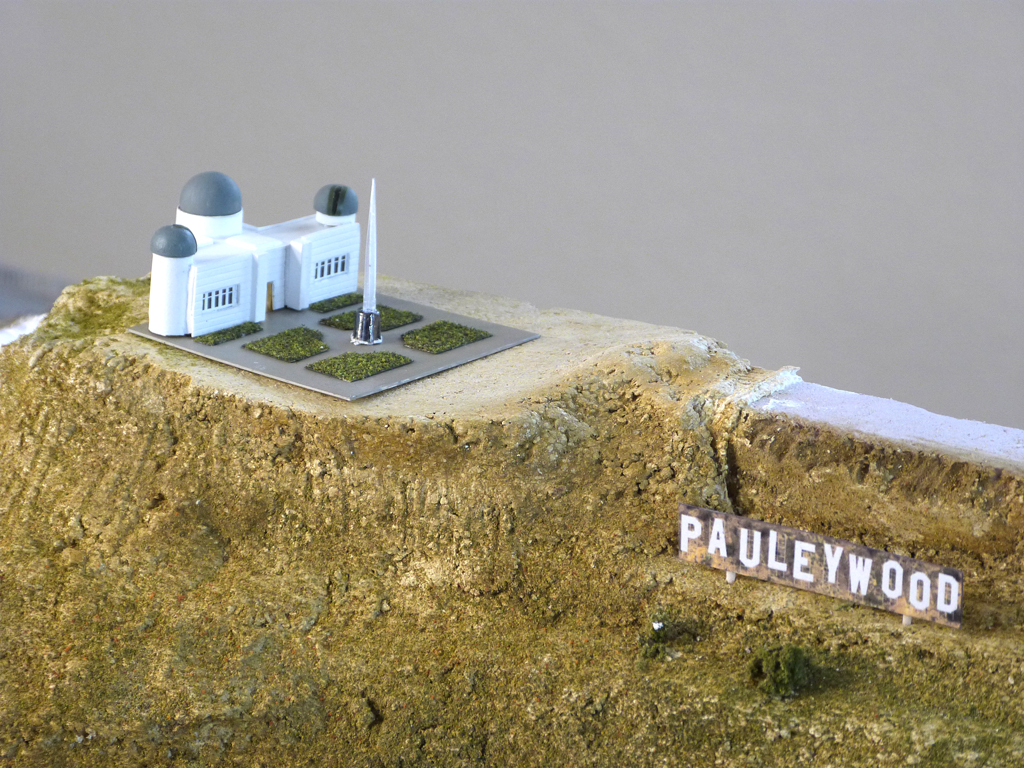
Hollywood Two icons that I had to include were the Griffith Observatory and the Hollywood sign. |
|
|
|
|
|
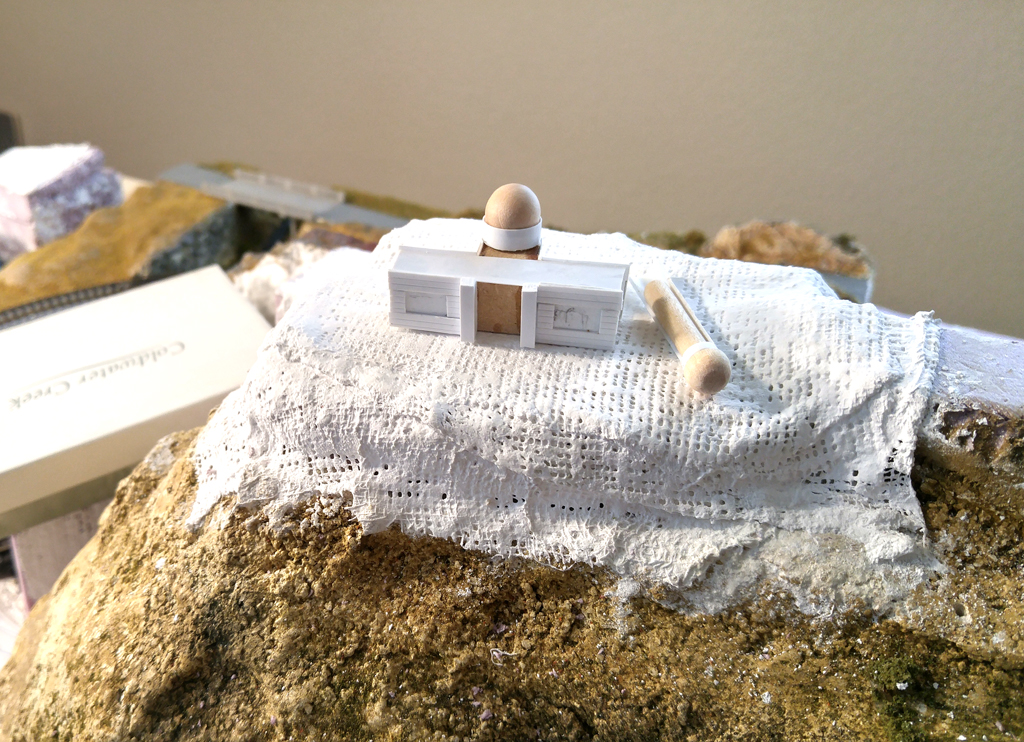
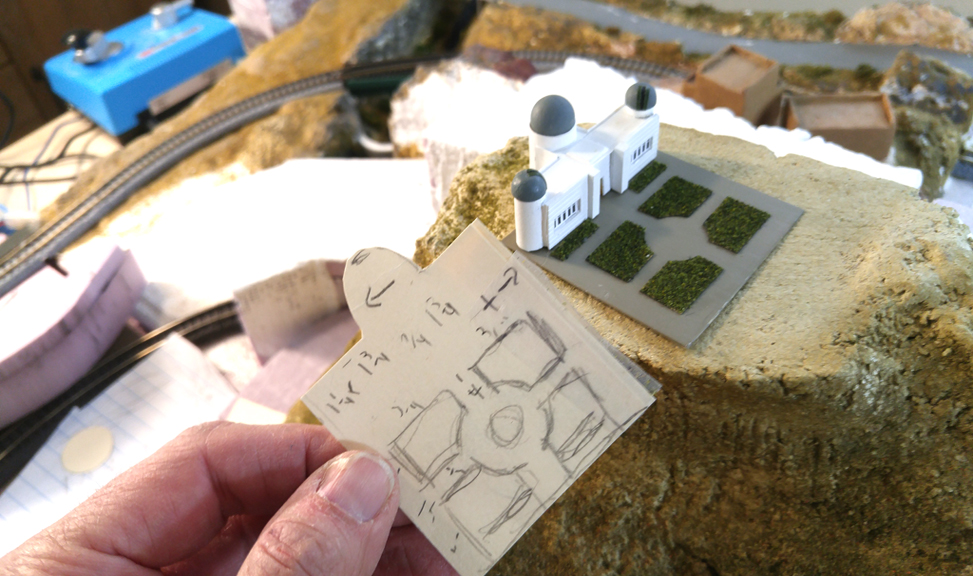
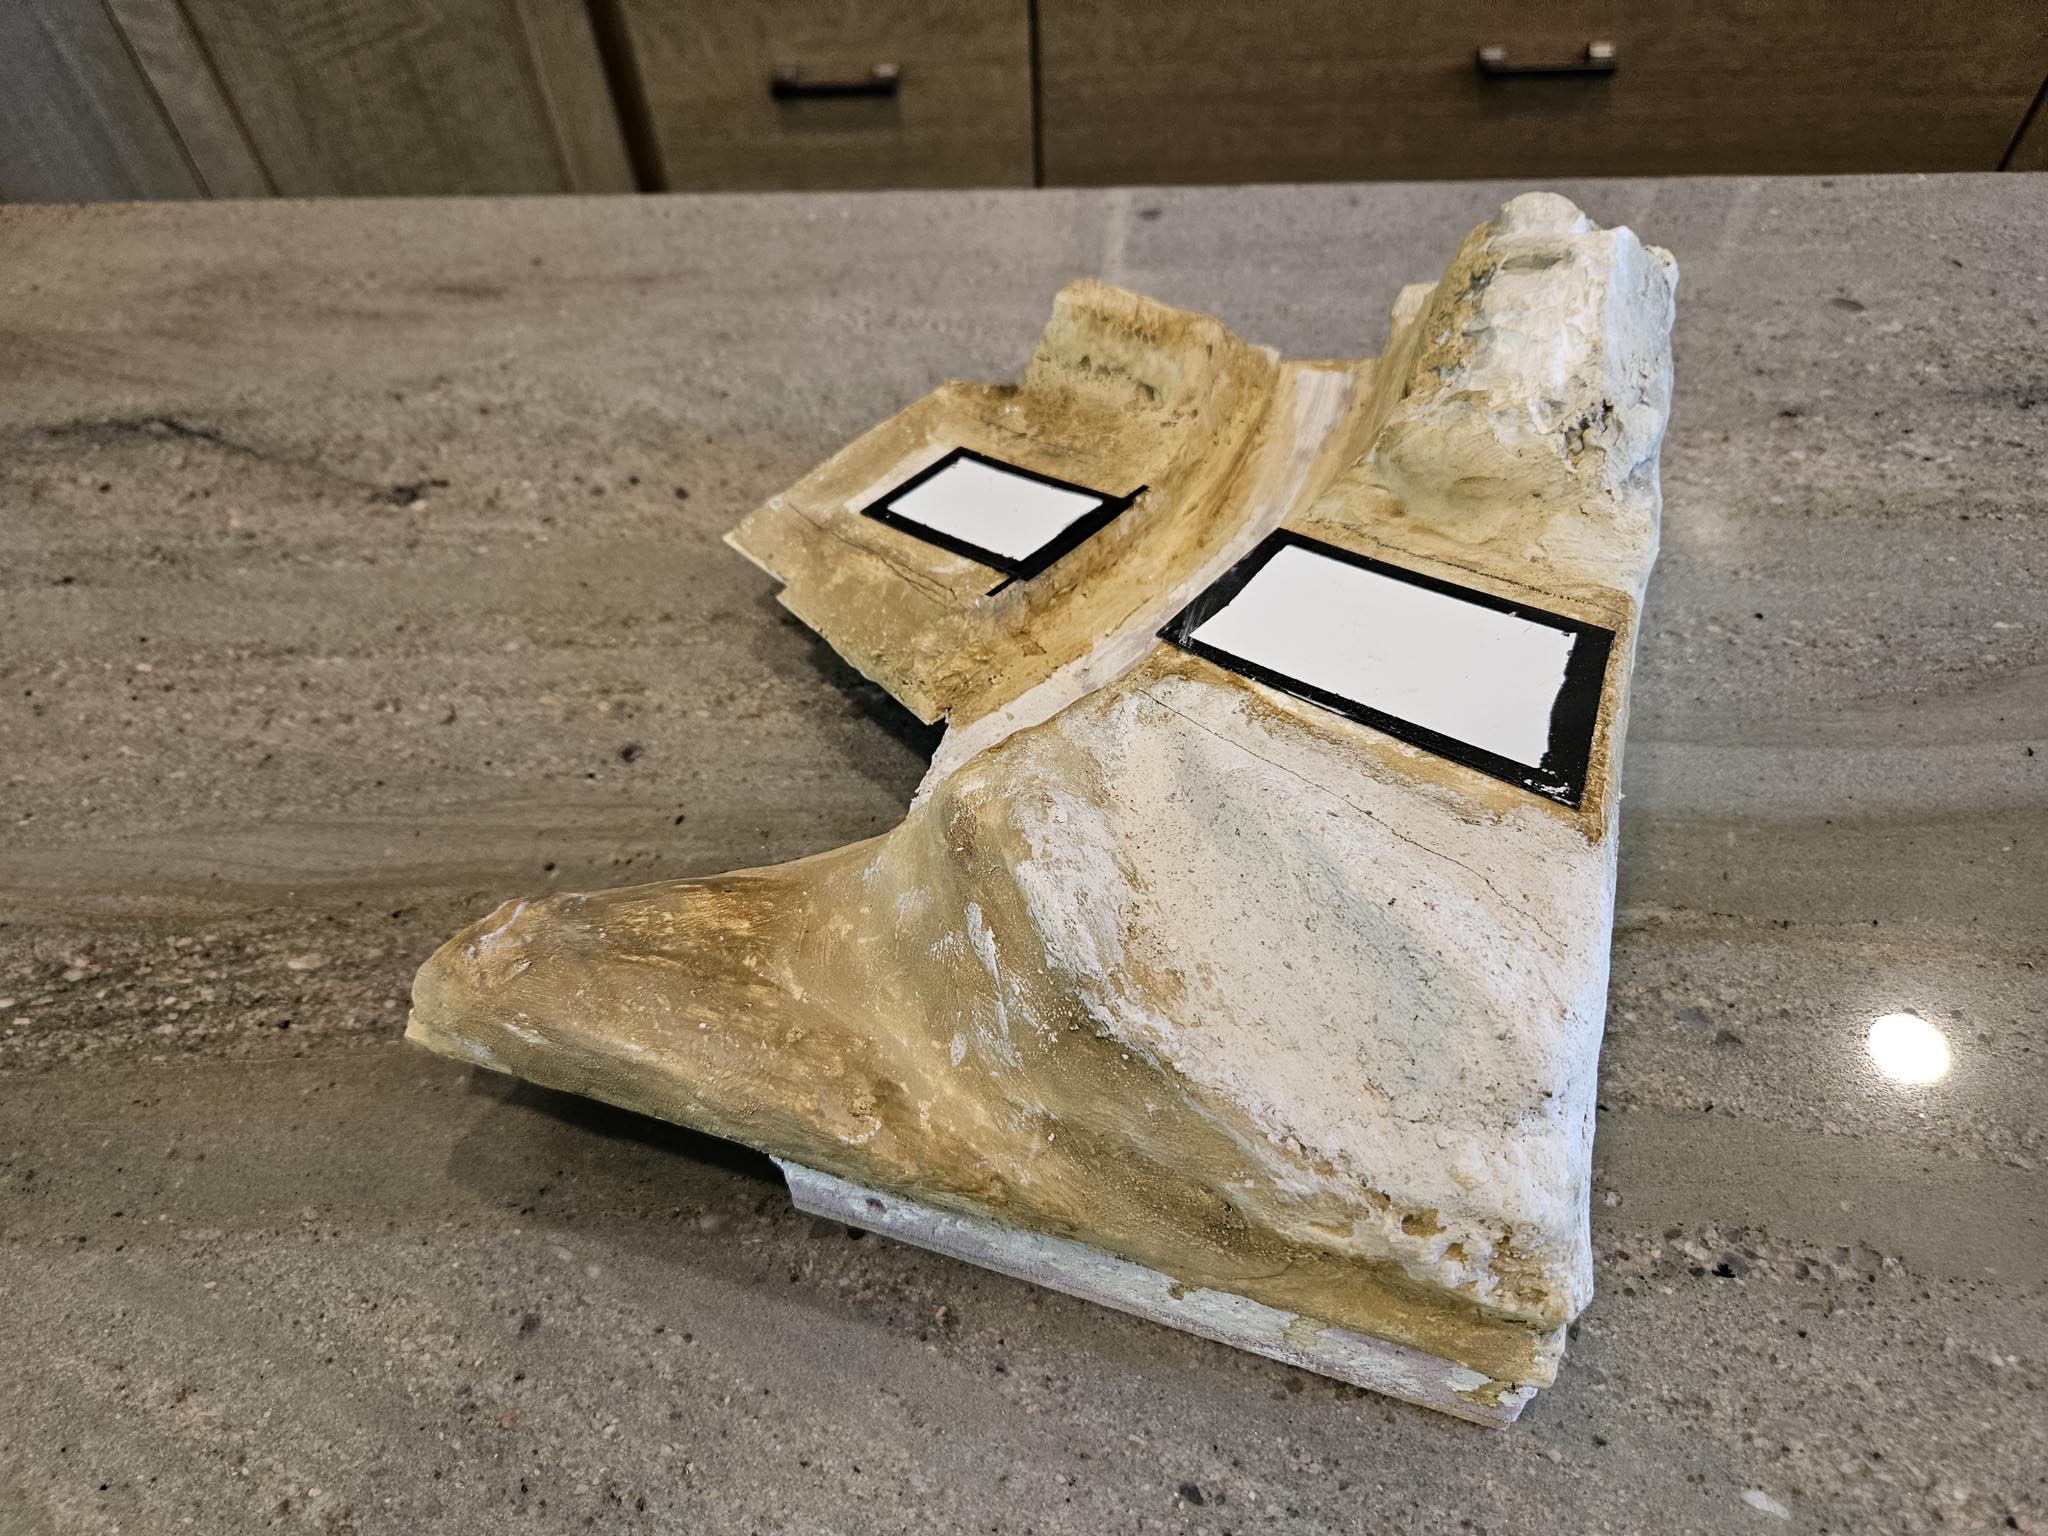
I had actually designed the Observatory about eight months ago knowing I would eventually build it - but not knowing when. (That turned out to be now.) It was constructed with a couple of small pieces of wood covered with styrene. I used styrene tubes and small wood spheres for the domes. The front windows are simply tiny black squares printed on white label material. Though the building is small (about 1"x1"x2") there are at least several dozen pieces - not to mention the ones I didn't use for various reasons. In researching the Hollywood sign, I came a sign generator and couldn't resist the opportunity to name the landmark after myself. When I added a little landscaping material and color to the mountain, I tried to match the print so the letters would appear to be separate pieces.
As you probably know by now, I enjoy dress rehearsals and evaluations, especially when I'm about to move on to another area. I did a bit more planning on the canyon road as well as what will be an orange grove. |
|
|
|
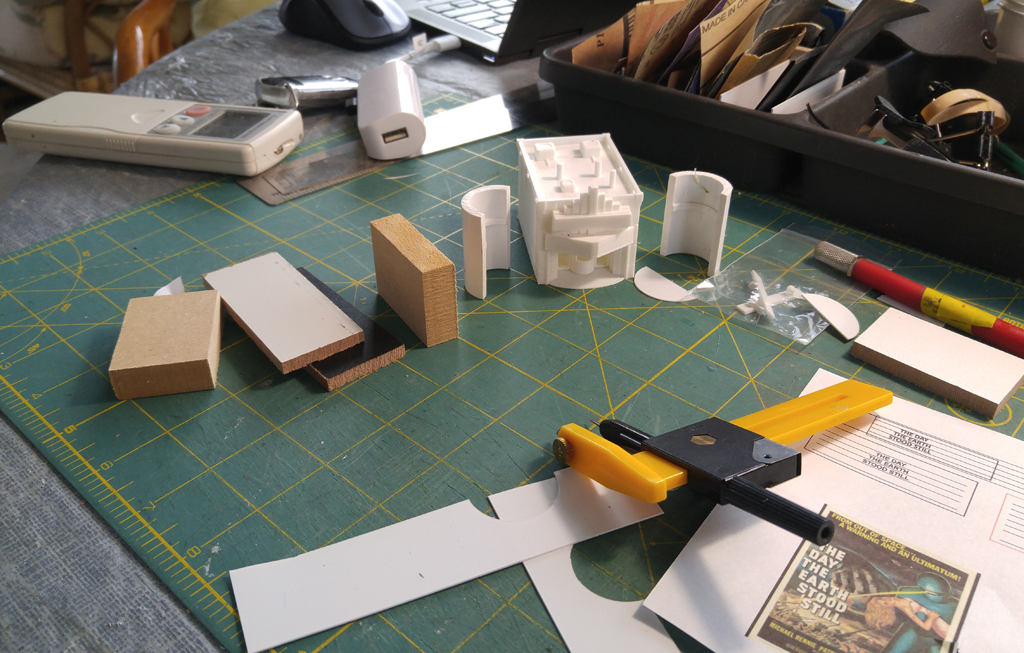
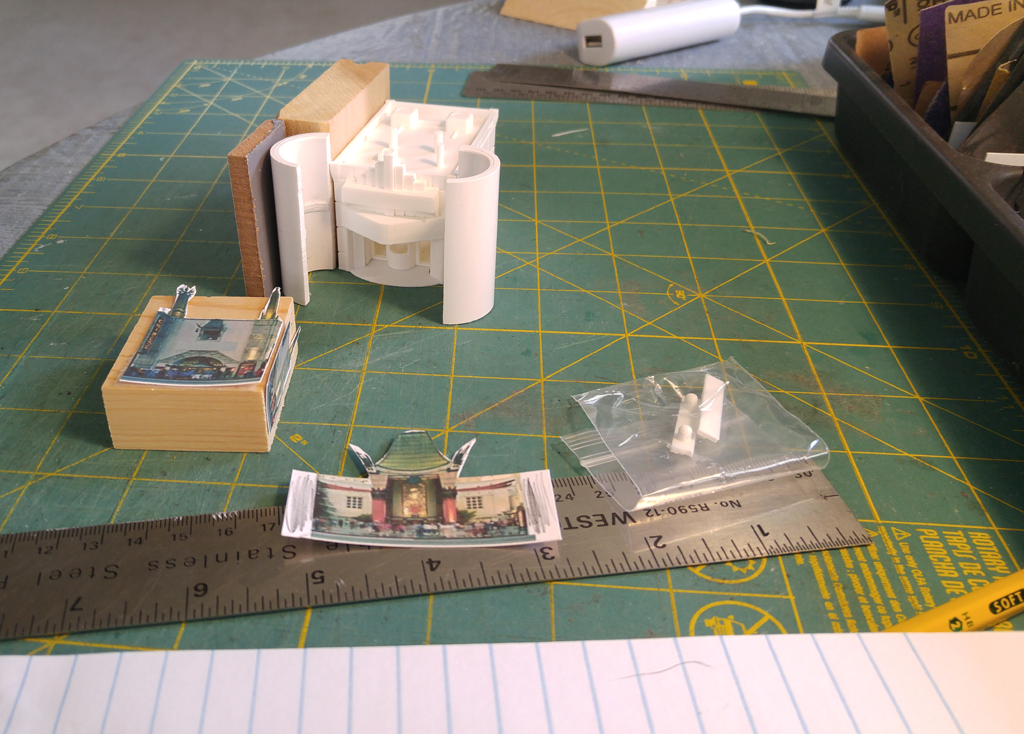
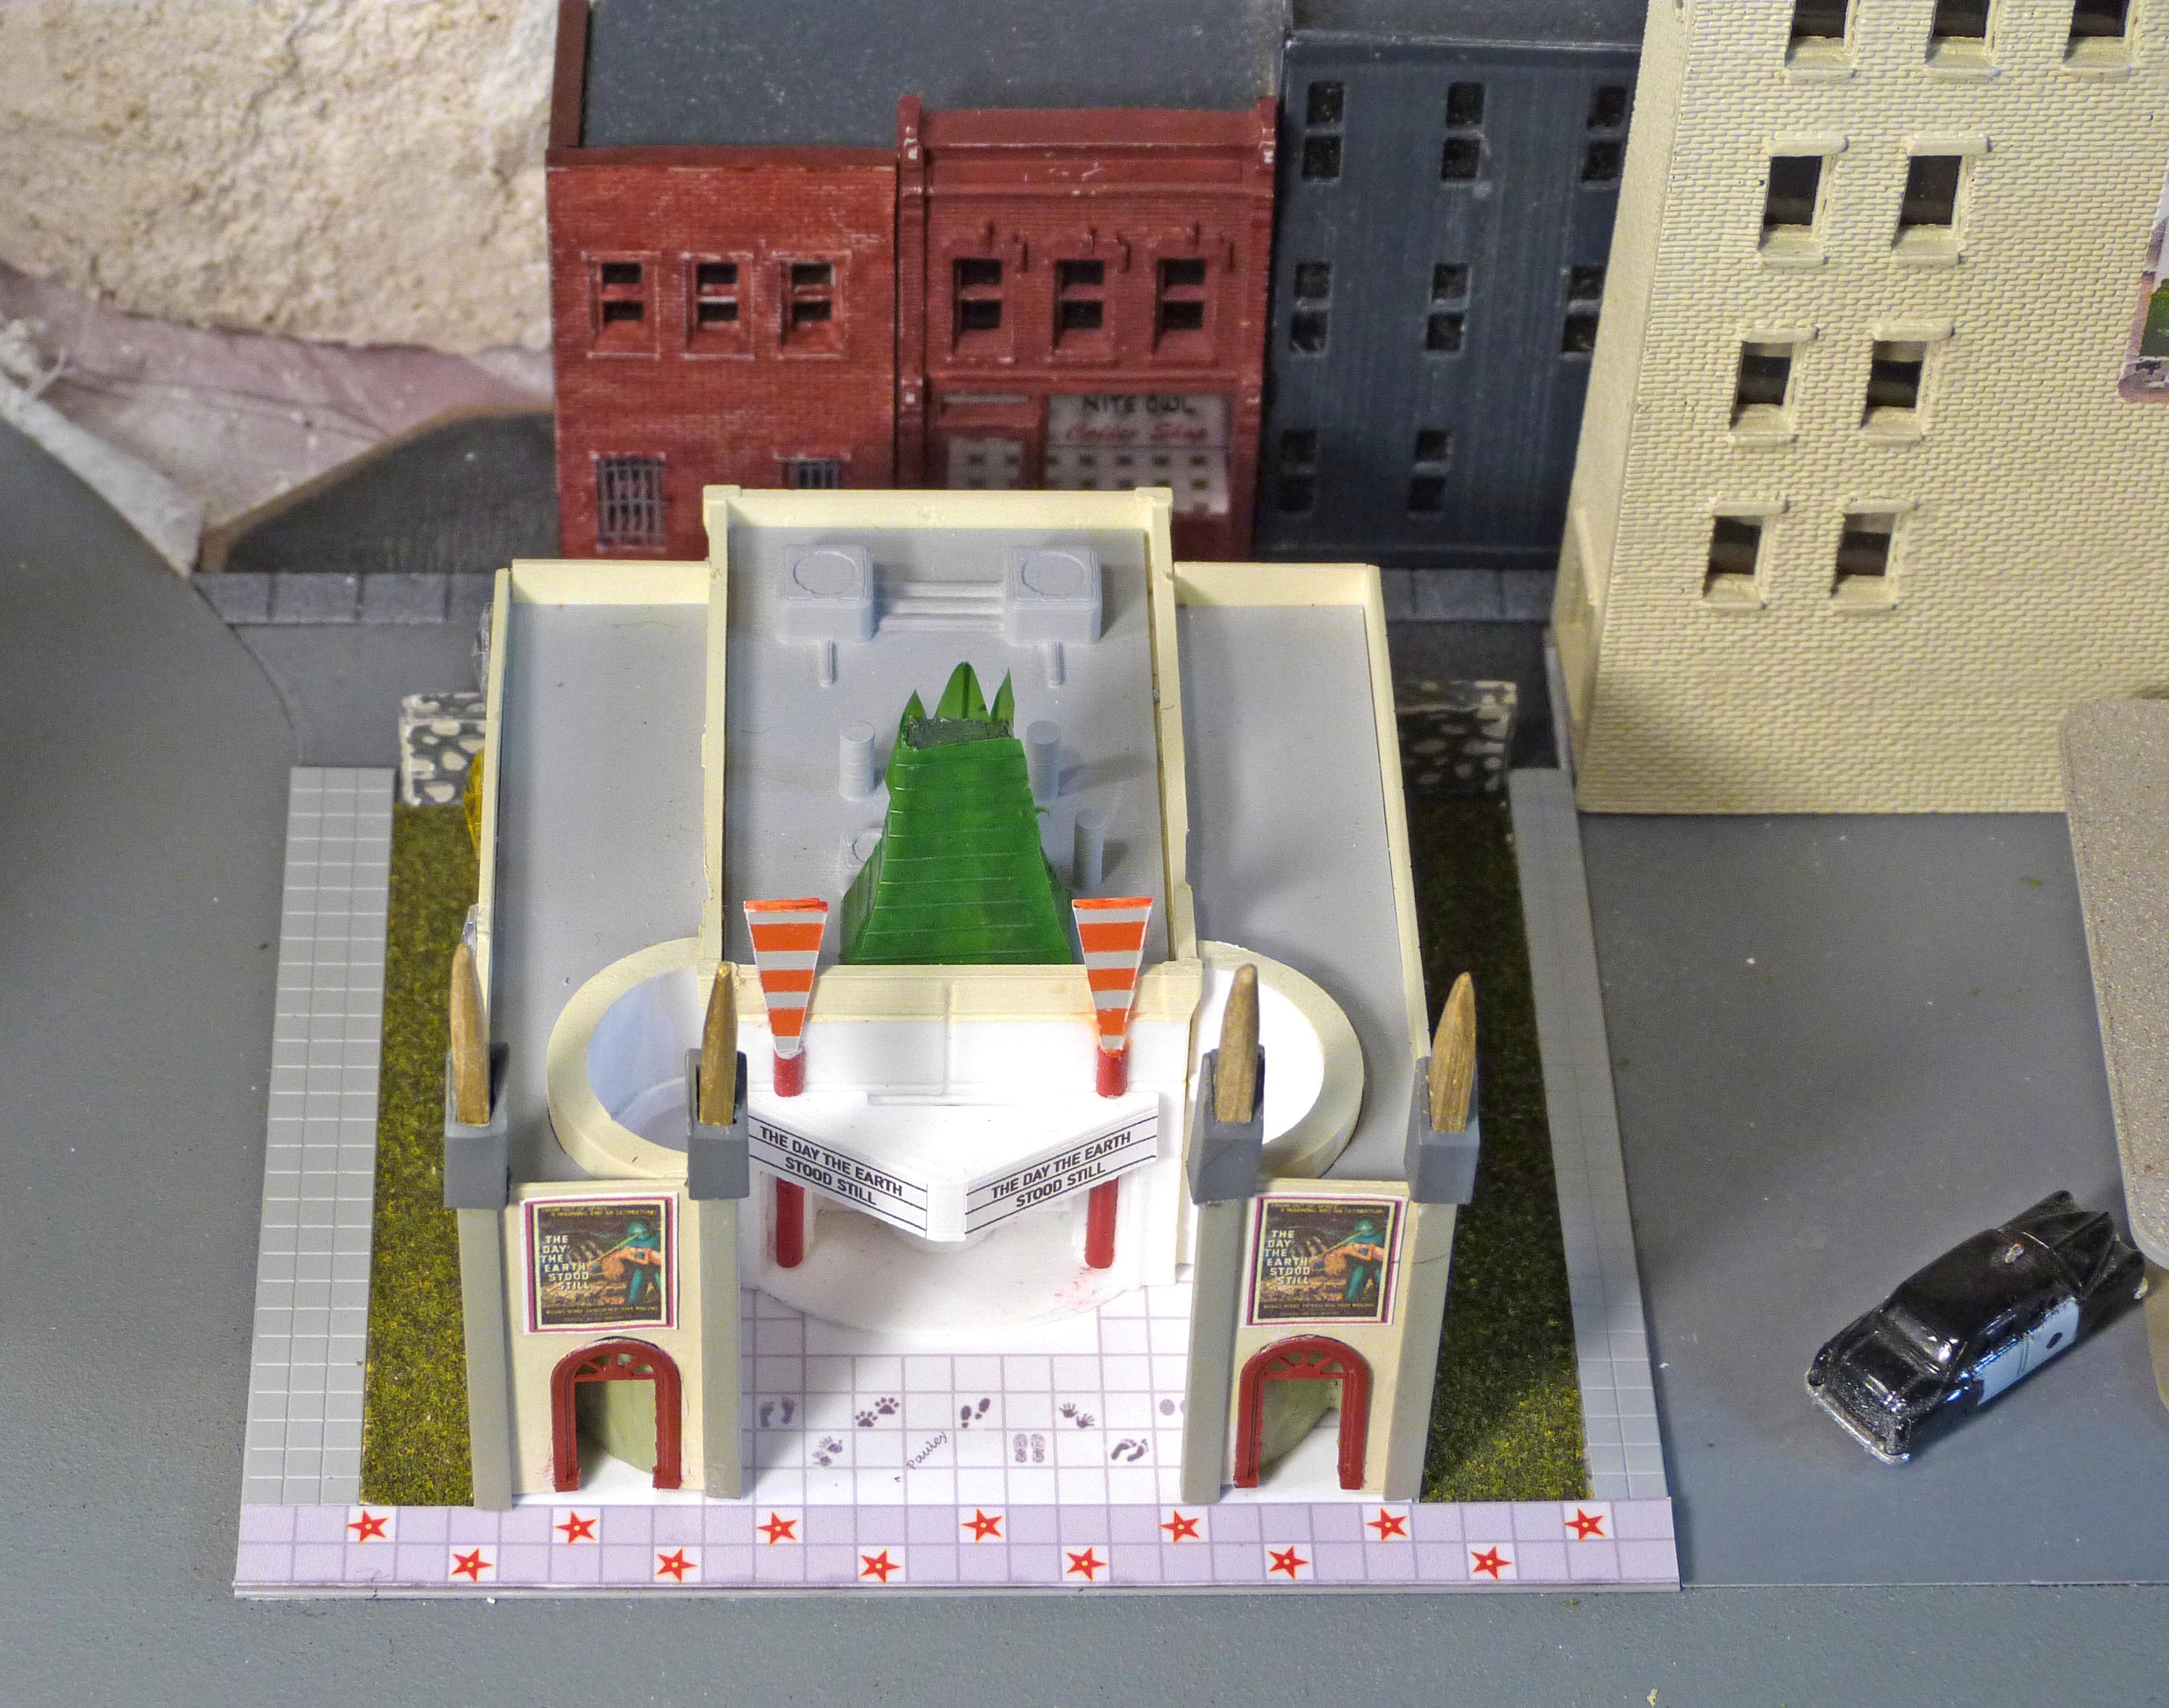
Grauman's Chinese Theater Now simply known as the Chinese Theater, Grauman's is very a famous Hollywood landmark. The Super Chief was known as the "Train of the Stars" because so many Hollywood celebrities were frequent passengers. But the building's complexity left me puzzled for a long time as to how I was going to make it. Fortunately, when working on the Chicago portion of the layout, I purchased a small restaurant from a company called Small Town 3d Models. I saw that they also had a small movie theater, and although it didn't really look like the Chinese theater, I was able to scratch build and add side sections (using wood, styrene and even a piece of PVC sprinkler pipe). Then I added some decorative elements using photos I found on-line as well as some signage. I'm very pleased with the results, and although it is not a copy of the Chinese Theater, anyone who has seen a picture should recognize it. |
|
|
|
|
|
In the original “The Day the Earth Stood Still” the robot Gort was played by a seven-foot-plus man named Lock Martin. He was “discovered” while he was a doorman at Grauman’s Chinese Theatre. A few years later (and after Mr. Martin no longer worked at the theater) the movie was shown there. I just had to include a cardboard cutout of Gort – by the front doors, of course.
|
|
|
|
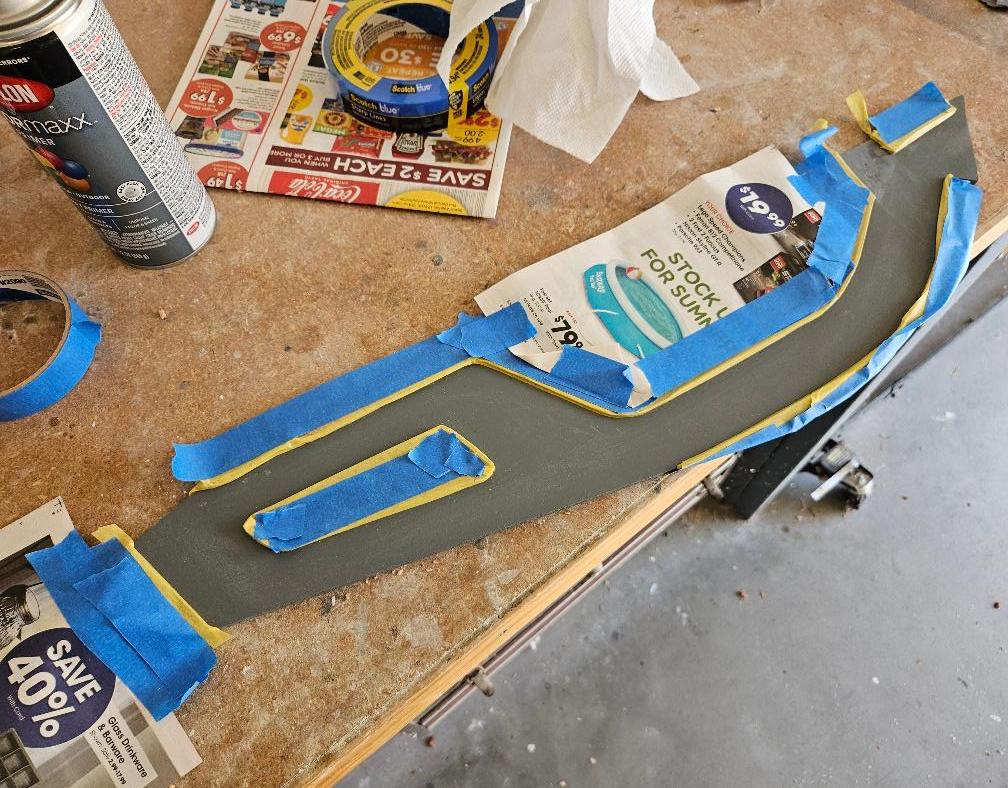
I reached a point where I needed to have streets in place so what I could move on to sidewalk and building placement. (Anyone in or near Los Angeles probably felt the ground shaking when I moved the LA section to the garage for road construction.)
|
|
After some putty, sanding, lots of masking and a spray paint job (I forgot to take picures of that process) I'm very happy with the results.
The Nite Owl While working on this section of Los Angeles, I happened to watch a couple of scenes from LA Confidential, 1997. It is a great movie about the “seedier” side of LA in the early 50’s, and since the plot includes a coffee shop called the Nite Owl, I decided to include it. By cutting the mountain down a bit (I always knew this was going to be likely) I made some space behind the theater to add a small street, and I built a row of dark, gloomy looking buildings which included the Nite Owl. I recreated the floor, added some furniture, signage and added a light. (This isn’t the first time I’ve watched a movie in slow motion to get detailed pictures.) |
|
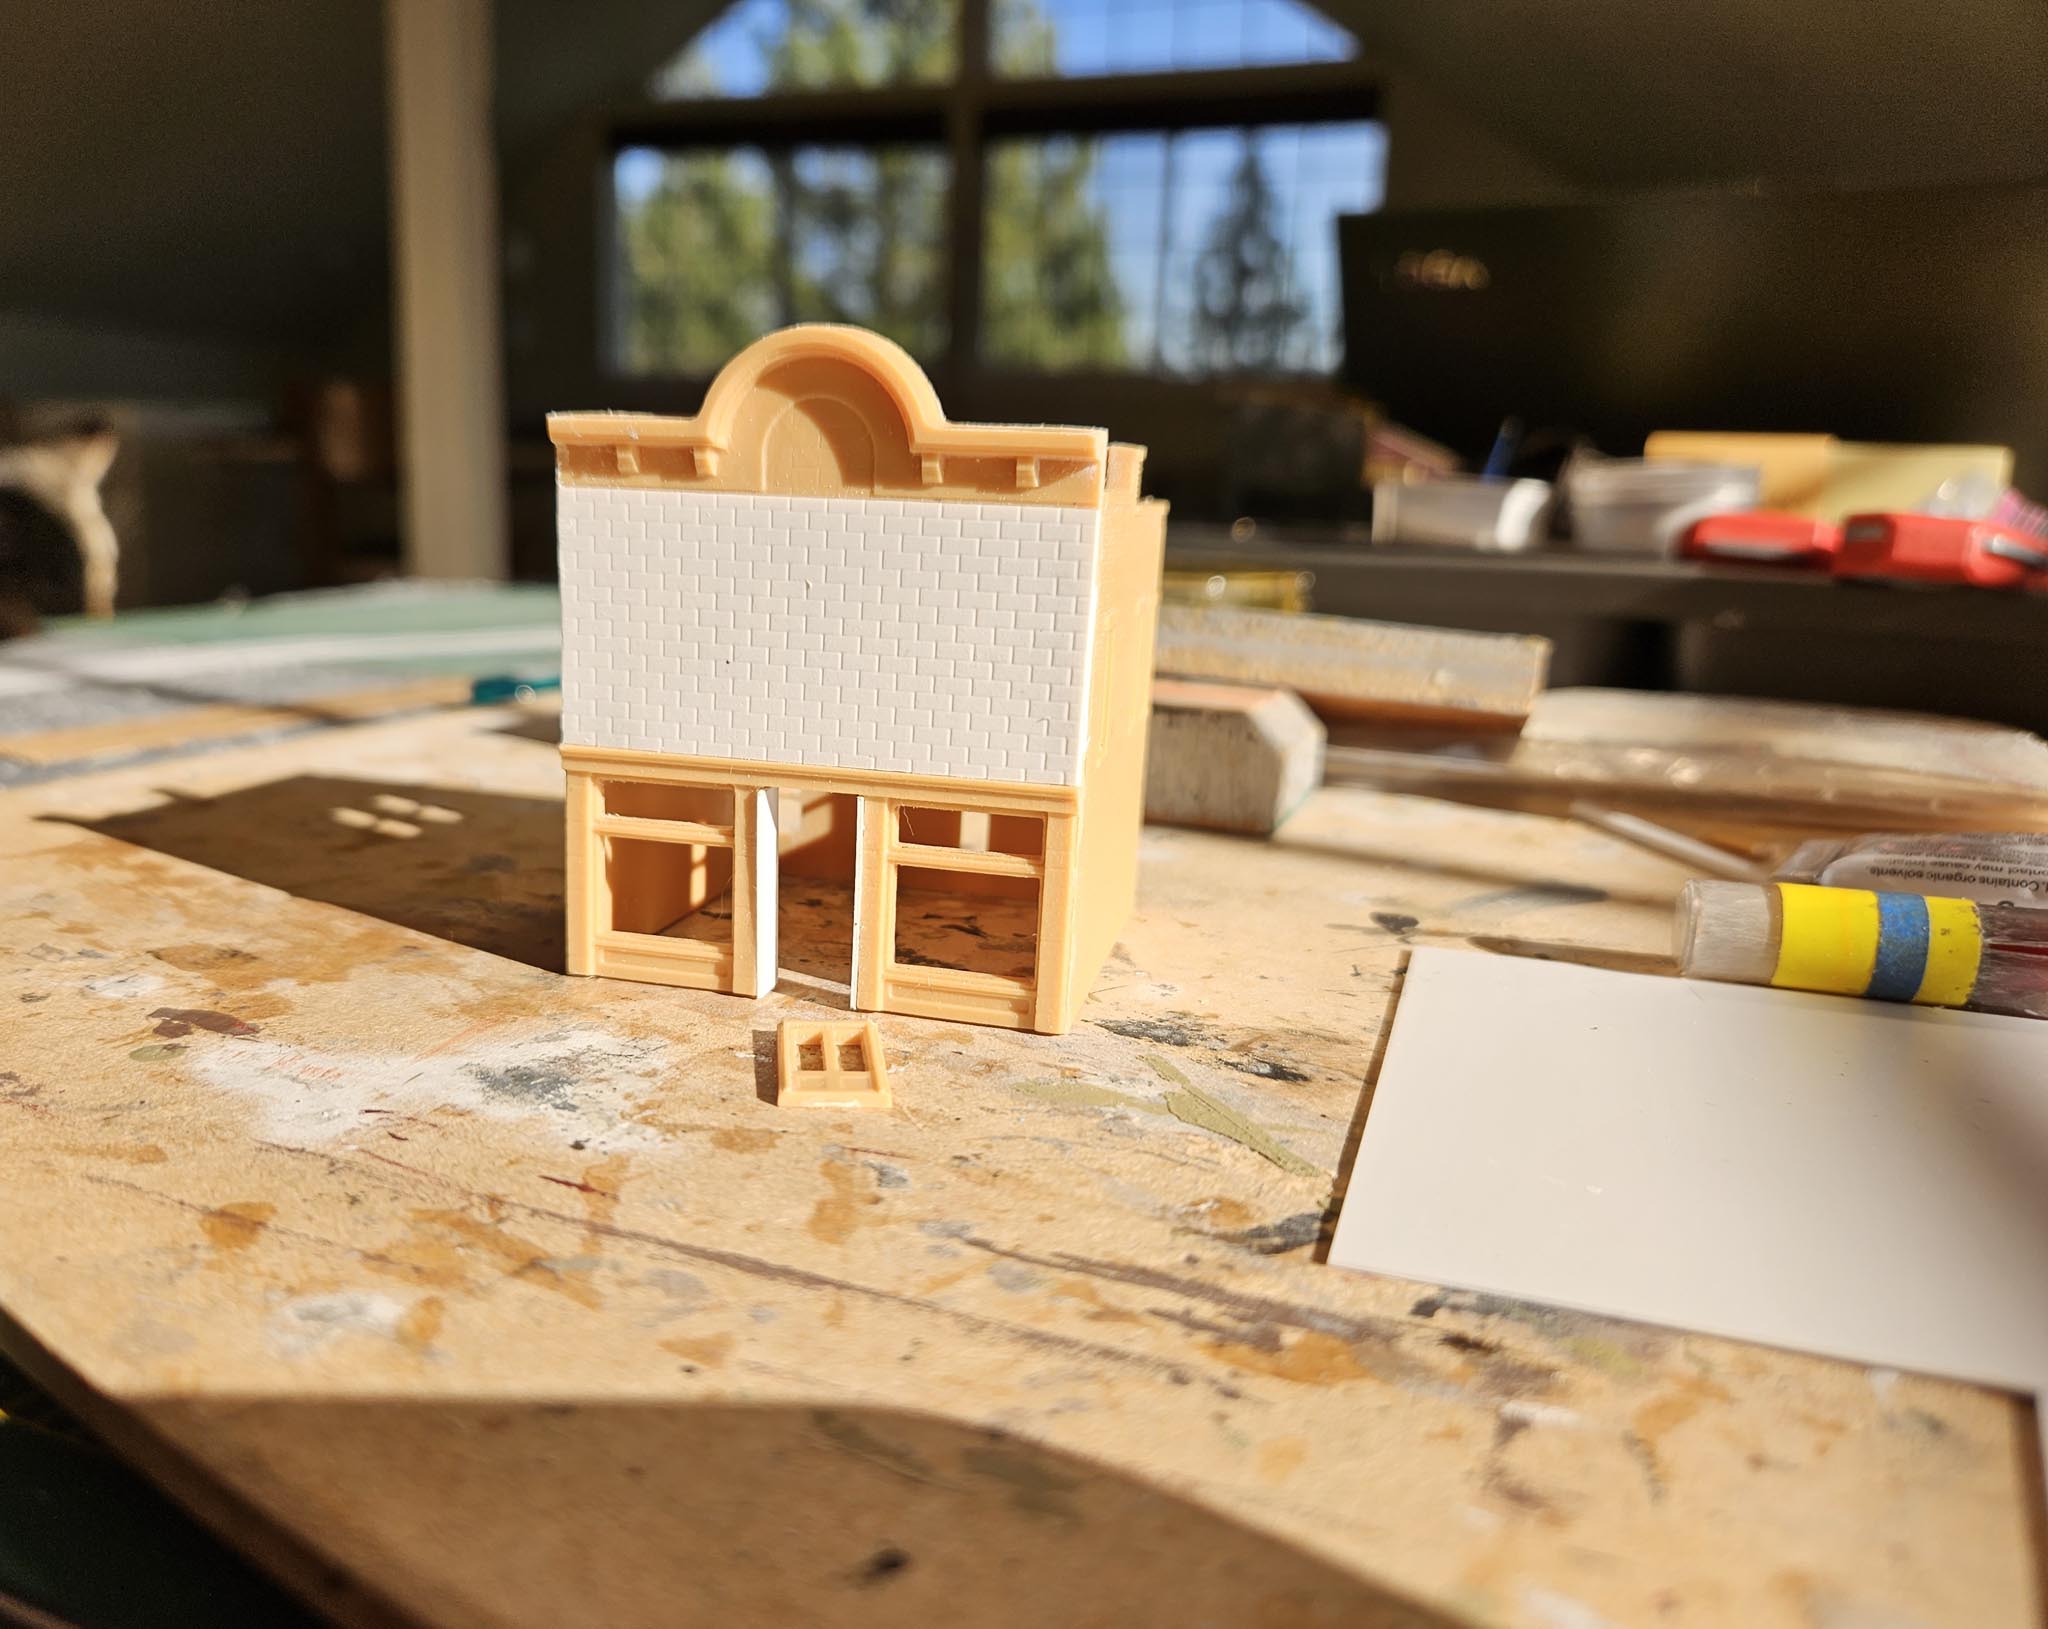
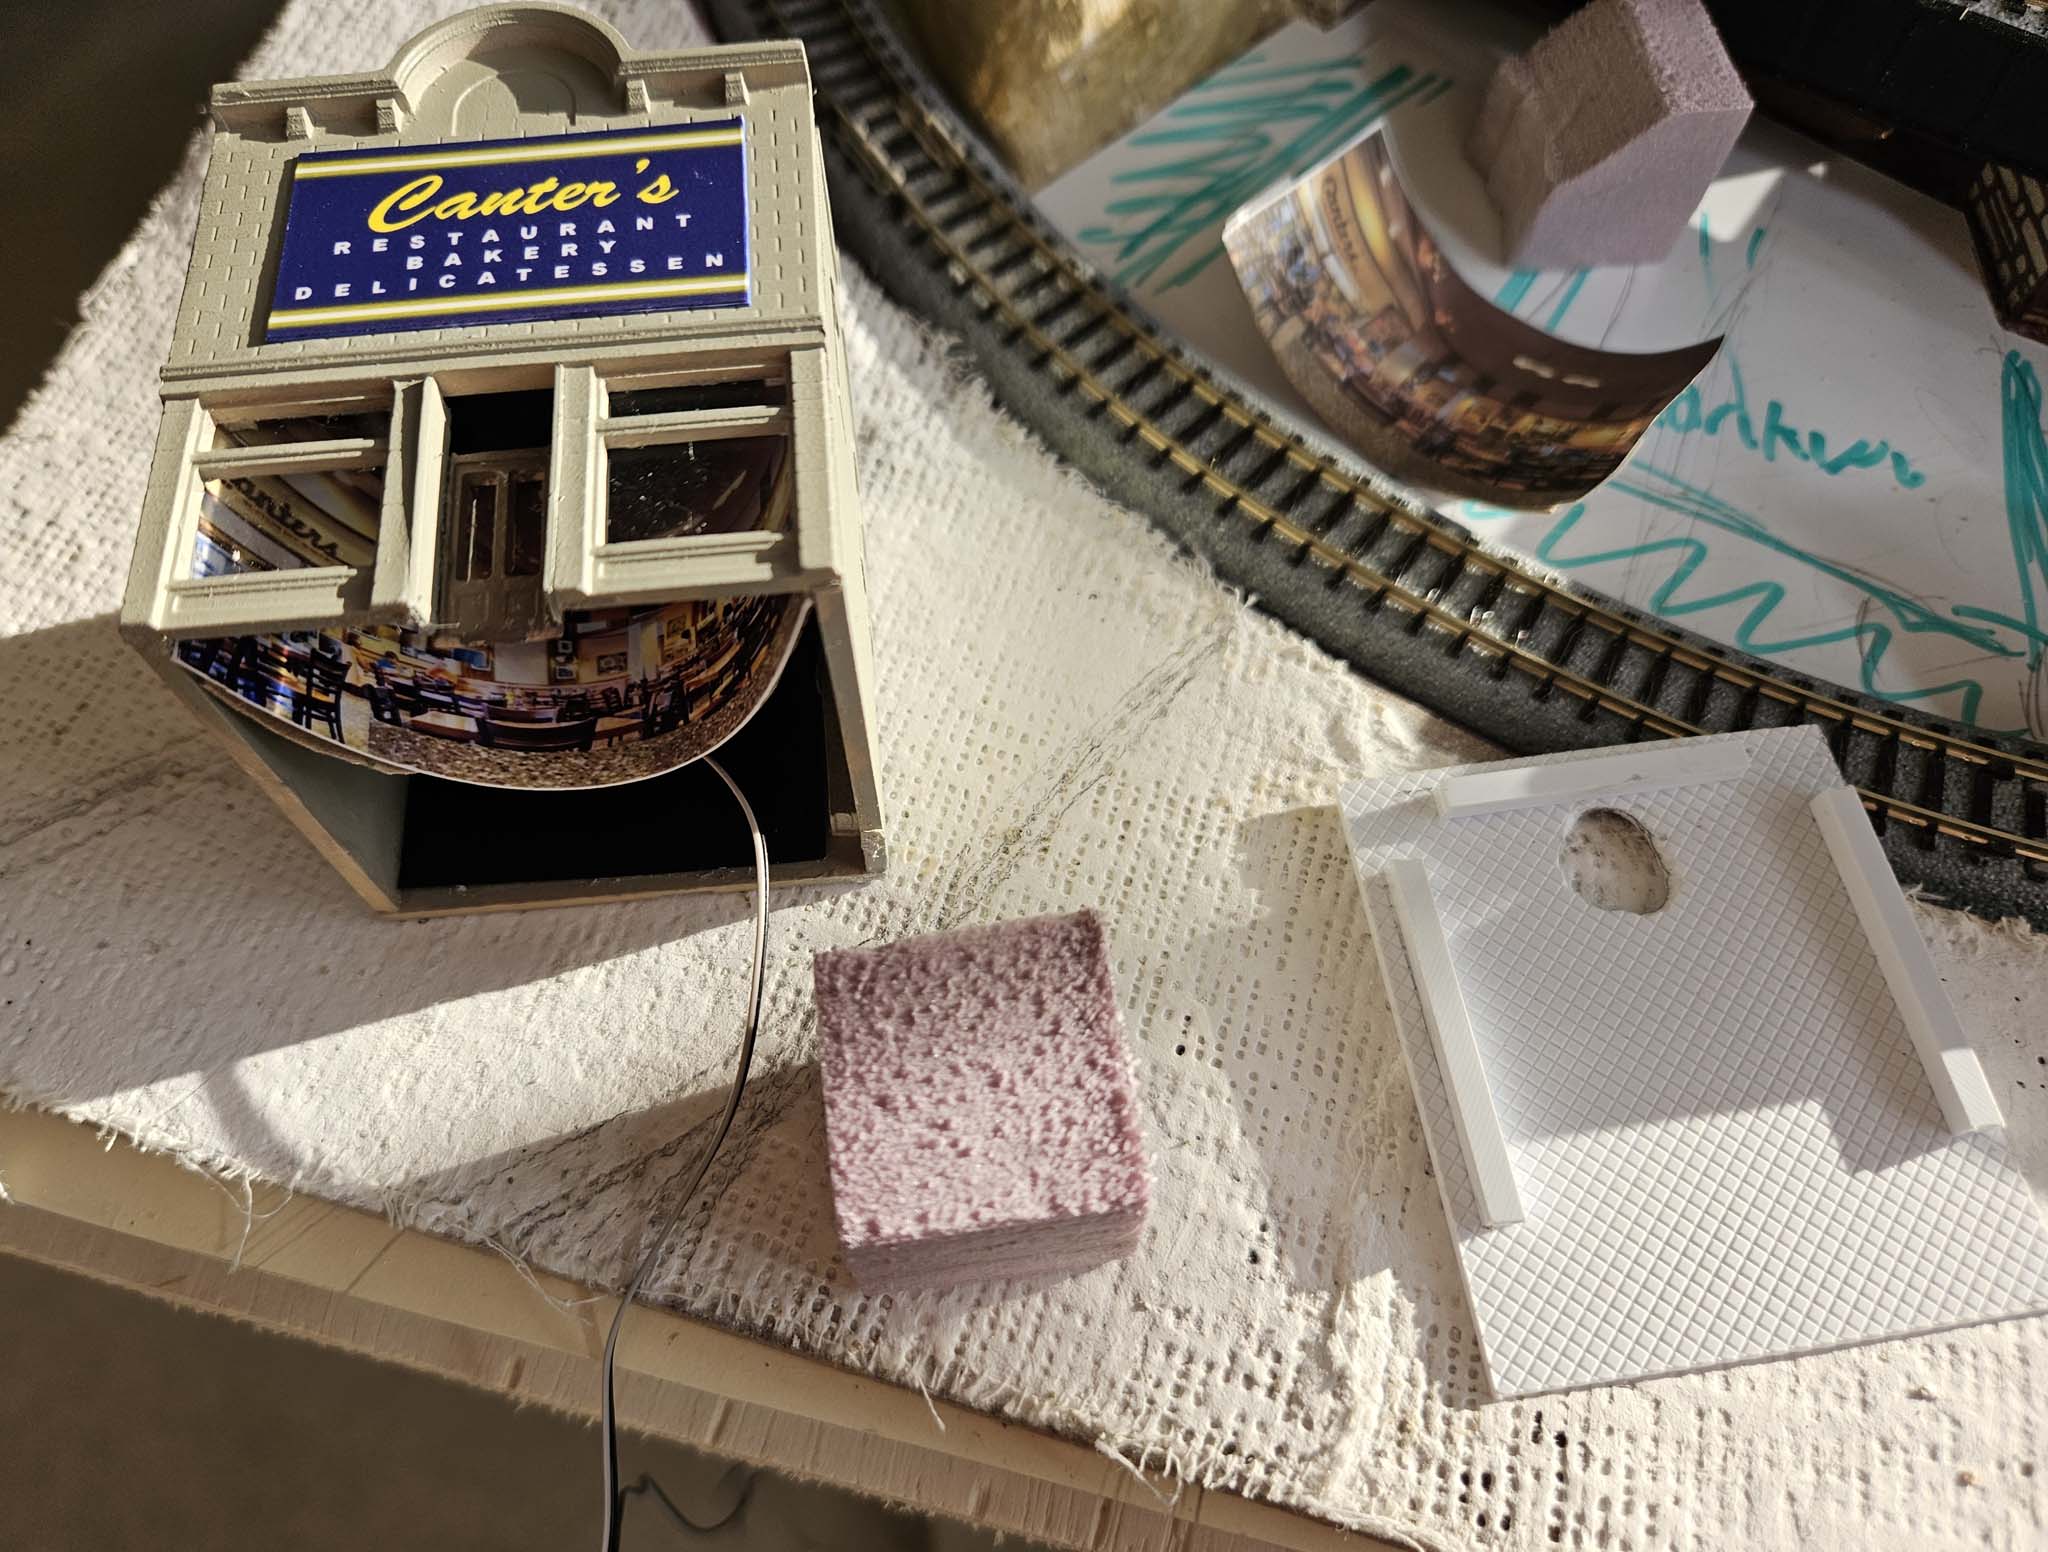
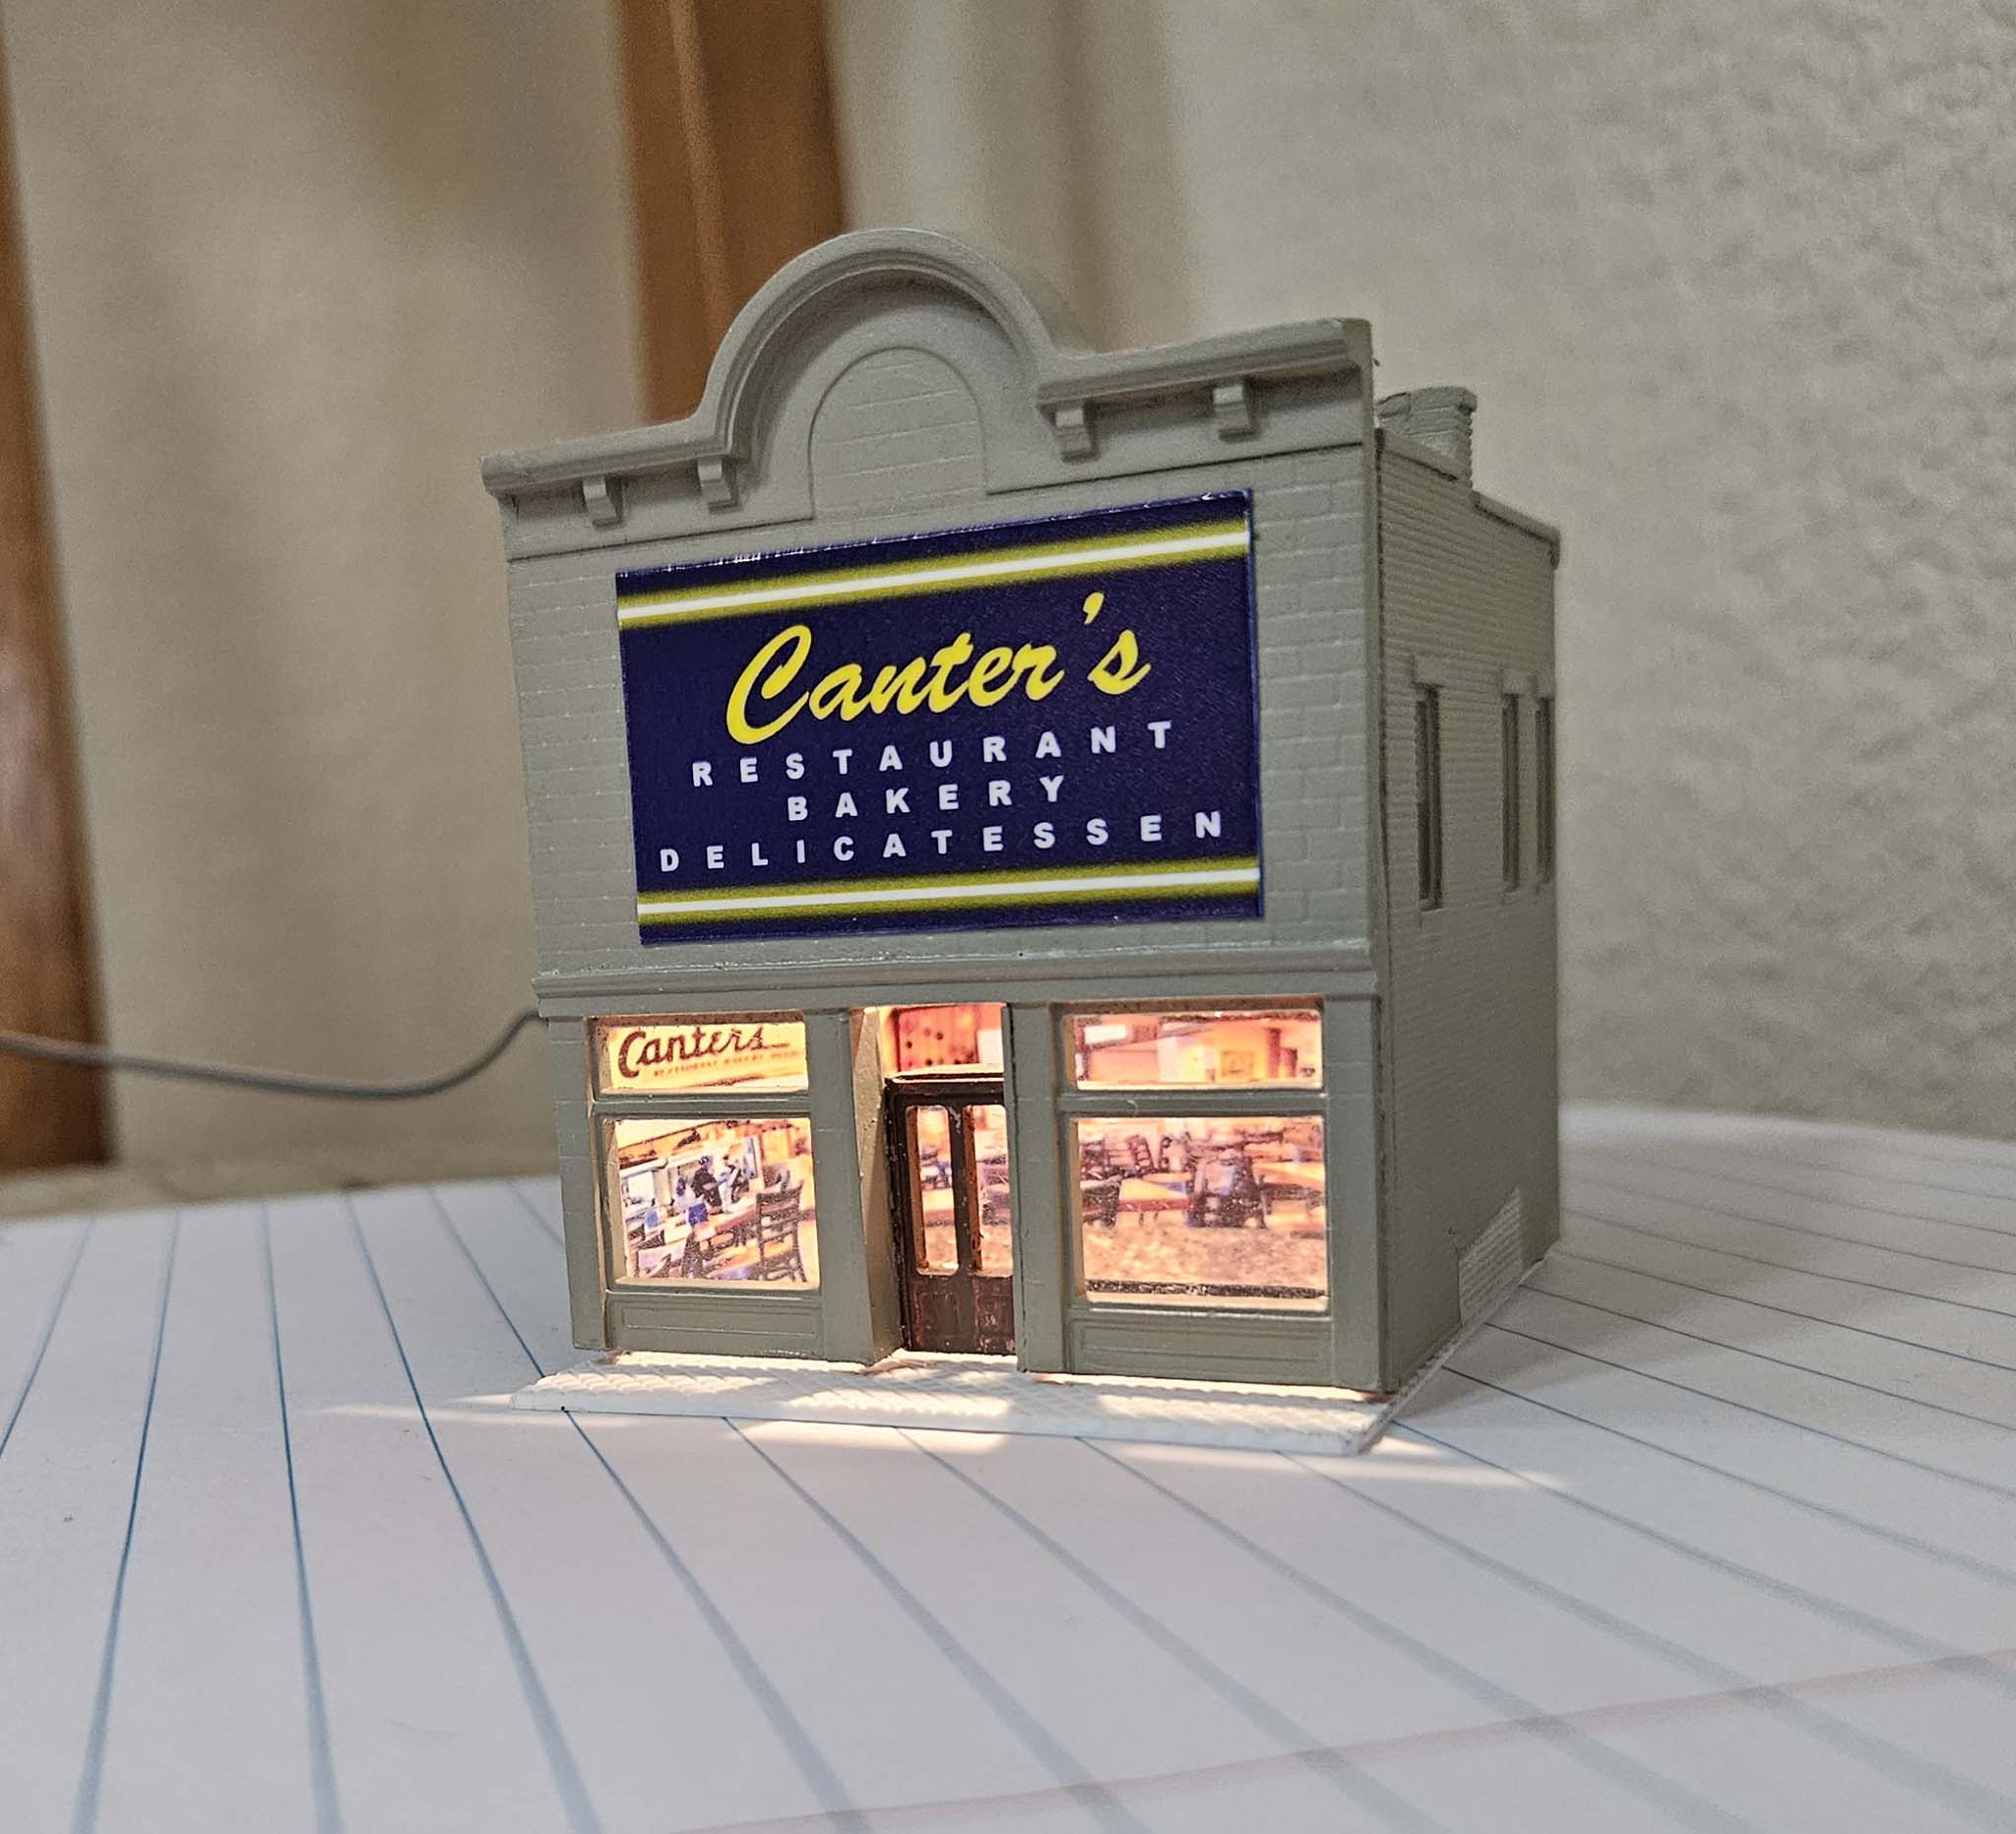
Cantor’s Cantor’s Delicatessen is a Los Angeles landmark, and I found a good spot for it next to the Santa Fe building. I had purchased a small kit at a swap meet a while back, and it was perfect for a little restaurant. I added a photo for the interior, and since Canter’s is open 24/7, it is also lit.
|
|
|
|
|
|
Any depiction of Hollywood must include the Walk of Fame. Using Microsoft Excel, I created the sidewalks in front of the theater including stars as well as the famous foot- and hand-prints in the cement. I also added sidewalks on the block under Cantor’s and the Santa Fe building. Another Rehearsal After I completed the above, I decided to give the entire layout a dress rehearsal to pause and evaluate. It’s a moment when I can take a little break, plan the next step(s), and, to be honest, take a moment to appreciate what I’ve accomplished so far. Sometimes, when I’ve been working on small details for a long period, it feels like I haven’t done much. But seeing a section of the layout come together after working on lots of “little” pieces, is the reward. |
|
|
|
|
|
By the way, the gas station and donut shop were kits created way back when I was planning a shelf layout (see page 7 of Layout Details). I will add the gas pumps and signage later. Jumping ahead a couple of weeks, a little more progress has been made on the edge of the Los Angeles layout. It consists of three small sections which will include some orange groves, trees and Travel Town, a small railroad museum and train ride located inside of Griffith Park. |
|
|
|
My next step was to address the electrical requirements of the layout by connecting all the track switches and lighting wires underneath the table. (This is documented on page 10 of Layout Details.)
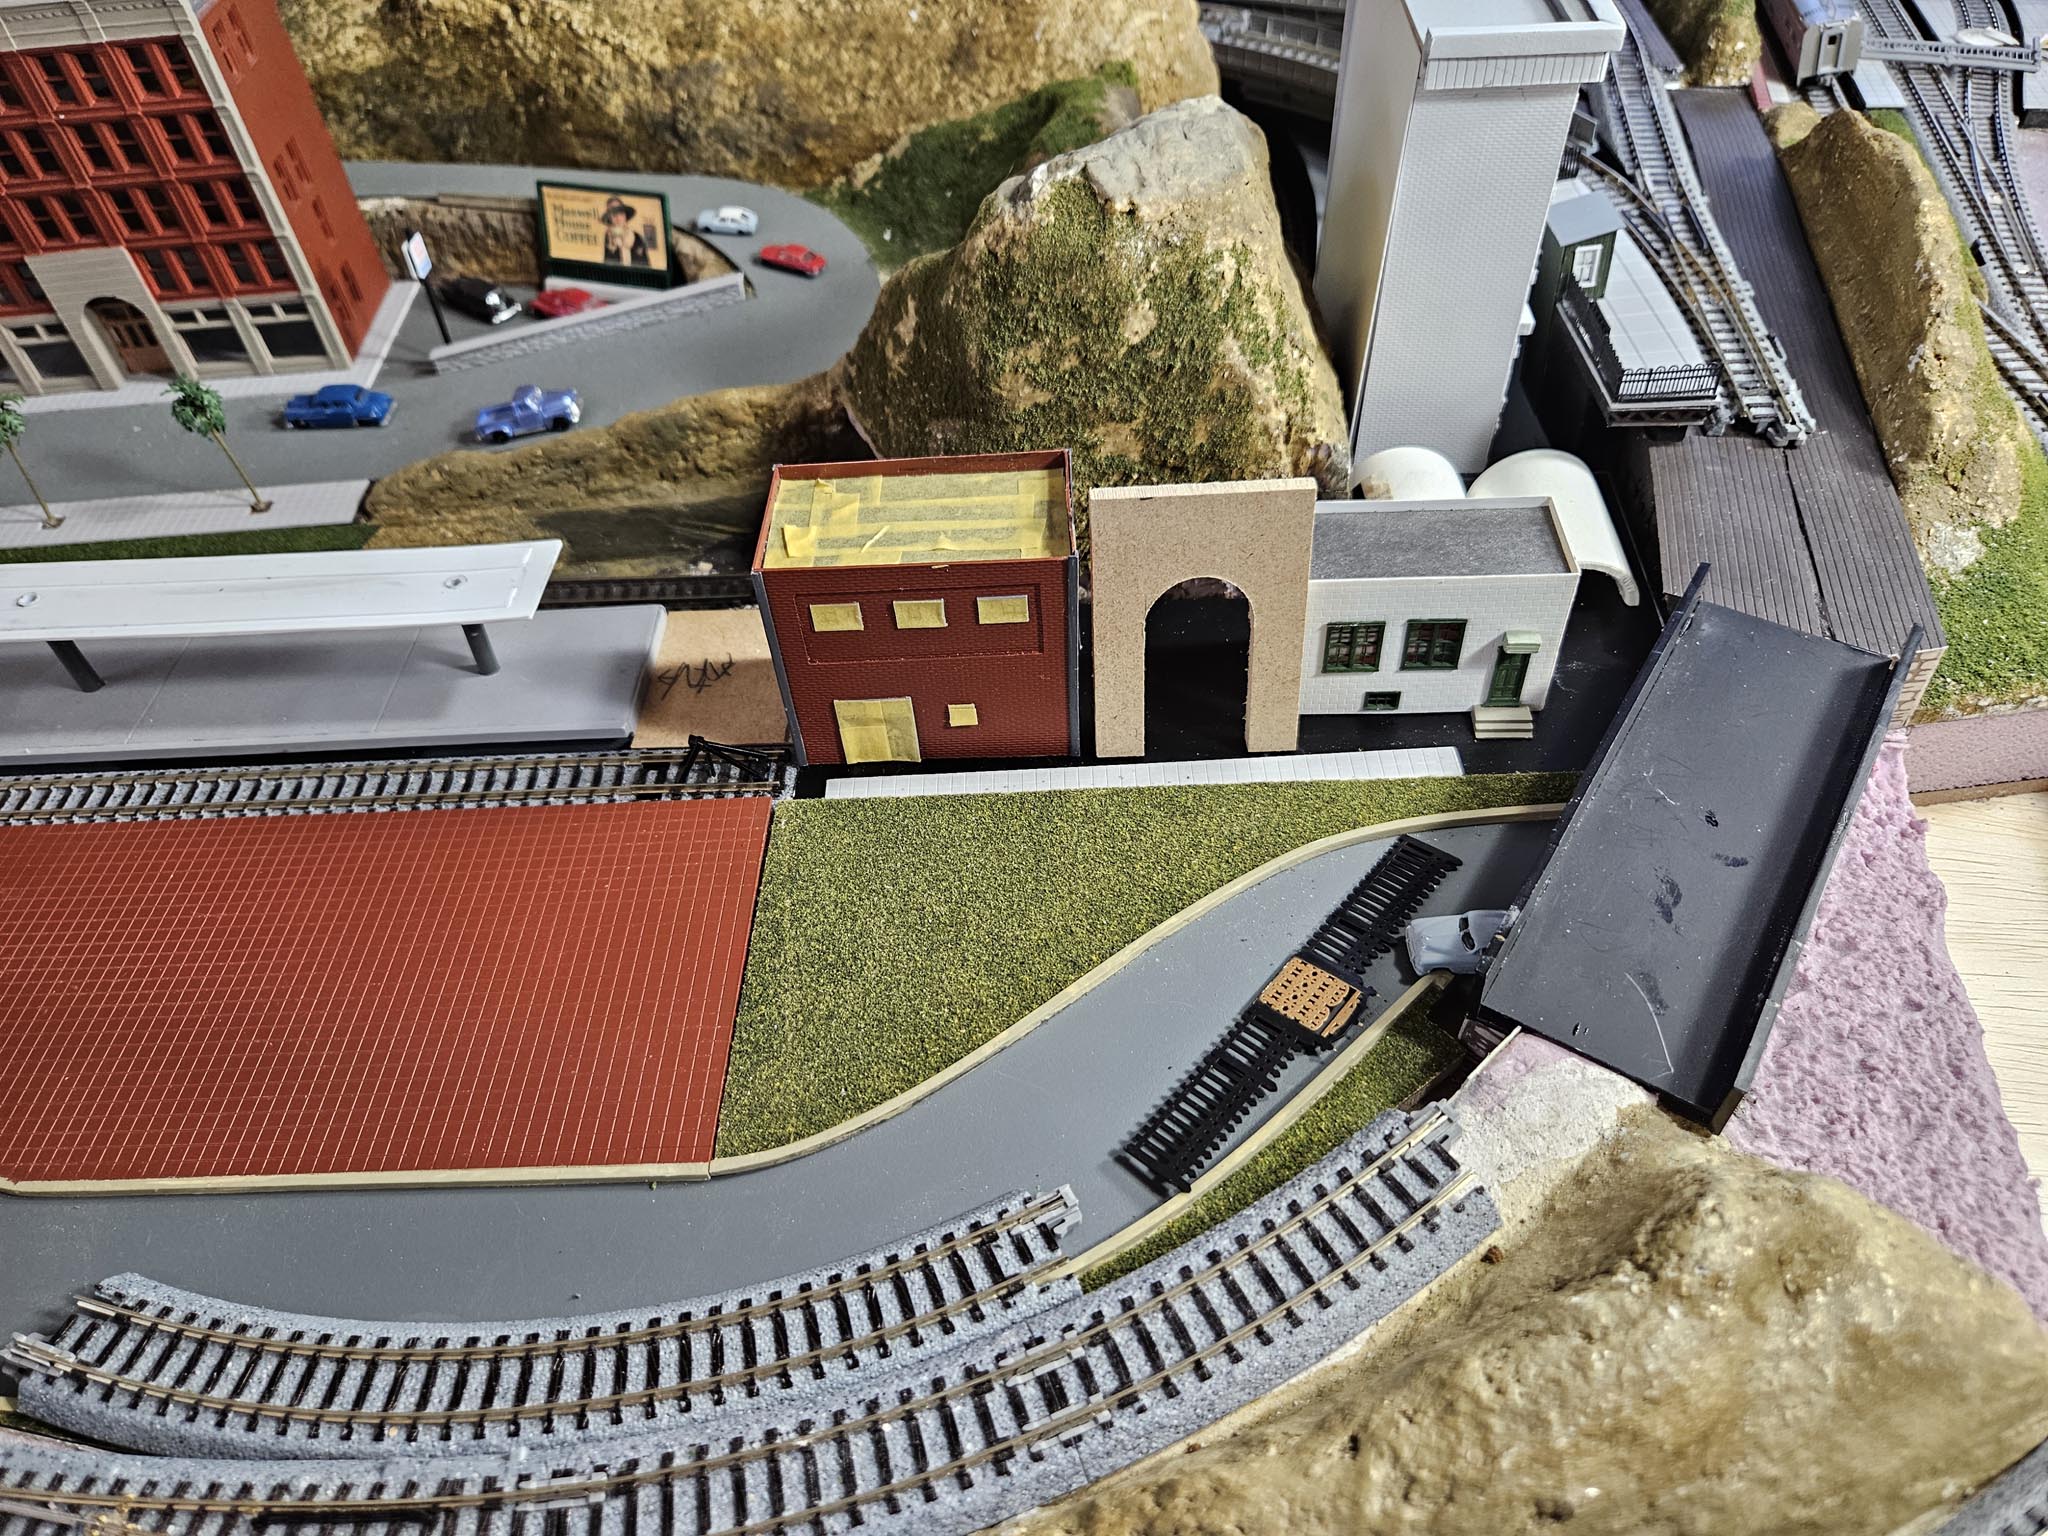
I’ve been busy with other things for the last few weeks, not giving my layout too much attention. But last week I was given a gift – a moderate winter storm. We had lots of rain, some snow, and cold temps for a few days. Anyone with an indoor hobby (like model railroading) can probably understand how happy I was to spend a few days “trapped” in the hobby room. I was able put a lot of Los Angeles together, resolving a few design challenges and completing the gas station which I had started over three years ago. (It was originally intended for use with a shelf diorama.) I also planted a few palm trees. I also realized that I had a bit of space along the main street that’s just calling out for something. I have a good idea, but right now a piece of pink foam is acting as a placeholder. The long-awaited tar pit was created, and I conducted some experiments to make tar. As of now, it looks like Woodland Scenics’ Realistic Water with black tint is going to be the ticket. |
|
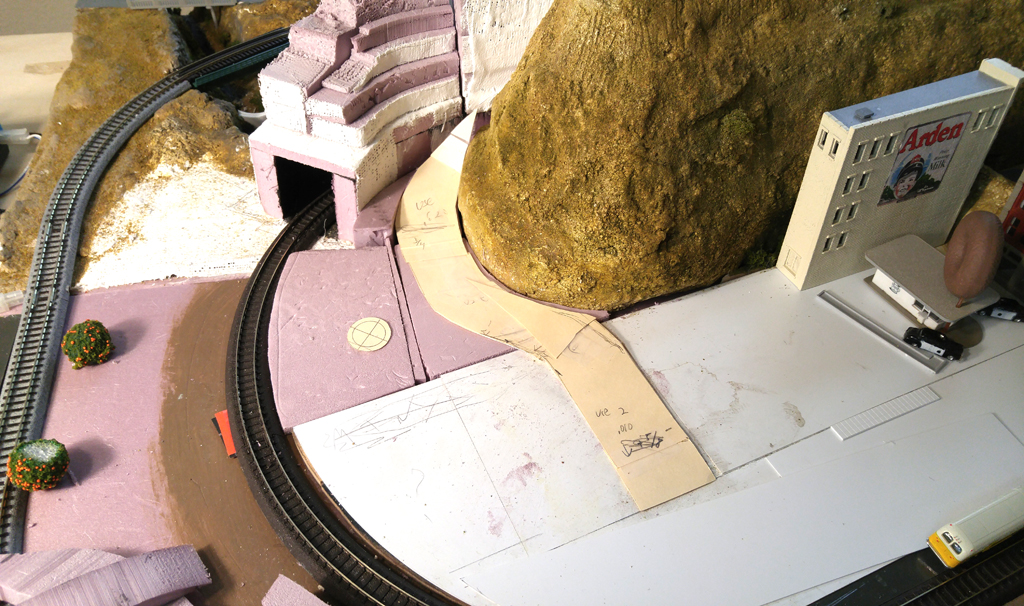
After I placed some of the terrain, I realized that I did not leave enough clearance around the curves and had to carve a bit more off. The truth is, the radius of my curved track is woefully inadequate for the cars of the 50’s Super Chief, and it looks ugly if not stupid. (The Super Chief should look graceful as it glides around curves.) I don’t think many modelers would build a running railroad like this.
But this layout is more focused on art rather than science. And while I think of it mostly as static diorama, its minimal functionality (running trains and a few lights) gives it another dimension. (By the way, the trolley runs fine.)
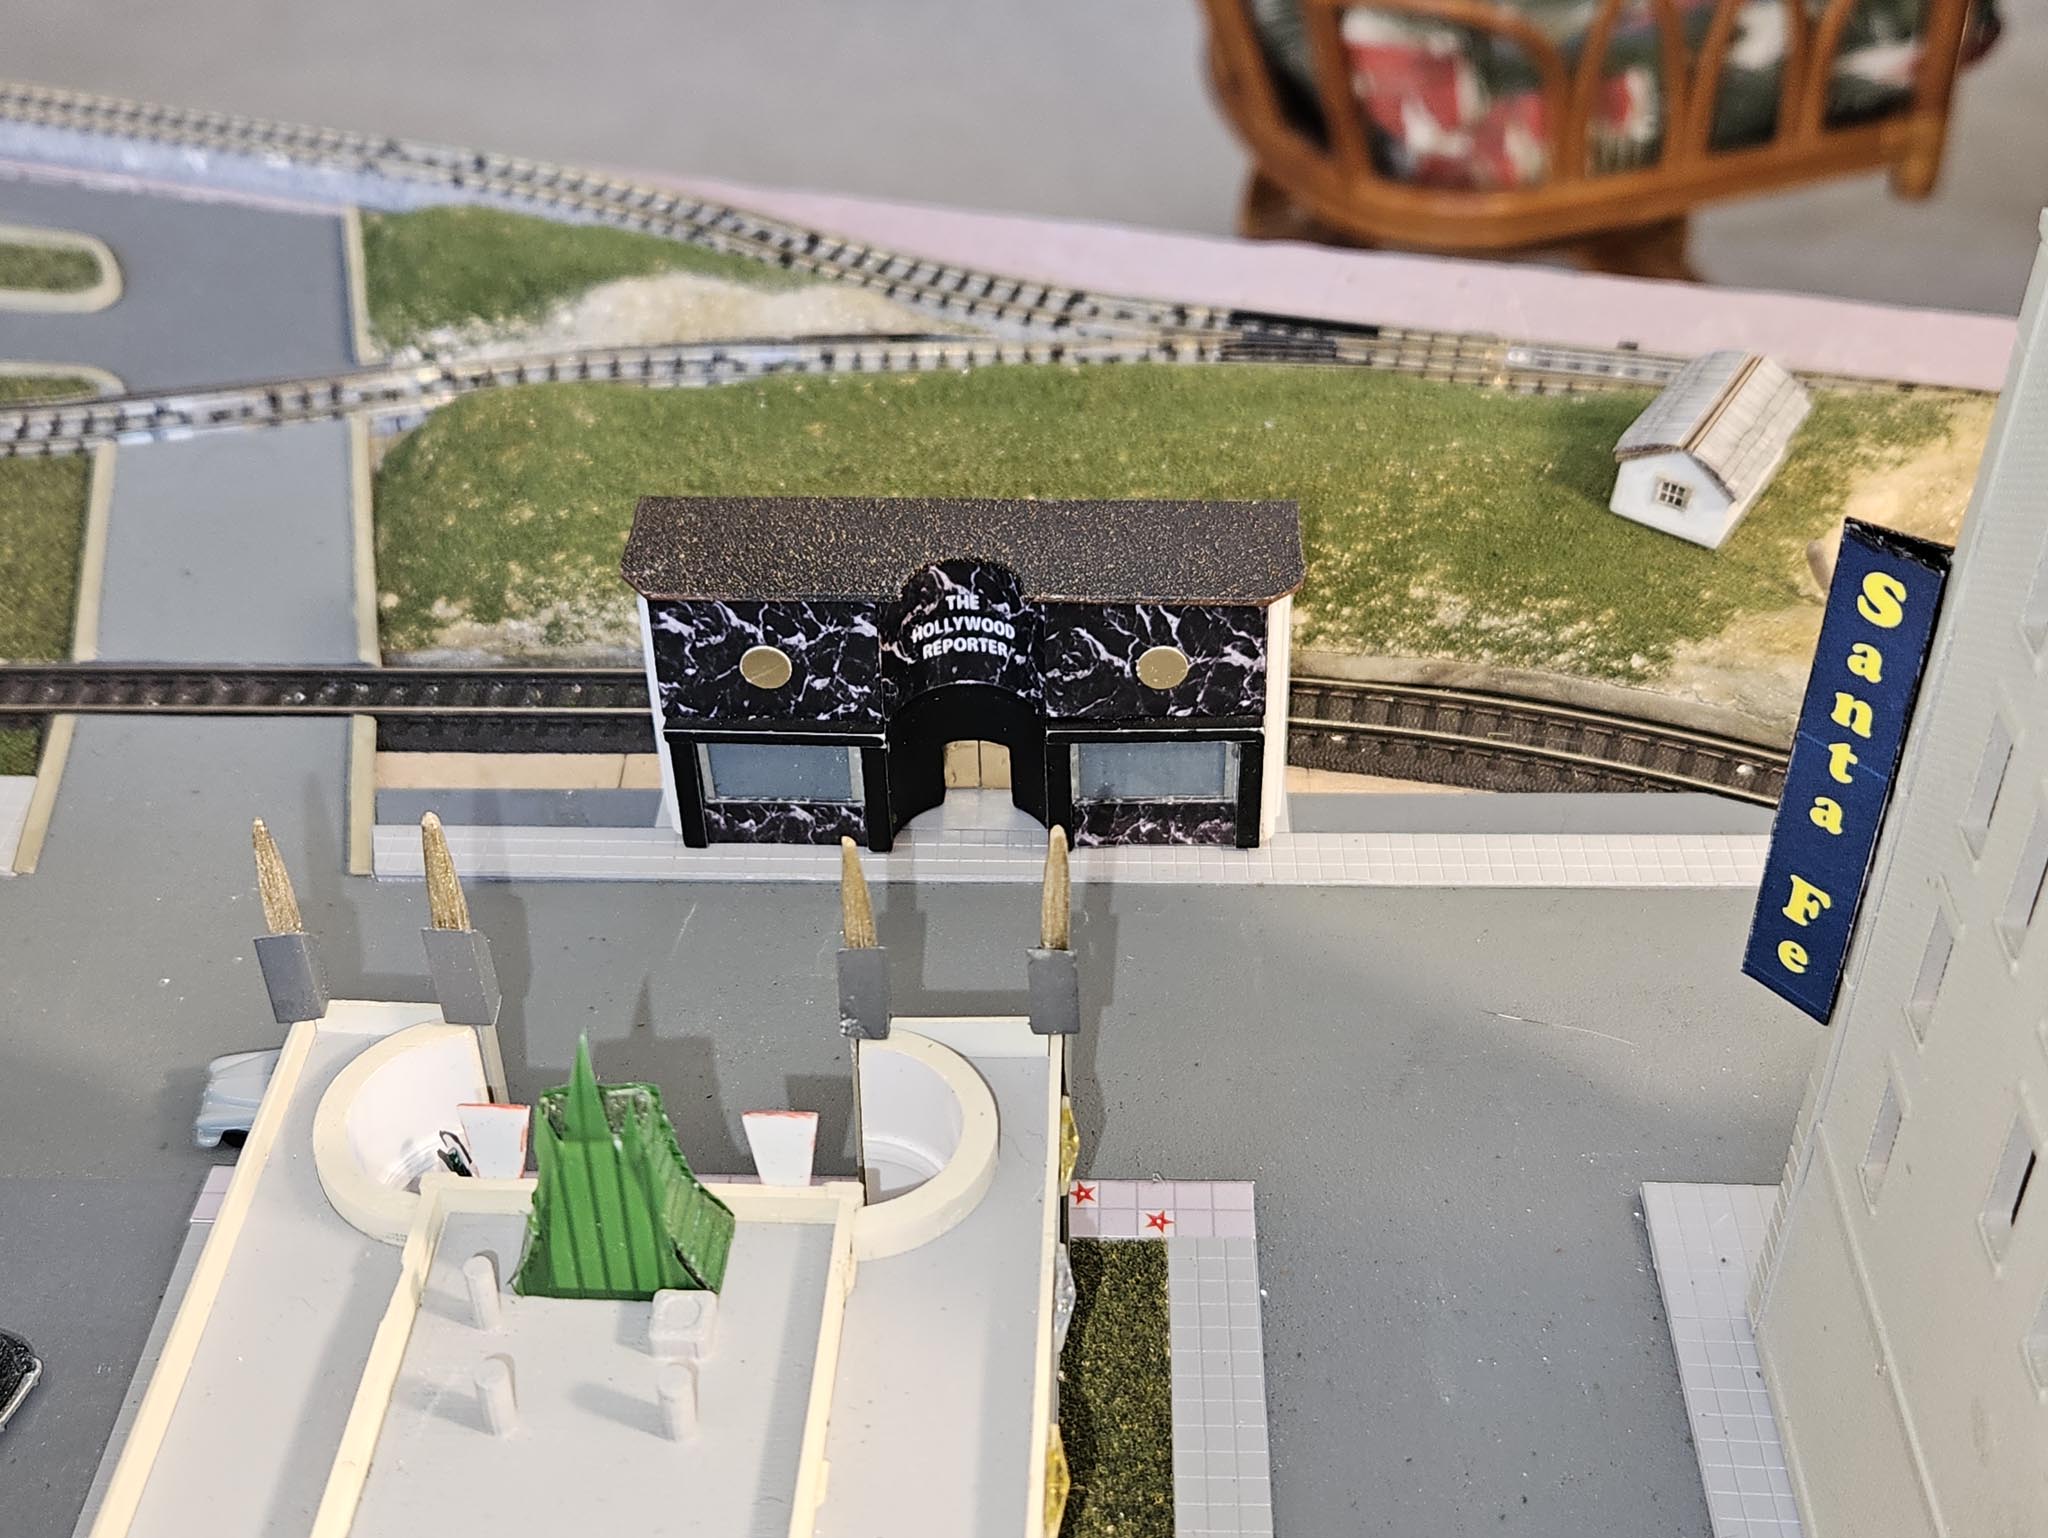
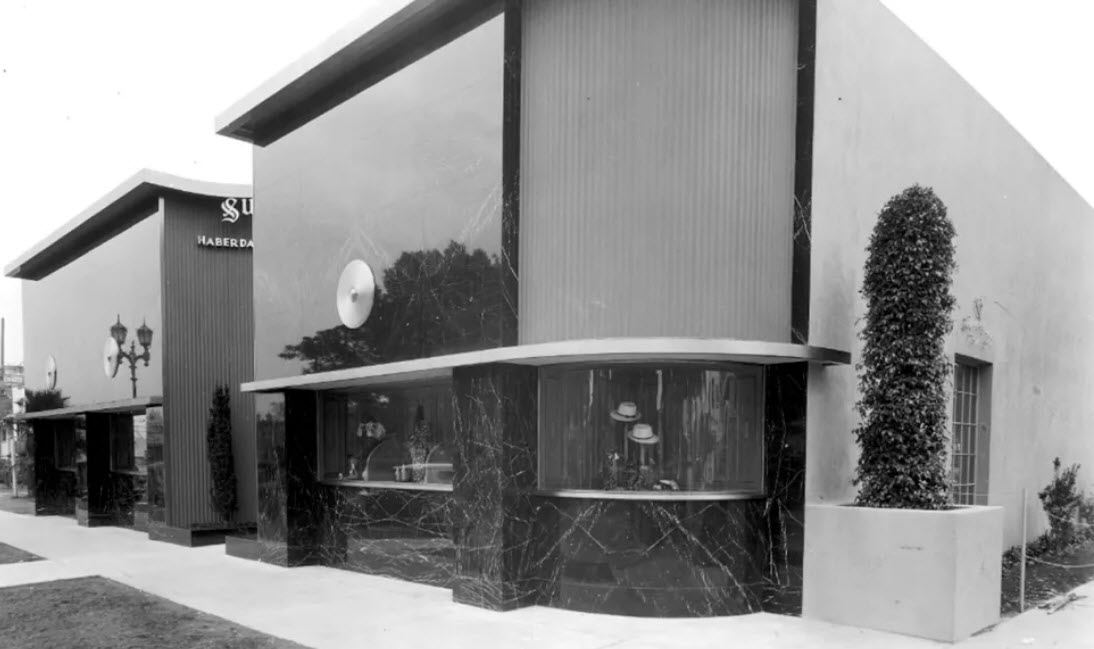
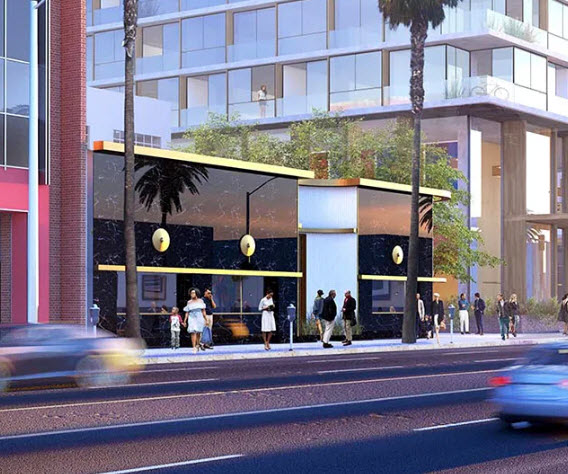
In the mid-1990s, I worked at an alternative weekly newspaper in Hollywood called the LA Weekly. (It was a fun job.) The Weekly was located in a neat Regency Moderne-style building that was originally a classy men’s haberdashery in the 1930s. It was then home to The Hollywood Reporter before the LA Weekly became its tenant in the early 1990s. My office was actually in a newer section in the back half of the building, depicted on the (greatly compressed) model by the center window. The historic building is currently vacant, but there is talk about remodeling it to be integrated into a new development. I hope that happens. | |
|
|
|
|
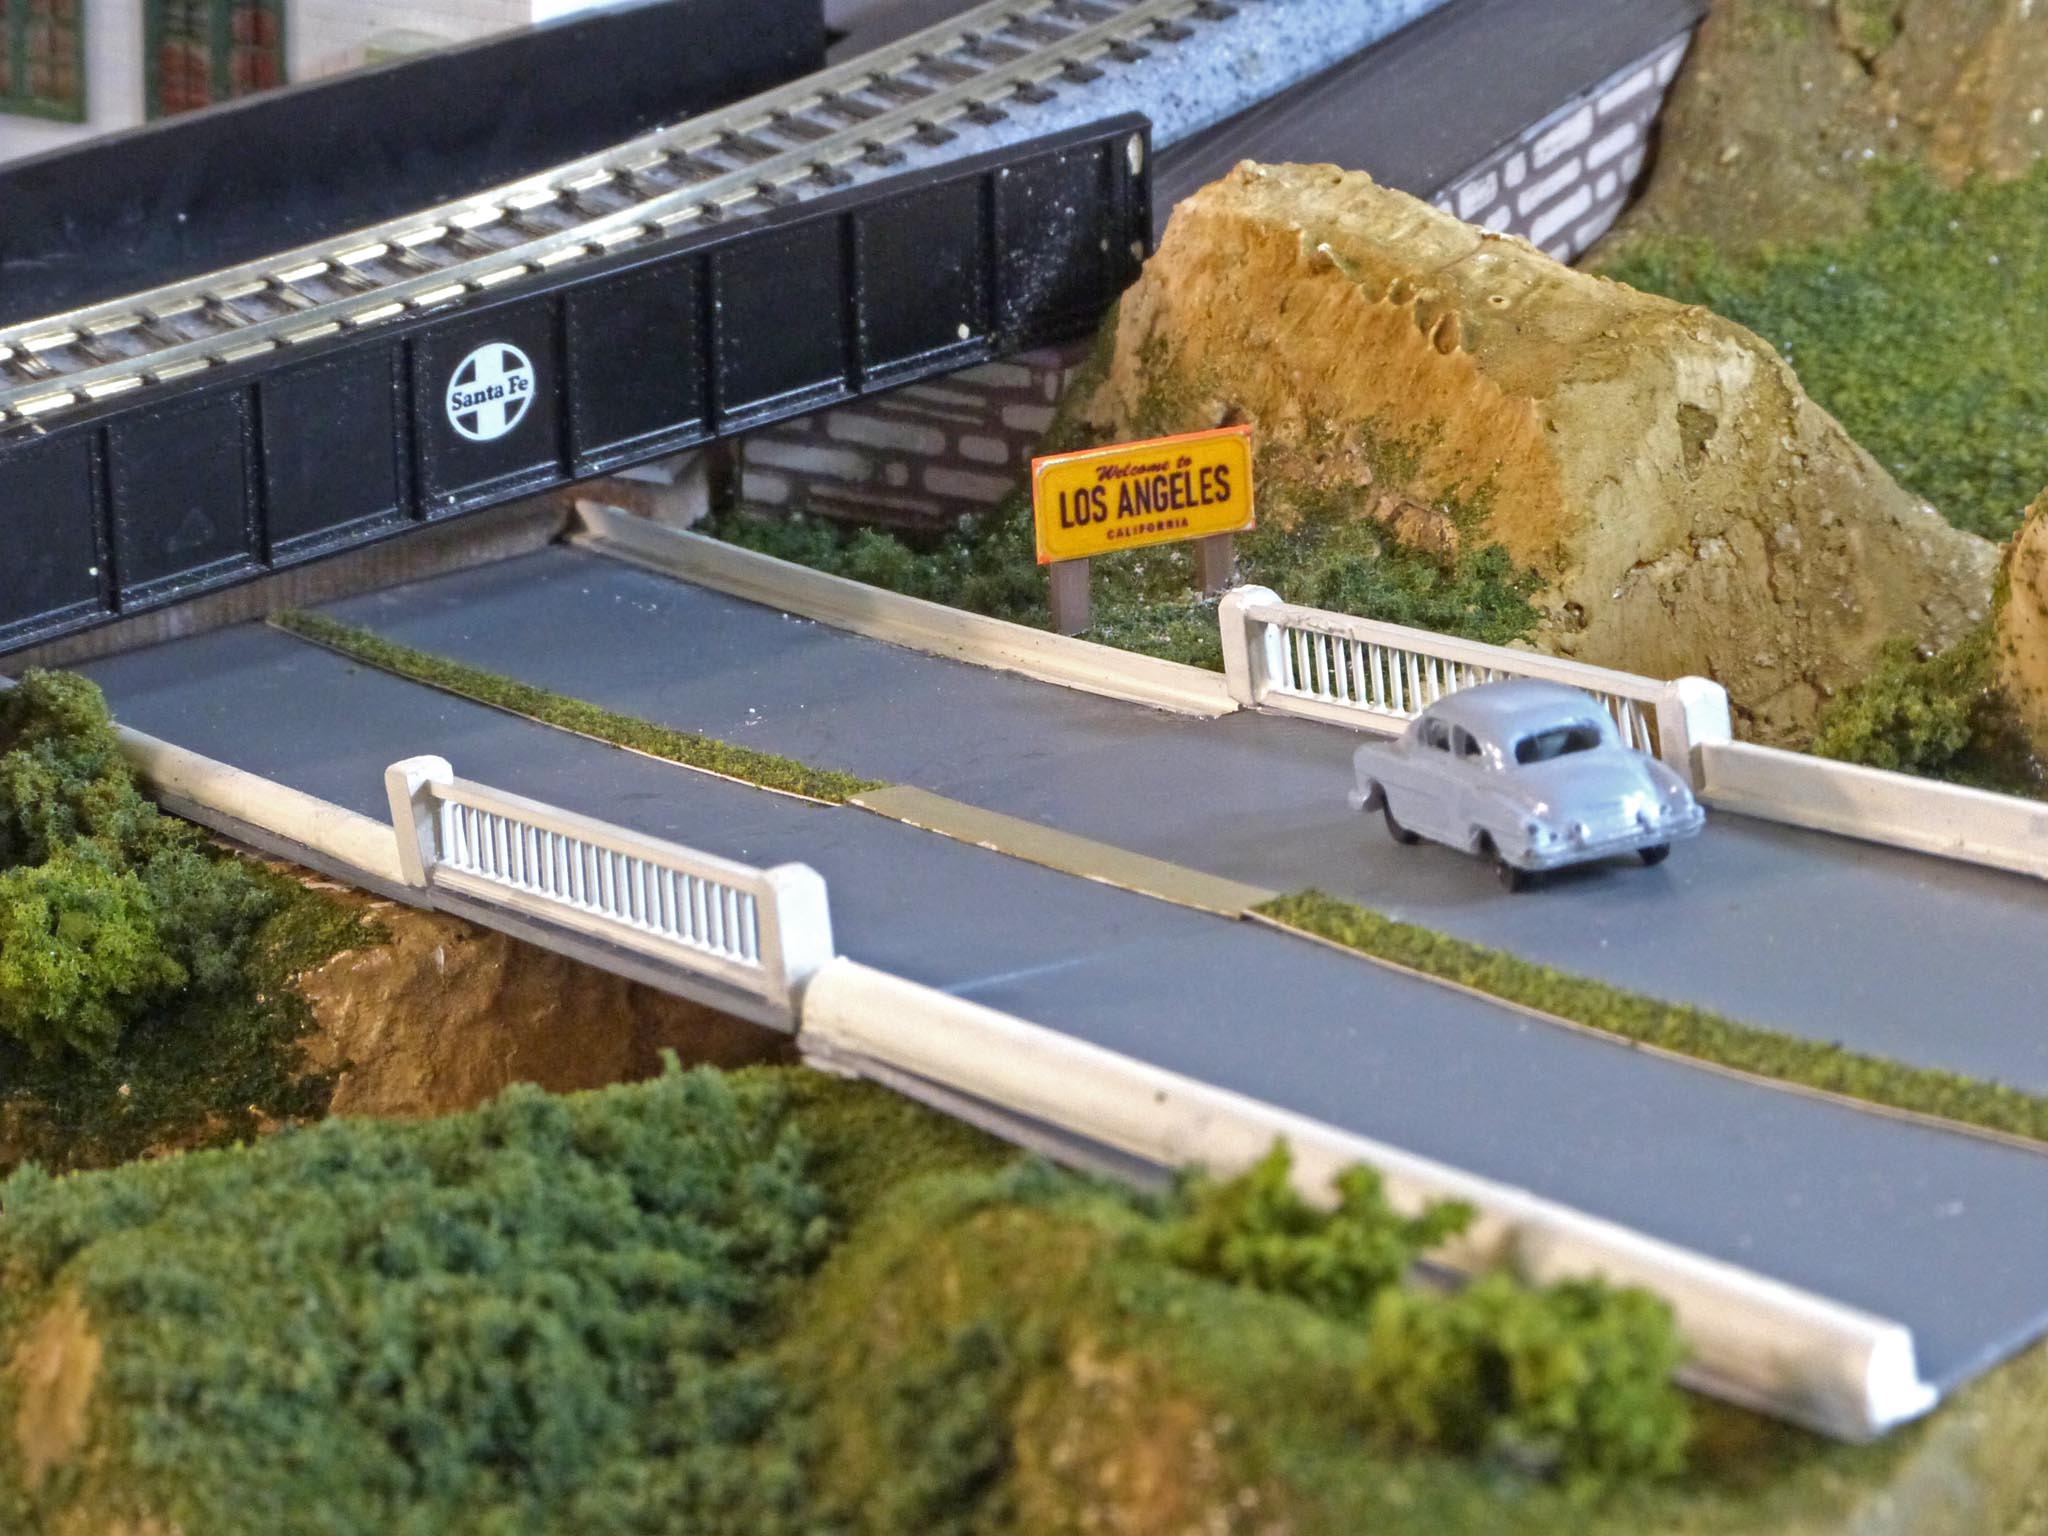
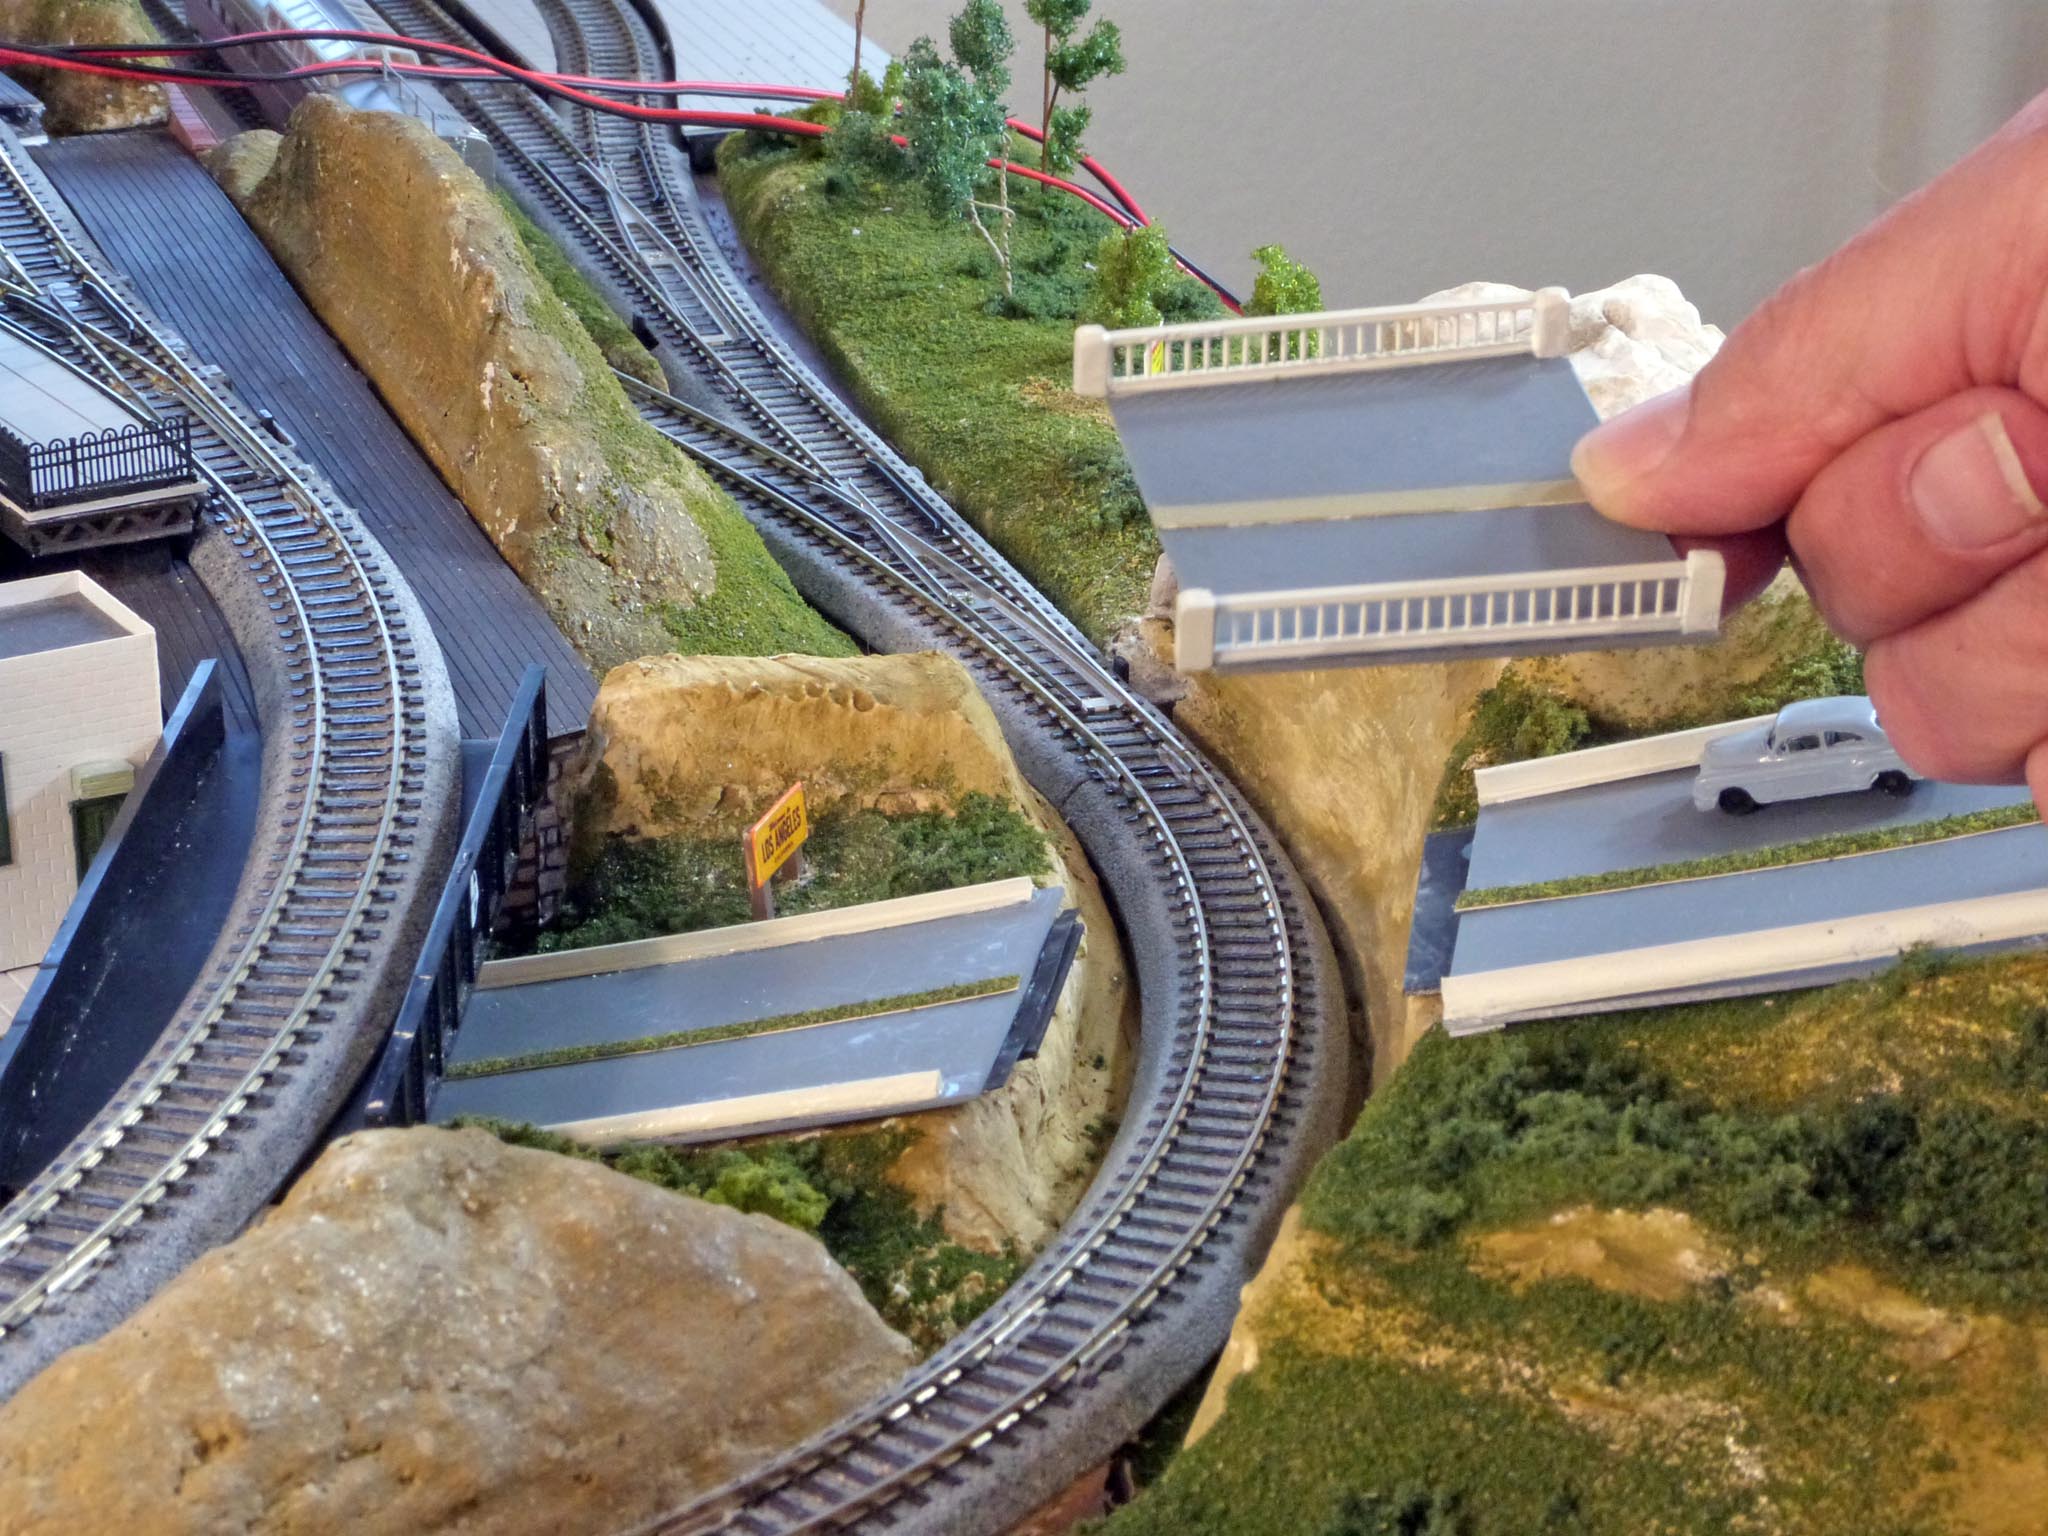
I’ve made quite a bit of progress lately, and have nearly completed an additional two small sections of the Los Angeles layout. Welcome to Los Angeles I always felt this corner area needed a welcoming feel and be sort of an entrance to the entire layout. It’s a bit abstract. In the first place, the approach angle is way over the top (pun intended). It looks more like a San Francisco street than one in LA. But so what? In the second place, it does not provide enough clearance for a train to run under the overpass. But I came up with a solution. I added two Woodland Scenics Just-Plug cars to add a bit of sparkle to the area. The head- and tail-lights work. There is also a flashing red light on the roof of the police car. |
|
|
|
|
|
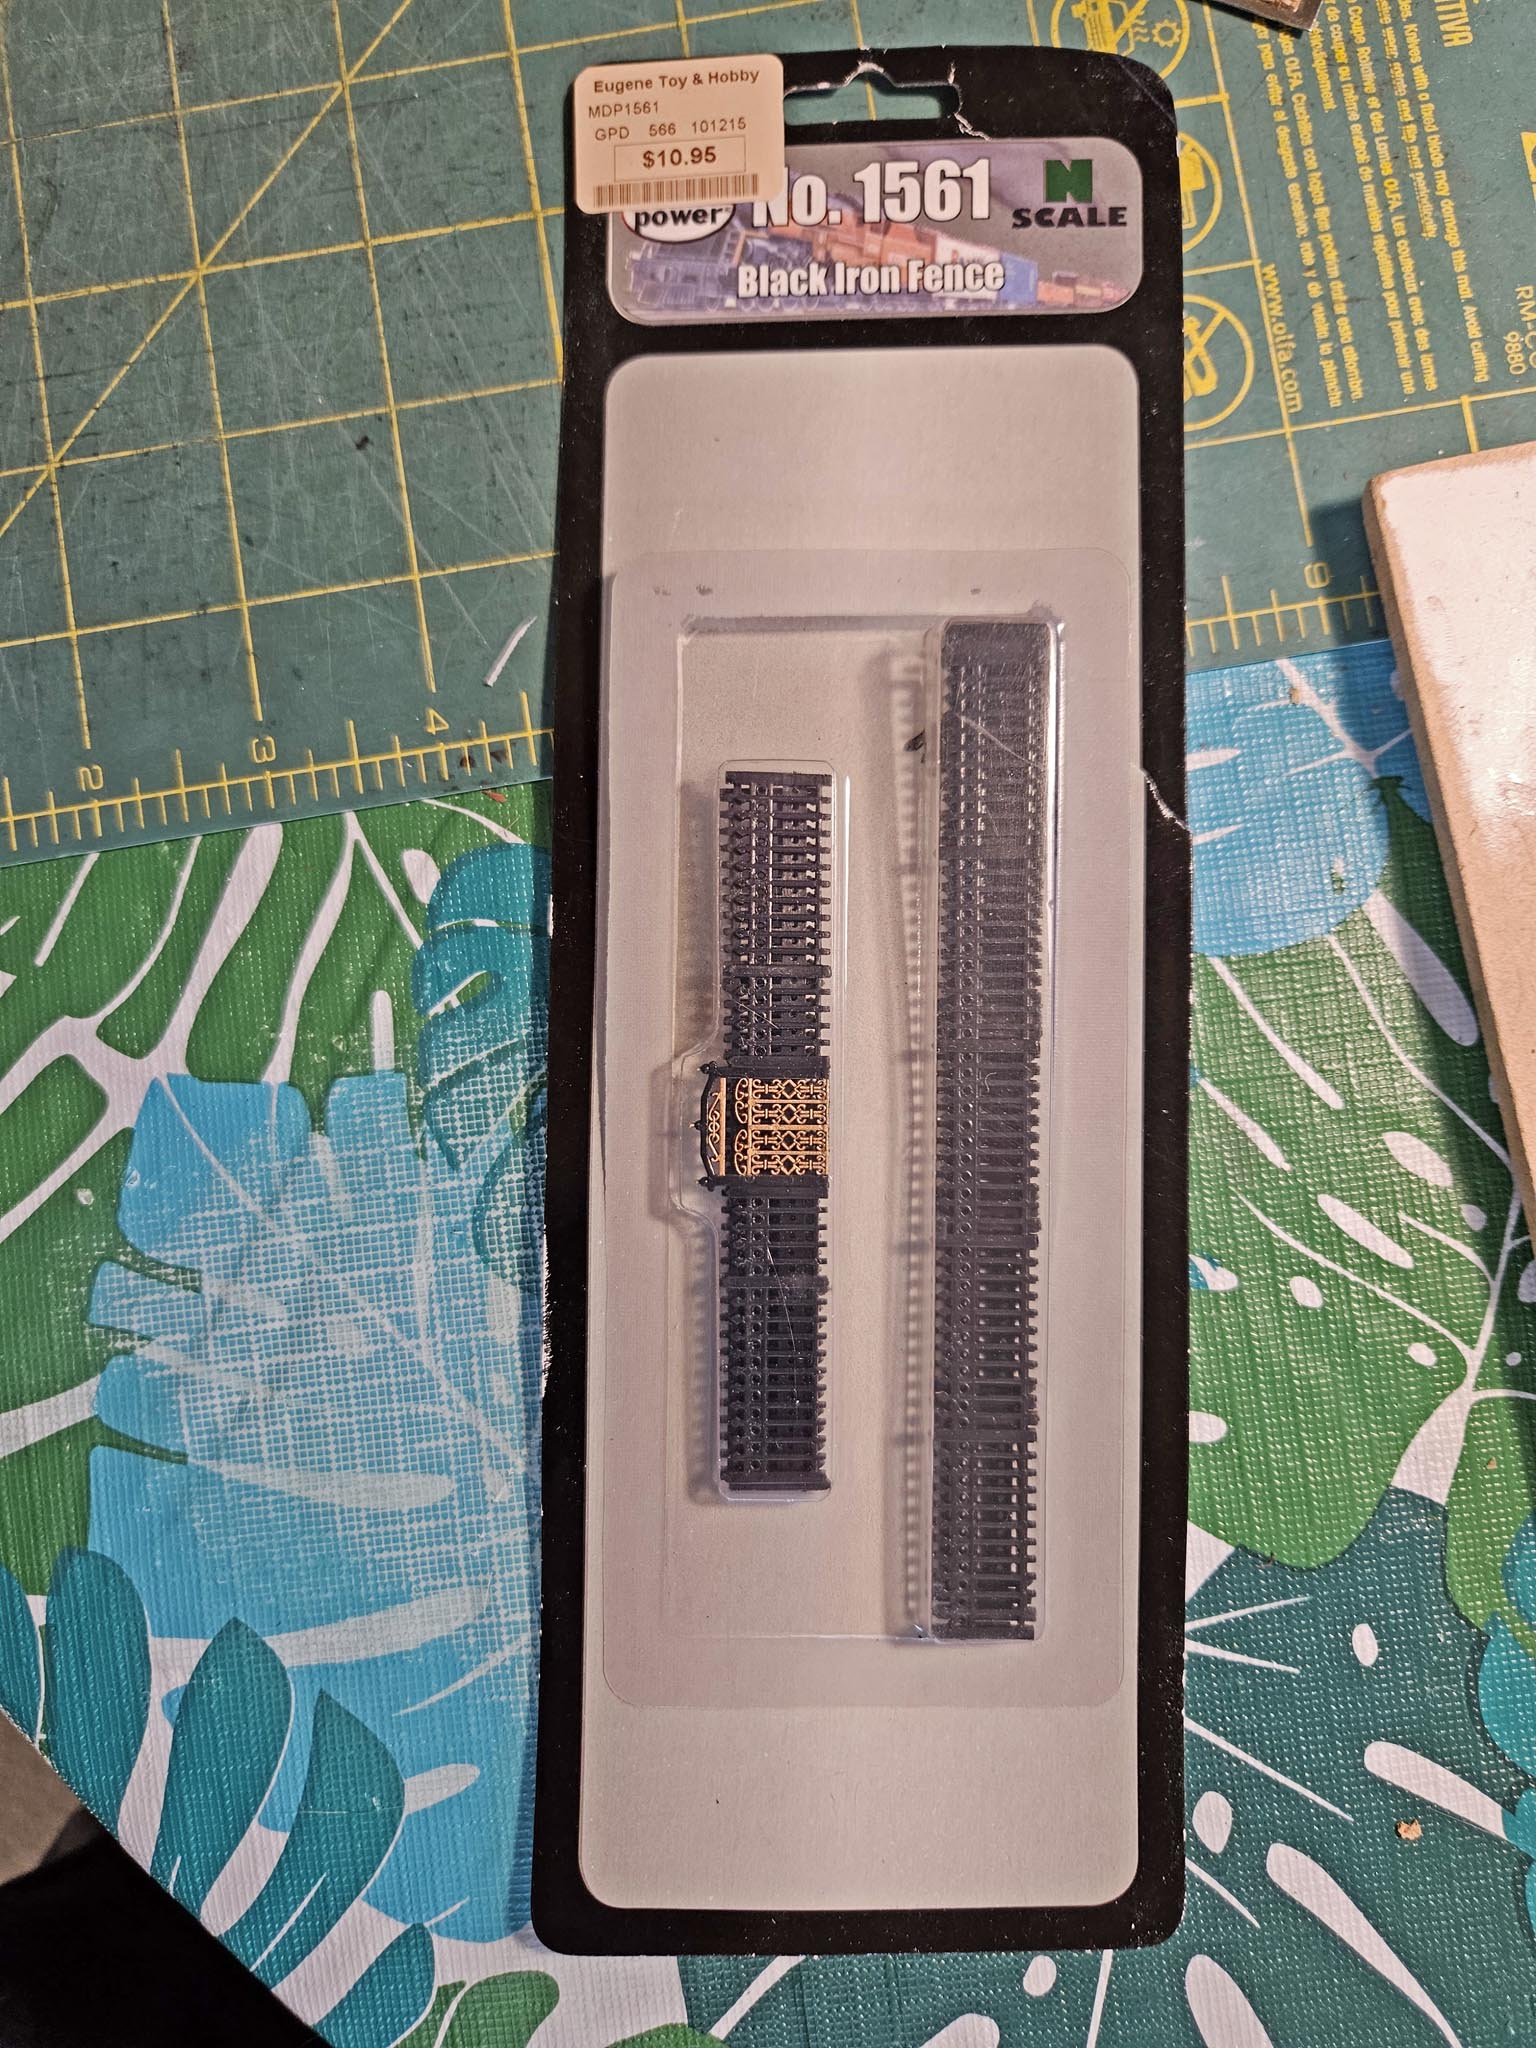
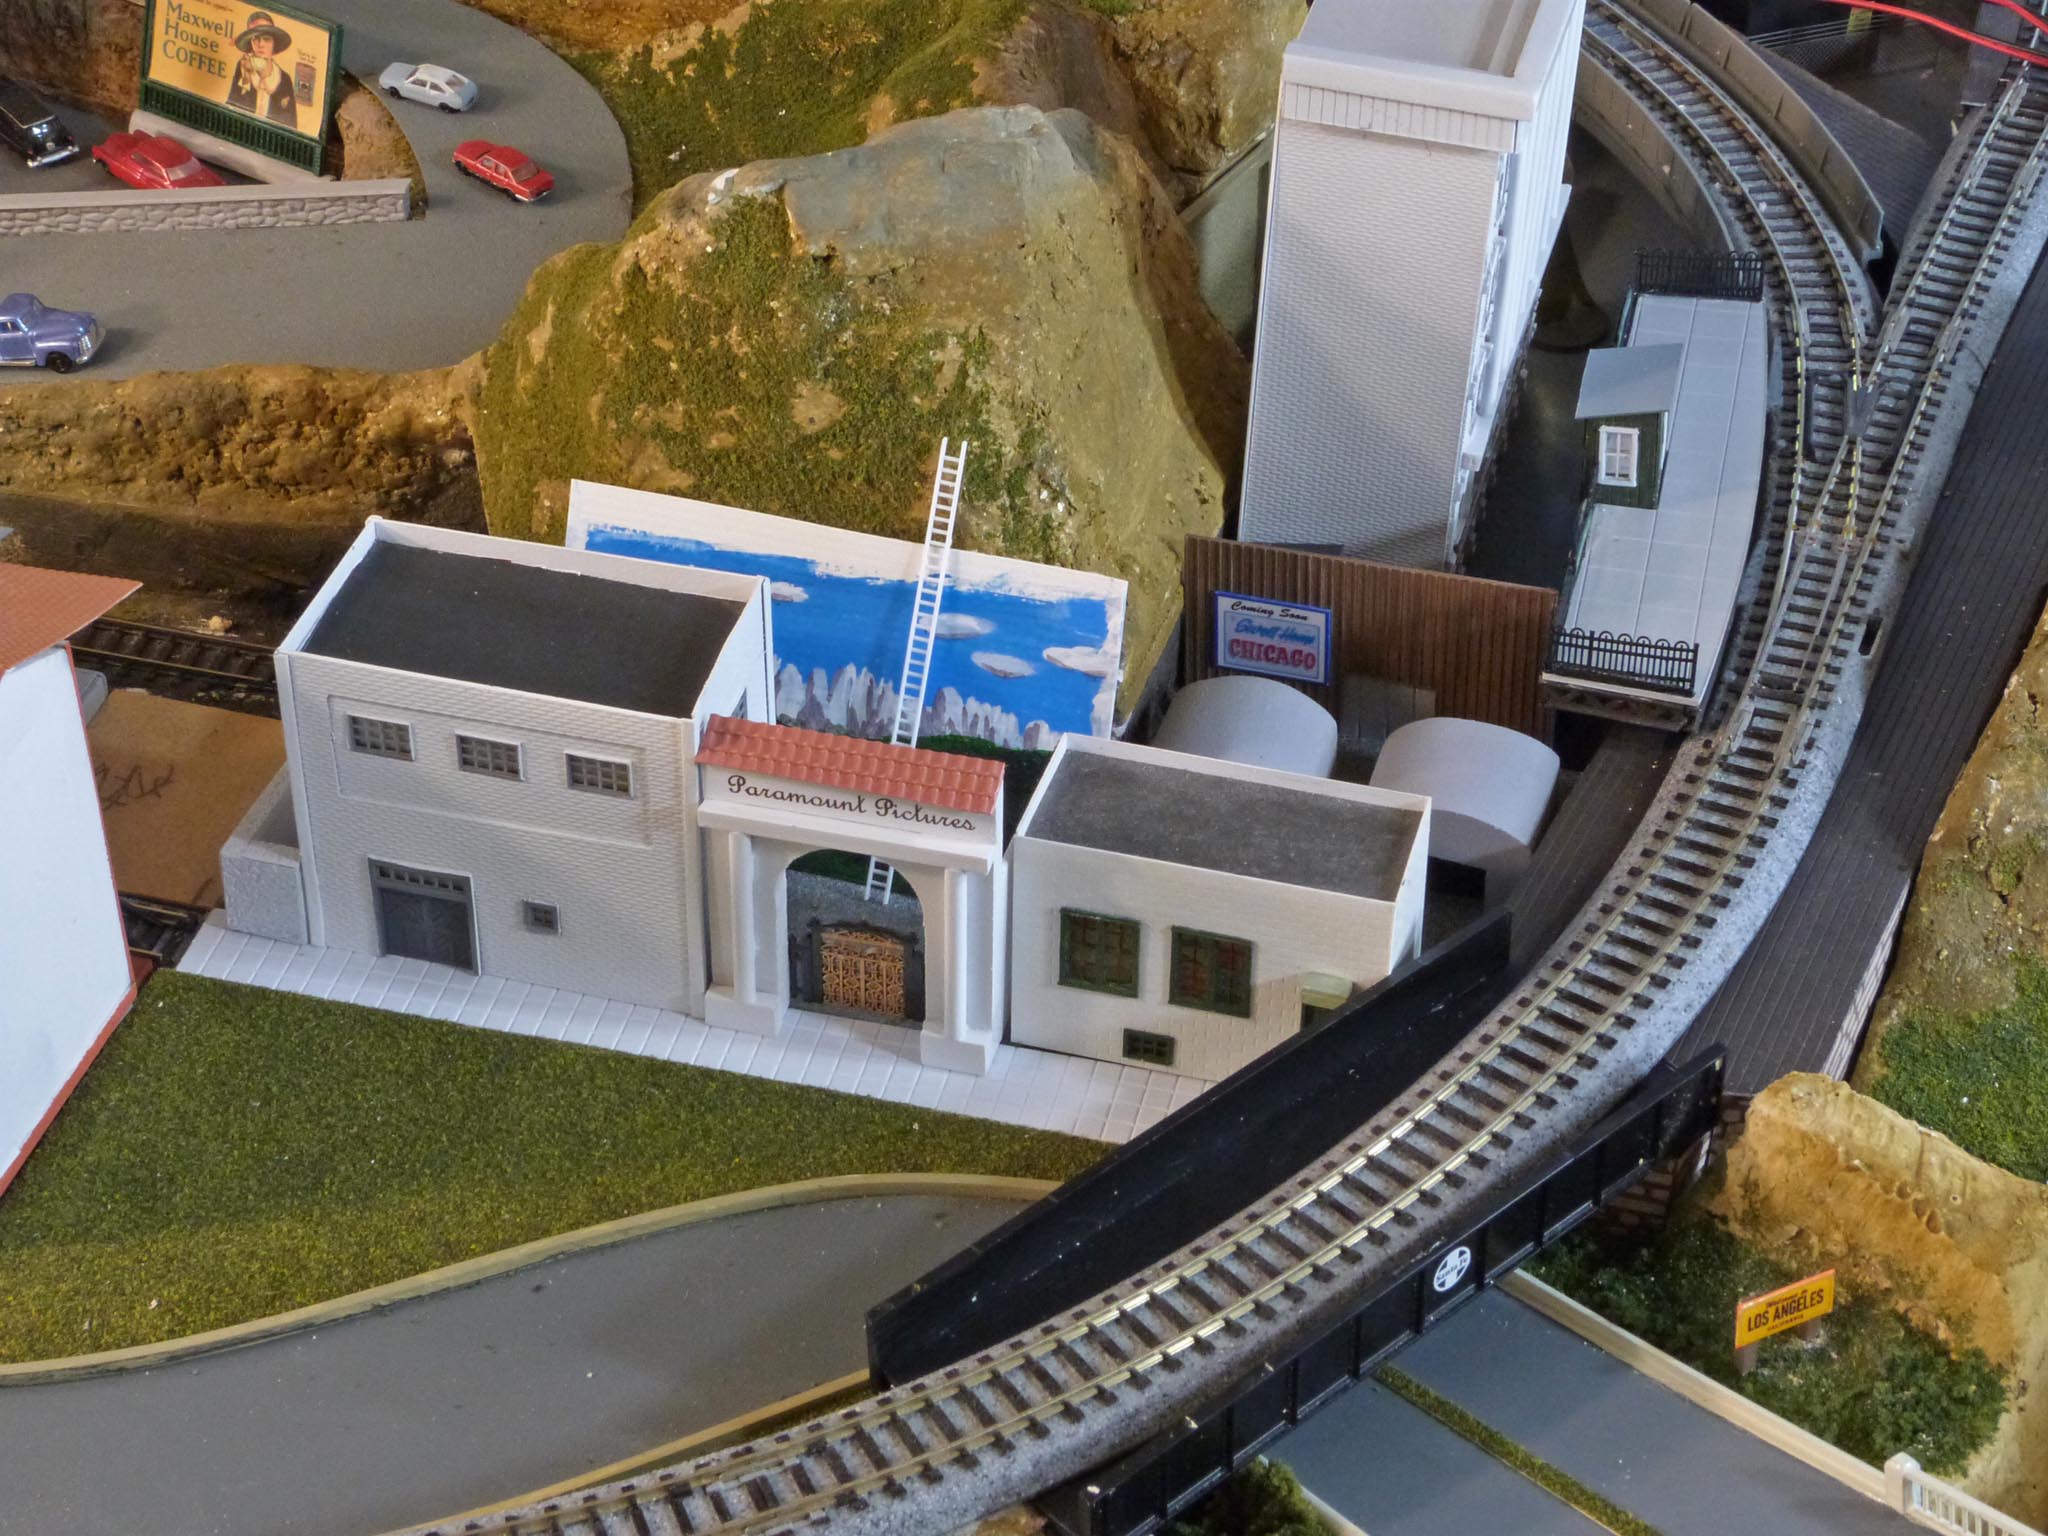
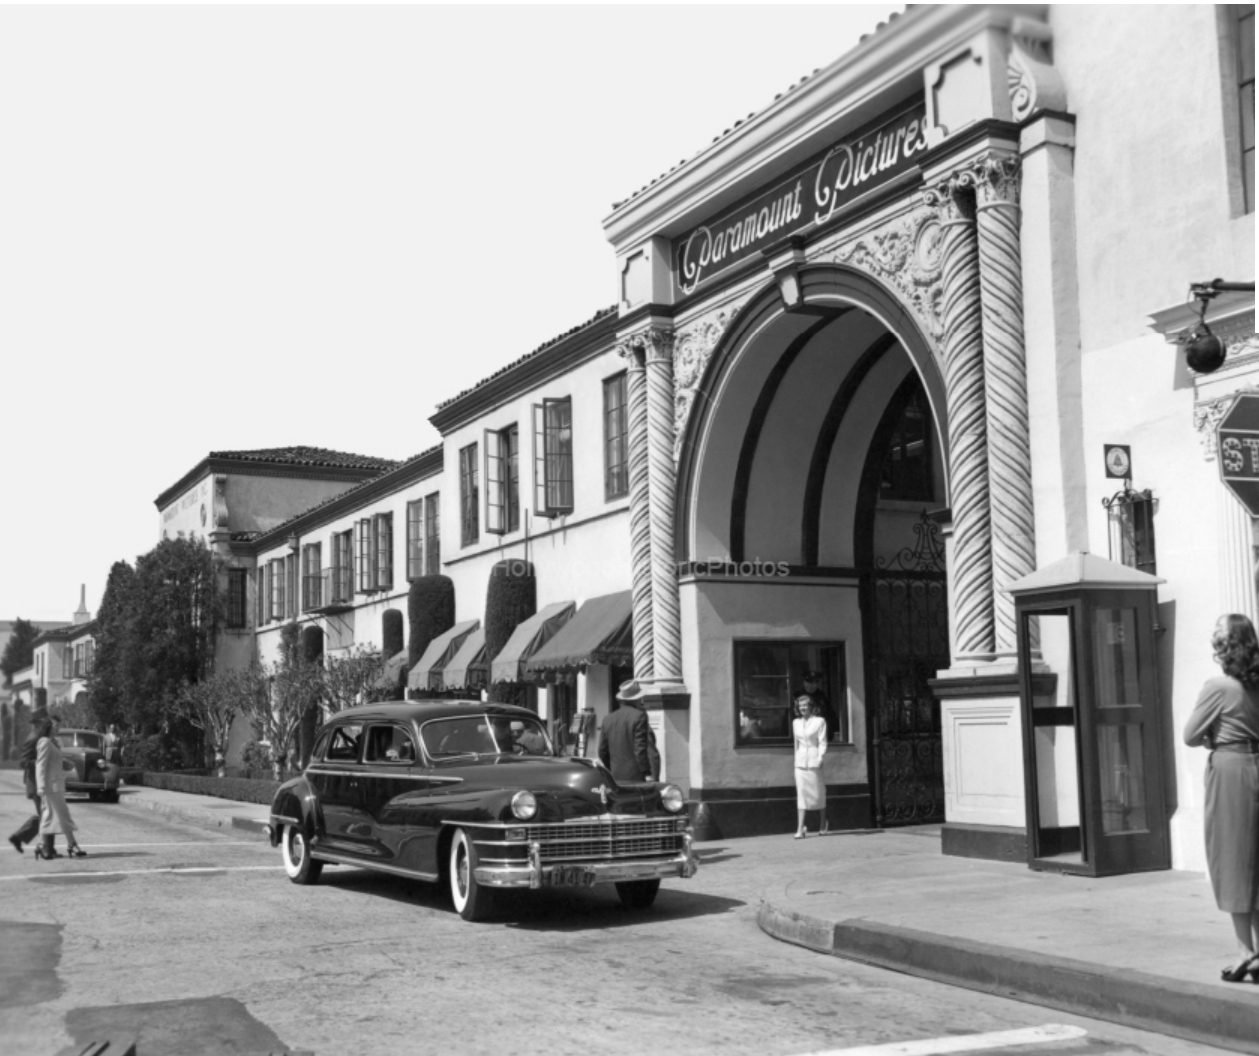
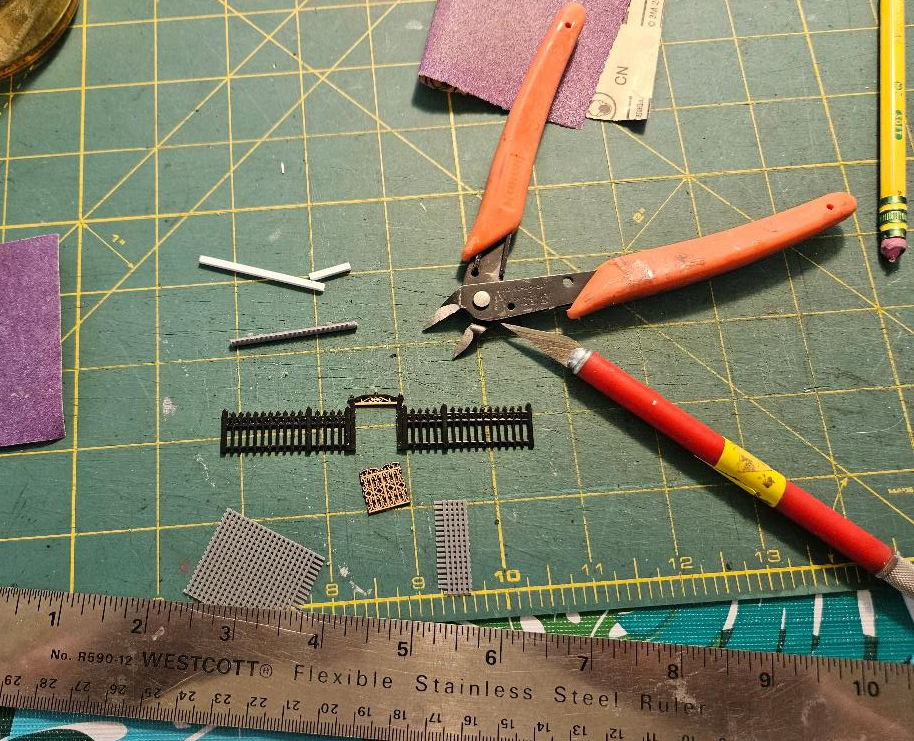
Paramount Pictures This is a funny one. There was a small area on the layout that I really didn’t know what to do with. I had placed a couple of buildings there as sort of placeholders until I thought of something appropriate. On a recent visit to Eugene, Oregon, I stopped at the hobby store there. I’d been there before, and knew that they had a very limited n-scale selection, but I take any opportunity to visit a hobby store while I’m visiting an area. I came across a package that contained two n-scale gates. They reminded me of something so I got them. When I got home, I did a search, and came up with two incredible ideas. The first was a 1950’s photograph of the main gates at Paramount Pictures. Perfect. (More on the second idea below.)
|
|
|
|
|
|
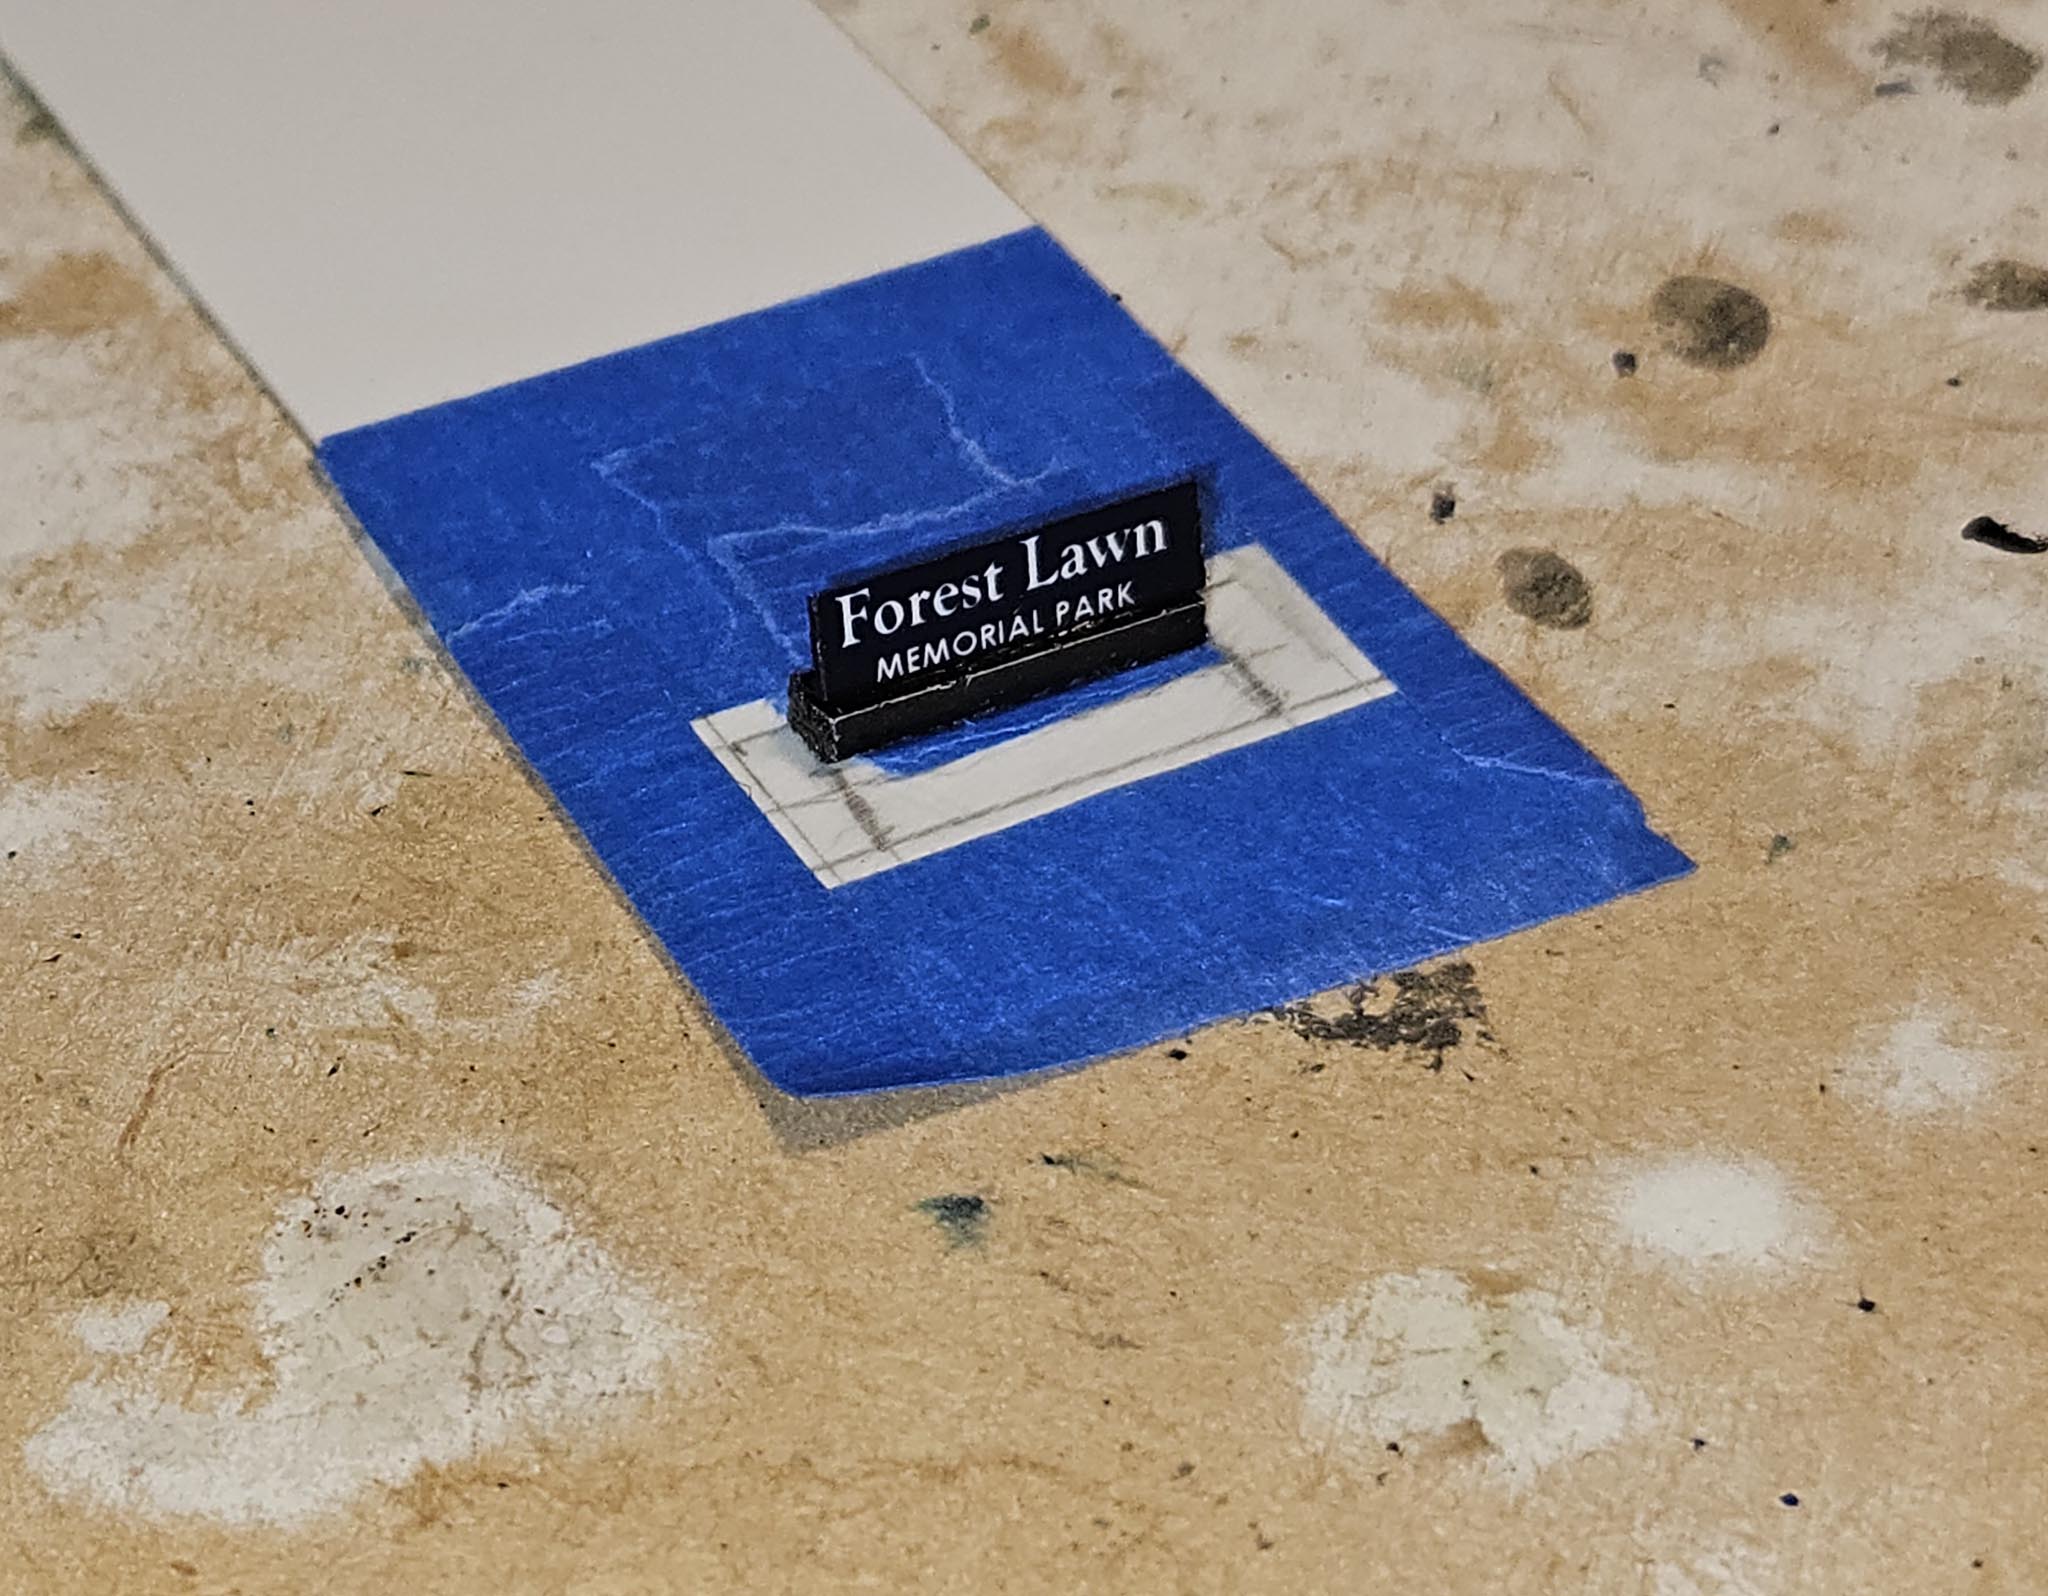
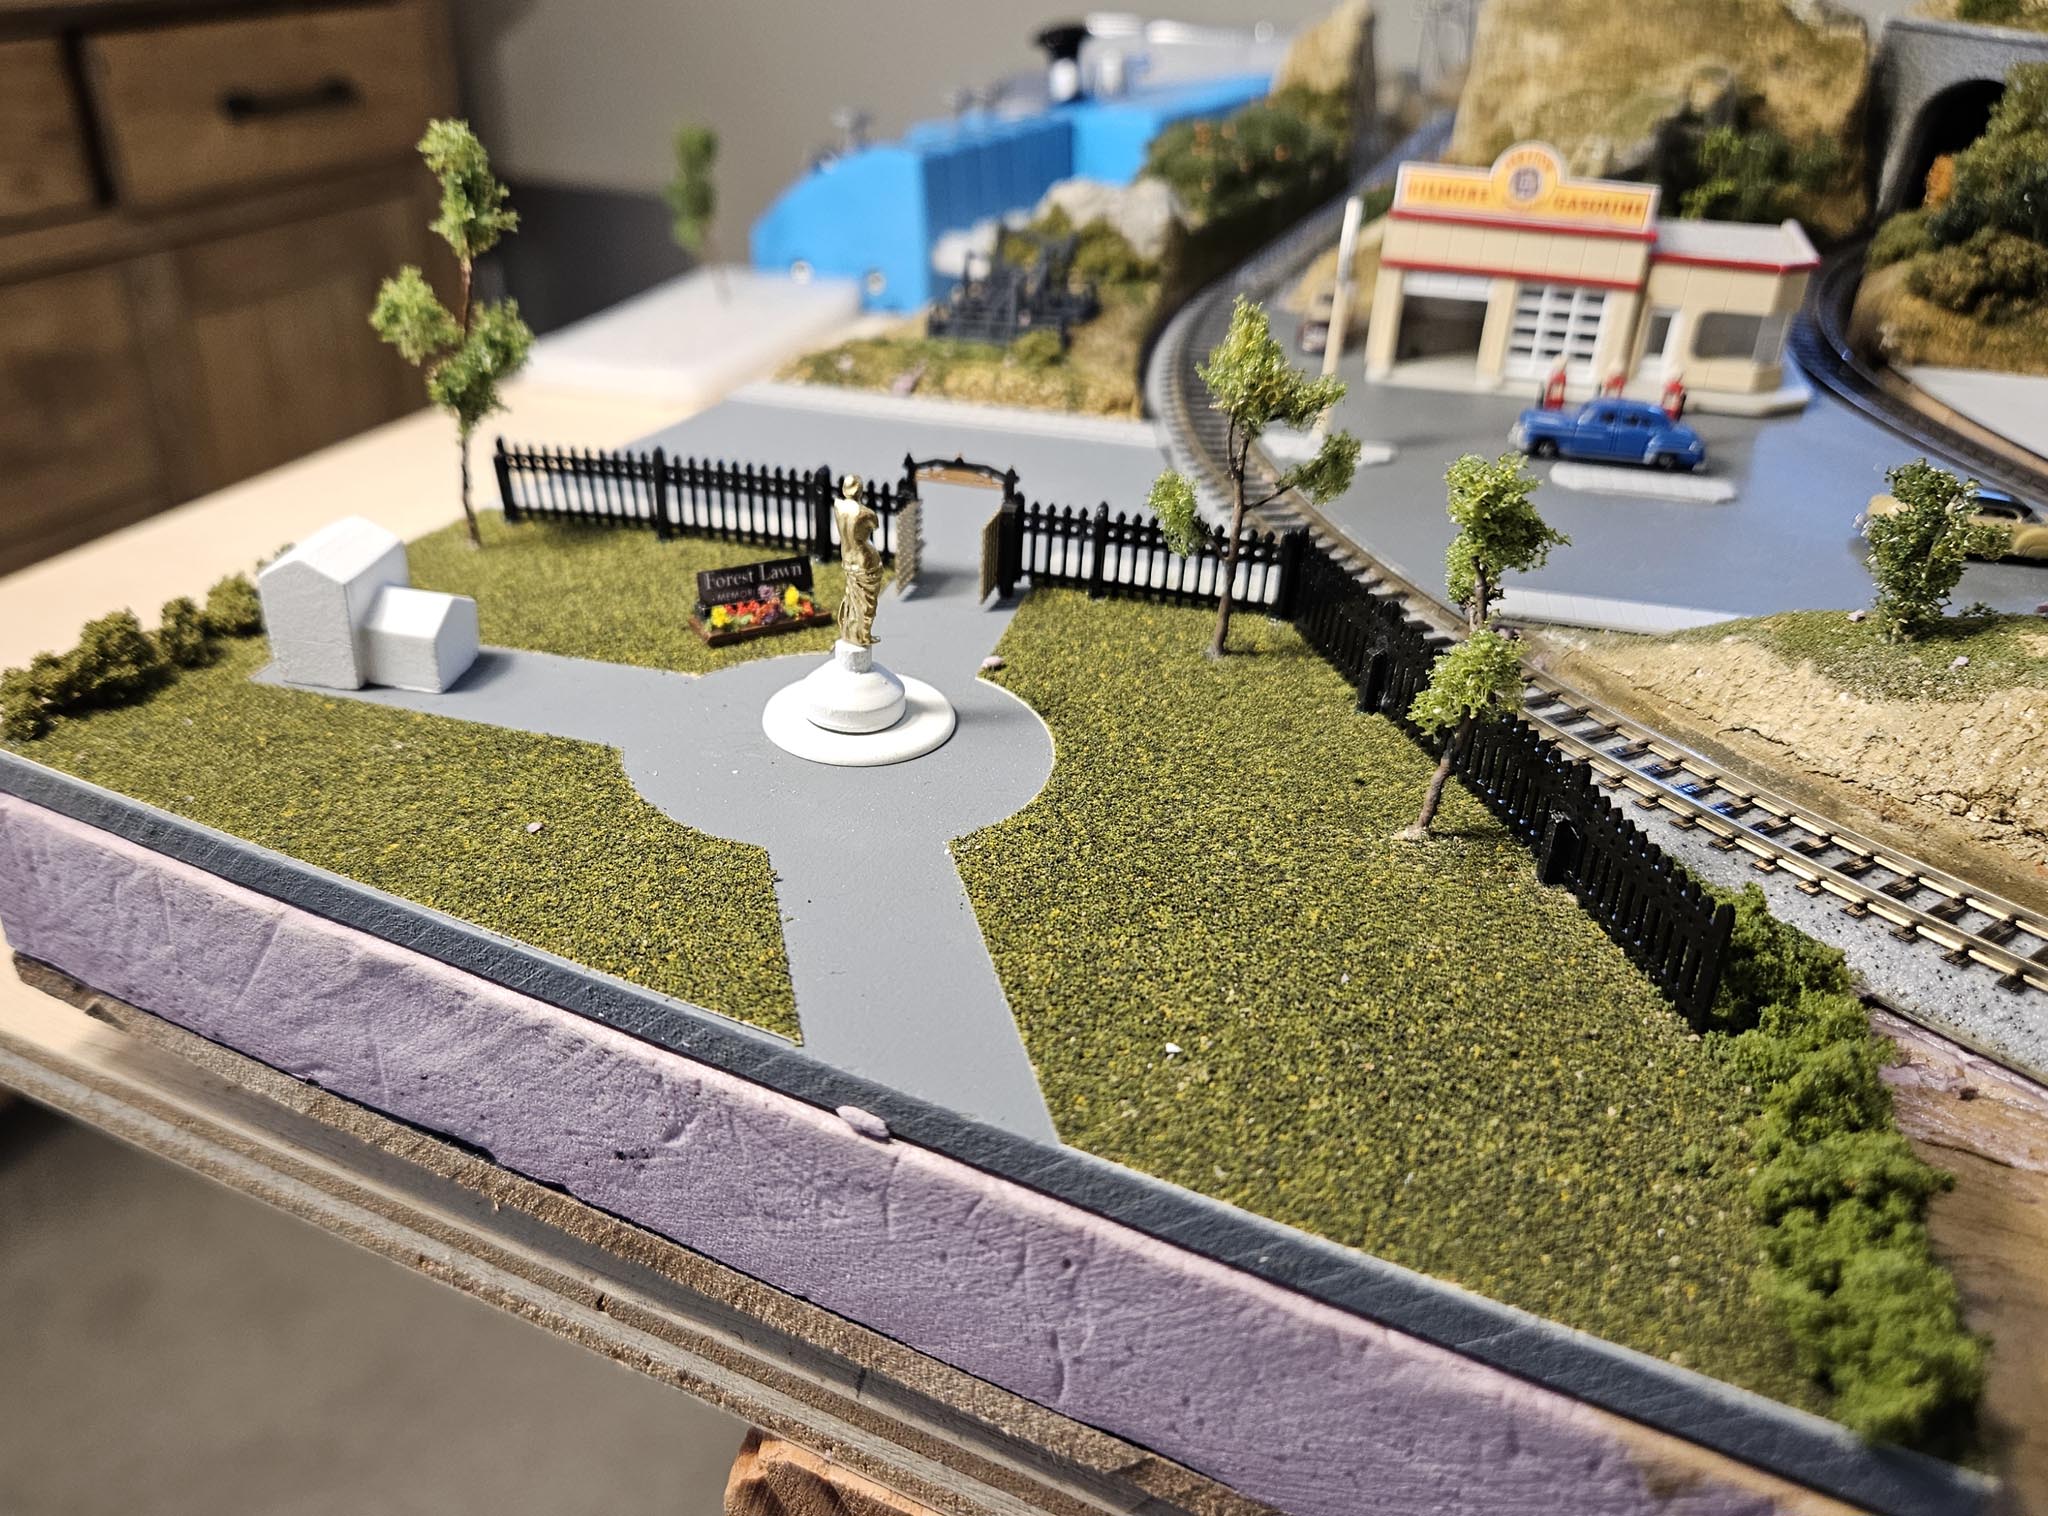
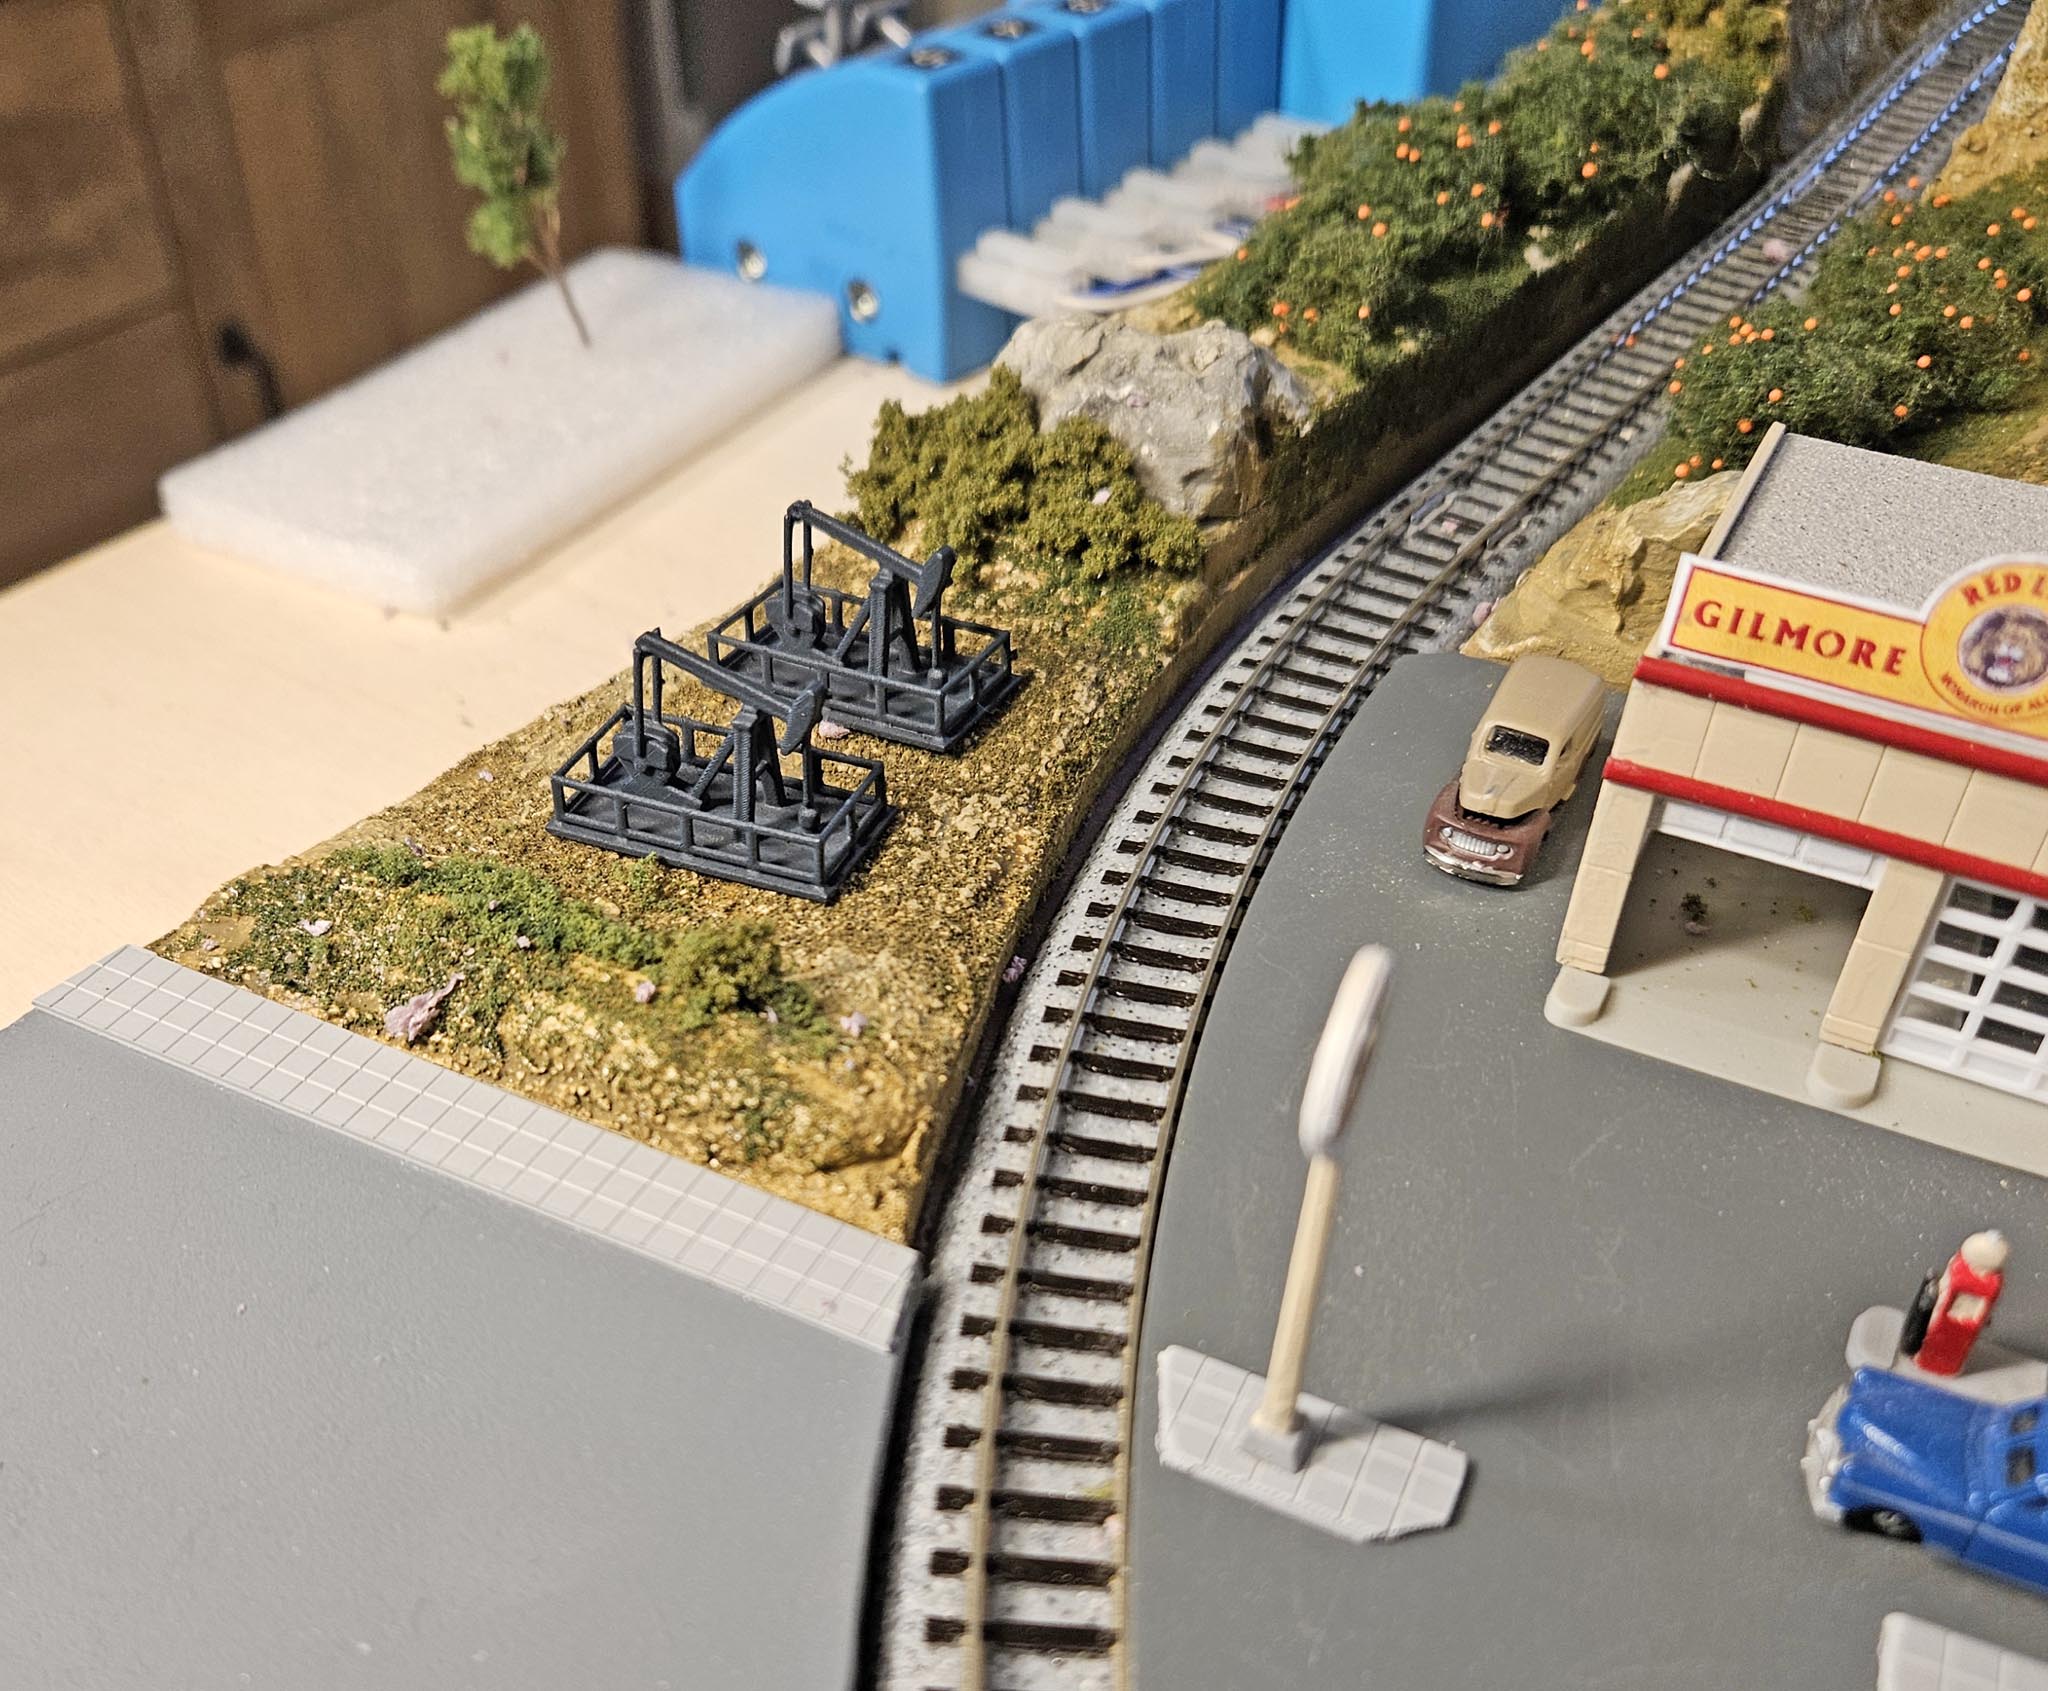
Forest Lawn The second idea I had for the gates was Forest Lawn Memorial Park in Glendale, California. Forest Lawn is much more than a cemetery. Although hundreds of celebrities are interred there, it is an incredibly beautiful location that includes churches, art, gardens, a museum, wonderful city views, and more. For more information: www.forestlawn.com. Another reason I wanted to include it is because of a family connection. As mentioned above, my wife’s father was a sign painter and artist. At one time, he was hired to apply gold leaf to a replica of Michelangelo’s David at the park. Unfortunately, I could not find a scale model of David, but I was able to purchase a small Venus de Milo who is standing in for him. And since I had modeled a gas station and oil rigs, the La Brea Tar Pits is the last piece of the petroleum puzzle. The "tar" is actually Woodland Scenics Realistic Water tinted with black pigment. |
|
|
|
|
|
| |