Return to Layout List

4.

Interstate 5

(and the Rogue River Area)


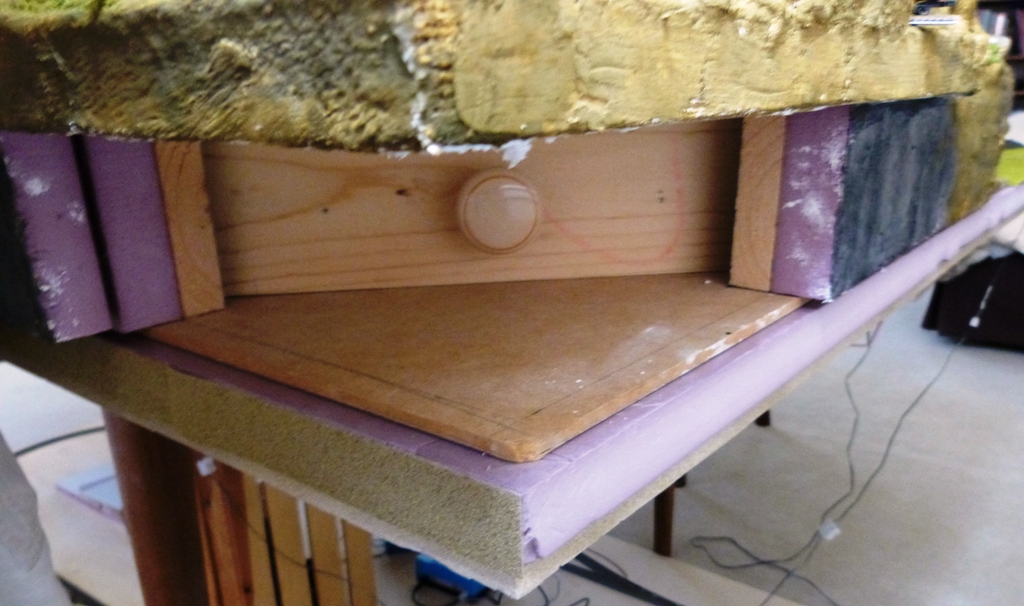
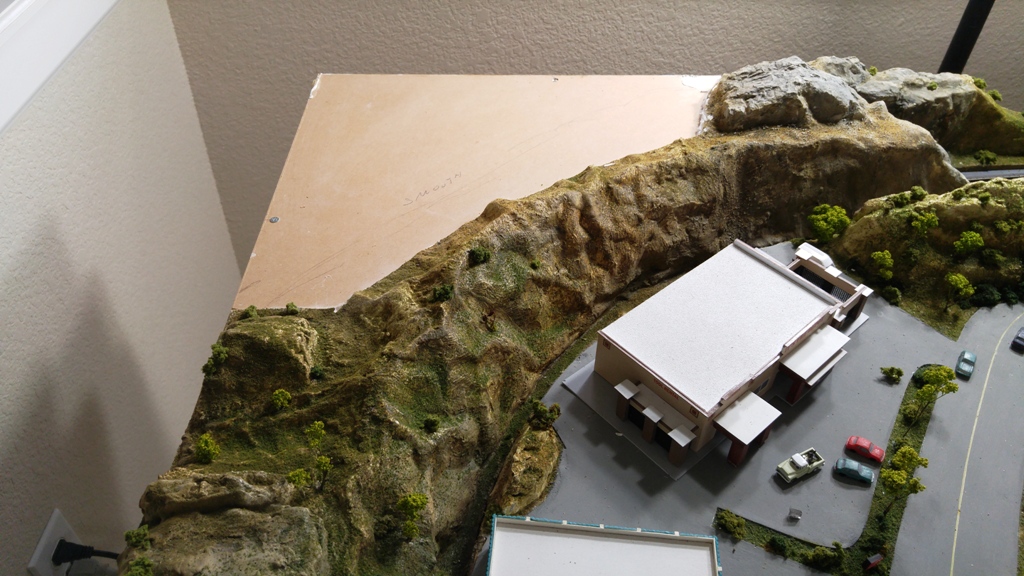
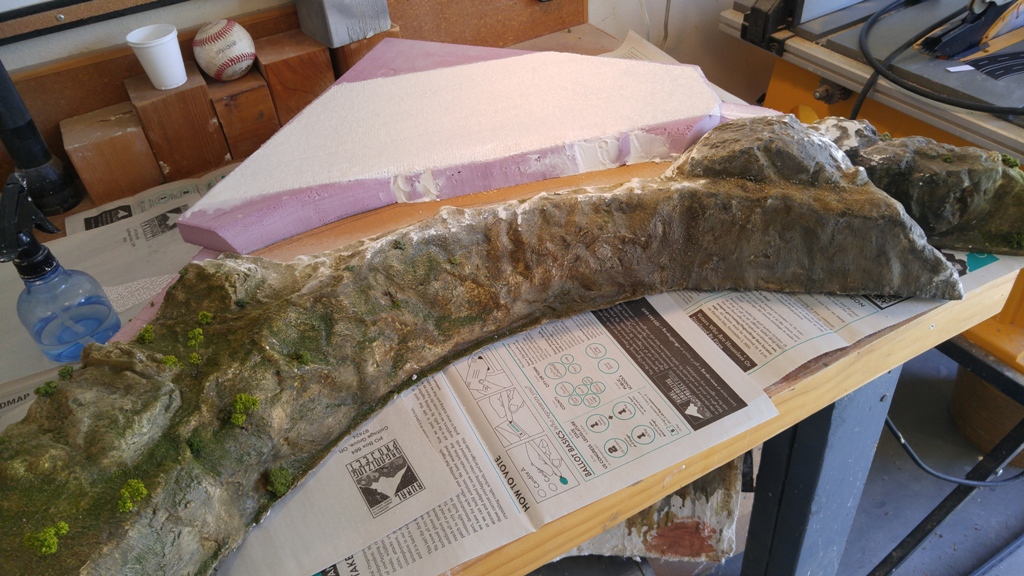
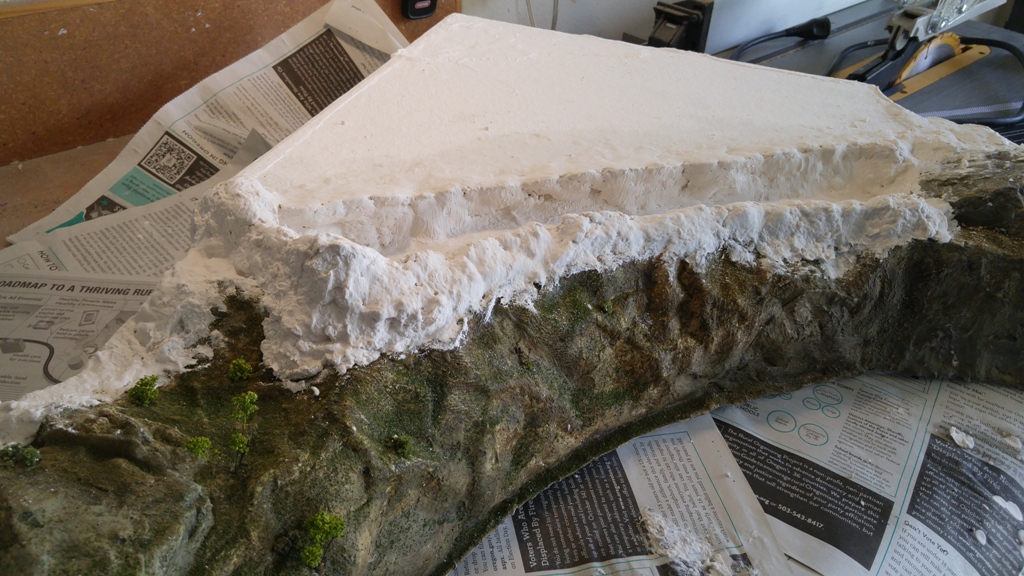
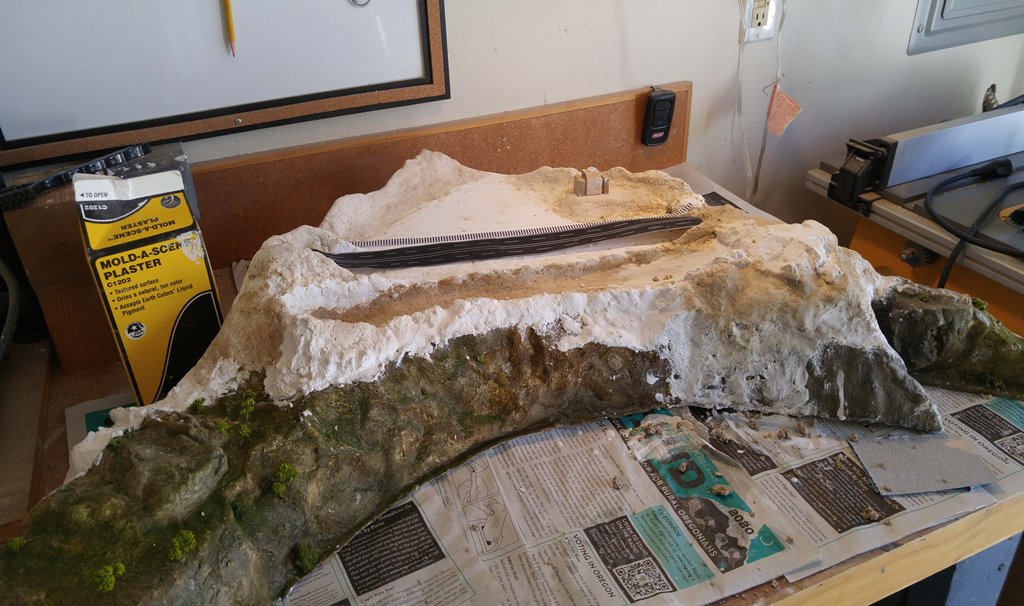
When I was building the Eastside area in 2019 (see My Layouts, page 1), I left the top of the mountain flat and mostly bare knowing that someday I would be adding a scene in that location. Well, that time has come.

The City of Rouge River (on the Rogue River, of course) is just south on the I-5 freeway, a bit east of Grants Pass. Although I haven't spent a lot of time in Rogue River, we've been driving by several landmarks there for years, visible from the freeway.

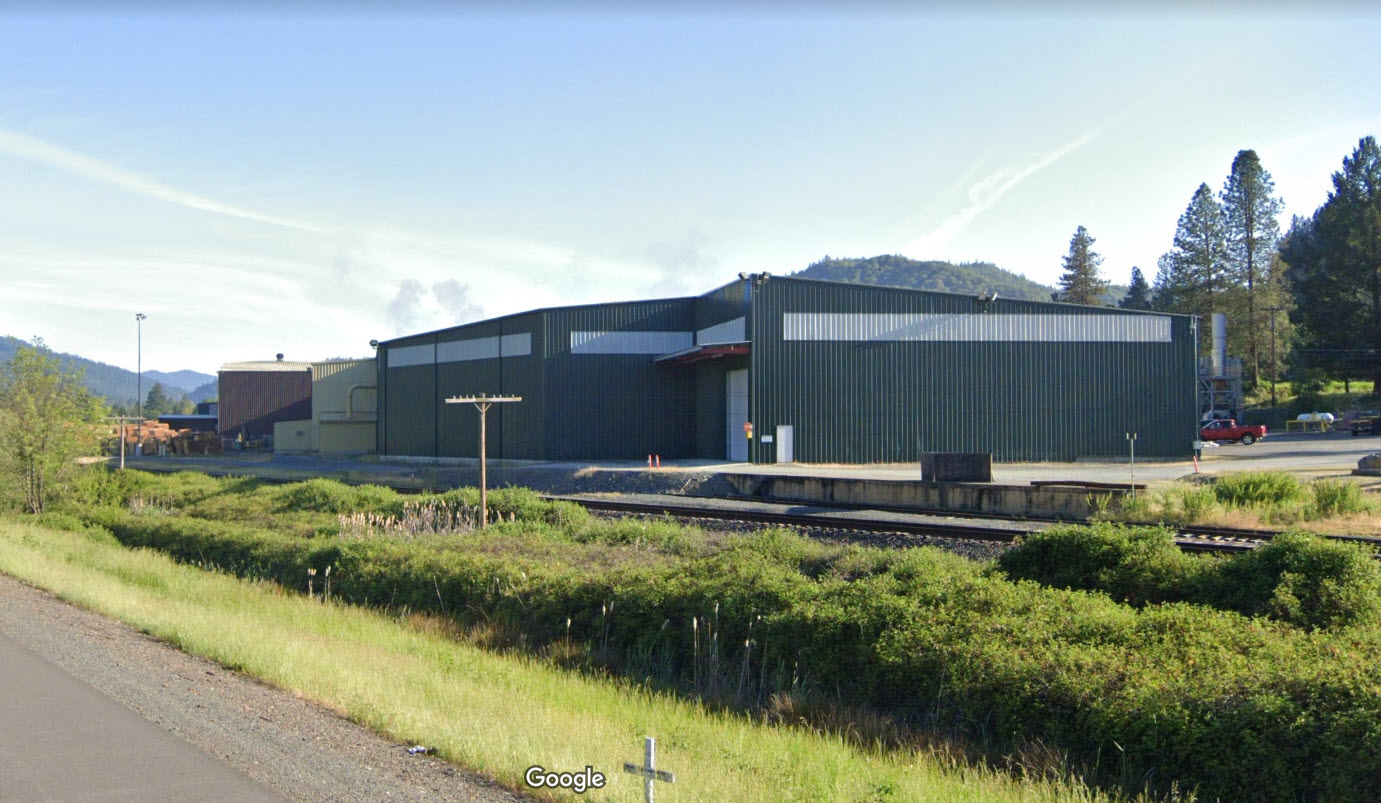
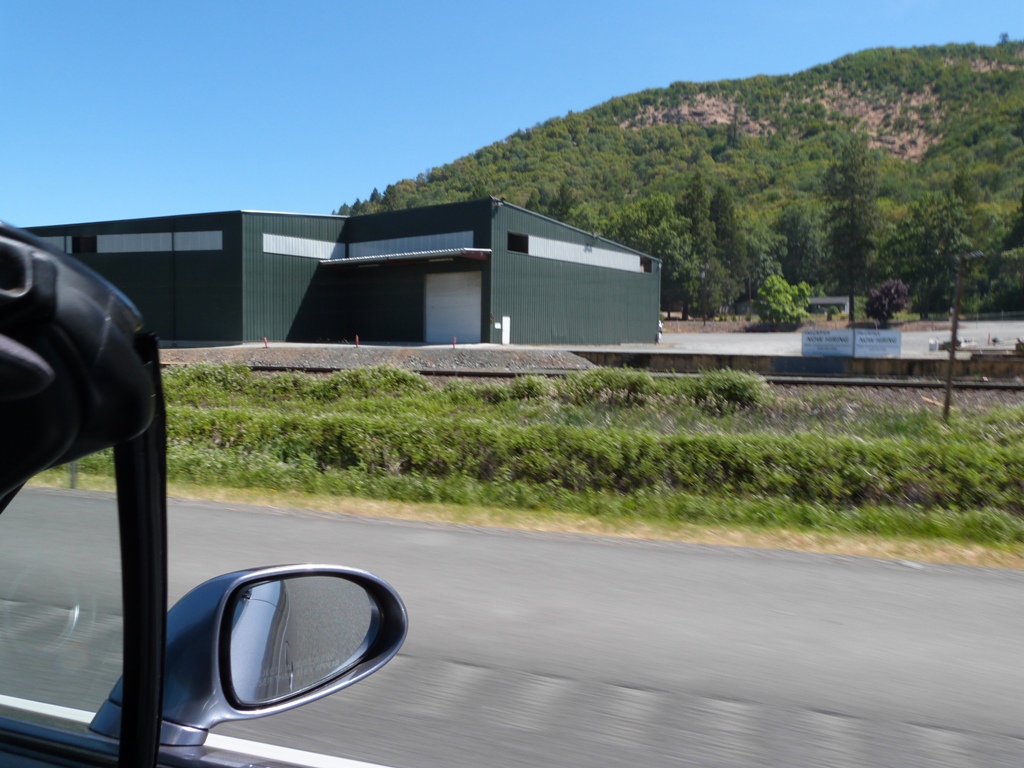
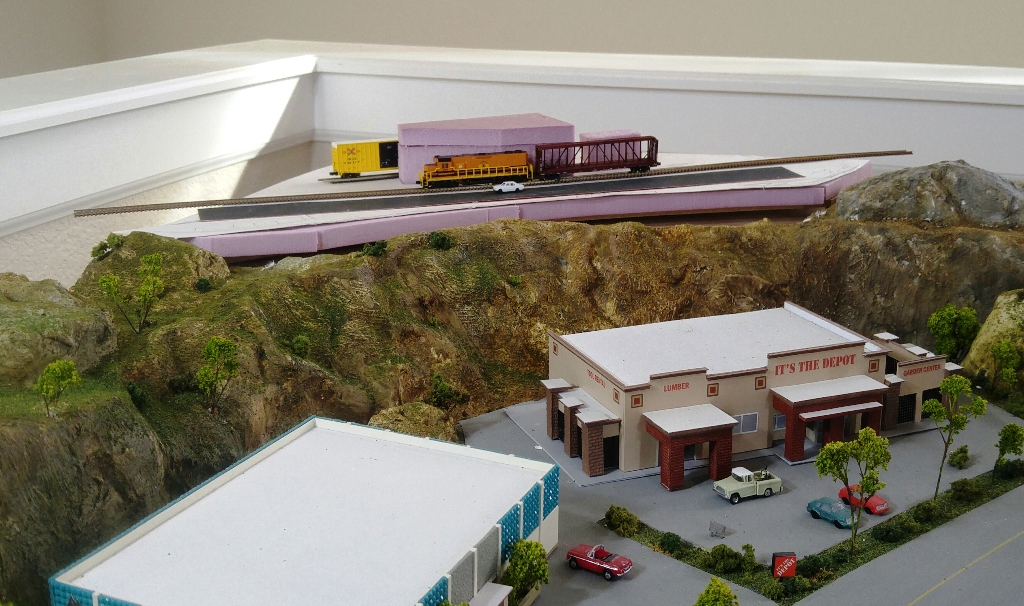
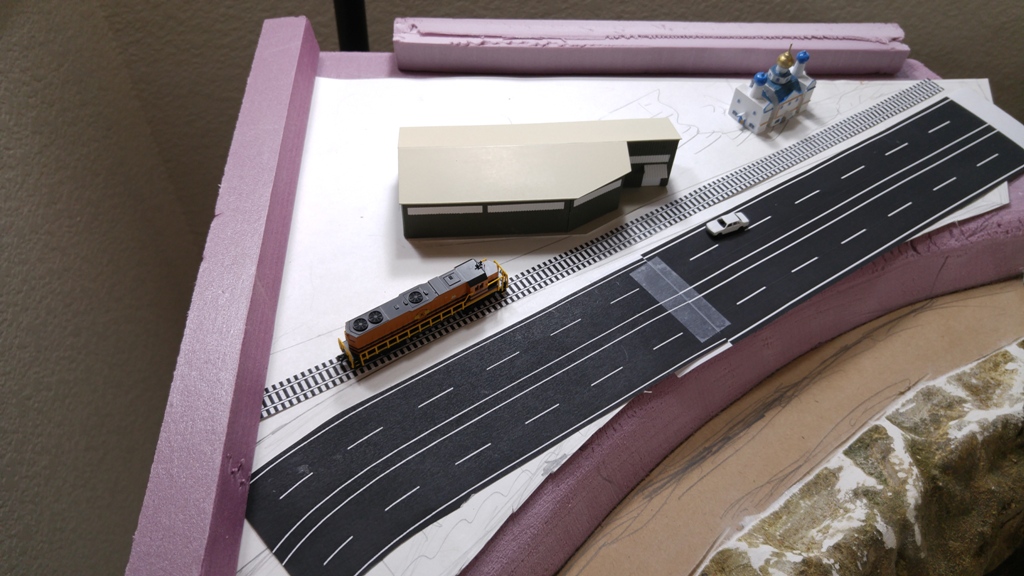
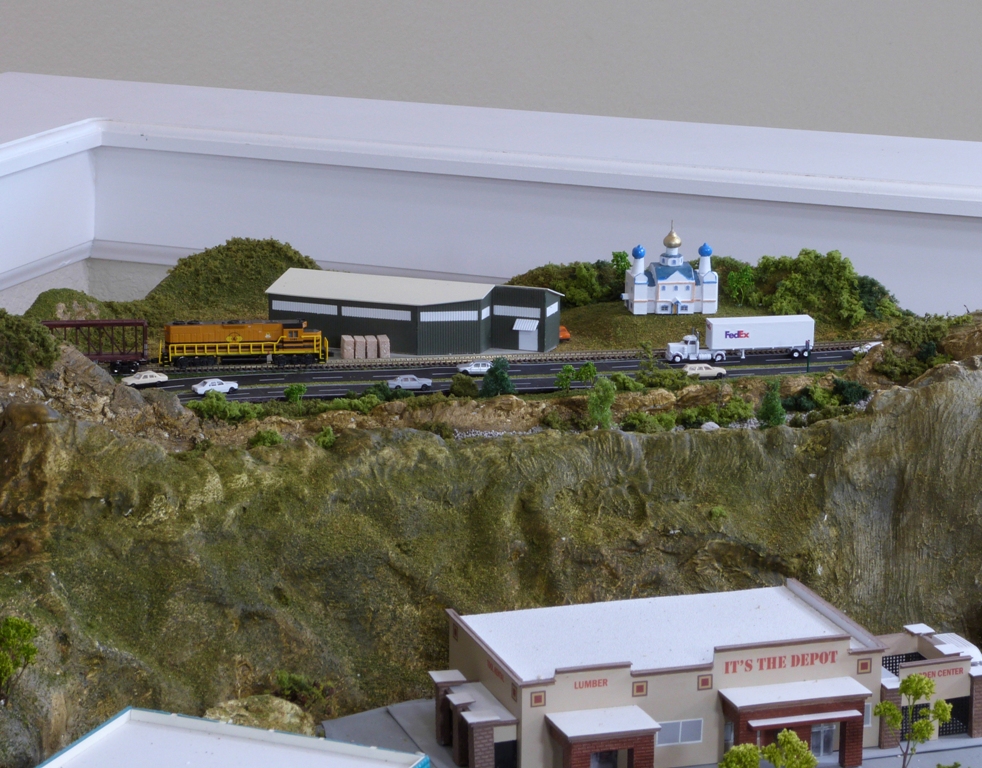
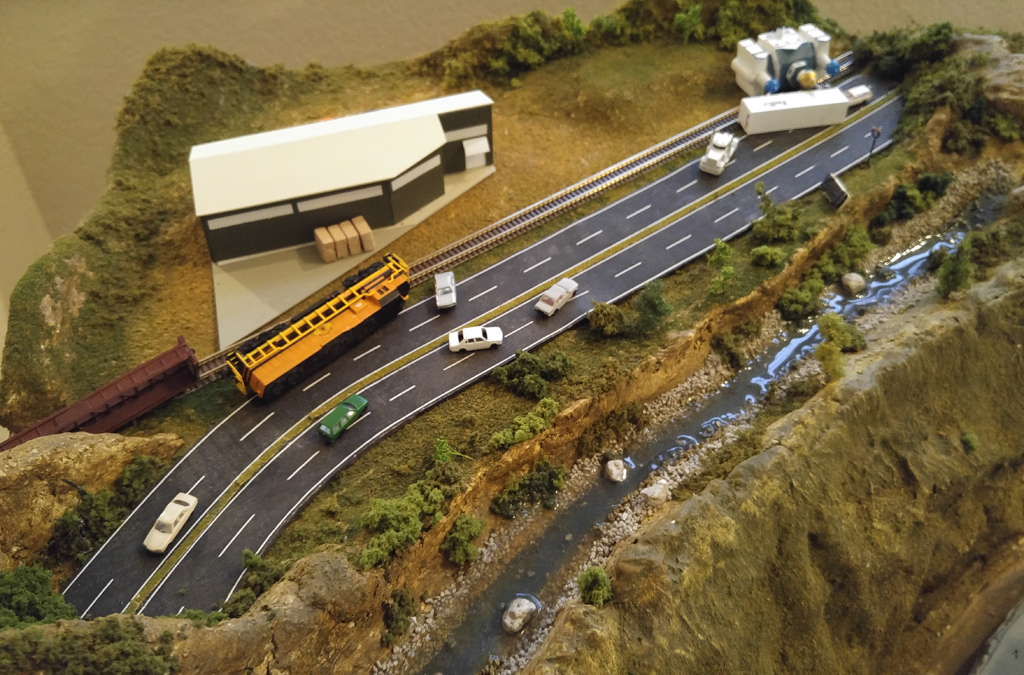
The huge Murphy Plywood plant is also a stop for local freight trains, and can often be seen with a boxcar or center-beam parked nearby. Sometimes even a locomotive. (And, if a certain railfan is really lucky, he'll be cruising on the freeway next to a train on parallel tracks.)

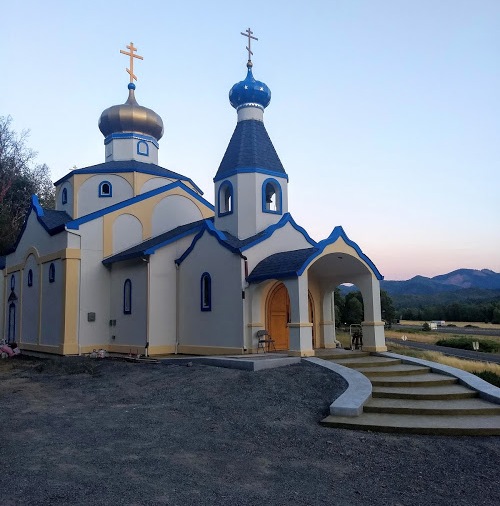
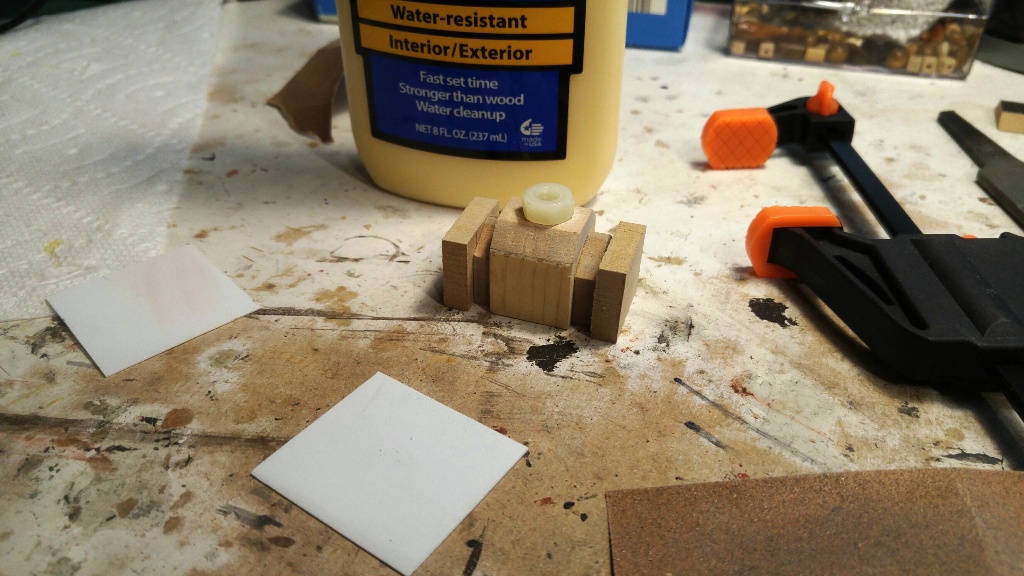
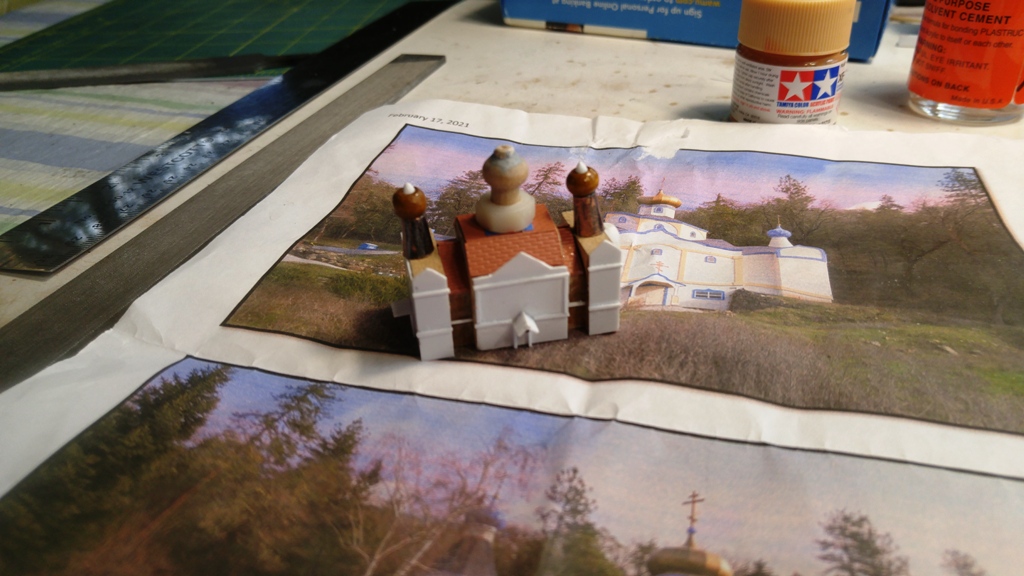
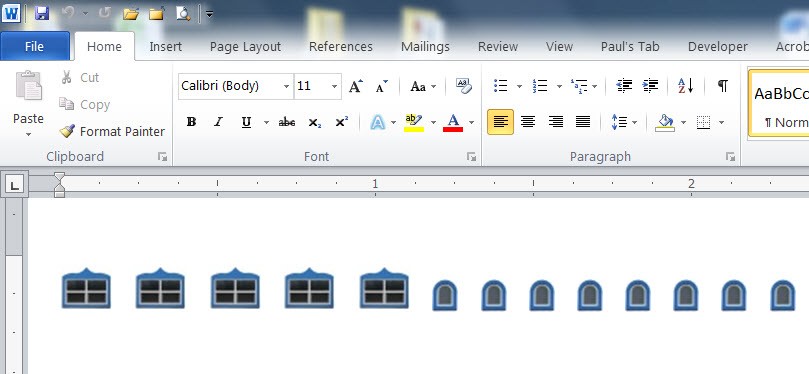
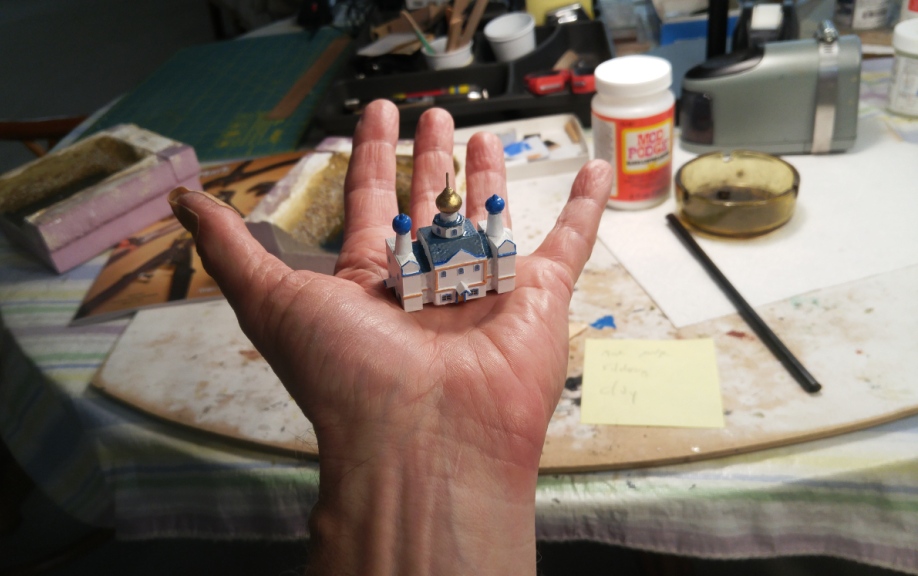
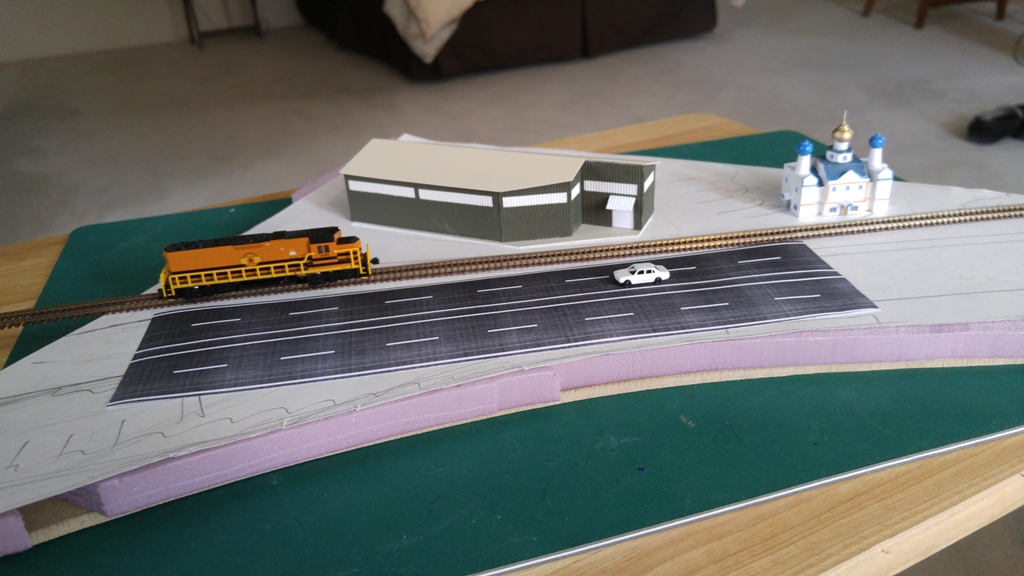
Not far from Murphy is a very ornate Russian Orthodox church, something that I thought would look great on a layout - although I was a little curious as to how I would built it in such a small size.

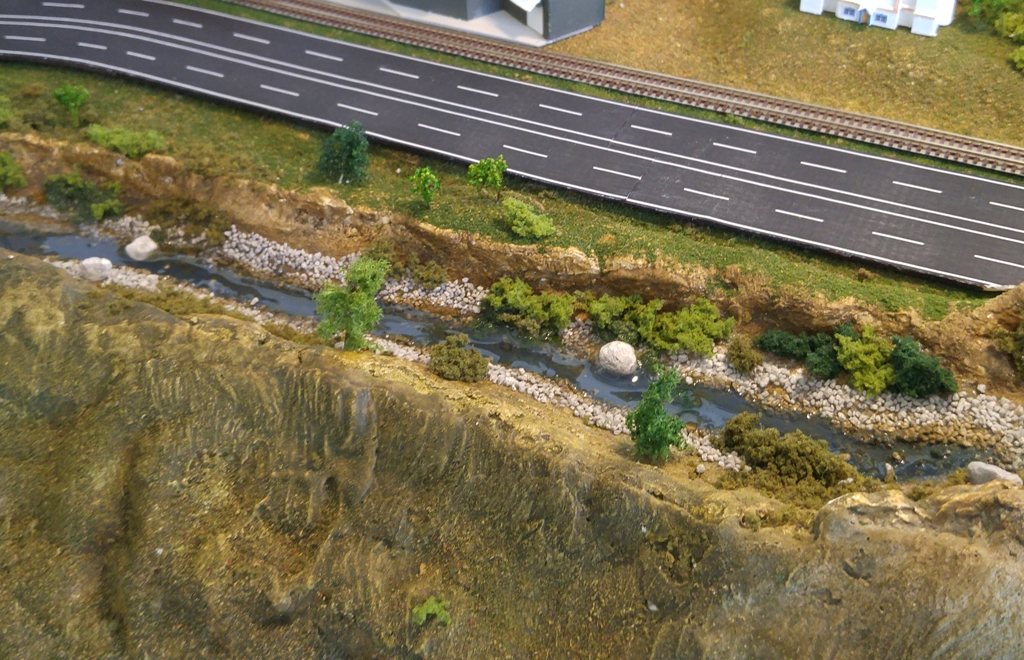
On the other side of the freeway is the Rogue River, a few miles upstream from Grants Pass.

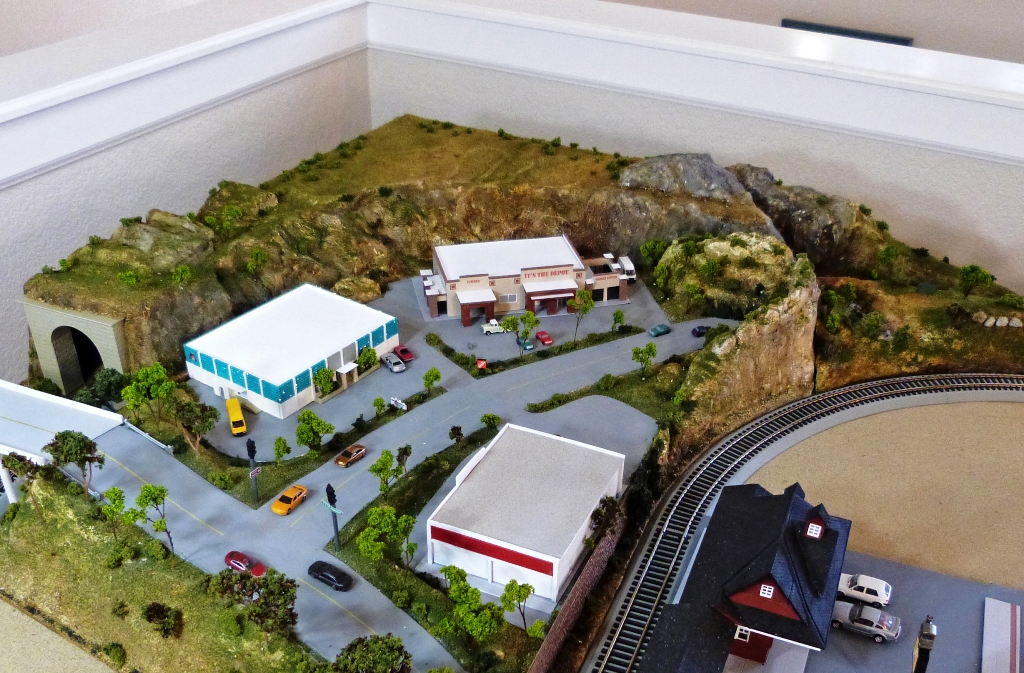
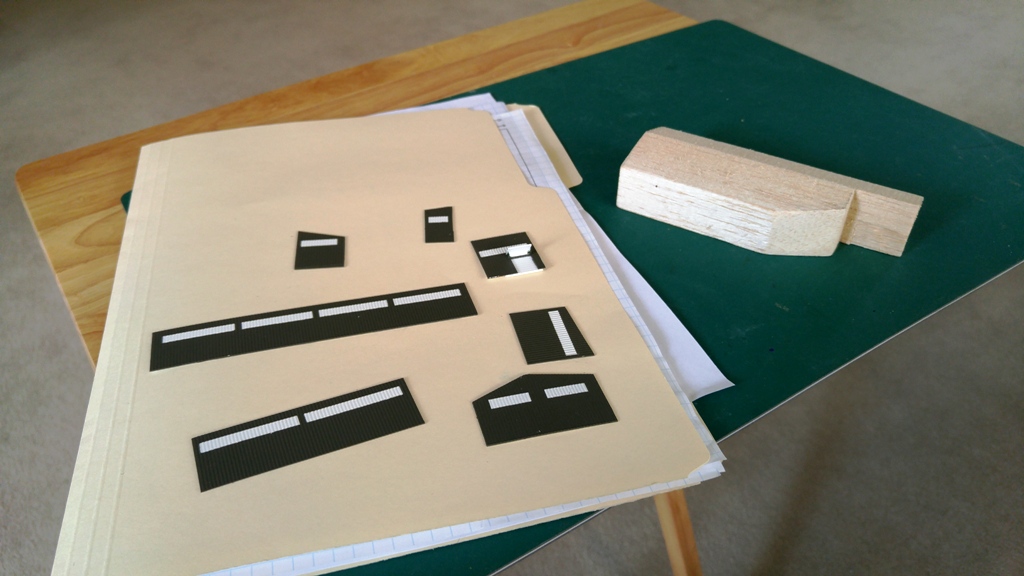
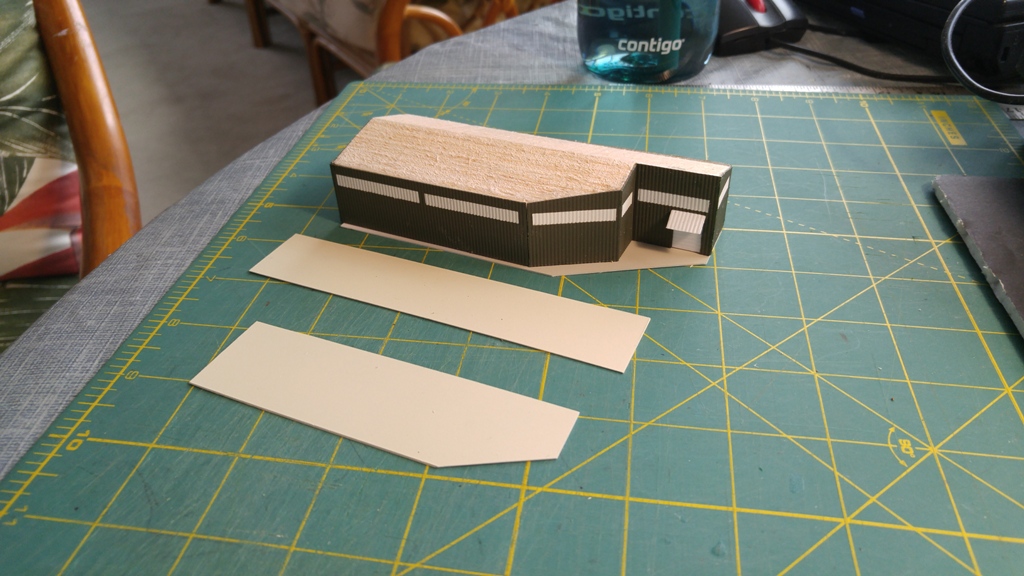
To emphasize the distance this area is from my main layout (plus because I didn't have a lot of space available) I used Z-scale vehicles and built the structures and roadway to something close to Z – although precision of scale was not really important here.

A few years back, when I originally envisioned creating this area, I had actually thought about placing a small, working Z-scale train layout up there. But I'm not ready to undertake the challenges that would be required for that right now. Besides working in the smaller size, availability in Z is very limited compared to HO, or even N. However, I wouldn't rule out a Z-scale train layout sometime in the future.


Murphy Plywood Plant
A Google view of the real plywood plant.

Church
Building the Russian Orthodox church in Z-scale presented a modeling challenge - at least for me.

The original mountain.
The mountain's original layout.
(Wow, the river section isn't even on
the drawing board in this picture. )
Trap Door
Always include a trap door
for access to derailments inside
longer tunnels.

The Structures

I thought that having the two structures completed would give me a better feel for how to do the landscaping. I decided to undertake the more challenging of the two first: the church.

The building consists of over 50 small pieces in the space of about two cubic inches. The parts include pieces of wood, a hex nut, several beads, thin styrene strips and panels, and small printed labels for the doors and windows.

This project also required some of the smallest painting I've ever done. (I'm very fortunate that I have extremely good near vision - my prescription for distance is another story.)

And I truly feel that my manual dexterity has improved since starting this hobby. (My patience sure has.) Working at this scale was a good learning experience, and I'm very pleased with the results. (In fact, when I look at the picture below of the little church in my hand, frankly, I'm amazed.)

Church construction
Church construction begins...

Church constructino
...and continues.

Church windows
A good way to create doors and
windows - especially ones this small!

Church in hand
Completed church in hand!


Murphy Plywood is a large and complex plant, and the space I had available was very small. As with the Home Depot model, a major challenge was using selective compression to incorporate a few of the most noticeable styling cues. So while my building represents a small fraction of the actual plant, I think that any person who lives locally would recognize it. (By the way, in modeling parlance, what's being modeled is referred to as the "prototype.")

For spacing and positioning calculations, I first built a test building out of pink foam. But I've wanted to try working with balsa wood a bit more, and found a small block just the right size at the local hobby store.

After designing and shaping the basic balsa wood structure, I cut pieces of corrugated pattern styrene to the sizes and shapes of each wall as well as smooth pieces for the roof. The white part of the building was masked off before spraying the siding with a closely matching green paint.

Working with the balsa wood was fun. Although it's very soft, it beats pink foam for rigidness and I think that could contribute to making measurments and cuts more precisely. However I learned that you've got to be very careful with sandpaper. In fact, a good press with a finger will dent it.

Another neat thing about balsa that I had learned previously is that thin pieces can be cut and shaped easily with an X-acto knife and a French curve.

Balsa is a bit pricey, but for some effects, it's perfect. Give it a try.

Murphy
Driving towards the plant.

Plant Construction
The balsa wood structure and
the painted side panels - it's like
a little kit.

Plant Construction
About to add the roof.

Mockup
The plywood plant and church
meet for an evaluation mockup.


Landscaping

Here's a situation where having a modular layout (and a removable section) is a big advantage. I knew the process of remaking the mountain would be messy. The first step in landscaping the area was to remove the original section of ground cover. And although it was pretty easy as I had used Shaper Sheet (planning for this day), it was still a messy process, espcially when I started to scrape off some of the adjacent landscaping materials in preparation for additional plaster products. And, of course, there would be a lot more landscaping to do. All in all, being able to bring the module to the garage was necessary - and easy!

Using the buildings I had made as well as mock-ups for the roadway and tracks, I built up the mountain on the sides as well as the top with a bit more foam and plaster.

Old landscaping removed.
An easy first step.

Section Slice
The section I removed would make
a pretty good start to a diorama.

Rogue River Area
Another mockup - in place, this time.

Bulking up the mountain.
Adding foam to the sides.


I generally cover pink foam with plaster cloth. It takes Earth Undercoats and scenic material very nicely and provides a good base for other plaster products.

It's very easy to apply once you get the hang of it. (That could be a pun to anyone that has used it.) Since it will be under other surface coverings, it doesn't require precision fitting. Where I'm planning a very flat area like concrete or asphalt, I apply a single smooth layer. Elsewhere, overlaps or bumps will not be a problem.

This was like other dioramas I have done, with the slight difference that it had to blend with three adjacent areas. It wasn't difficult.

The first thing I wanted to do is "bulk up" the mountain by adding foam to the sides, and various plaster products all over. While I had a general idea of what I wanted it to look like, I had not planned every detail and fine-tuned the design as I went along.

This is the point where I started the "production/evaluation" cycle. (It's another benefit of having a relatively small and lightweight section.)

On all but the simplest of production, rather than doing a large amount of work at one time, I like to evaluate the progress by seeing the scene in place after I've made a few additions or changes. This helps me make the next ones. As production continues, periodically setting up the emerging scene with as many of the components as possible gives me a better idea of what the final diorama should/will look like. If the actual components aren't yet available, mock-ups and stand-ins are used, like printed tracks or foam buildings.

Even though production can take quite a bit longer this was, my creative juices flow better, especially because I'm not working off a master plan. In fact, during  one of my evaluation sessions I got the idea to add a depiction of Table Rock, a neat rock formation and popular hiking spot not far from the area being modeled.

Adding pink foam
Building up the surface with pink foam.

Another mockup
Yet another mockup, this time with
a few more components in place.

Plastercloth
Sculpt-a-mold and Plastercloth
cover most of the new surface.


Mountain grafting
I'm certainly not the first modeler
to use the phrase "mountain-grafting", but that's what came to me looking at this scene.


After moving the mountain back and forth between my studio and garage a few times while fine-tuning, I finalized the plaster portions of the layout and moved on to painting the undercoats using Earth, Green and Slate Gray. (At this point, the diorama stayed in the garage until completion.)

Because of the very different way that Sculpt-a-Mold accepts colors (not necessarily bad, but not very absorbent), I used a "skim coat" of Hydrocal in some places so that I could match pre-existing terrain and colors.

I also painted and started to prepare the riverbed putting talus and a few rocks at the shoreline. Then it was on to landscaping.

A funny thing occurred to me about this time. Here I was doing all this detail work, and yet few people ever see the actual scene in any kind of detail. Some may catch a glimpse in their peripheral vision as they zoom by on the I-5, and I think most people will recognize the church. But even for locals, unless one is a train geek, travelers on the freeway probably wouldn't give the plywood plant, or the area around it, a second look.

I still kind of sweated the details, and foliated the area with a variety of grasses, turfs and trees.

Roadway construction
Roadway construction.

The riverbed.
The riverbed.

The Final Touches

The River

After most of the foliage had been placed, I added a few rocks and bushes along the river, touched up the deep blue riverbed and painted part of the talus with Earth Undercoat. Then I poured three layers of Realistic Water (at least 24 hours between them).

The Roadway

As described in "What I Wish", I created the freeway in Excel. (Let me know if you'd like details on how it was done.) I added the small curve in the roadway by taking a screen shot of the Excel spreadsheet and distorted it in PhotoShop. (I used a program called Snag-It, but there are a number of ways to take a shot of the screen.) Then I printed the two pieces of "roadway" on plain paper and affixed them to a piece of balsa wood for easier handling and gluing.(I was going to use styrene, but I happen to have a piece of thin balsa that was long enough to use in one piece.)

Once the roadway was on the balsa wood, it was very easy to trim to fit the space. (A sharp X-acto works wonders on a thin piece of balsa.) I also added a thin strip of grass mat as a median.

It's funny - I didn't want solid black, but my old laser printer could not print shades of gray very well. As it turned out, it didn't print black all that well either - it was slightly washed out - and perfect!

By the way, use caution when using paper as a material on layouts as it's extremely vulnerable to damage during, and after, production. For instance, after I completed the printing of the lanes, there were several production steps that were very risky including cutting and gluing and some additional landscaping nearby. Paper is unforgiving when it comes to errors or sloppiness. (The truth is I had to print a second version having messed up the first - but I did a much better job the second time!)

To be honest, I'd be reluctant to use printed paper again for a main part of a scene, unless it could be easily replaced if damaged.

But if you are going to use paper on your layout, especially a larger and/or horizontal piece, schedule it as late in the production cycle you can so that you don't have to work around it with glues, paints, tools, or just your hands. And after it's on the layout, cover it while you continue to work.

The Track

I realized that at that distance and size, ballast wasn't necessary – or even practical. So just to make sure the flex-track would be flat and straight, I glued it to .010" styrene strips which I had painted gray. That made it easier to glue the track down to the layout.


Etc.

I added a bit of foliage around the highway and tracks. Small blocks of wood were used for the plywood stacks in front of Murphy's. I may even add a bit more foliage. (I've got something on order that I'd like to try.)

It's nice to see this one complete. In cleaning up afterwards, discarding my project notes and drawings, I found sketches (which turned out to be very accurate) from back in 2019 - over two years ago.


I5

I5


Disaster on Interstate 5


You may have read about this. On the afternoon of February 10, 2023, a giant cat knocked over a locomotive, a Fed Ex truck and a small church on Interstate 5 in Rogue River, Oregon. Several automobiles were also involved.

Disaster

Fortunately, no one was seriously injured and the damage was quickly repaired.

The cat is still at large.

Return to Index

Go to Layout List