The Z Scale Adventure
After I completed the N scale Super Chief layout, I took a little time away from trains to play a bit with watercolors and urban sketching.
One of the reasons I decided to give art a try is that I’ve been thinking that sometime in the not-too-distant future, I could wind up in a smaller residence without room to build or even have a layout. Although I have no plans for that move yet, I guess I simply didn’t feel like starting another large-scale project. So, I watched a bunch of YouTube videos, pulled out the old watercolors, and started playing. My first results are here.
My break from model railroading didn't last long. I still had an itch to build little things, so after a lot of talking it over with myself, I decided to take a look at Z scale, which is 1:220 vs. N scale at 1:160. HO is 1:87.
It’s funny. From what I’ve read, this scale was named “Z” because it was thought that nothing could get any smaller. It is indeed very small (but take a look at T scale!).
The First Steps
Despite the fact that it’s been around since the 1970’s, it seemed difficult to find products in which I had an interest. The hobby shops that I sometimes frequent have nothing in Z. And its Internet presence seems somewhat disjointed with only a few vendors selling a complete line of Z scale equipment.
Another odd thing is that a search will often turn up videos and links that are very old, sometimes ten or more years! I think it's a bit weird that there isn't a lot of more recent information. I had really hoped to find a “getting started with Z scale” tutorial. I guess I'm writing my own.
I found a vendor (zscalemonstertrains) who seems to sell a complete line of Z scale components from a large Japanese company, Rokuhan. After a bit of research, I put a track plan together.
A(nother) Trolley Layout
If you’ve perused this web site, you probably know that, having spent many hours on Boston’s rapid transit system as a kid, I like, and often model, trolleys. I’ve got an old Boston PCC trolley running through my HO layout, a Los Angeles trolley on my N scale Super Chief layout, and several other stand-alone dioramas featuring trolleys.
Well, as Paul McCartney said about silly love songs, here I go again.
In my searching, I did find something that interested me – a 3D-printed Z scale trolley made by Showcase Miniatures. It’s very high-quality little kit. And it gave me the idea to build a small trolley-based shelf layout.
It actually looks very similar to the street cars that ran in Boston in the days prior to the PCC cars that replaced them. While there is about zero chance I'd find a Z scale PCC car, this one could do just fine.
|
|
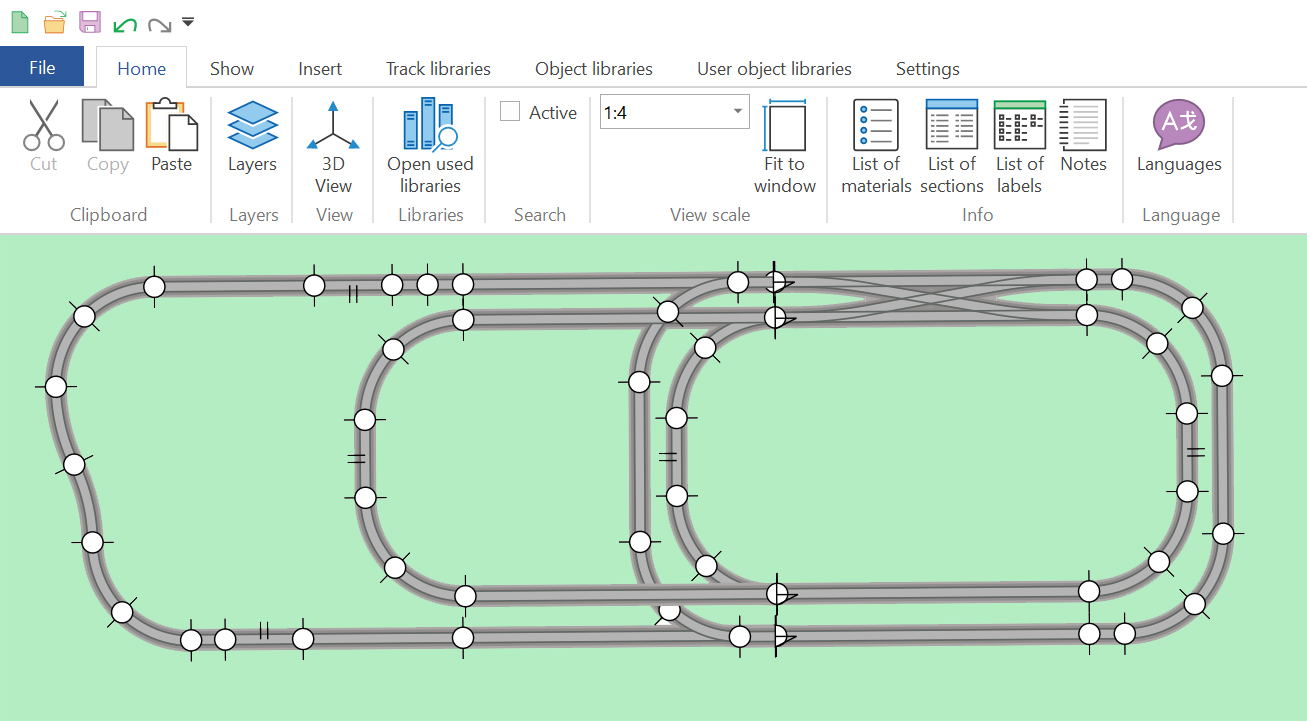
Since it was a 3-D printed shell, it was relatively easy to prep and paint the car in its beautiful Boston livery of the day. To come up with a potential track plan, I dusted off a program called AnyRail, which I used when I started my last layout, and I ordered a controller and enough track to create a simple oval. (I am already planning on a larger layout, but I wanted to give it a simple try first. | |
A possible future layout. |
A simple starter layout. |
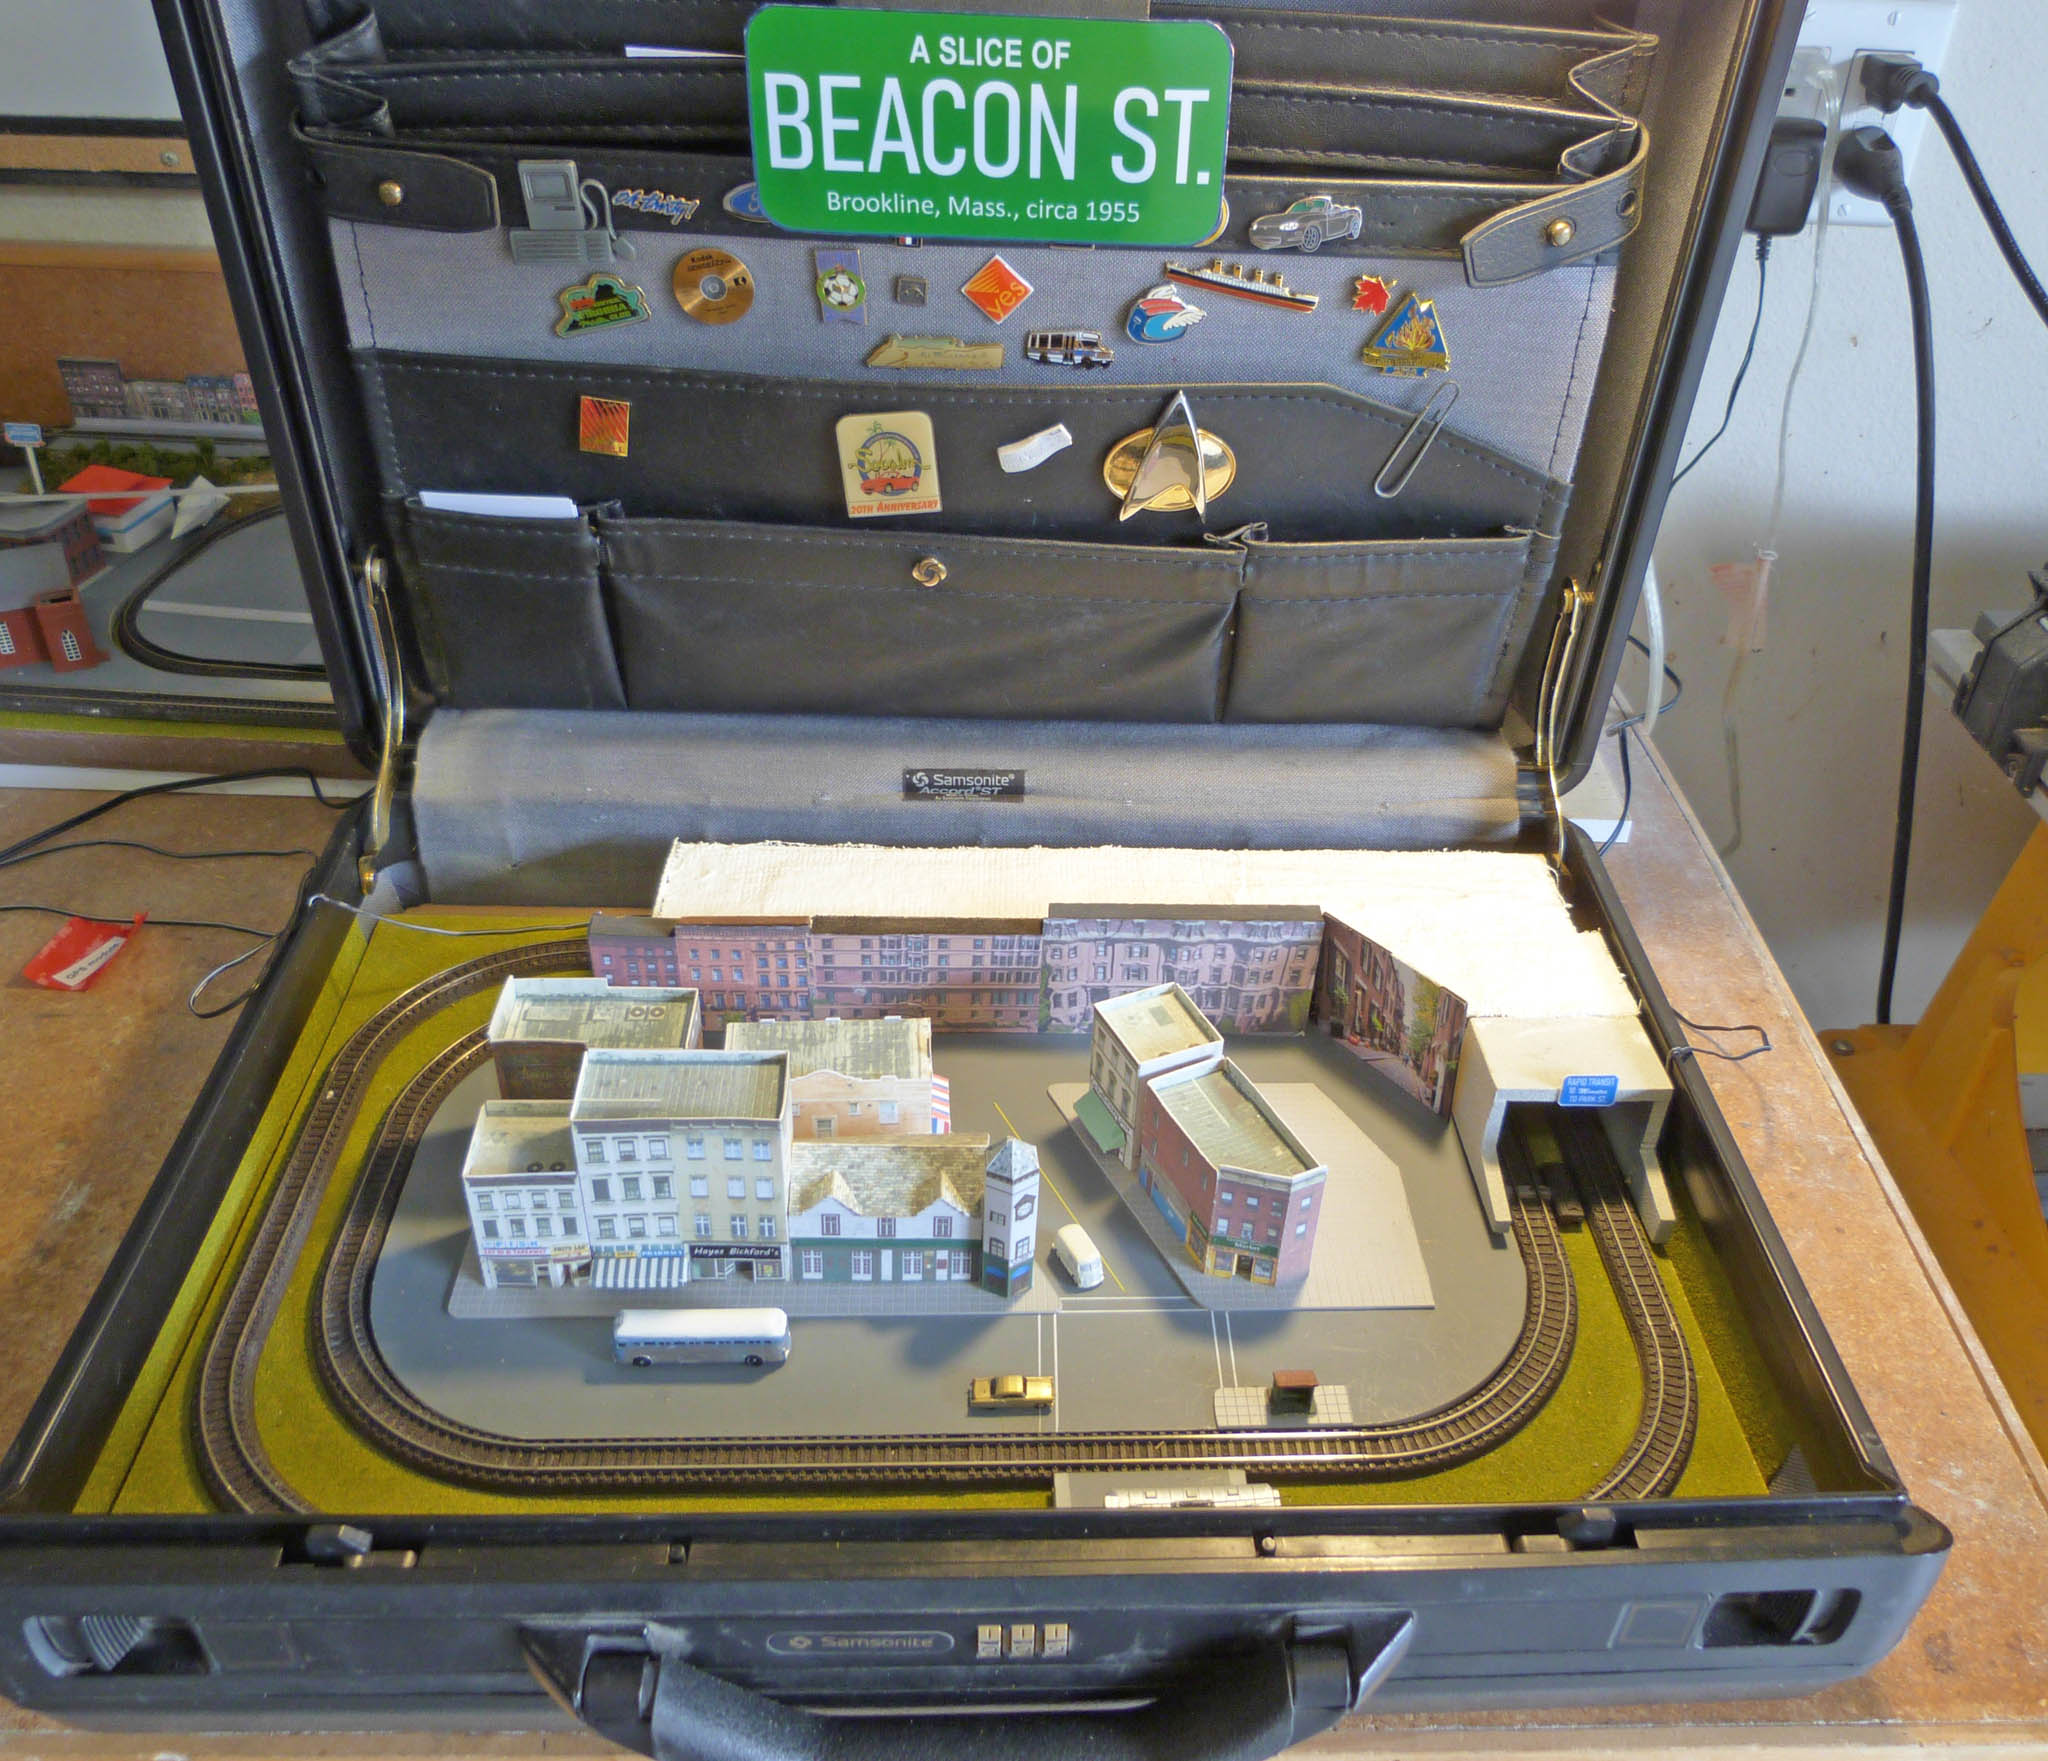
A Slice of Beacon Beacon Street is a major east-west street in Boston, Massachusetts, and its western suburbs of Brookline and Newton. It passes through many of Boston's central and western neighborhoods, including Beacon Hill, Back Bay, Fenway–Kenmore, the Boston University campus, Brighton, and Chestnut Hill.
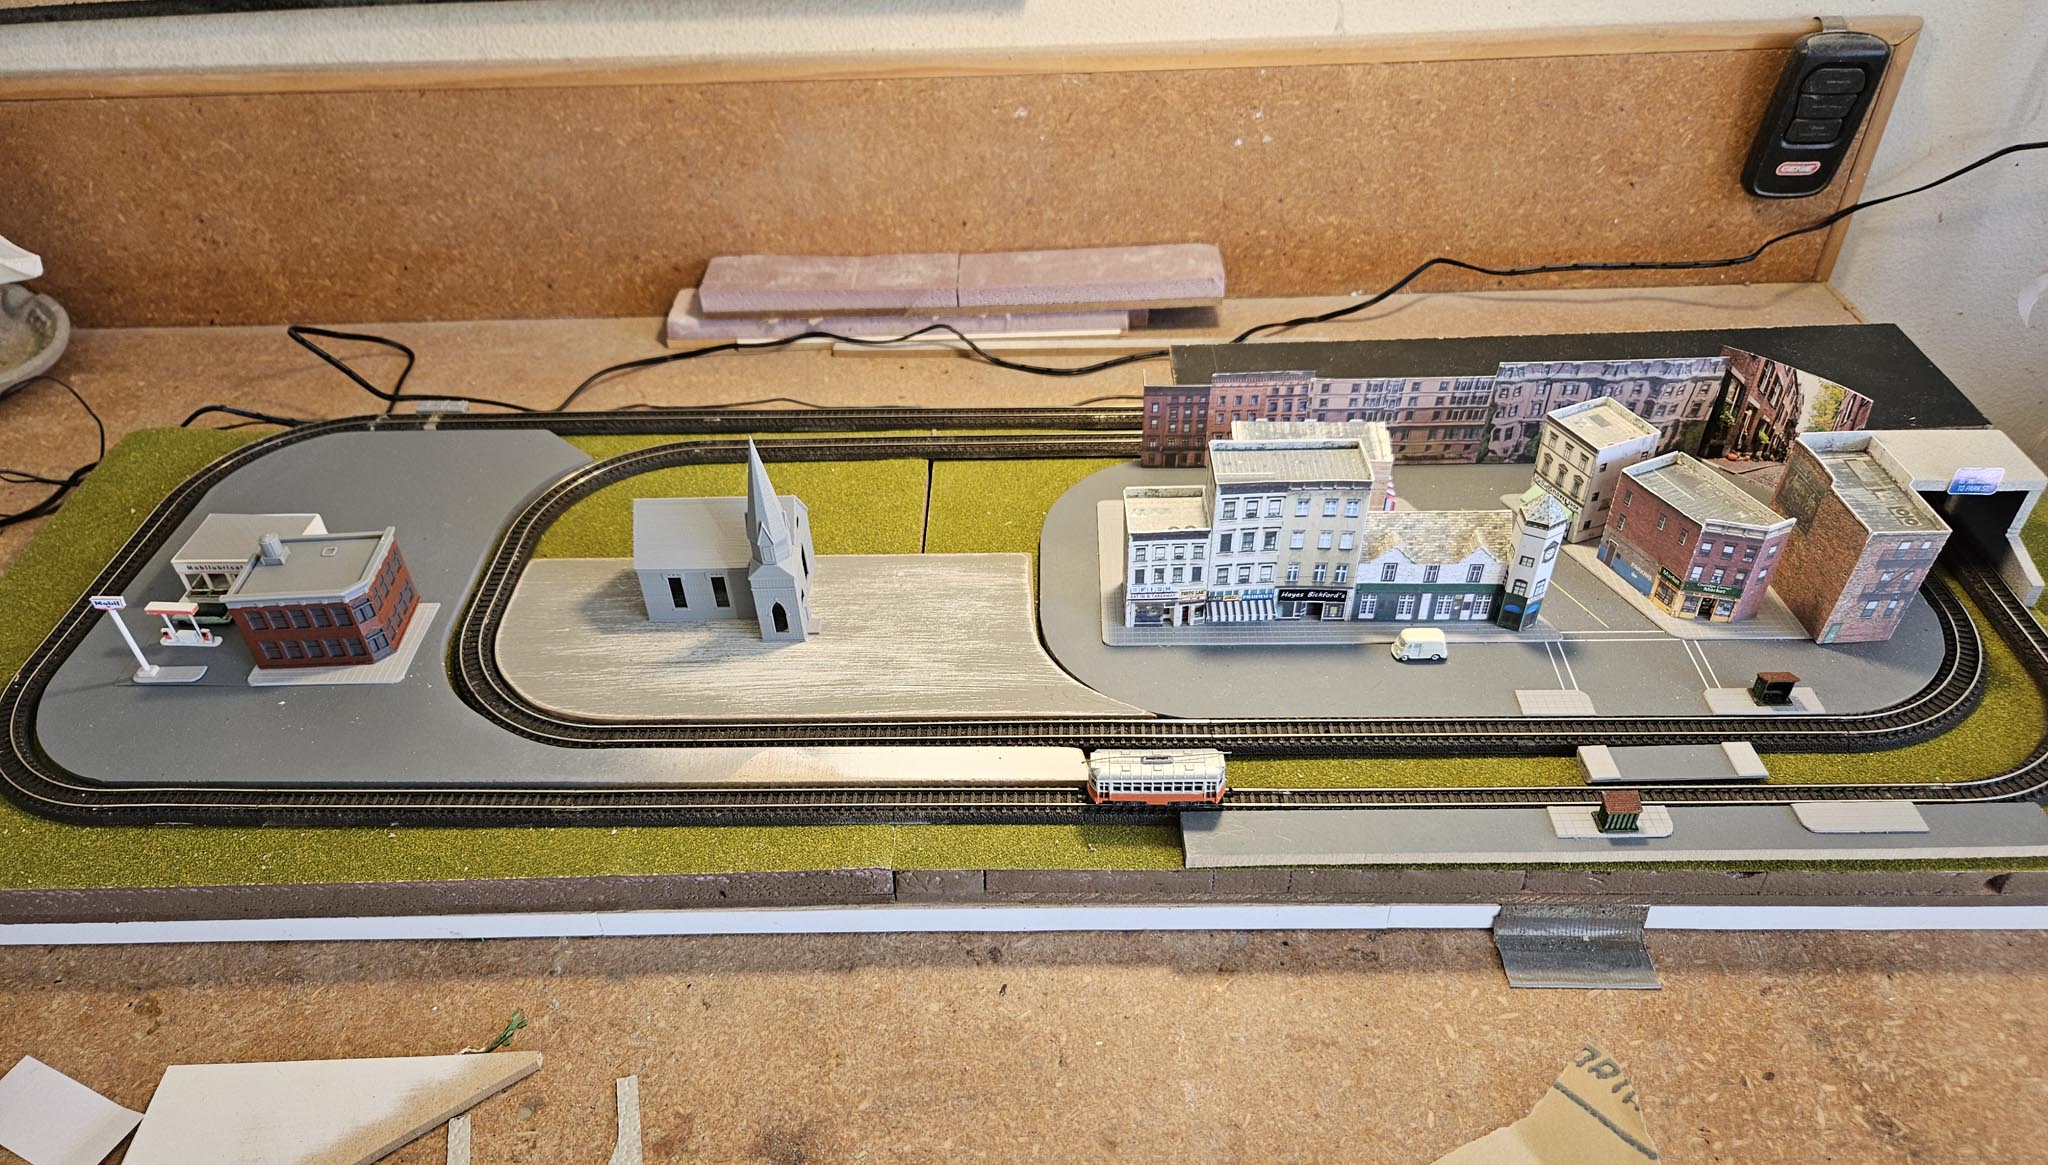
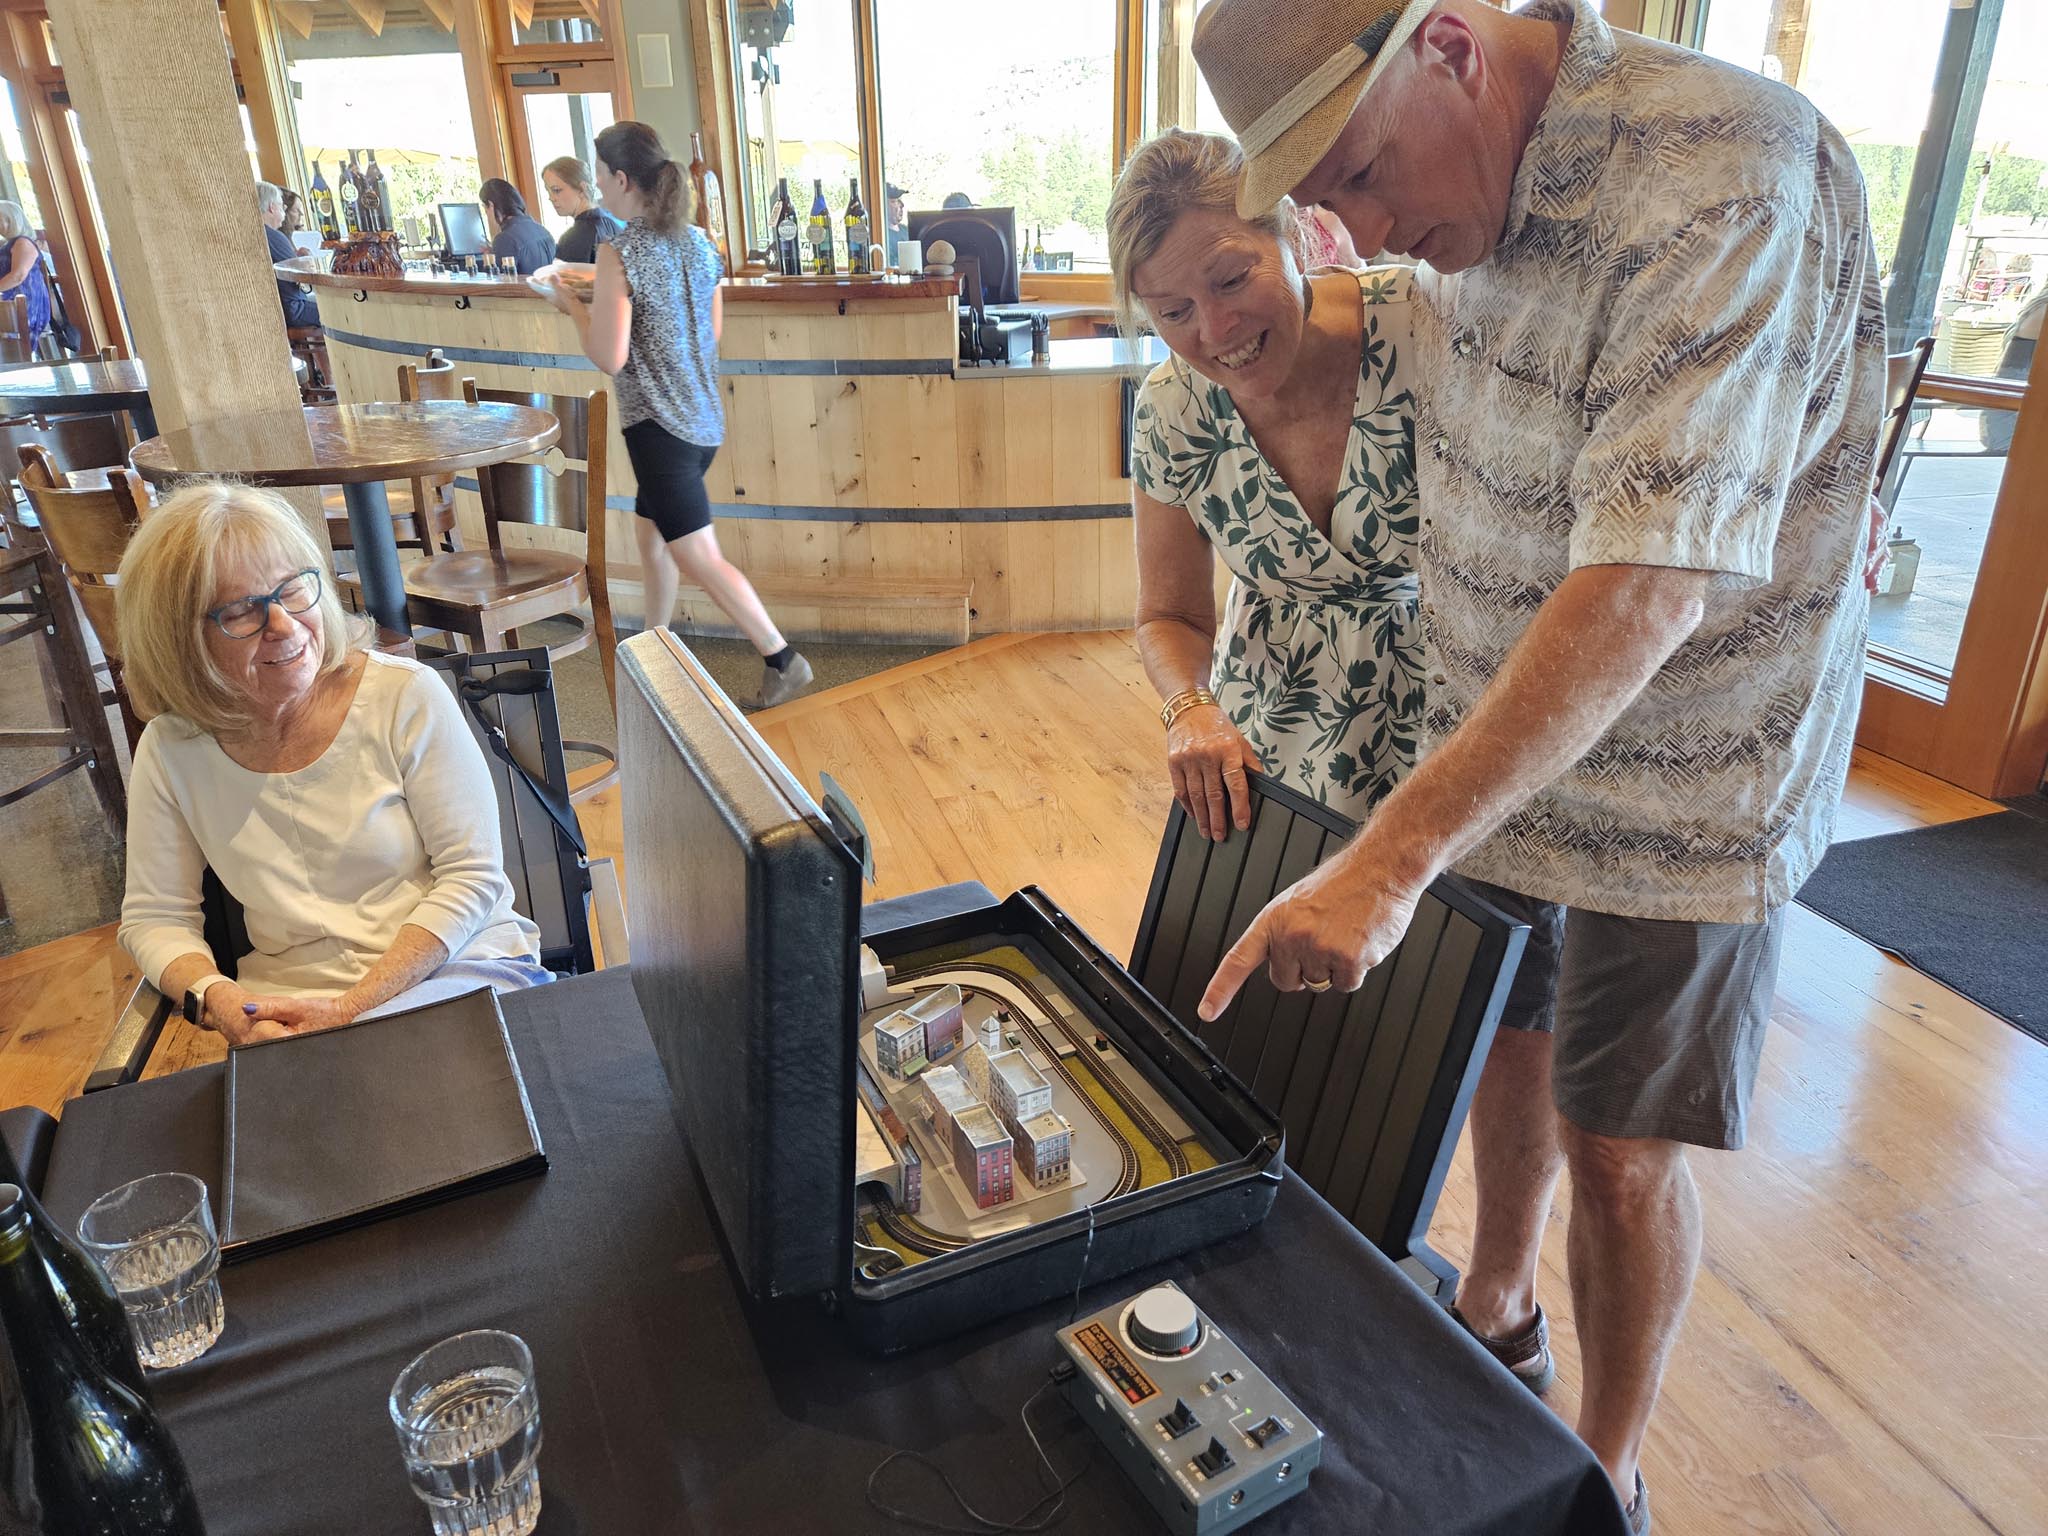
Because of the limited supply of Z scale structures, one of my first challenges was to find some buildings. Fortunately I found a company CustomZscales which offers a nice selection of easy-to-assemble cardboard structures, perfect for my needs. A Briefcase Layout Because of its small size, Z scale layouts often seem to find themselves under coffee tables and in briefcases. As it turned out, I had an old, unused briefcase (leftover from my working days of many years ago – shiver) and thought it might be fun to use it to house my first Z layout. (I can’t wait to bring it to my Saturday morning cars and coffee group soon.)
I liked the way the mock-up looked, so I decided to start on an actual layout. Years ago, when I was planning a shelf diorama, I assembled several test boards consisting of 3/16” MDF (medium density fiberboard) covered with a thin layer of pink foam. Good thing I saved them. Although this board will be covered, using foam putty I smoothed the joints and painted the foam. I'm thinking that my briefcase layout will be sort of a portable subset of a larger shelf-based layout.
| |
 Preparing the layout. |
|
|
|
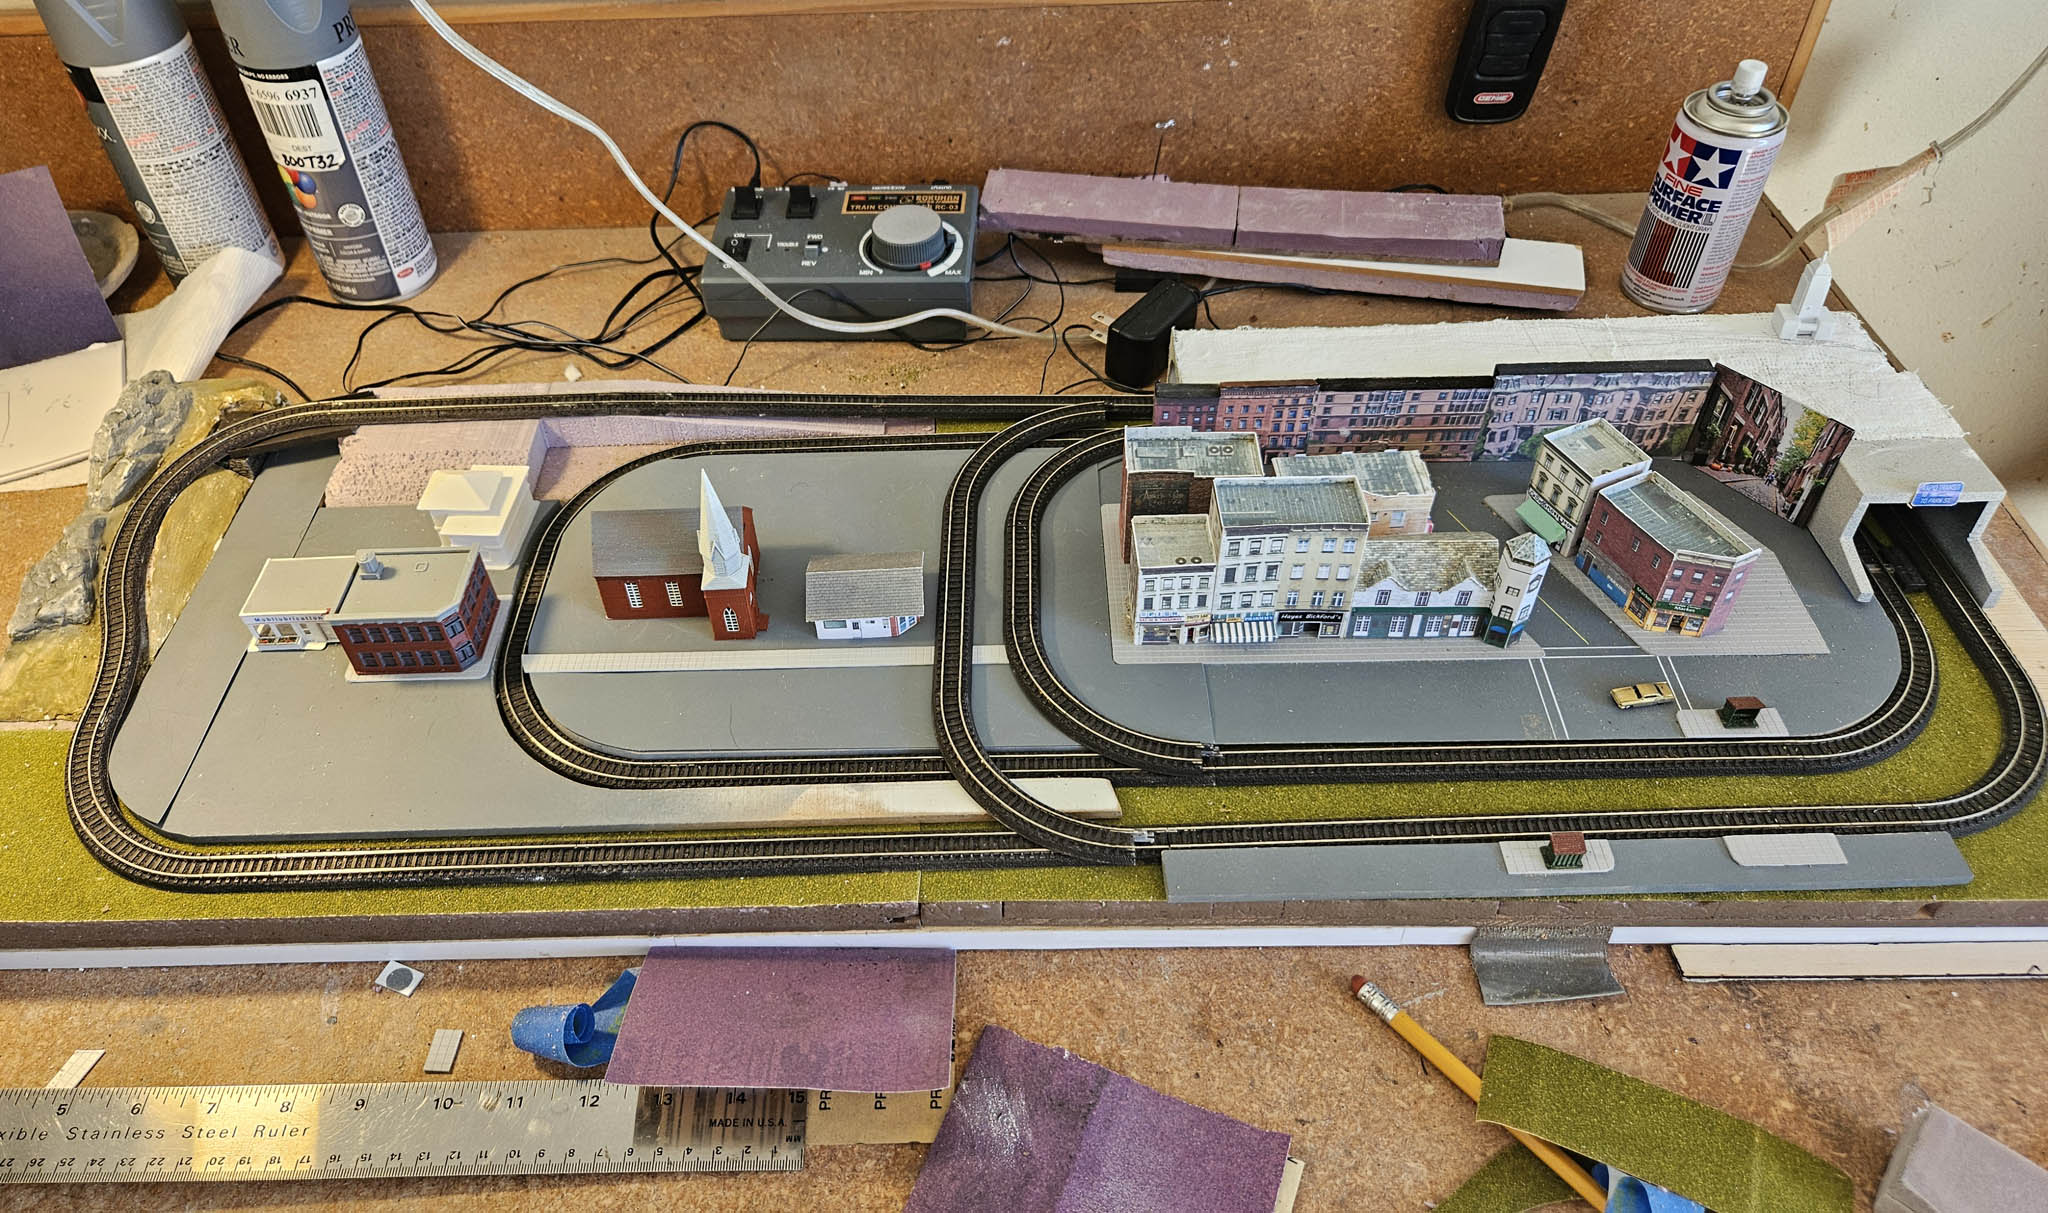
While I’m not a stickler for realism, I never liked the gray plastic sectional tracks. So, as I did in my other layouts, I painted the road bed and sides of the rails with burnt umber. If you decide to paint your tracks, a couple of words of caution: Try to avoid painting on or around switches – I think the reasons are obvious. Also, the paint can essentially be applied to the entire track and roadbed, as well as the side of the rails. However, have a paper towel handy to quickly wipe off the paint from the tops of the rails. Lastly, do not paint any metal track joiners or the rails they touch. I decided on a track layout for the briefcase. Using AnyRail software I created a track diagram and ordered the additional track necessary.
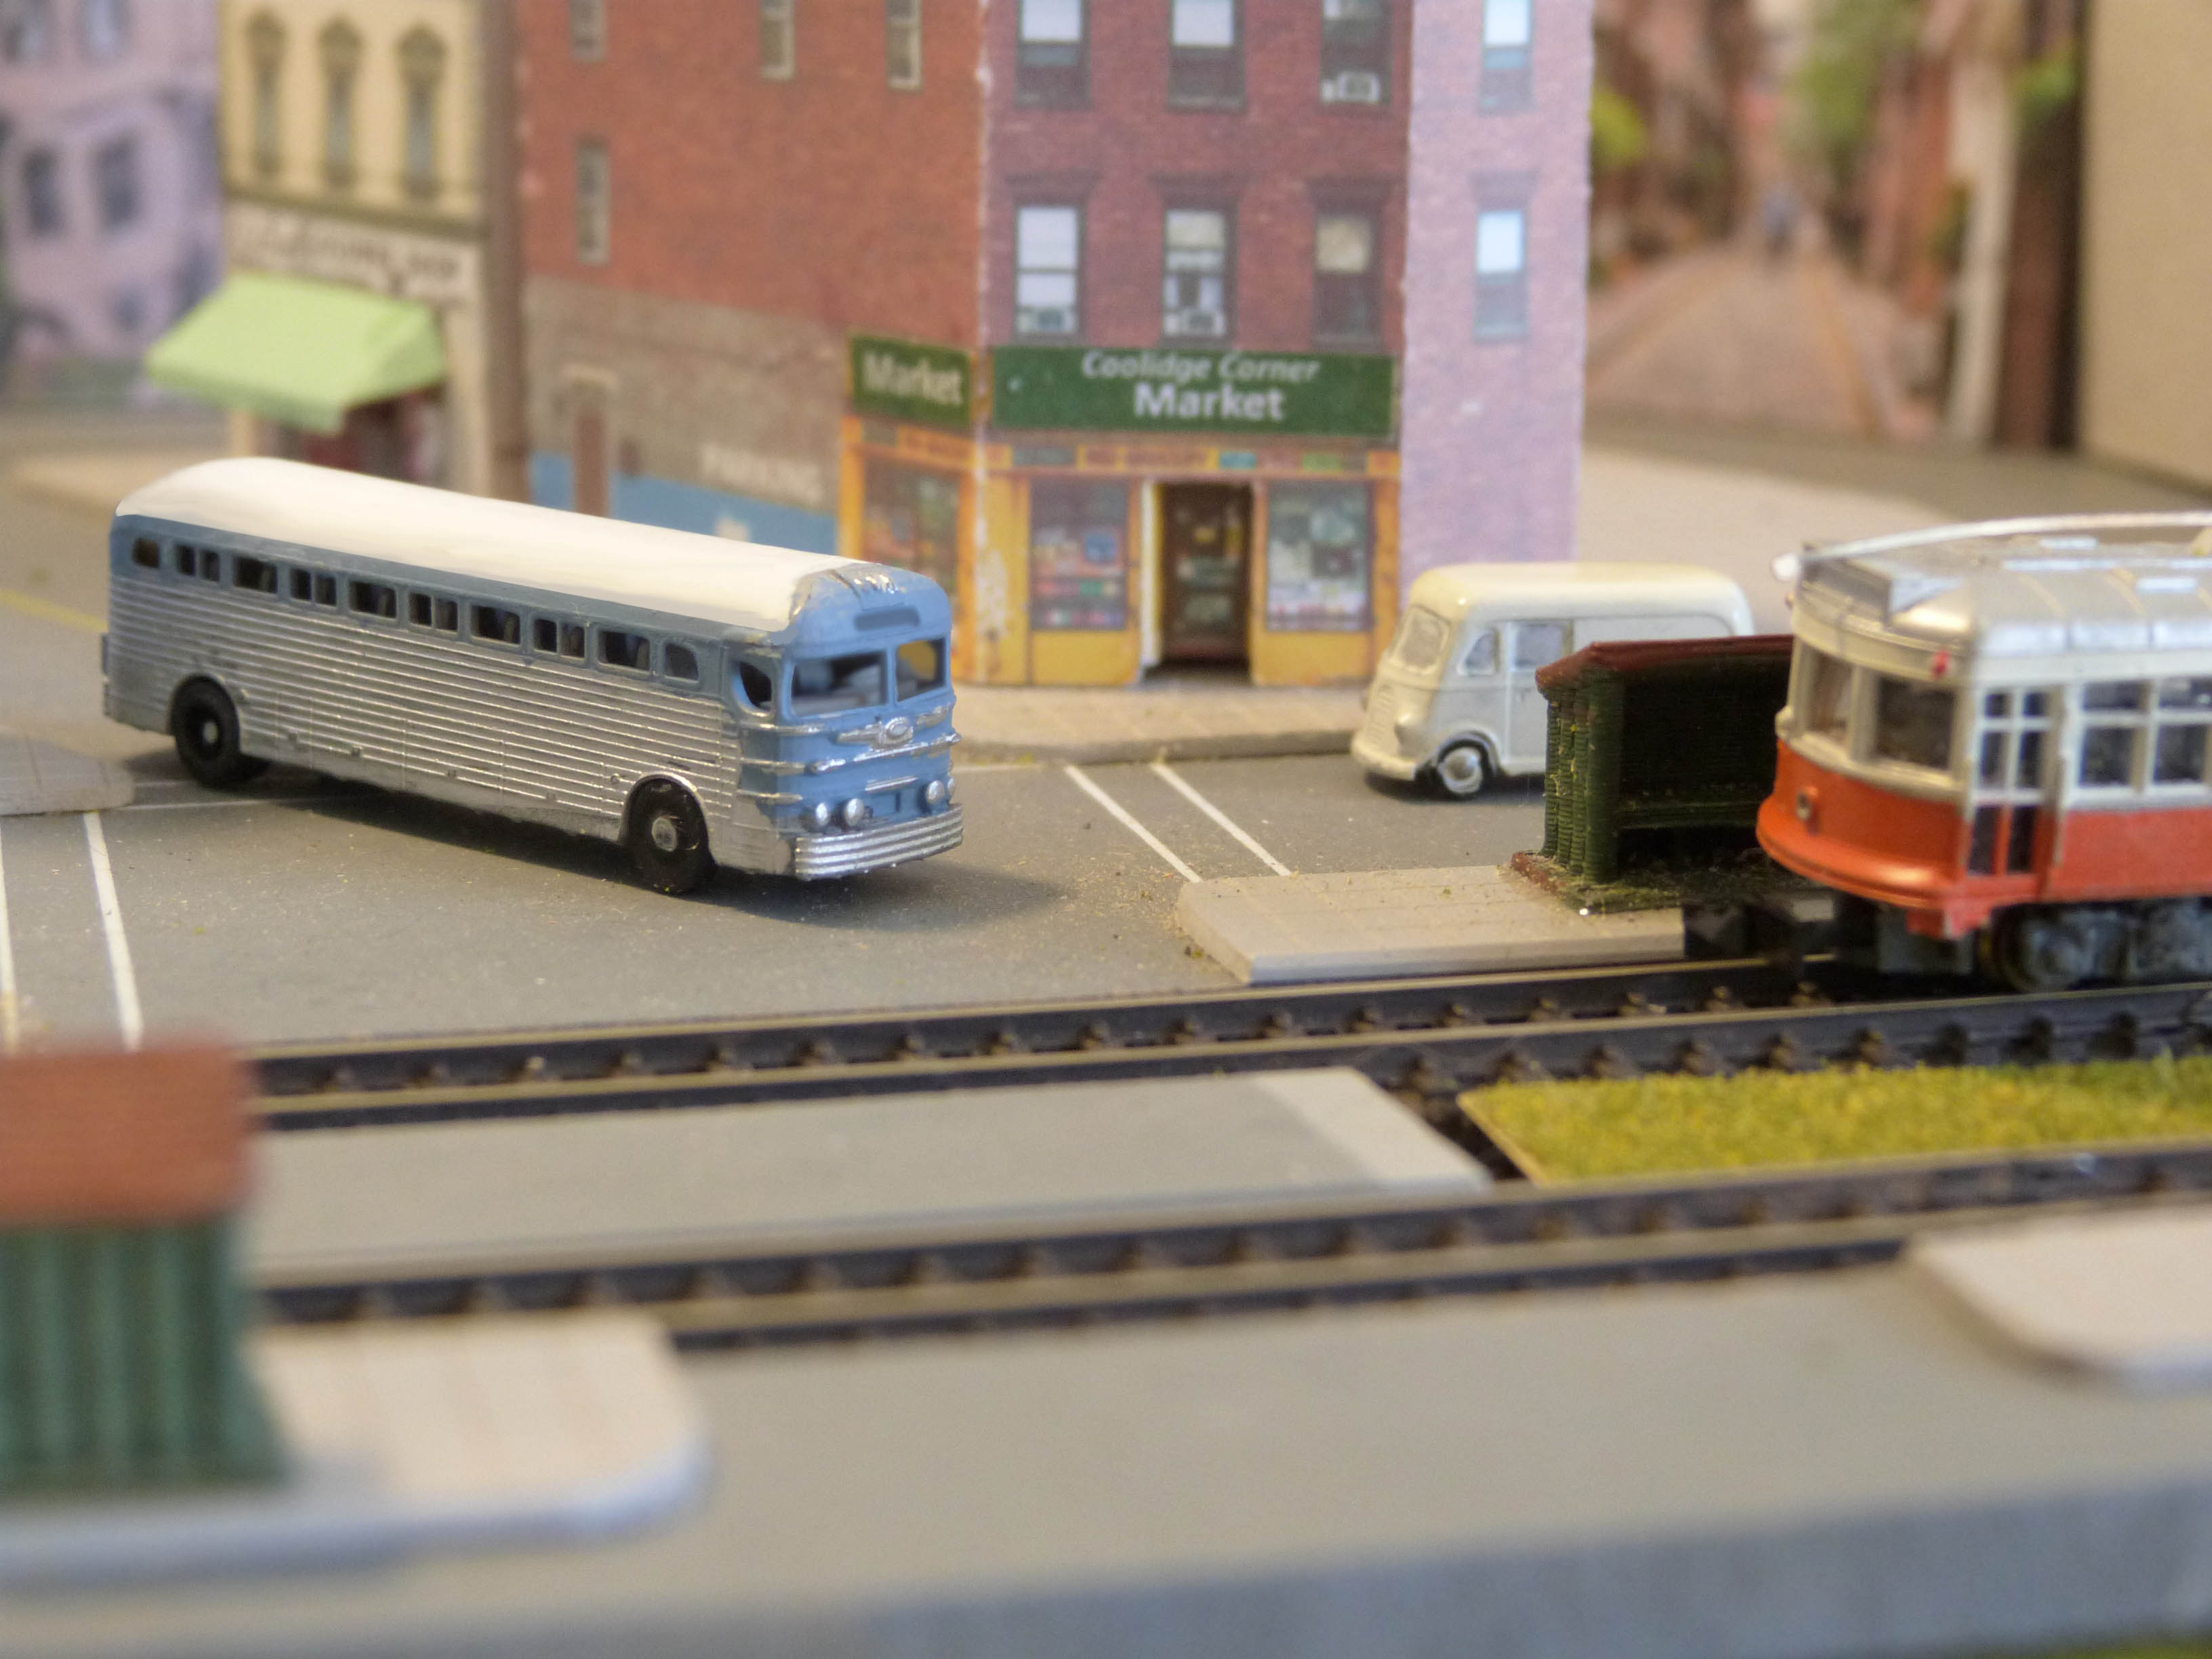
More Buildings I wanted to have a specific building that appears on the corner of Harvard and Beacon Streets, the area which I am modeling. If you have ever been to Coolidge Corner in Brookline, you have had the pleasure of gawking at one of the most beautiful buildings in the town, the S.S. Pierce Store at the corner of Beacon and Harvard Streets. This major Brookline landmark was built in 1898-99 for an S.S. Pierce Store...When it opened in 1898, the S.S. Pierce Store at Coolidge Corner sold imported goods from all over the world, as well as local provisions from Boston area farmers and artisans. The company, effectively a high-end grocery store, even provided free delivery to customers, way before Amazon provided that service! Courtesy of Buildings of New England. I ordered a few more cardboard buildings from the company mentioned above, including one that though could stand in for the S.S. Pierce Building. But one very important component of that building was missing - the clocktower. | |
Using the techniques I’ve learned from all my cardboard construction experience, I created the six-sided clock tower. The center strip of the building in the photo on the upper left, was modified using PhotoShop and duplicated in Word, placing them side-by-side. Then it was printed on a similar weight cardboard, a bit of cutting and pasting, and voilà – my own custom building. I went for an older and less fancy look than how the building appears today.
| |
|
|
My First Demo I hadn’t planned on bringing my briefcase layout anywhere yet, but between a sudden burst of creative energy, and a critical piece of track being delivered early, I prepared to show my buddies the layout at Saturday morning Cars and Coffee, the next morning. Fortunately, I had accumulated all of the components that would be necessary to build a working layout. But I had yet to used them all together - some not at all. It was great motivation, and I'm happy to report it all functioned very well. A very rewarding project. | |
|
|
My Second Demo Another inspirational opportunity along with a few welcome days of wonderful weather led to more progress on the briefcase layout.
I cut, painted and added some sidewalks and, using thin-point Posca paint markers, added street stripes. Then I created a title sign and holder for use when displaying the layout. I wanted to mount the buildings in such a way that I could remove the tall ones when the lid was closed. A small foam block in the buildings was held in place with two-sided tape, but allowed the buildings to be lifted off. I’ll probably eventually do something a bit more permanent. I had received a number of very nice period-correct 3D-printed vehicles which I painted using spray and very fine marker. | |
|
|
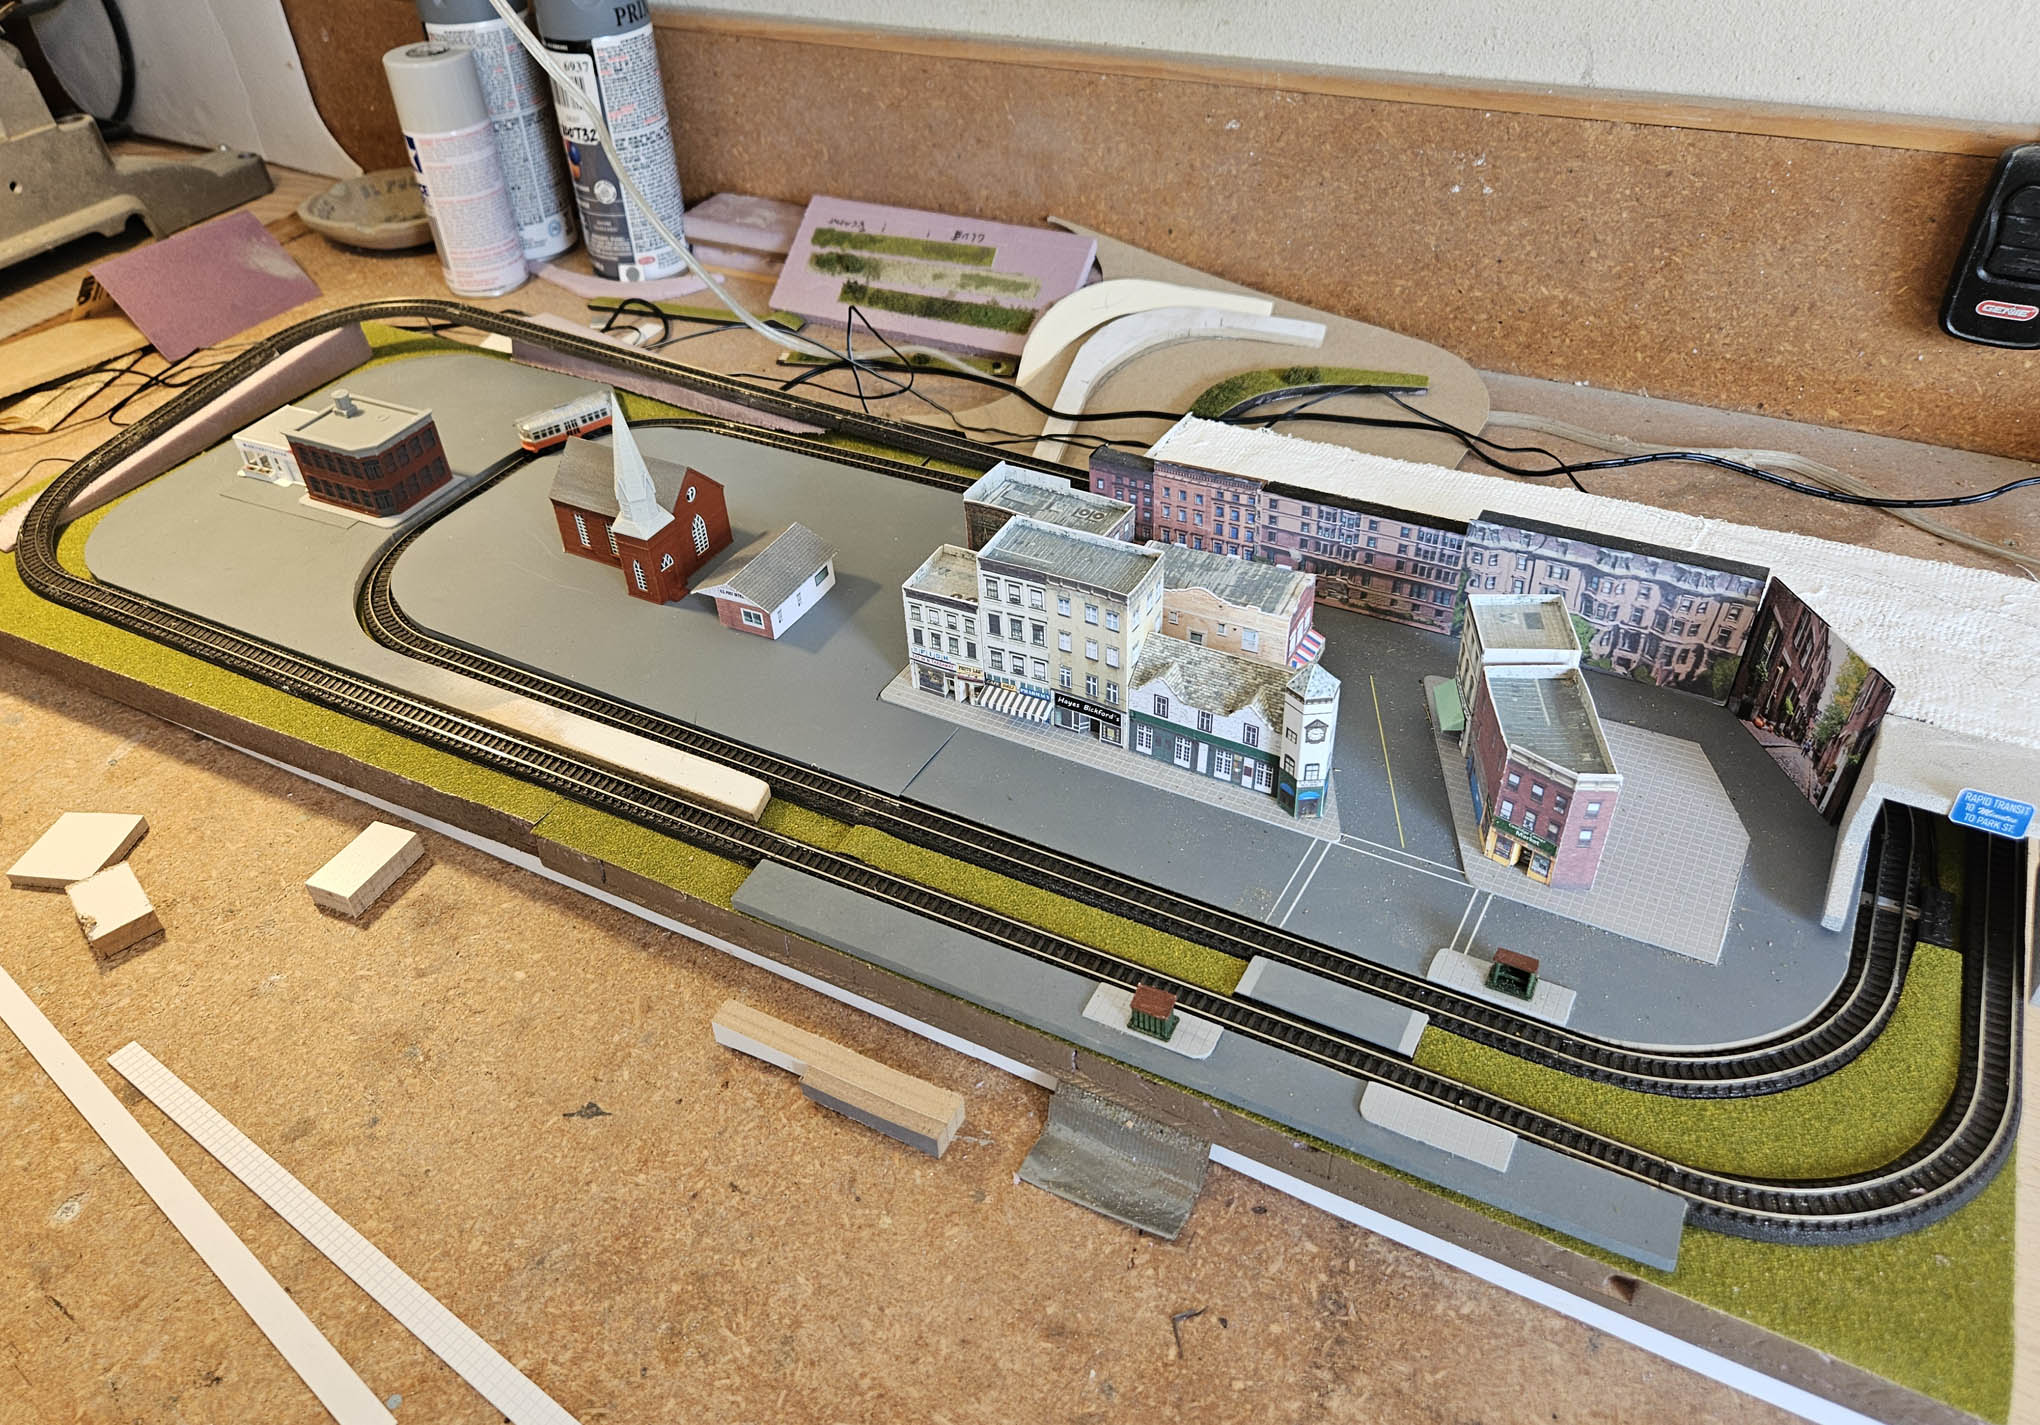
While assembling all the parts, I added a piece of Woodland Scenics grass mat that I’ve had for years. It may not be permanent, but I thought it looked better than the painted foam. After a final test running the trolley and switch (on batteries) we’re ready to go.
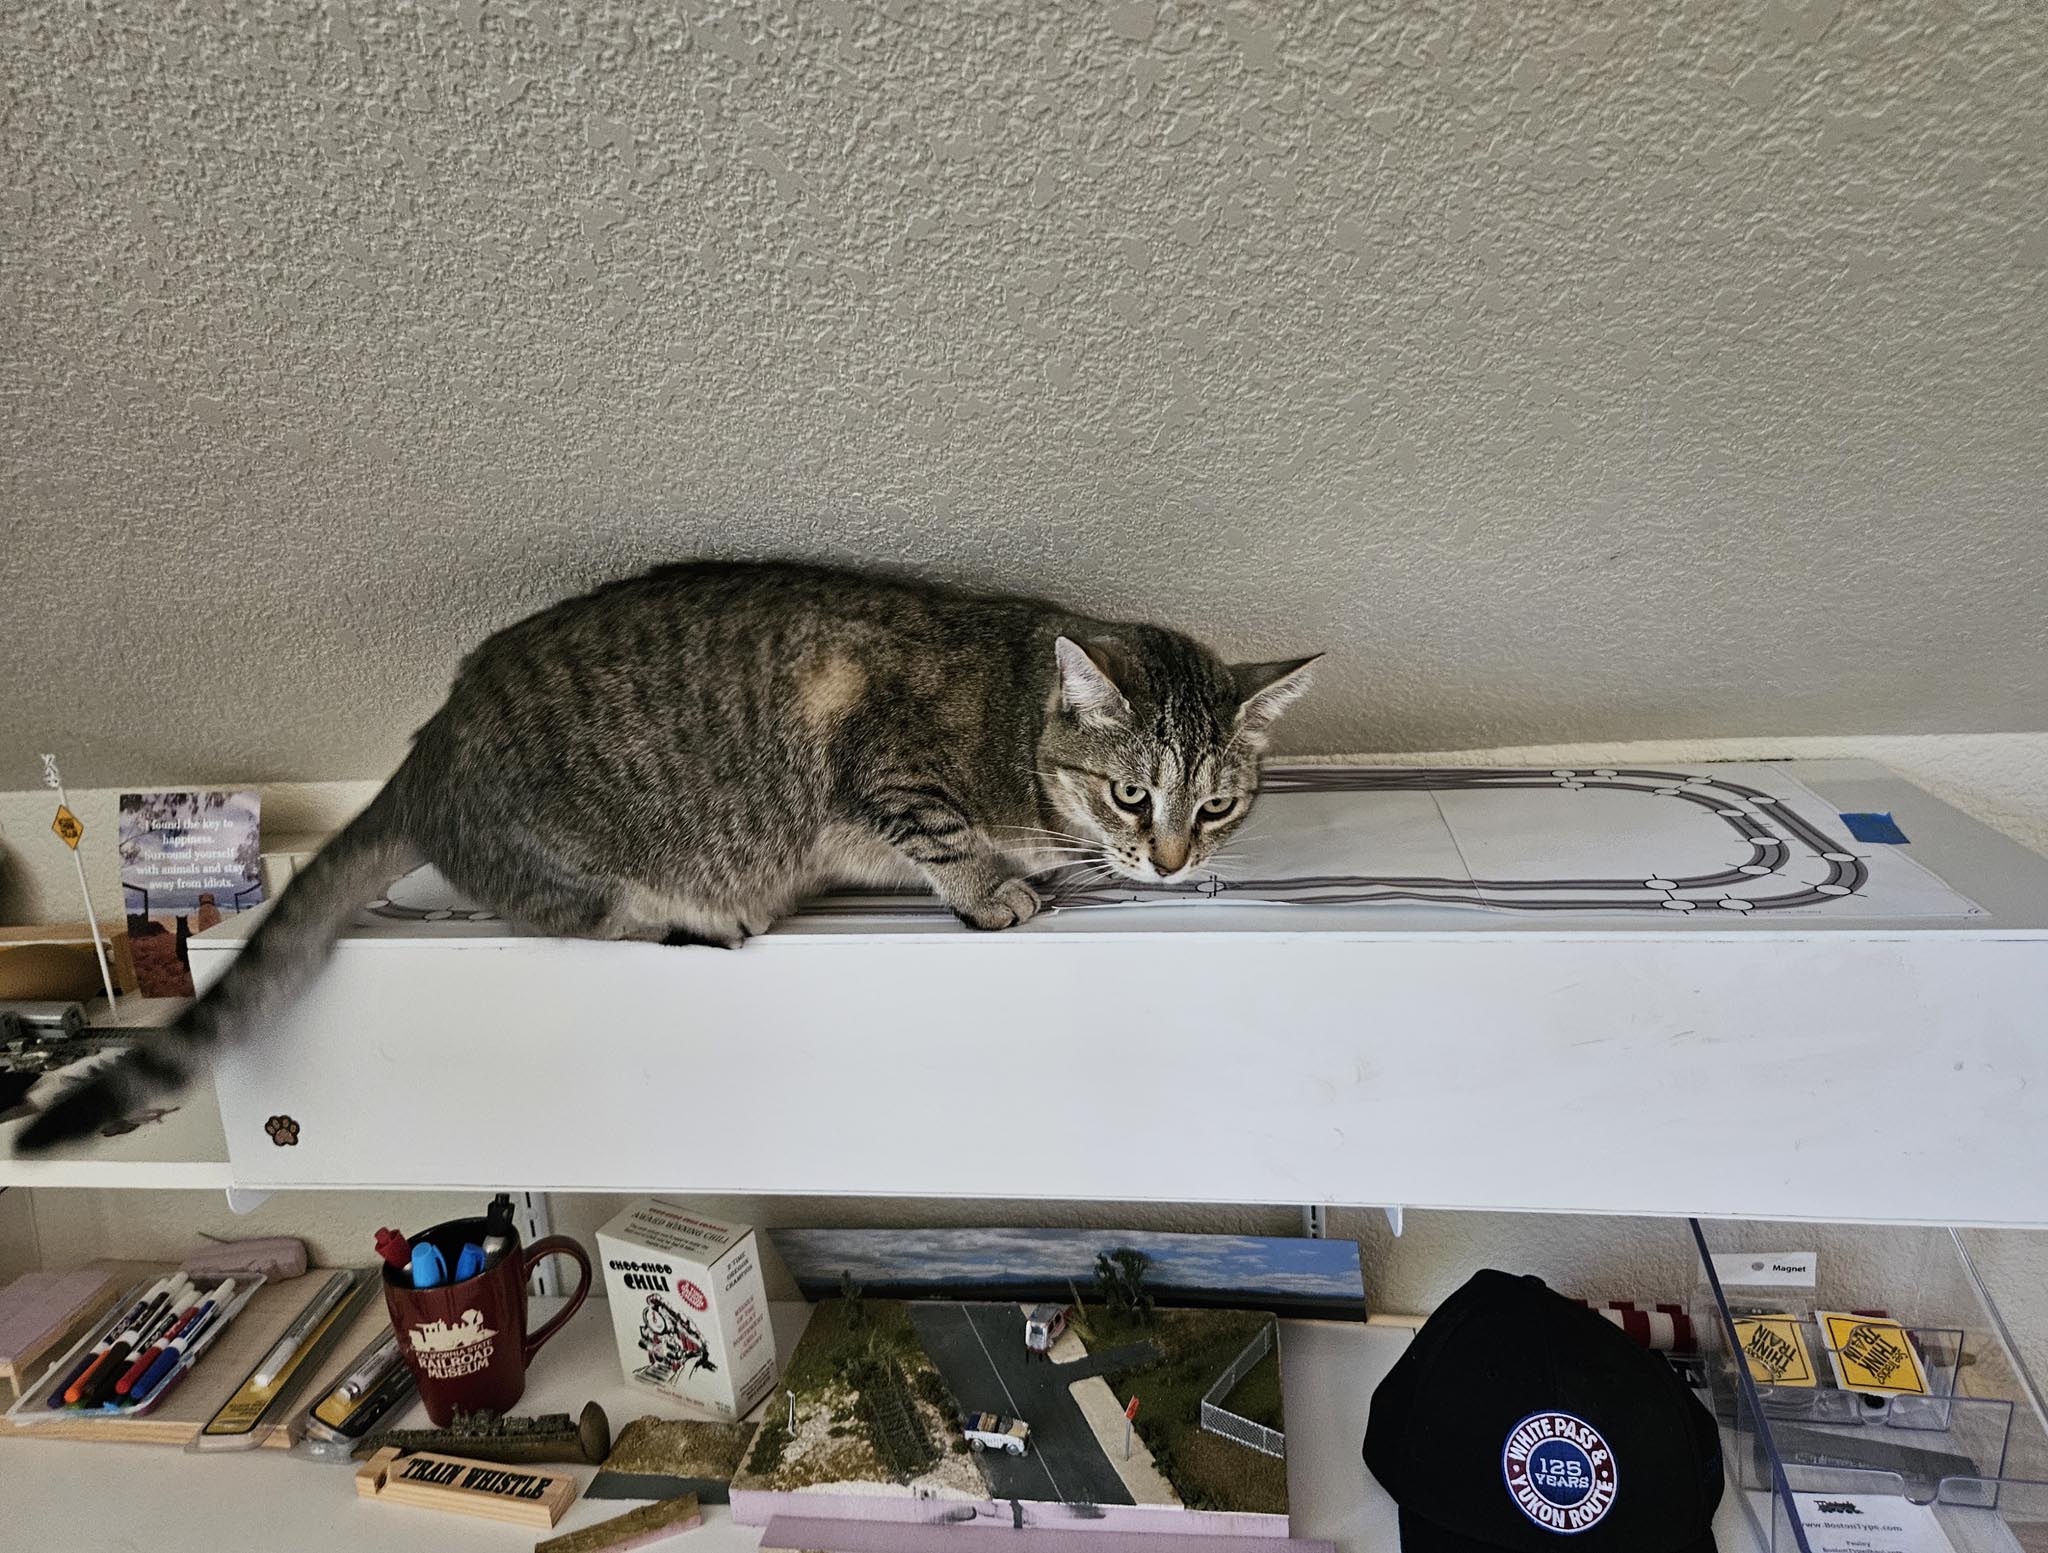
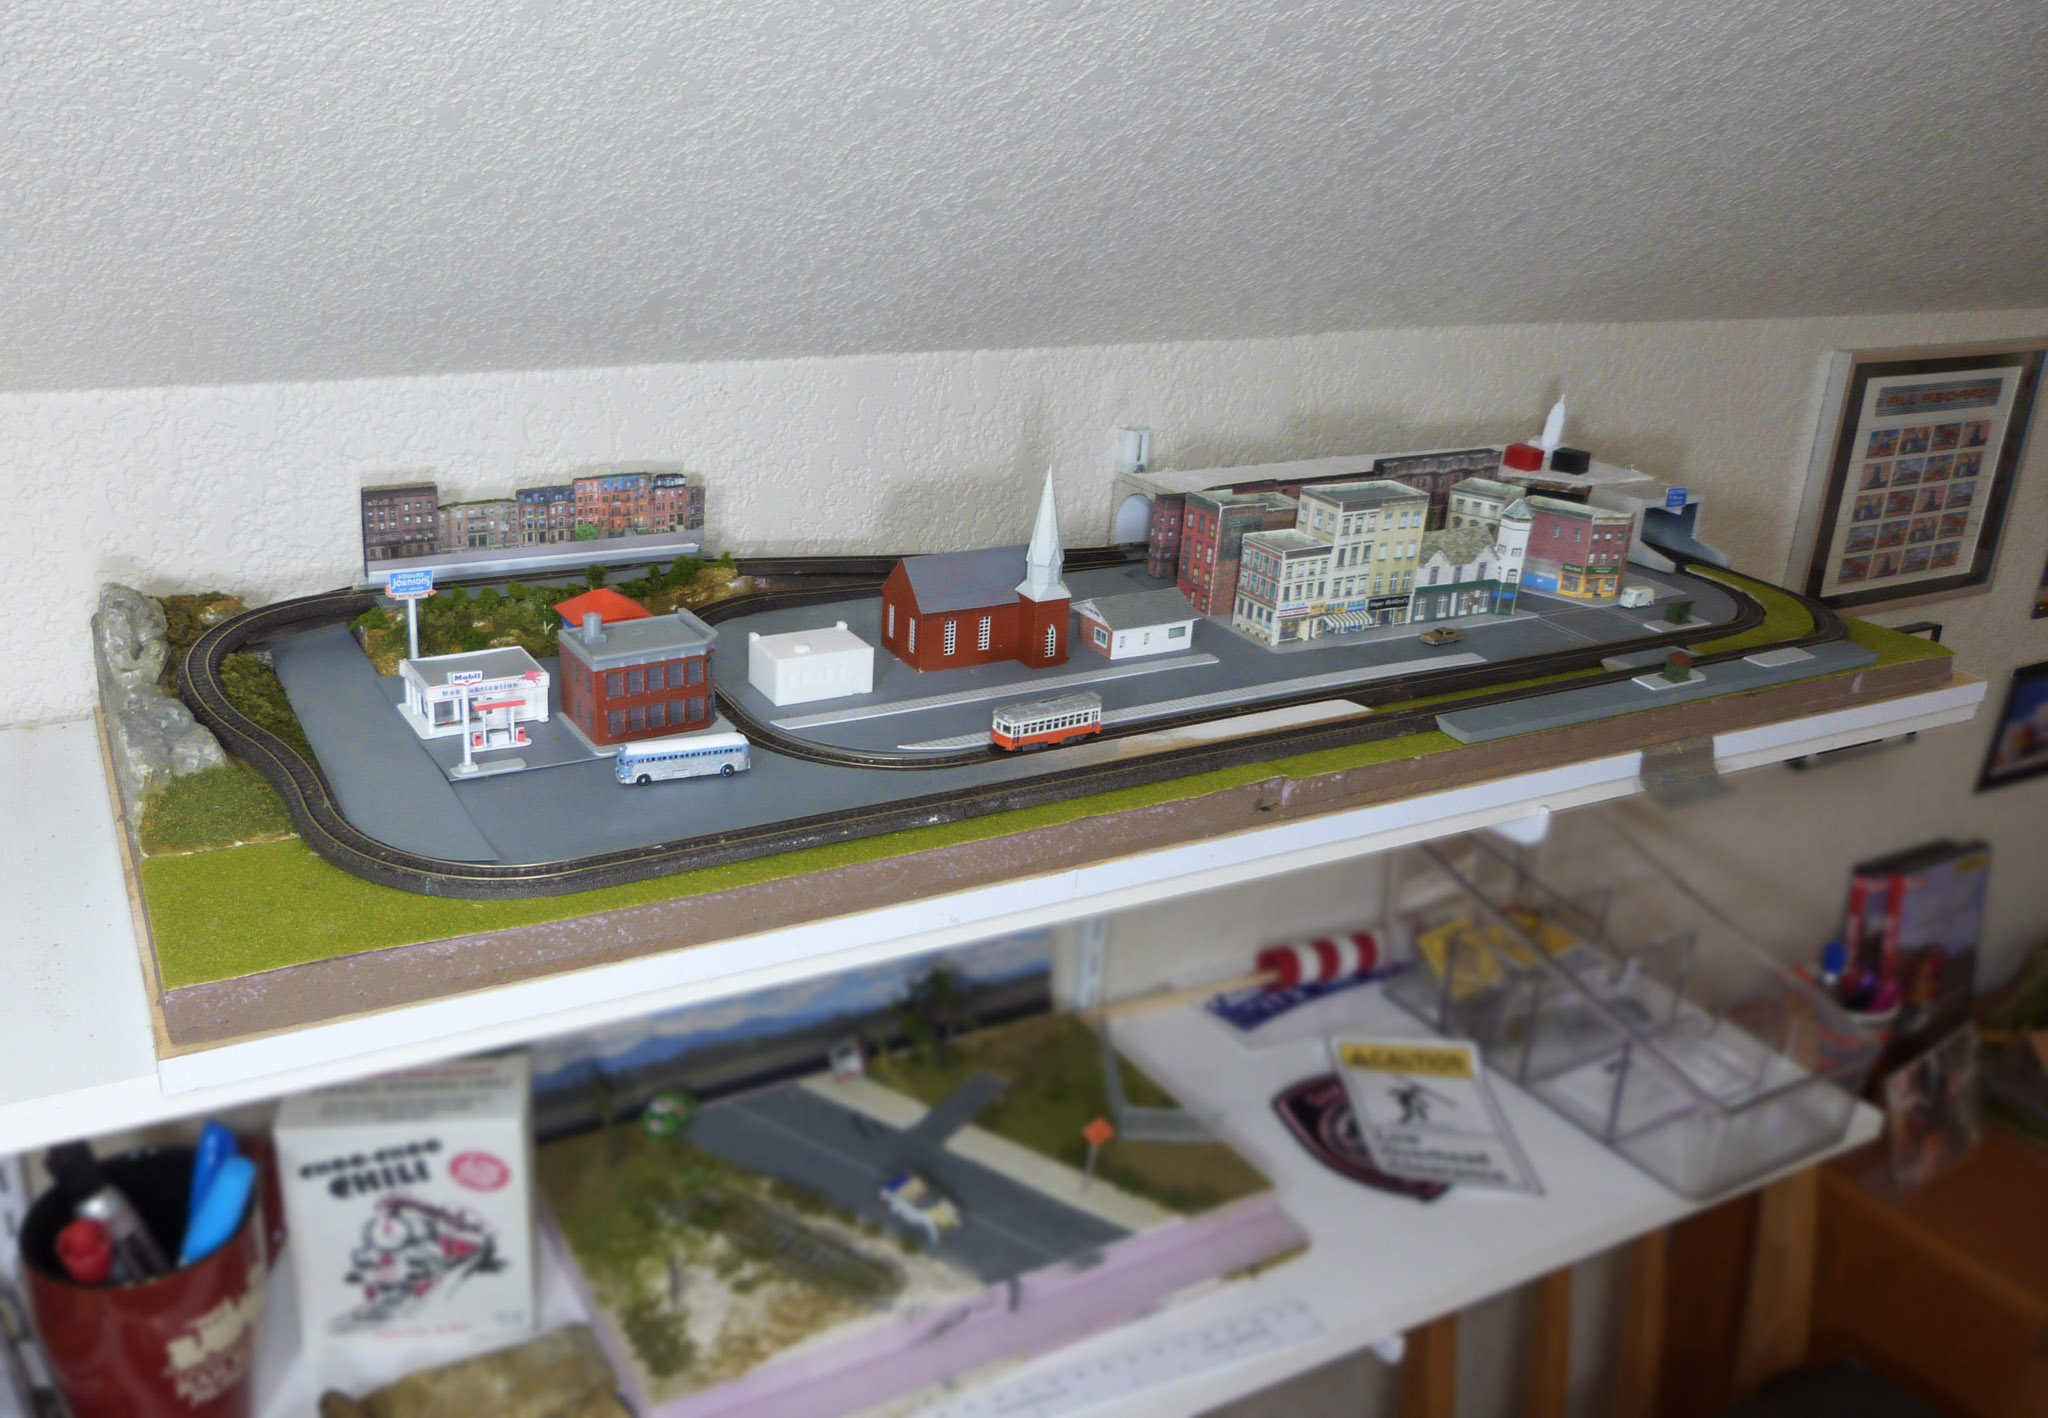
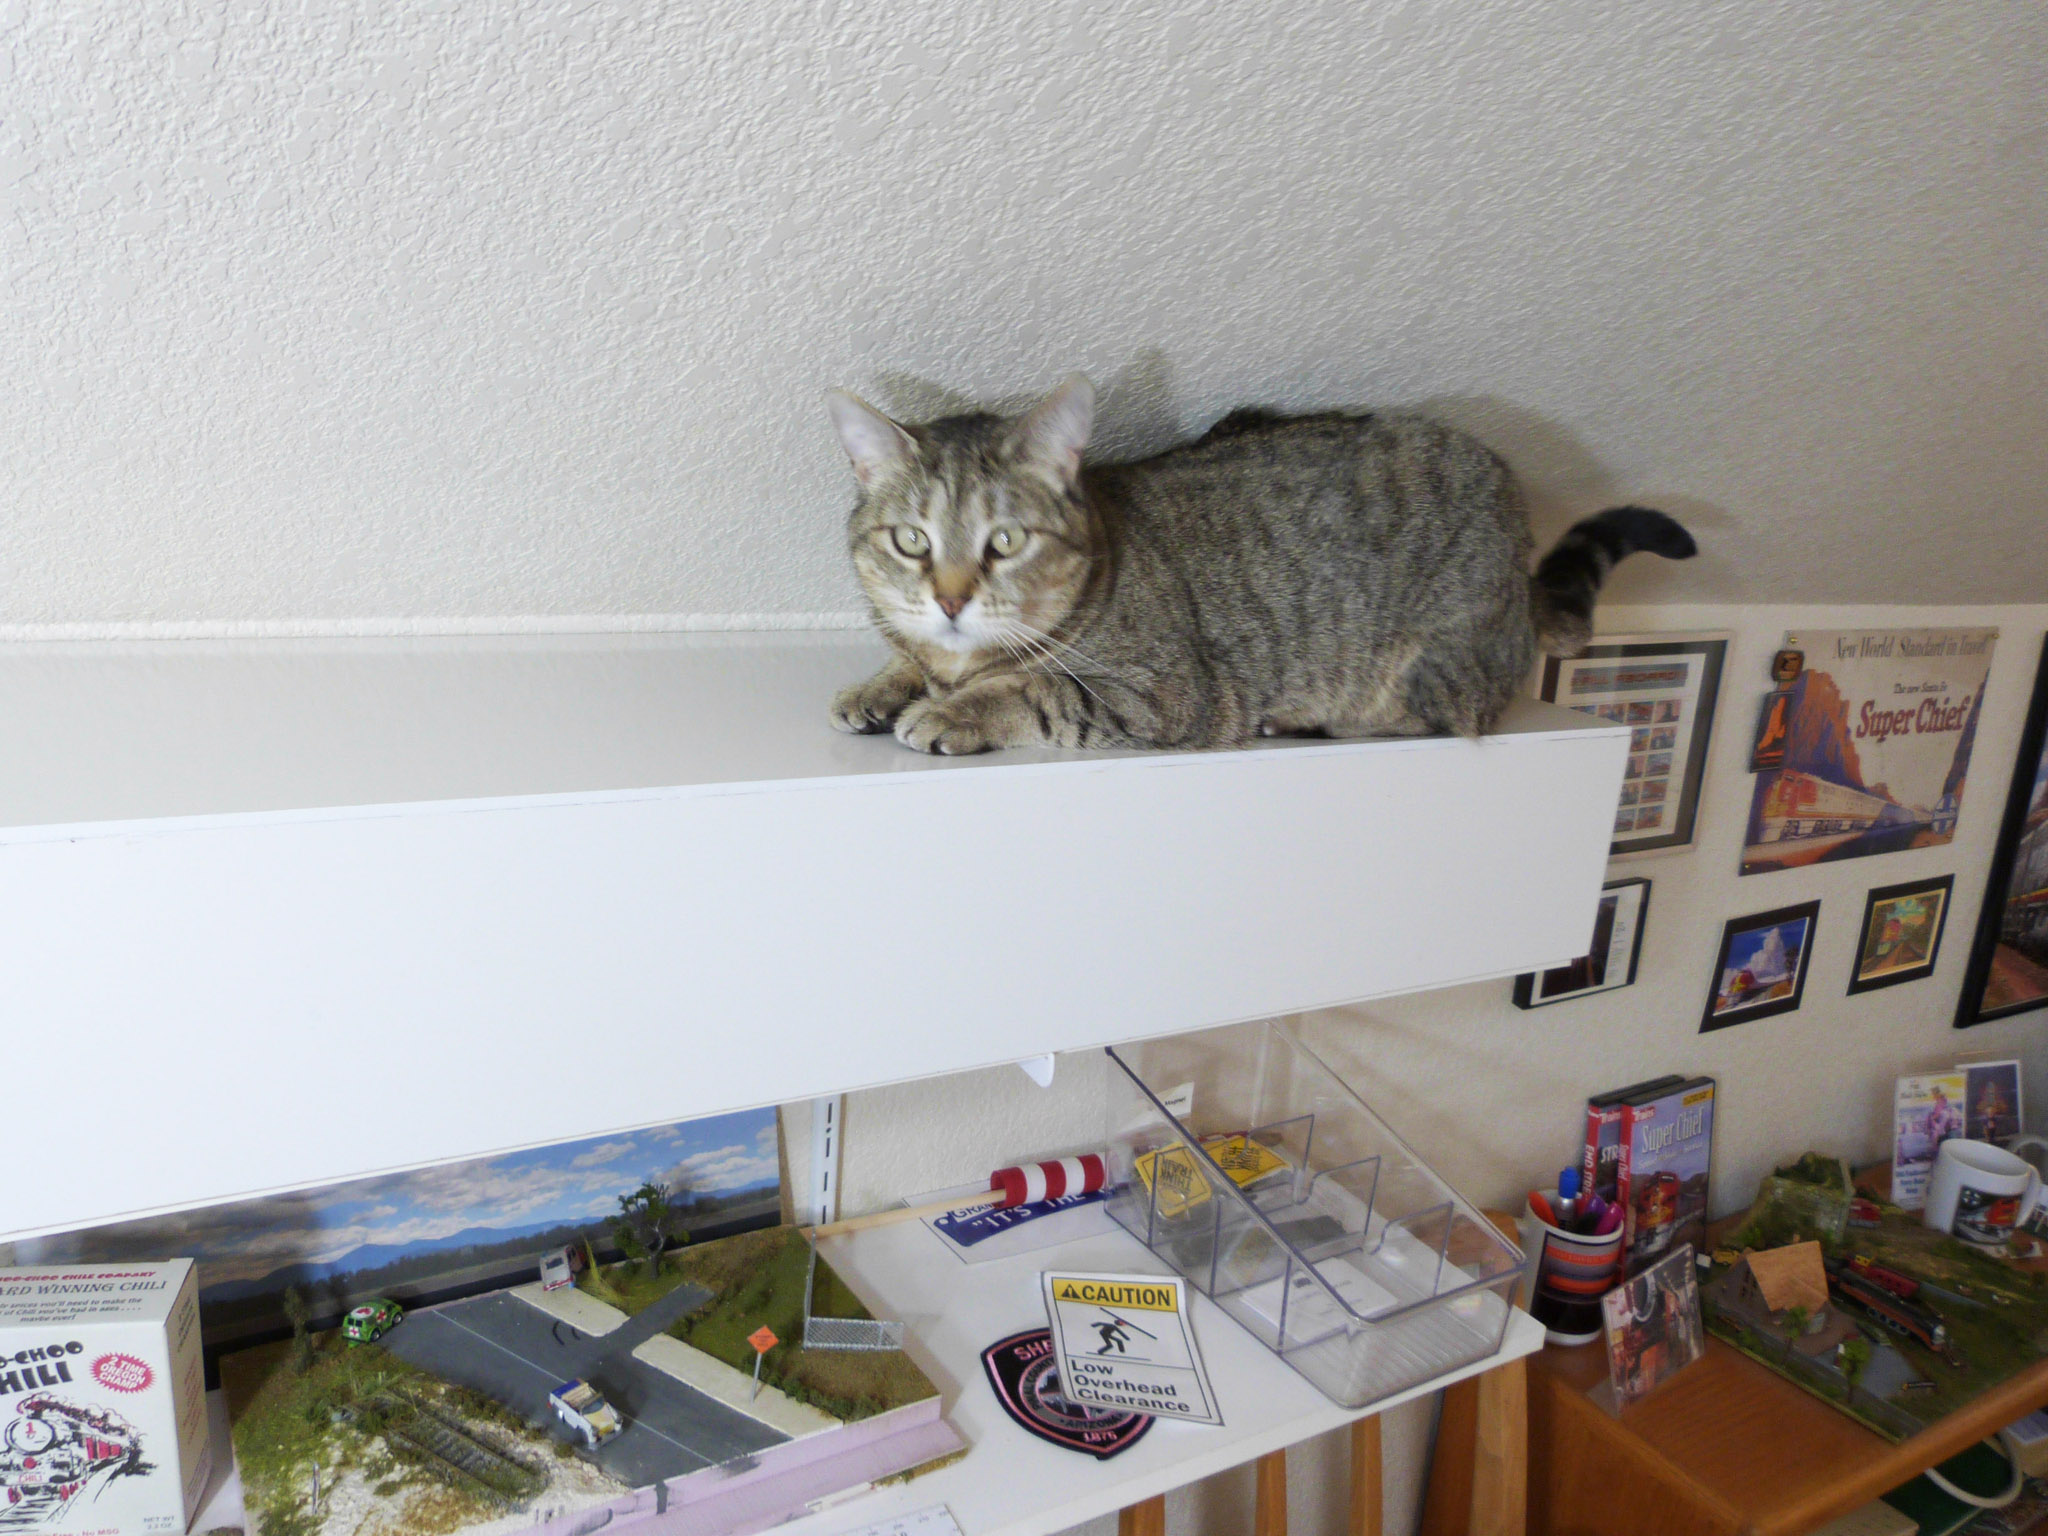
The Kitty Shield A Slice of Beacon Street will consist of two parts. On the right will be the briefcase layout, about 12” x 17”. On the left side will be the extended layout which will remain on the shelf, except when work is needed in the garage. The entire diorama will be covered by the new, as yet unpatented, Kitty Shield – a brilliant solution to render the layout invisible to cats. (Actually it's just a box.)
| |
|
|
| |
With the full layout in a relatively cat-safe area of the garage, I’m continuing the contemplation/planning/testing process. The next step is to finalize the exact position of the track. As I started thinking more about Beacon Street, I realized that my high school was on Beacon Street, as was the main building of the college I attended (Emerson) and four places of employment - all represented on the layout. I’m going to add a short tunnel topped with some small structures representing some Boston landmarks. Using photos of actual buildings, I made a backdrop in front of the tunnel at the rear of the briefcase section. | |
|
|
|
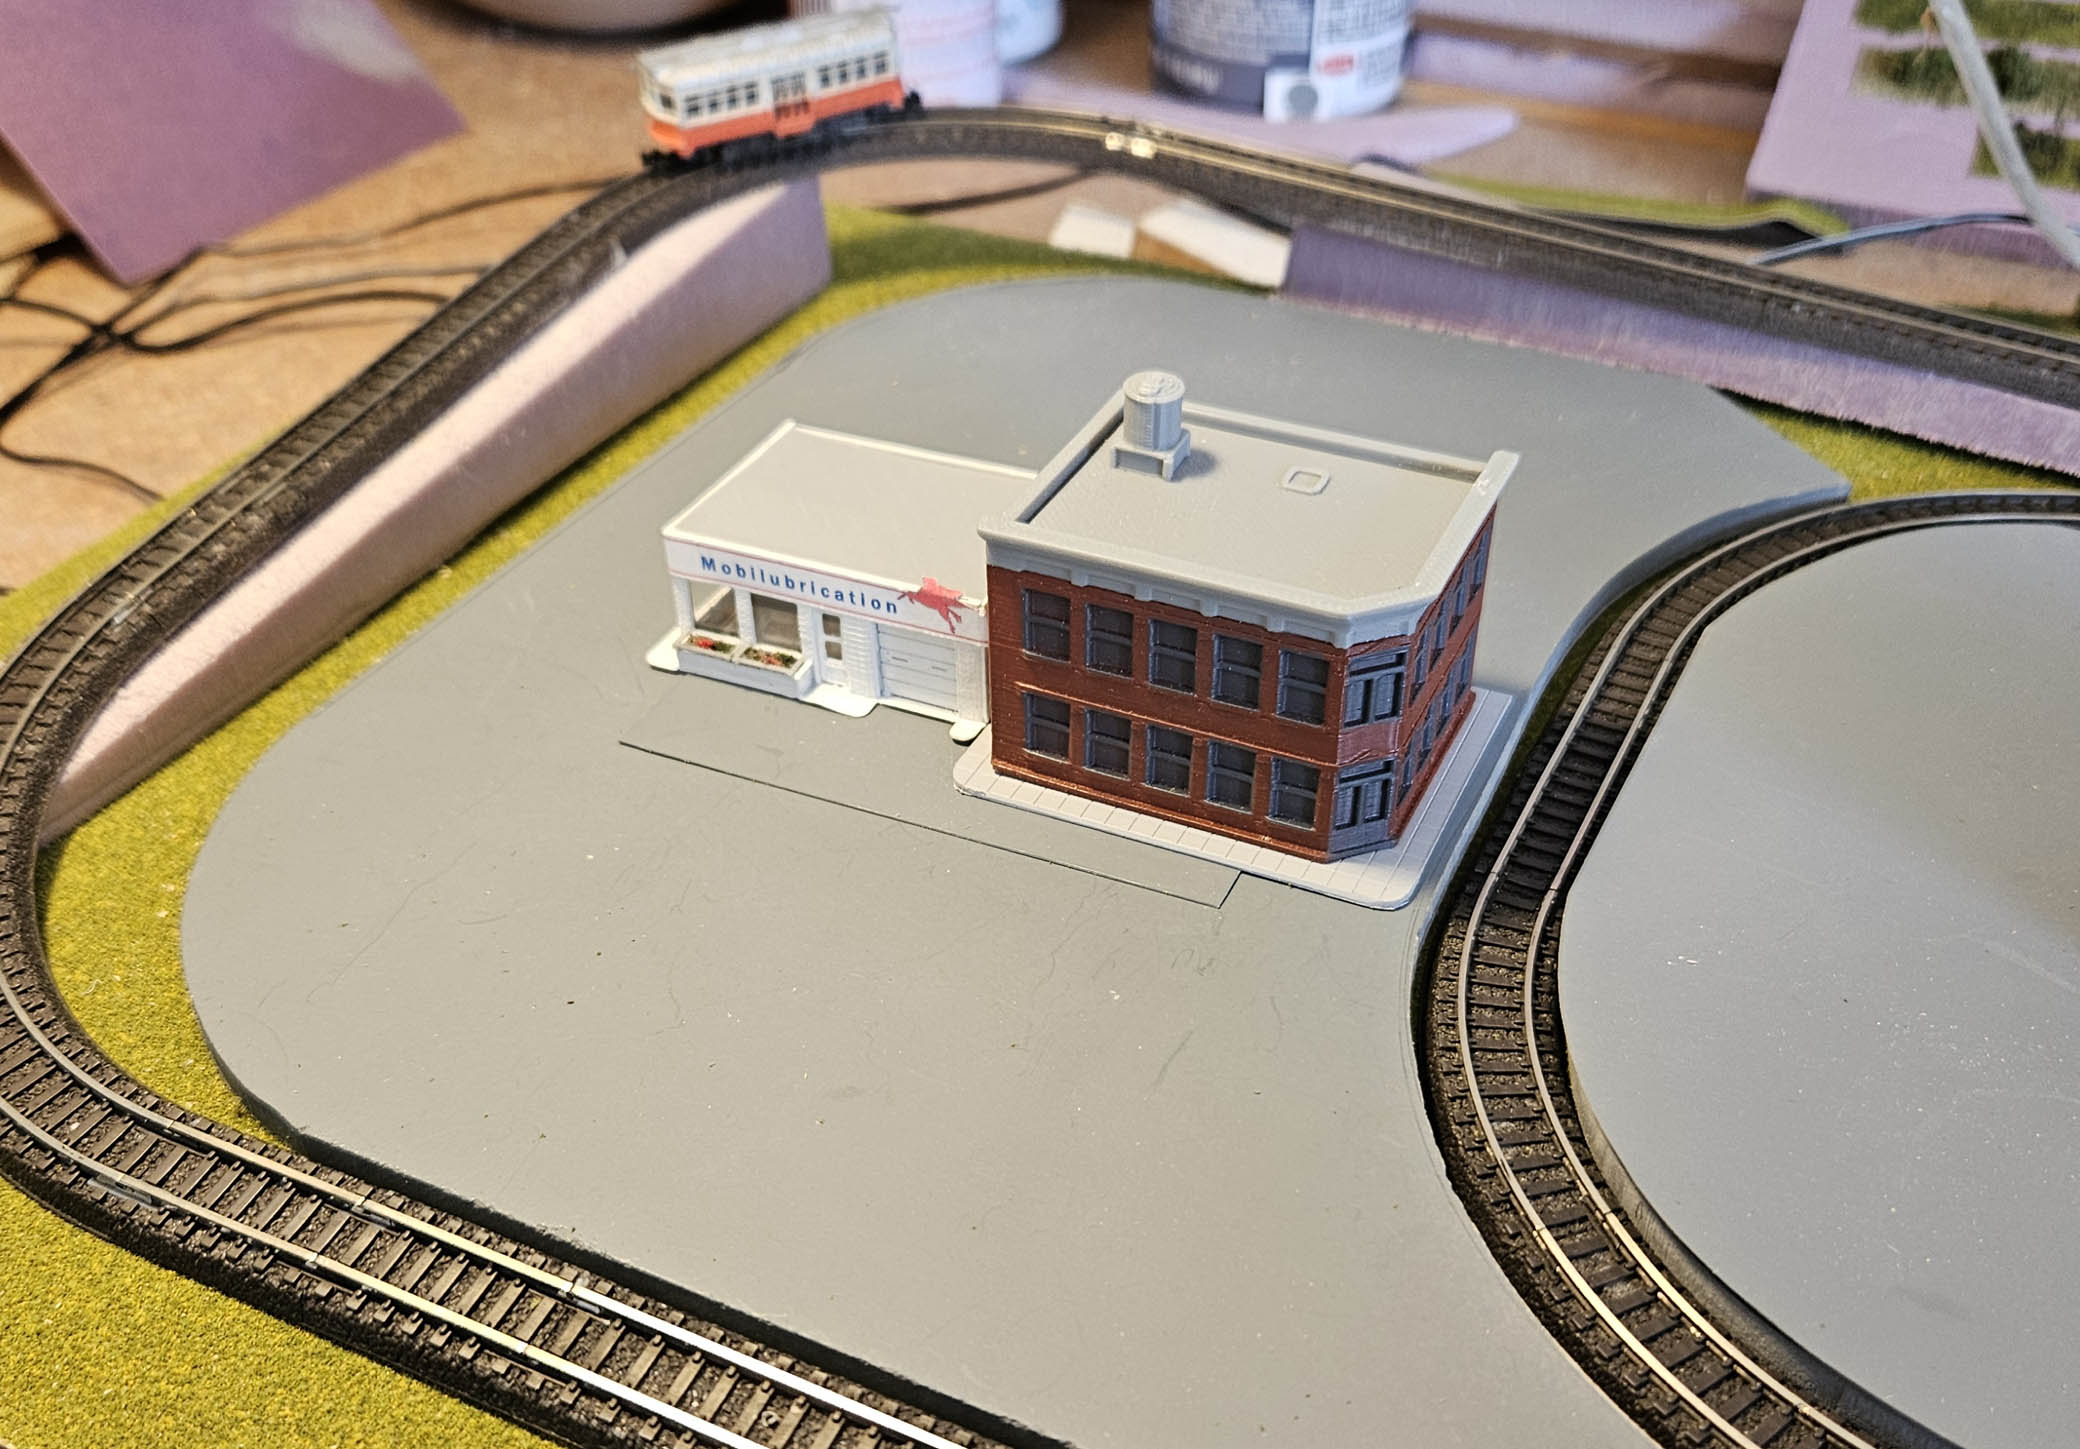
In the late 1960s, I worked at a Mobil gas station on Beacon Street in Cleveland Circle. | |
The kit was incredibly well-detailed. While assembling a 3D-printed kit is relatively easy, keep in mind that small 3D-printed structures are very fragile. You should have some experience (and a very sharp X-Acto blade) before diving in. | |
My high school was located right next door to that gas station in a small office building.
| |
|
|
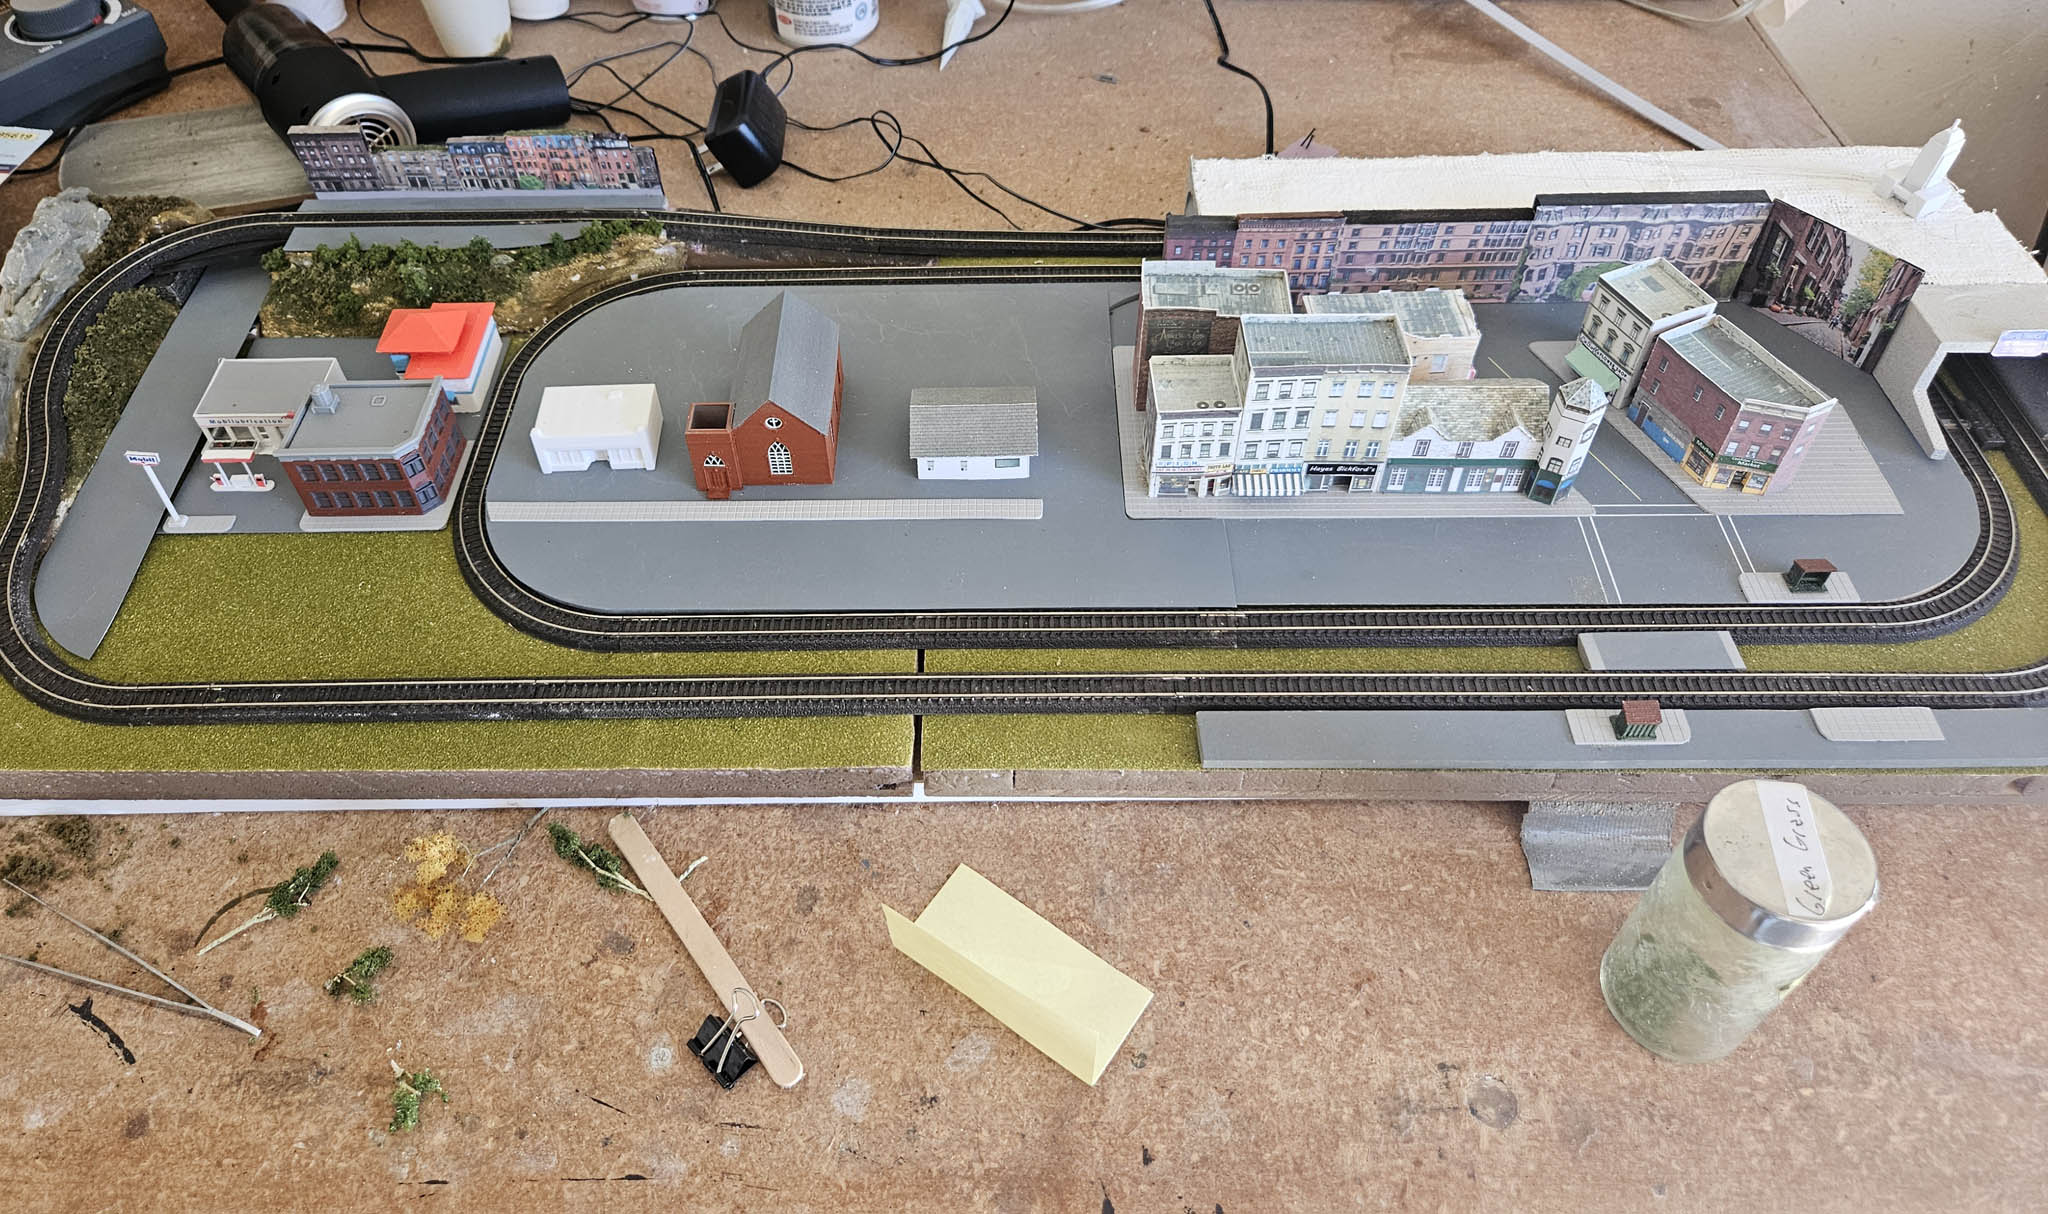
Boston has many hills. In fact, the street to the left of the gas station will rise to some depiction of Commonwealth Avenue, not far from where I lived for a while. | |
|
|
| |
|
|
After a cold winter, the weather has finally become mild and I’ve been able to get back to work in the garage. | |
|
|
I added a bit of landscaping to the newly created hills, and also built and painted an incredibly well-detailed old bus from Showcase Miniatures.
| |
|
|
Briefcase test fit.
More to come soon. Stay tuned!
| |
|
|