9.
Railfan Resort
As mentioned at the end of the last section (My Layouts, page 8), I wanted to create a real diorama using the Afta Plasta techniques described. The inspiration for one came quickly.
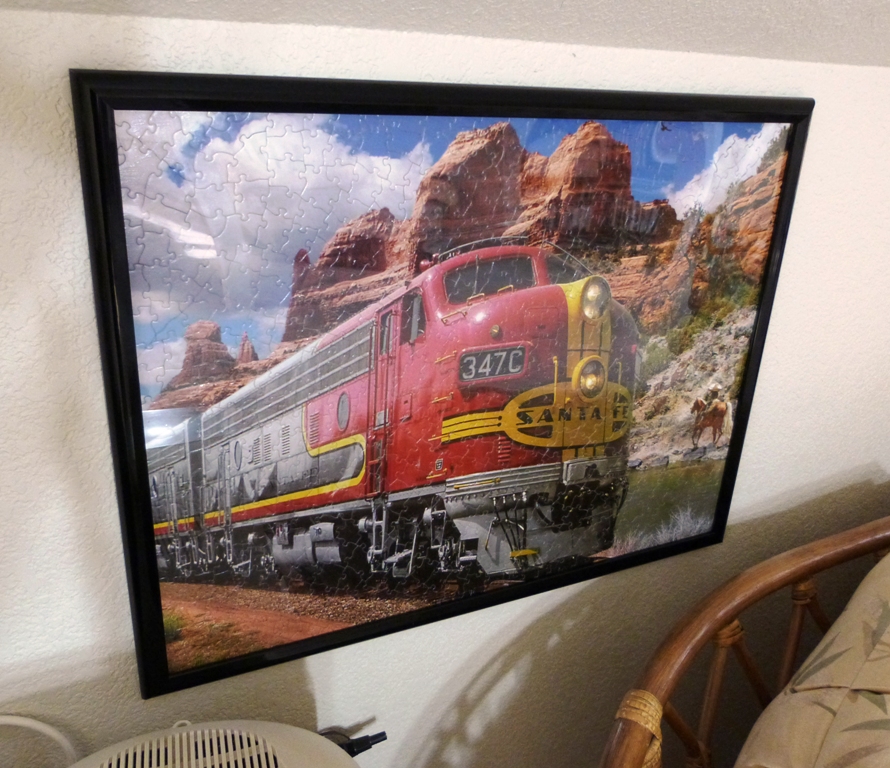
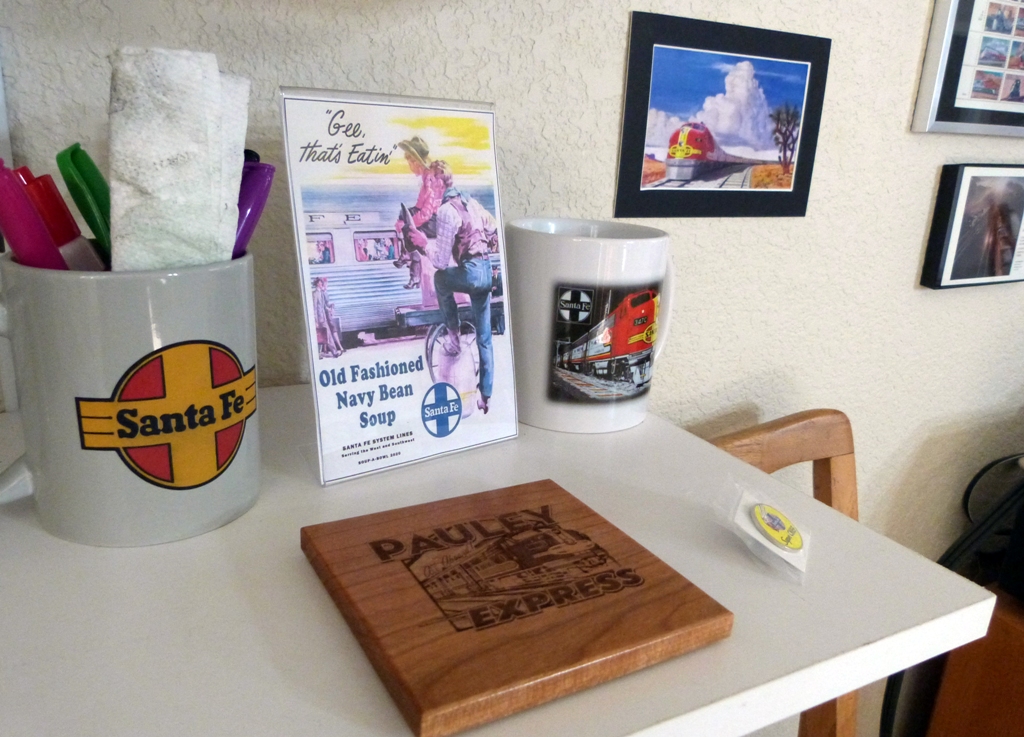
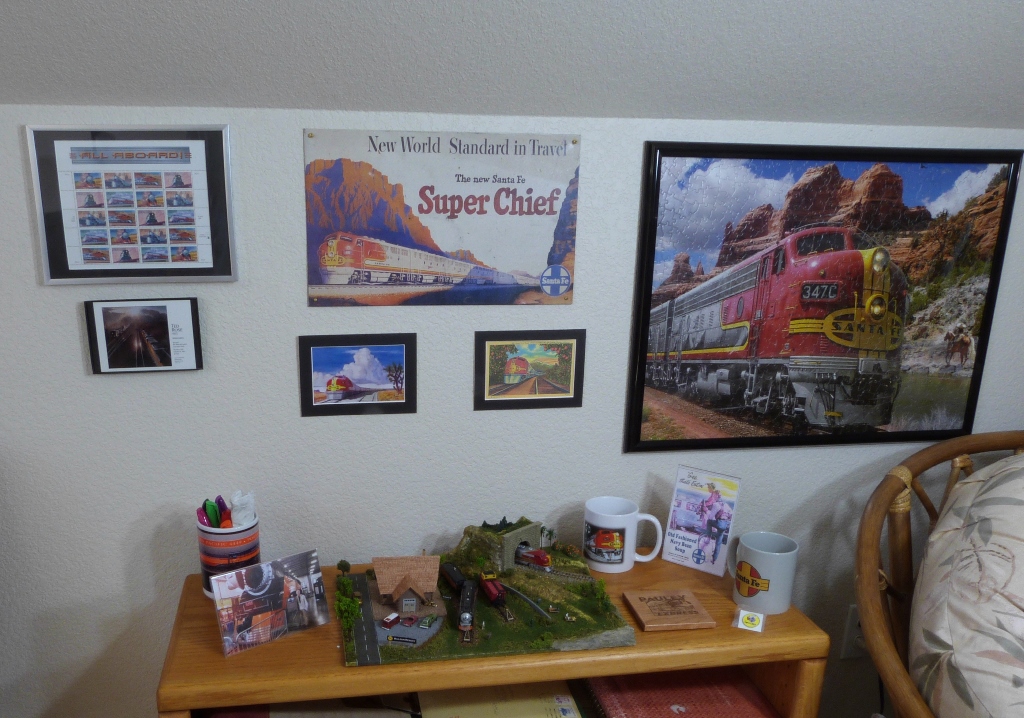
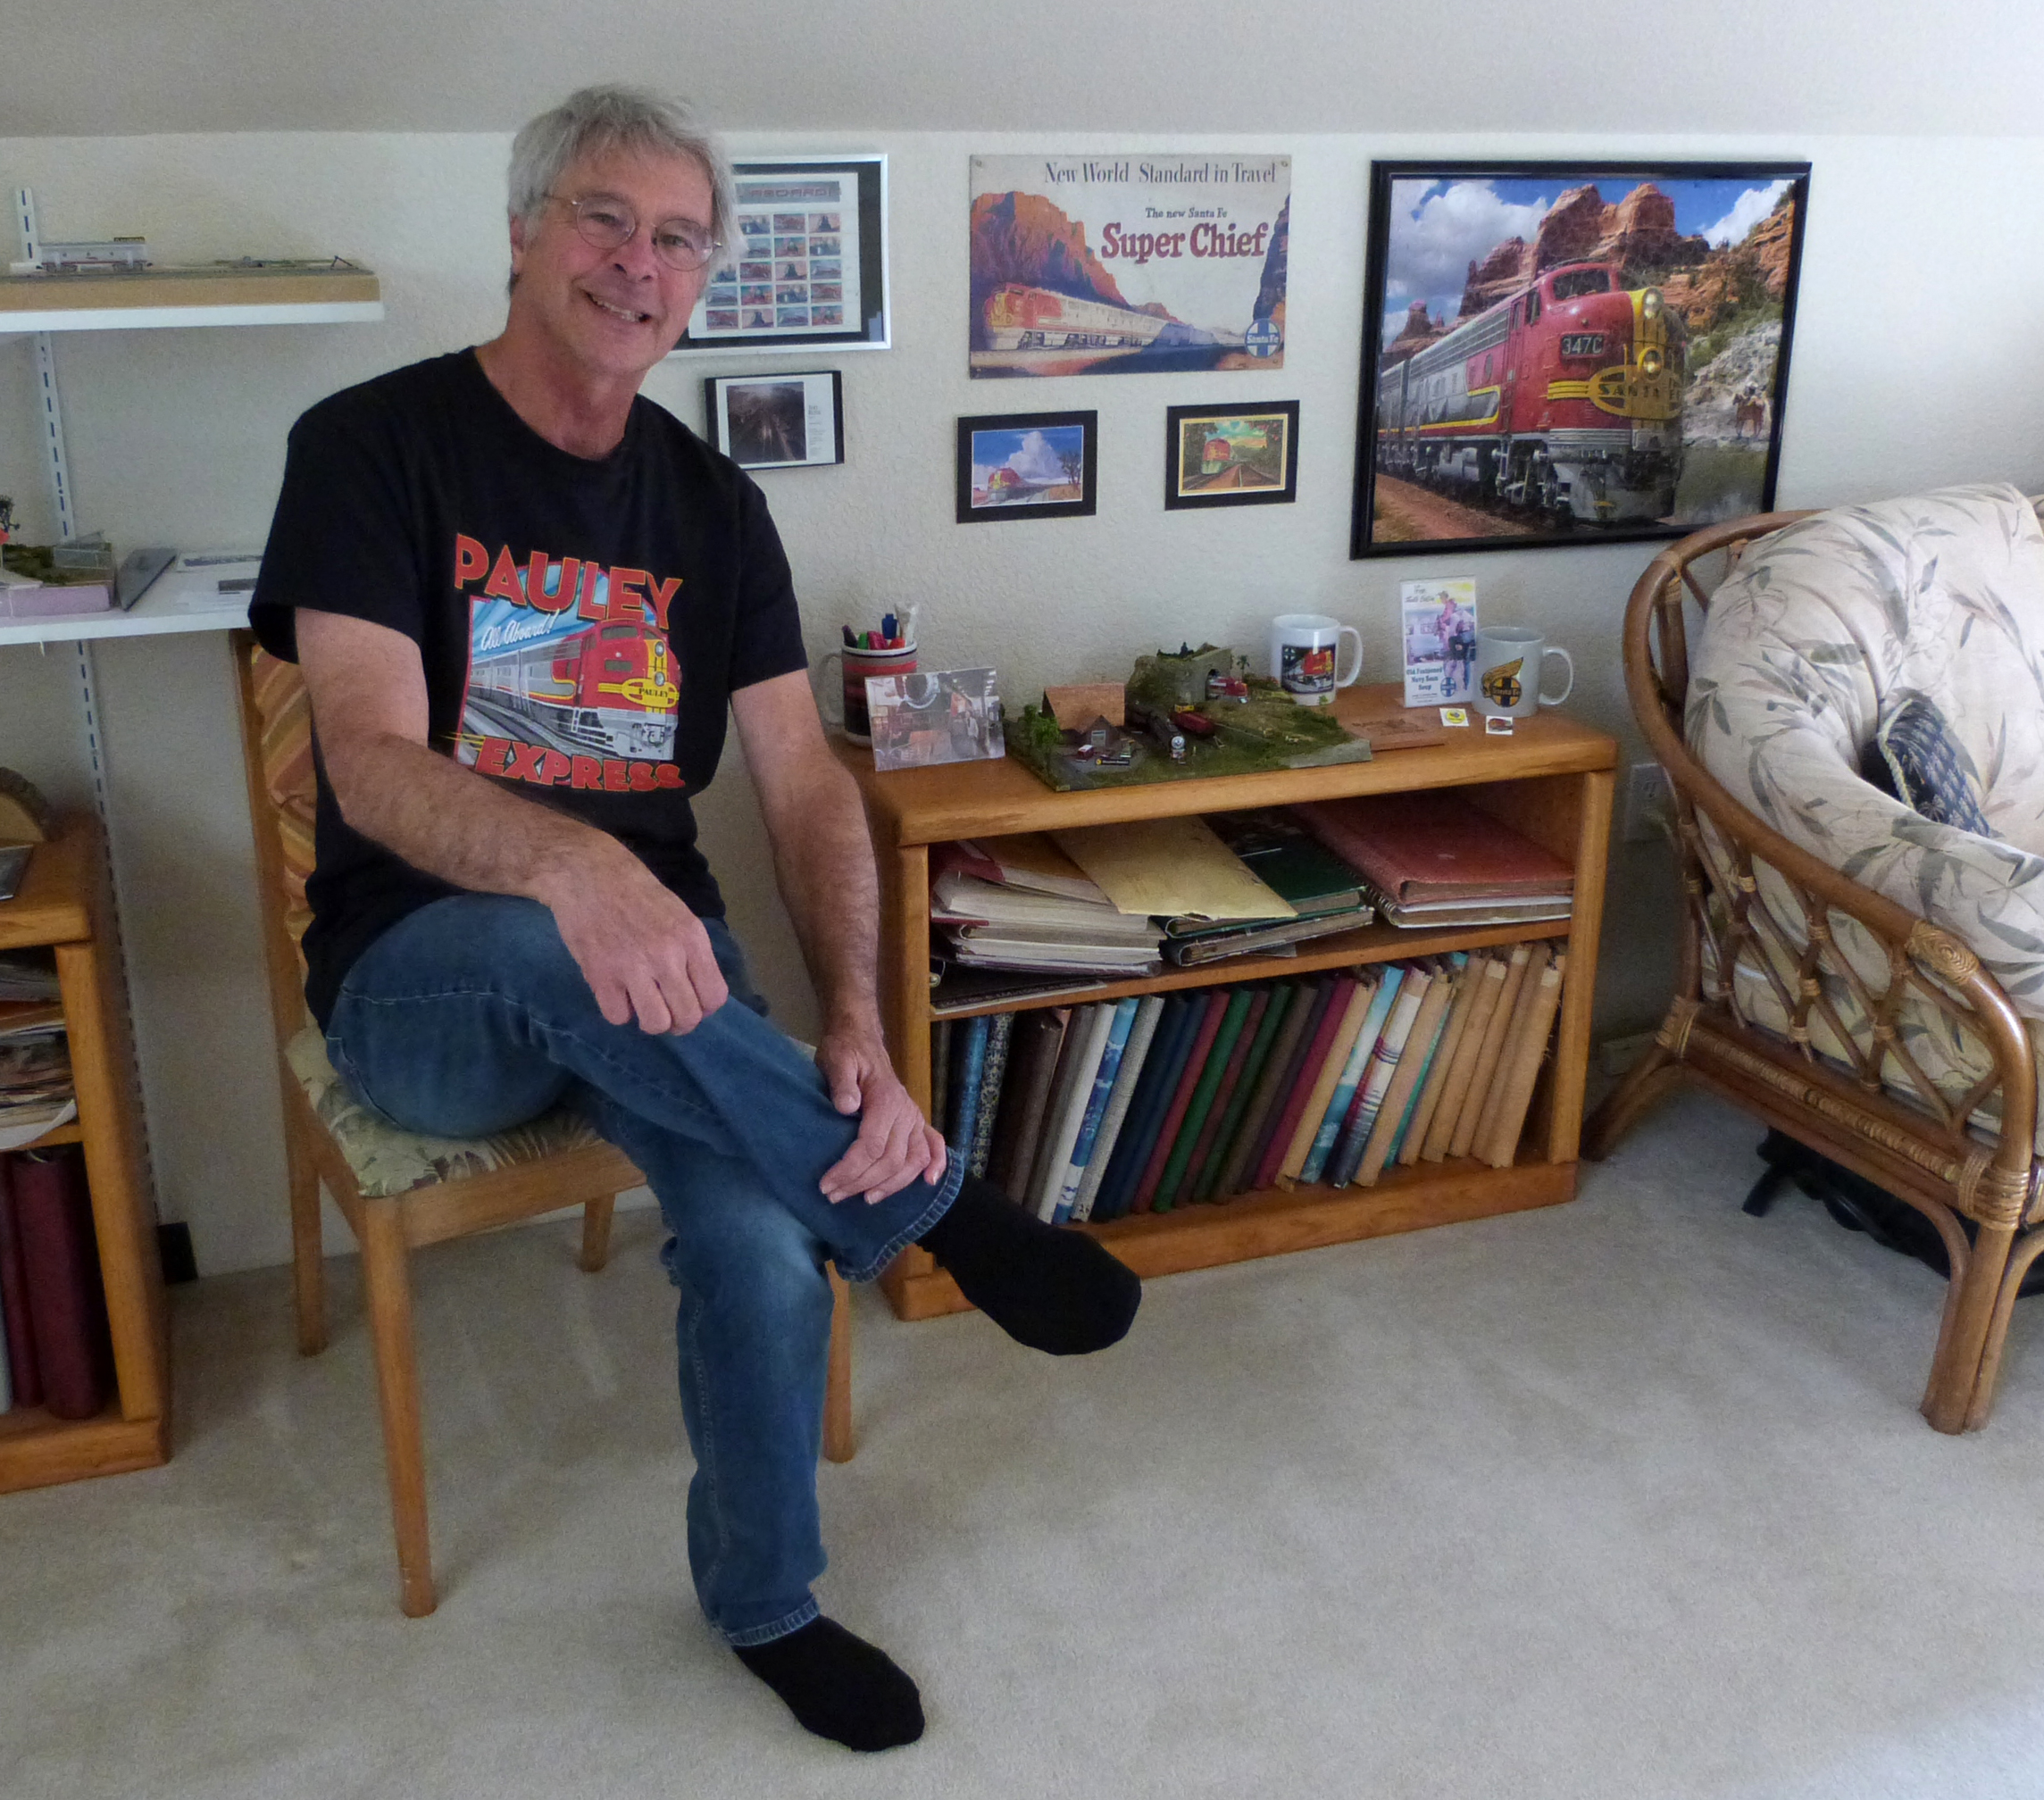
I had recently completed a jigsaw puzzle of the Santa Fe Warbonnet, and, using Mod Podge Puzzle Saver, glued it together and hung it on the wall close to my other Santa Fe paraphernalia. Coming to the undeniable conclusion that I'm a geek, I was inspired to poke a little fun at myself by creating the "Railfan Resort," a small N-scale scene, working only at my table with no plaster, no spray paint, no power tools, no workshop, etc.
|
|
|
|
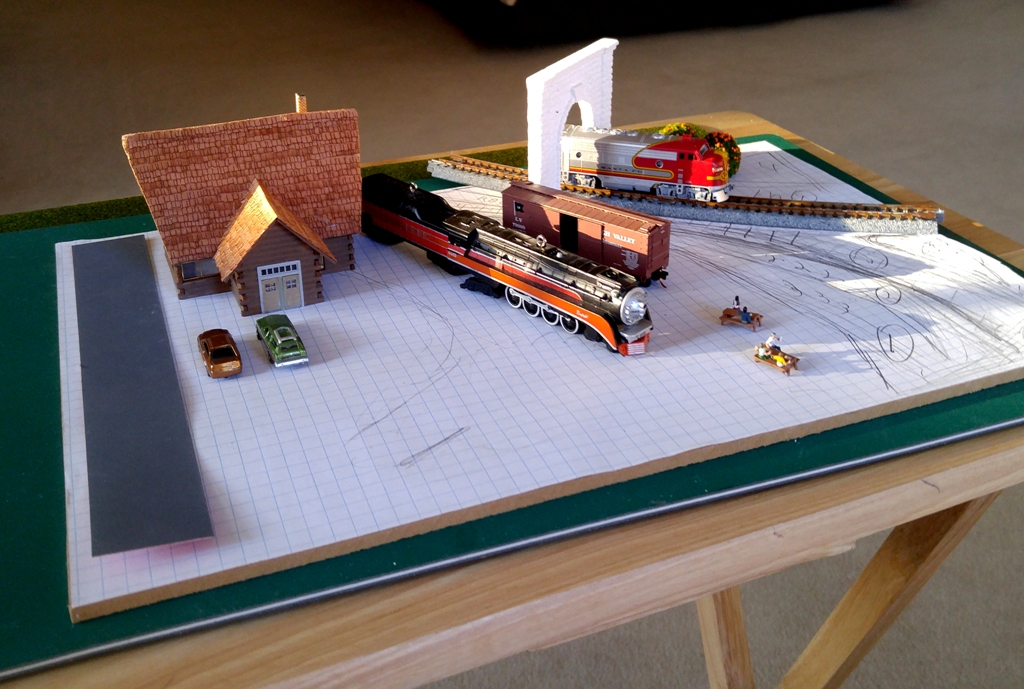
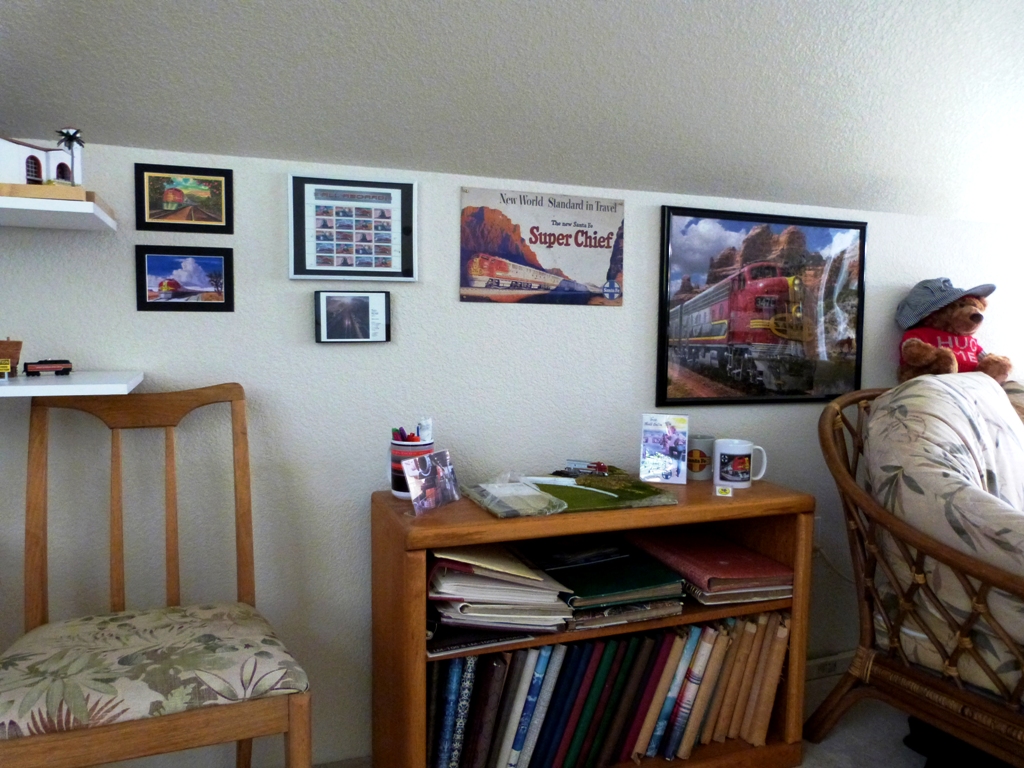
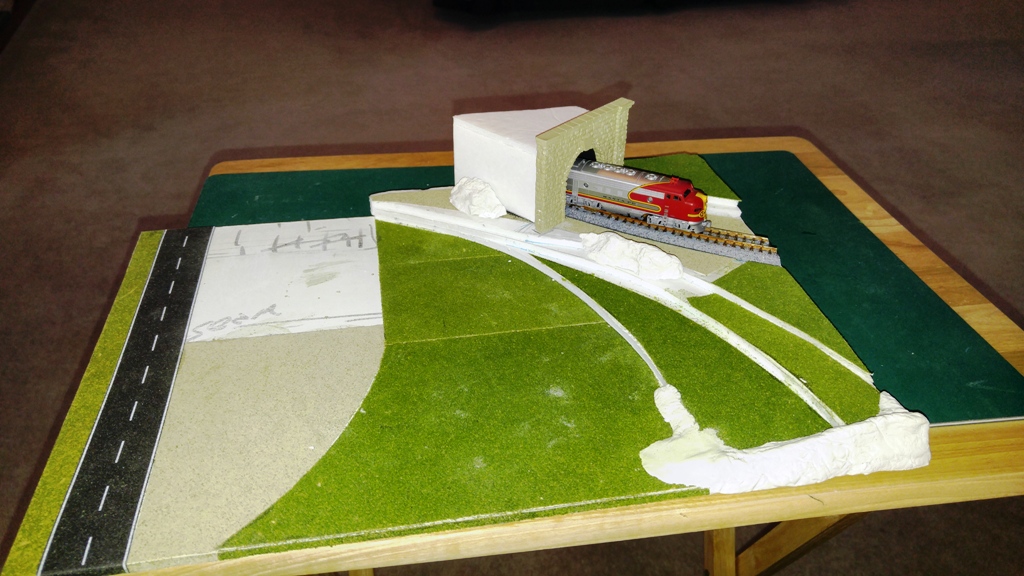
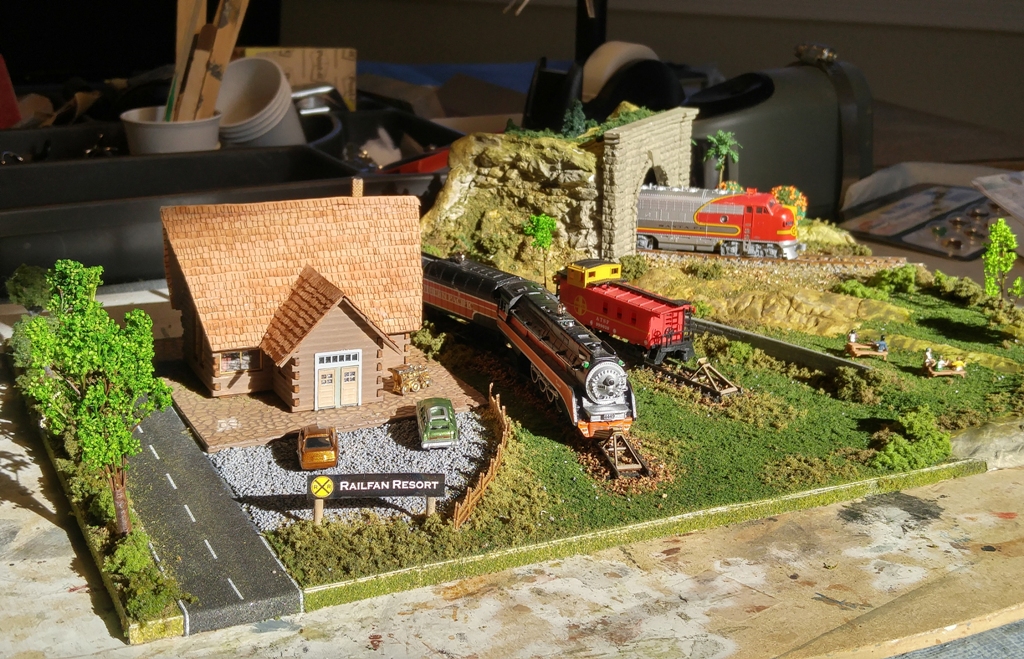
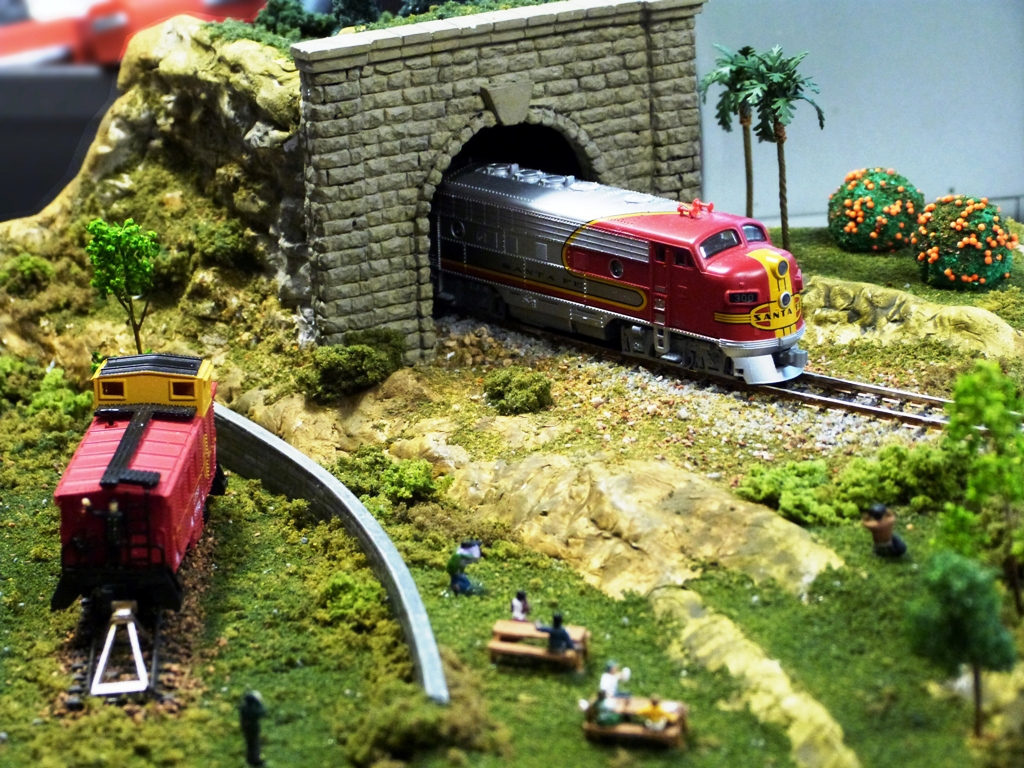
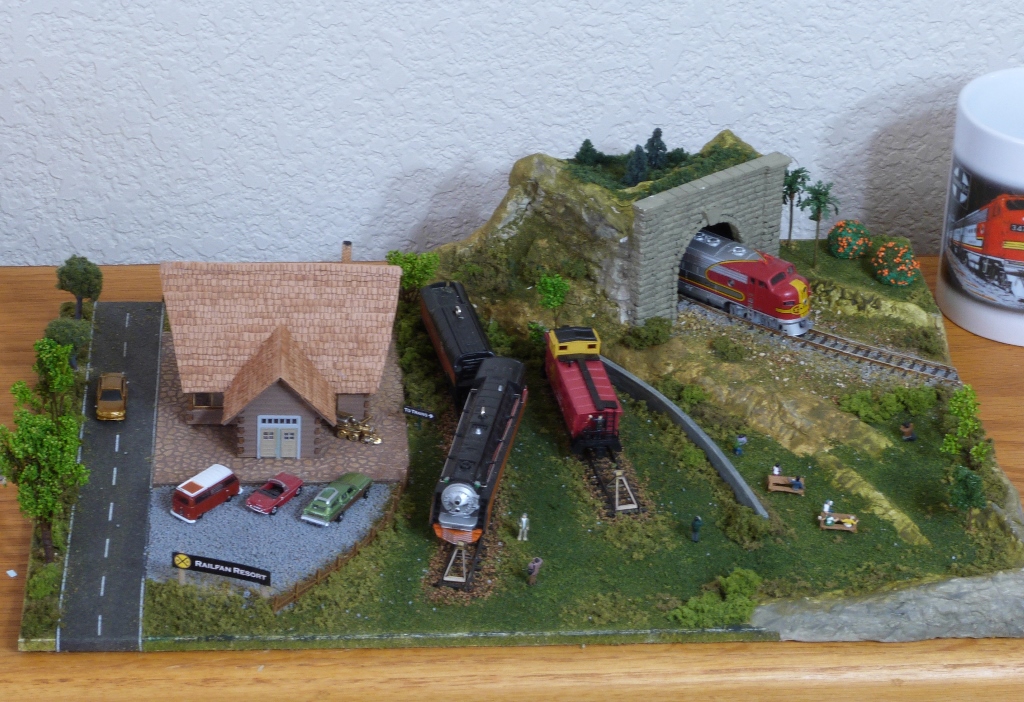
My little scene would consist of three main sections. Looking at the picture below, on the left side of the mockup, next to the road is the Railfan Resort building and parking lot. To the right of the building in the center of the scene is the train display area. And on the far right is a higher terrain and tunnel where a Santa Fe Warbonnet will be eternally posing for pictures. There will also be a little picnic area. The layout will reside in what seems to be becoming my Santa Fe tribute display (pictured below on the right). | |
|
|
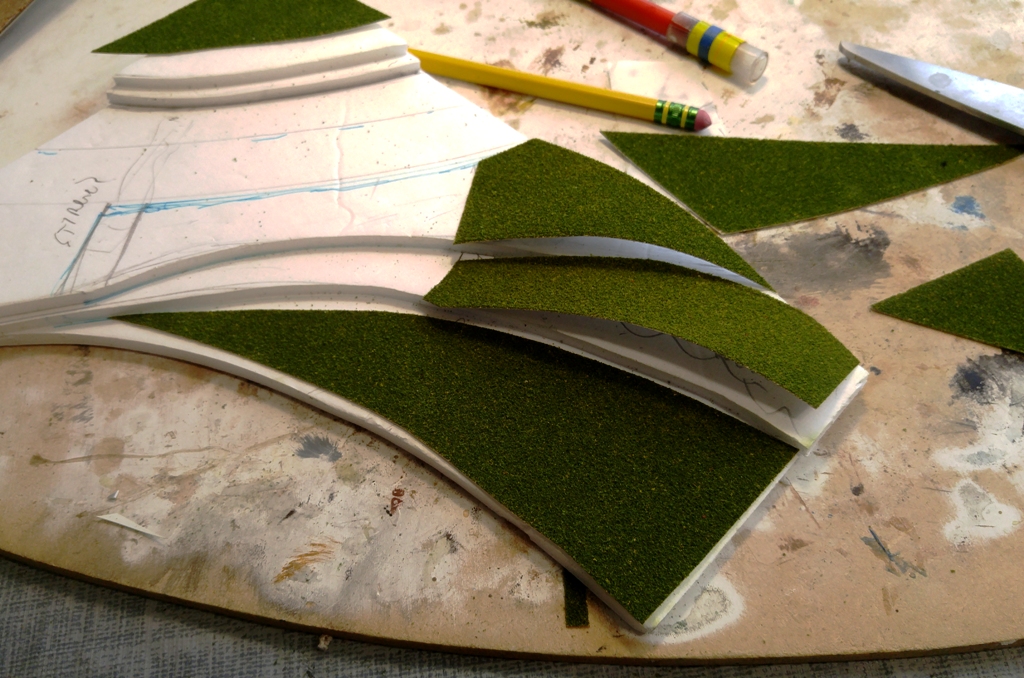
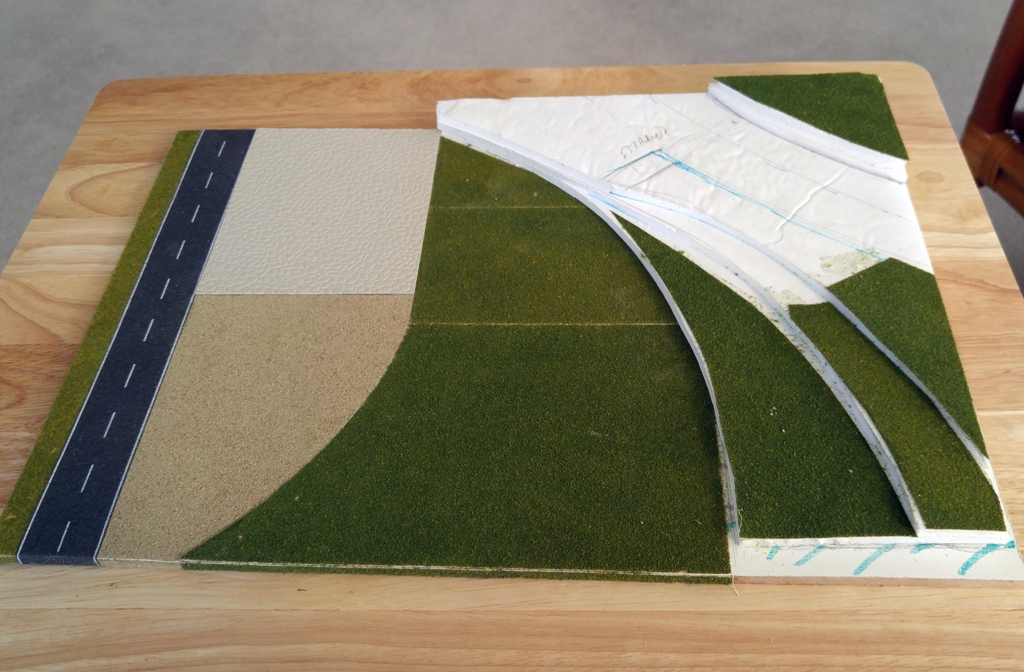
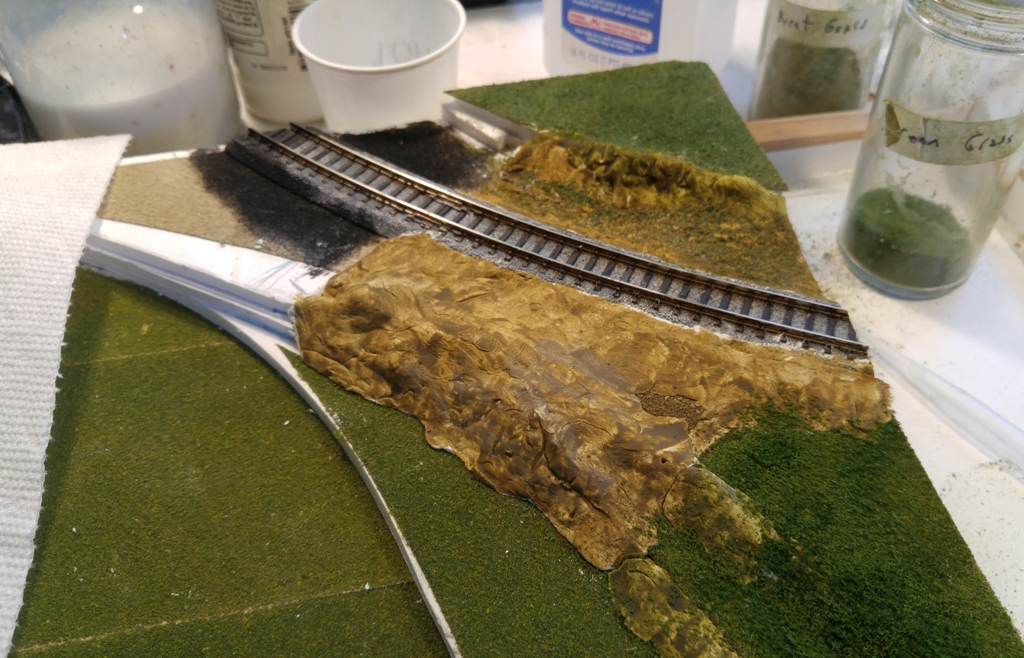
After some design and testing, I set up all the base surfaces using grass and sand vinyl mats, an adhesive road and a piece of styrene with a rock pattern which will be the sidewalk around the structure.
| |
|
|
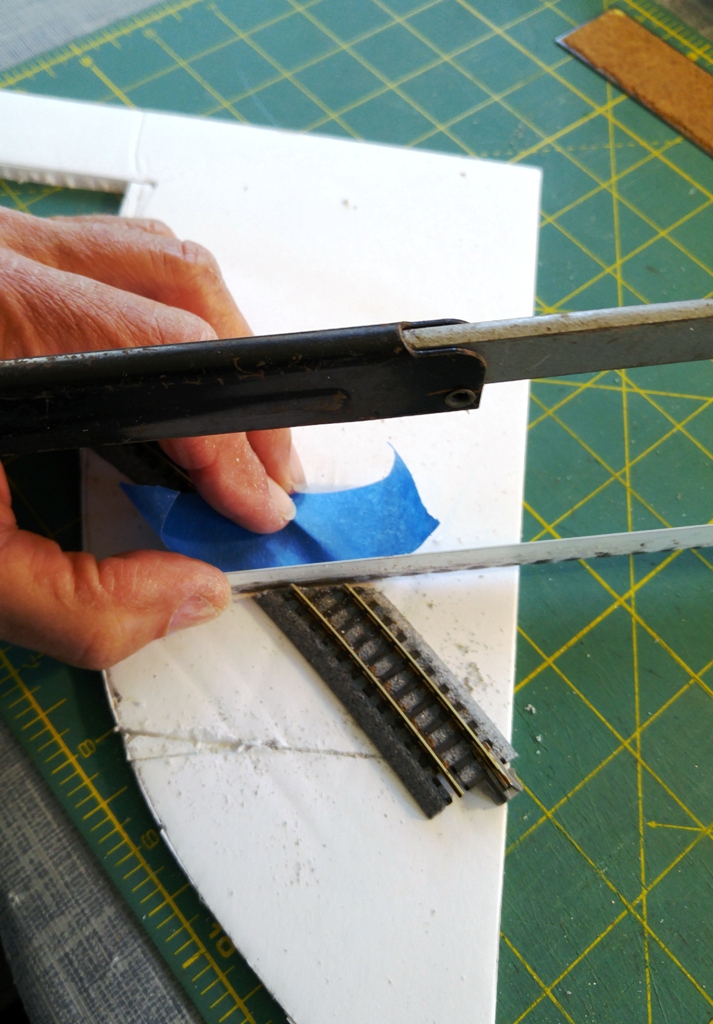
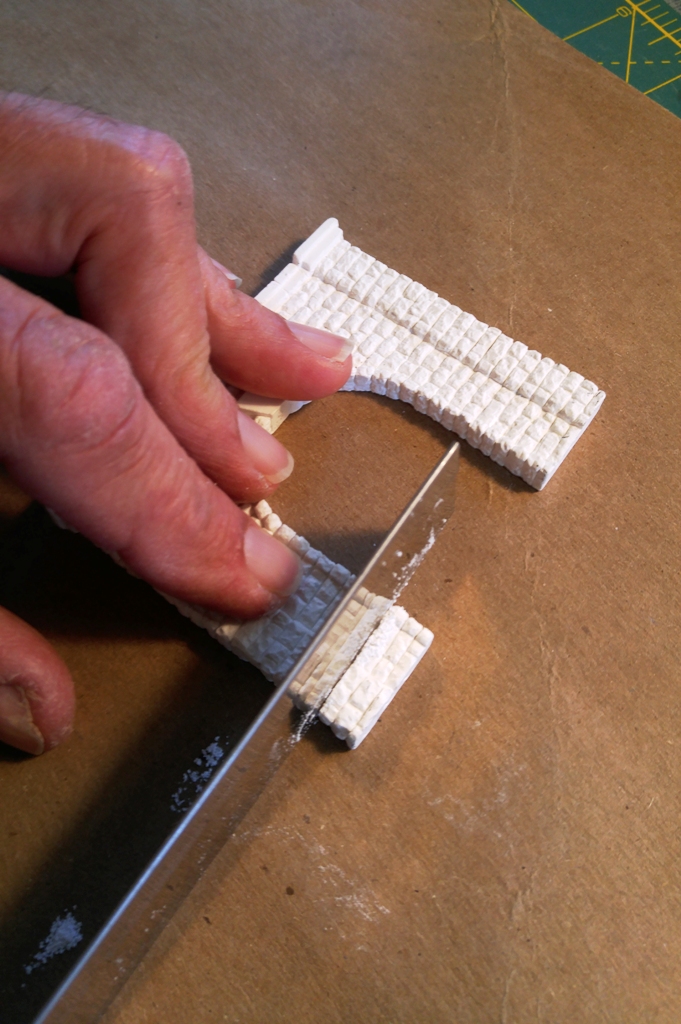
At first, I used Woodland Scenics Mat Adhesive to affix the pieces. But I realized that any glue would probably work in this case since I was permanently sticking the mat to the foam board. A few words about Woodland Scenics Mat Adhesive: Mat Adhesive can be used as a removable or permanent adhesive. Make sure to read and follow the directions (i.e. wait until both surfaces dry before assembling for a permanent bond) and it'll work fine. But be careful, because it's very sticky stuff, and it's almost unavoidable that you'll be washing your hands (and perhaps other things) a few times after you're done. For spreading the adhesive, use those cheapie disposable foam brushes you see at home improvement stores. They are actually good for a couple of applications if you rinse them out a bit, but I toss them after a few uses. And for the purposes of applying Mat Adhesive, you could cut off the hardened edge and it will still work fine. Used alone, vinyl mat material is quite "basic" and even a bit boring. But it makes a good base on which to attach other scenery as it is very friendly to more traditional landscaping glues and materials. Also, if you happen to leave a small area bare, it will show a bit of grass or sand. I wanted to see just how far I could take this "simple" approach, and knew one of the challenges would be in "disguising" the mat, as well as the clay. For the little road, I used an adhesive-backed "Asphaltstrasse" from Busch. I've used this product in several dioramas, and, while it's not as realistic-looking as plaster-based roadway, I think it's good for a quick, decent looking road, especially a small one. A word of warning. The adhesive on this product is probably as strong as what NASA used to glue tiles on the space shuttle – once down, it's not coming up. Take your time! Another (and somewhat safer) approach would be to simply stick it on a thin piece of styrene and then trim and glue the styrene down to a layout – a much more forgiving method, as it will be repositionable until the glue dries. After the base was set up, I moved to the higher terrain area. As I did in my recent Afta Plasta test, I cut foam core boards to make a small hillside, first cutting the bottom piece, then the top. After that I cut the layers in between, then glued them together. I knew I'd want spectators on a grassy hill, so I used the grass mat up there as well, although I also knew it would probably get covered with grass turf and other foliage. I used left over pieces of grass and sand mats. To tell the truth, at this point, although I kind of knew what I was going to do, unlike other dioramas, I didn't really have a specific plan. (I guess I rarely do.) But I knew the next step was clay. For the main line, I used two pieces of curved Kato Unitrack, cutting the ends with a hack saw to the angle of the layout edge, and then glued the track down and added a bit of clay to create a terrain. I tried a "rusty rail" pen to weather the track – I'm not 100% pleased with the results, but it will do. I next added Kato's ballast which matches the plastic track bed nicely. All in all, it looks good. Next up was creating a structure that will be the tunnel entrance using pieces of foam core. (Although foam core board has been my "go to" material for this project, I think that balsa wood would also be a good basic material, especially if more precise measurements were needed.) | |
|
|
|
|
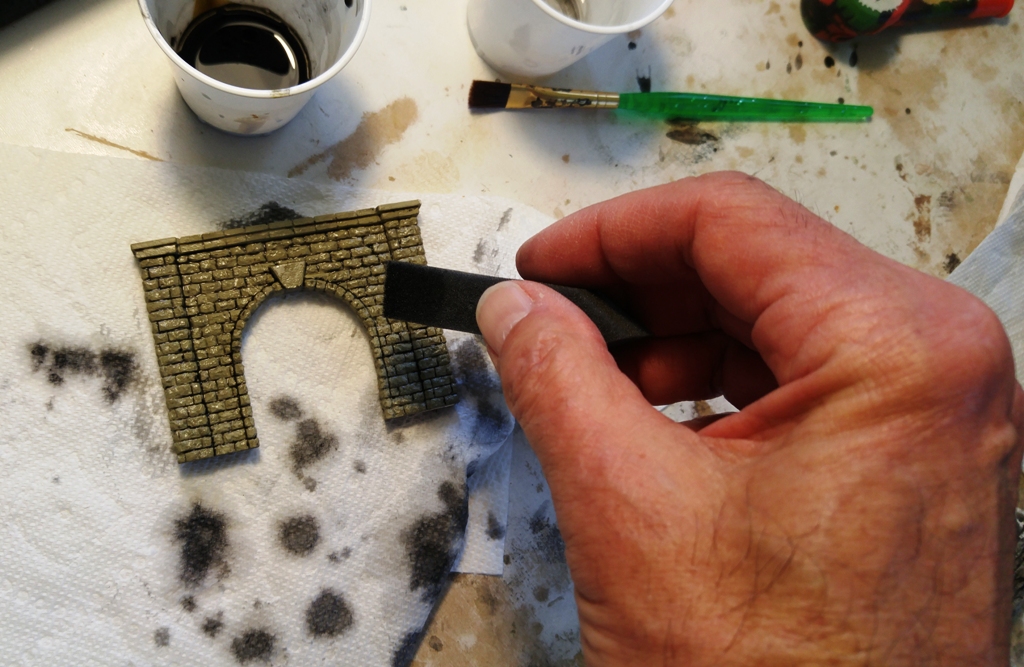
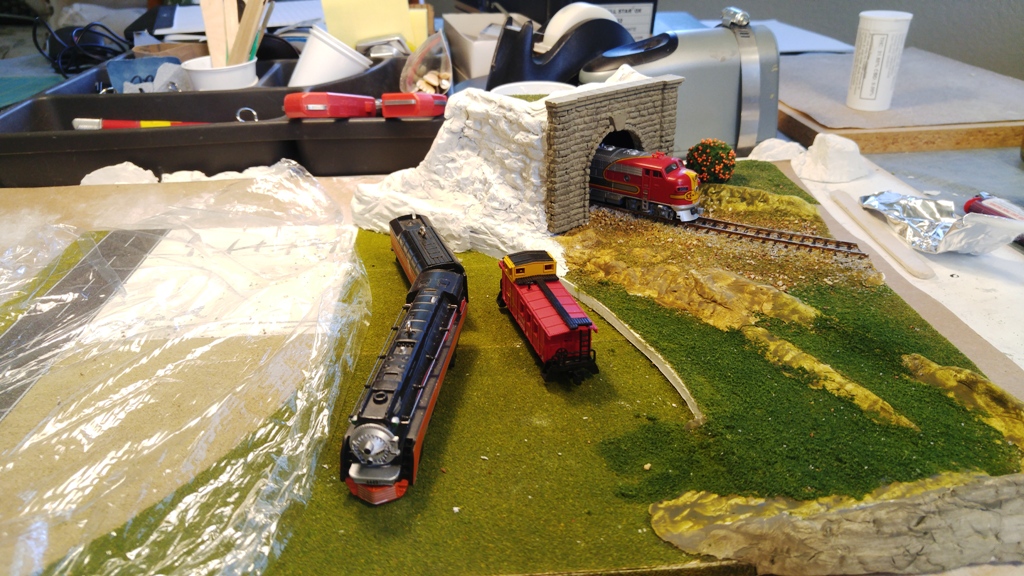
The actual portal is a plaster product purchased a while back and never used. I cut it down just a bit, painted it concrete, added a bit of black wash, then glued it to the front of the structure. I then added clay rock molds which I cut down to fit on the sides. A bit more clay filled in the other open areas. I added some scenic grass to the mats. It worked fine producing a nice, grassy effect. WS Undercoats as well as Stone Gray Liquid Pigment was used to "paint" the bare clay. The Undercoats don't absorb into the clay as they do in plaster, but I think they produce a nice "mottled" effect, making the ground look natural. There are probably many other paints to use for dry clay. Those with real artistic skill could probably use familiar paints to create sort of a 3-D landscape painting as clay (and plaster) creates a 3-D canvas!
| |
|
|
|
|
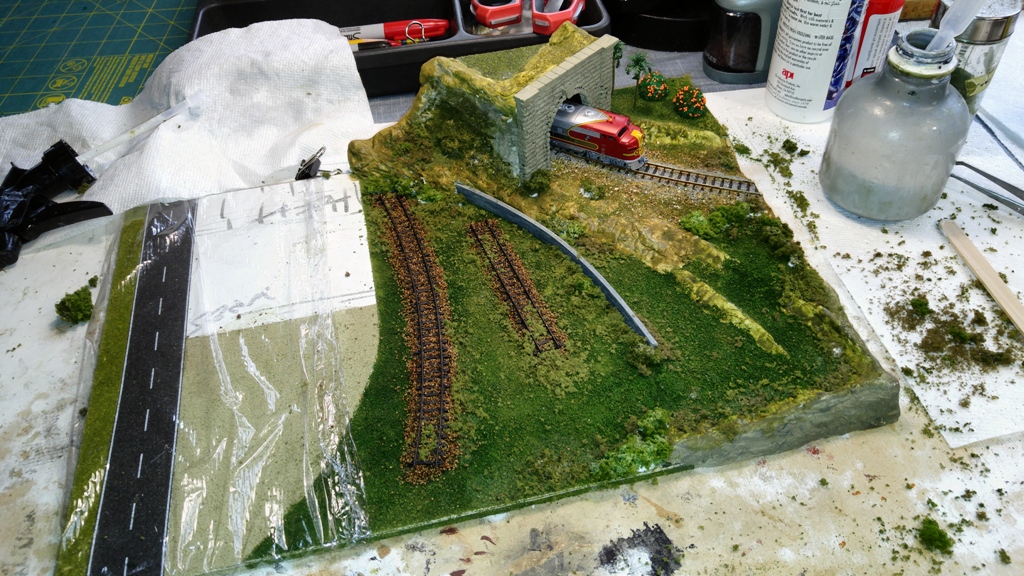
After I finalized positioning in the display area, the tracks were painted with burnt umber for weathering, glued down and ballasted. The bump posts are a pretty neat (and inexpensive) laser-cut kit from Osborn Model Kits. Although they can be painted, I like the weathered look of unpainted laser-cut material. After the display rails were glued down, I landscaped the two completed sections using traditional scenery material: grasses, turfs, bushes, trees and other foliage. I used a scrap piece of styrene rock wall pattern to make a small wall between sections. It gives a little variety to all the clay used between levels. I unwisely affixed the foam road to the layout early on to plan positioning and sizing. But I realized how vulnerable it would be during the relatively messy landscaping phase, so I wisely covered it with plastic wrap. I was rewarded for protecting myself from my own mistake when a drop of scenic cement plopped itself in the middle of the road. That was a close one! With two sections complete, I moved onto the last, the resort structure and parking lot. I thought the space initially planned for the parking lot area was too large, so I moved the building and its foundation forward about 20 scale feet leaving room behind the rear patio for a little display of classic vehicles. | |
|
|
|
|
|
|
|
|
|
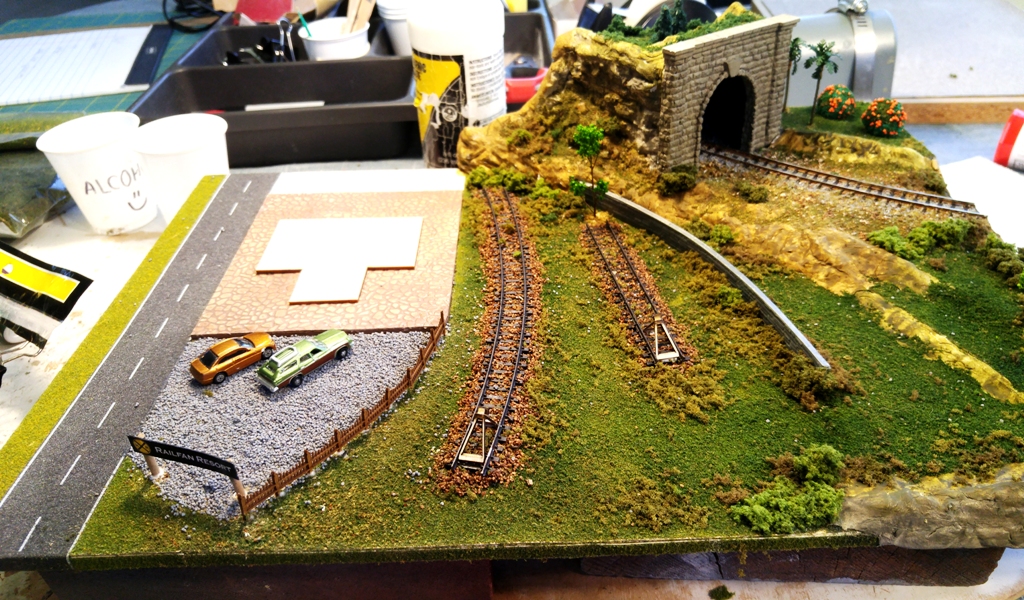
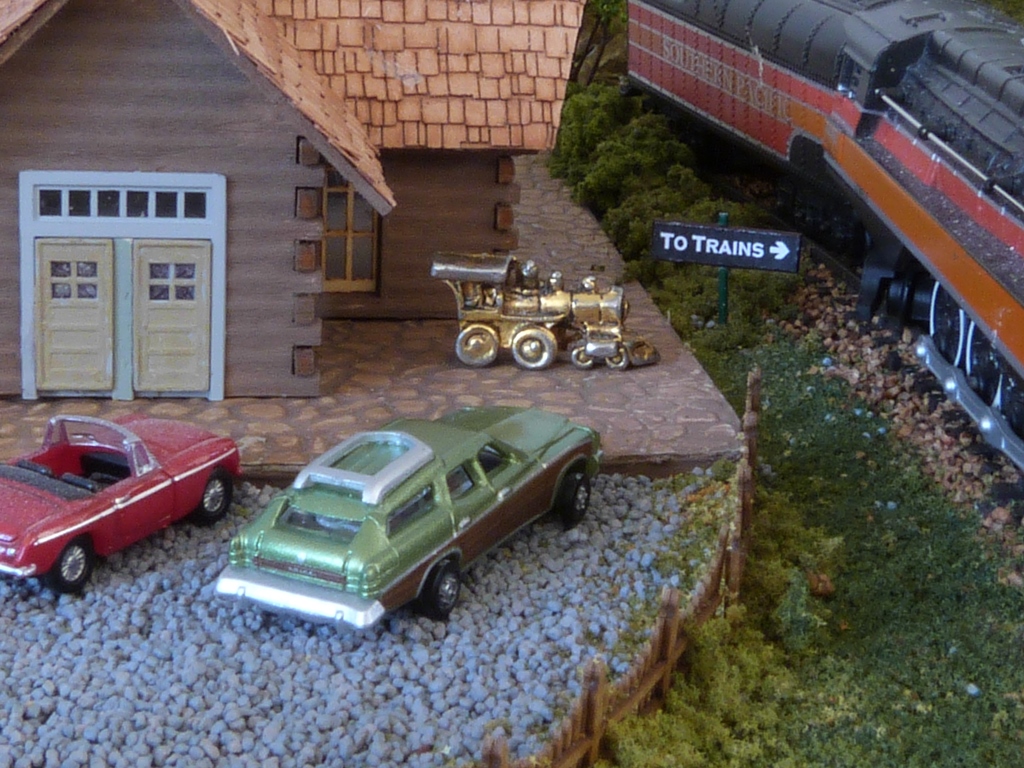
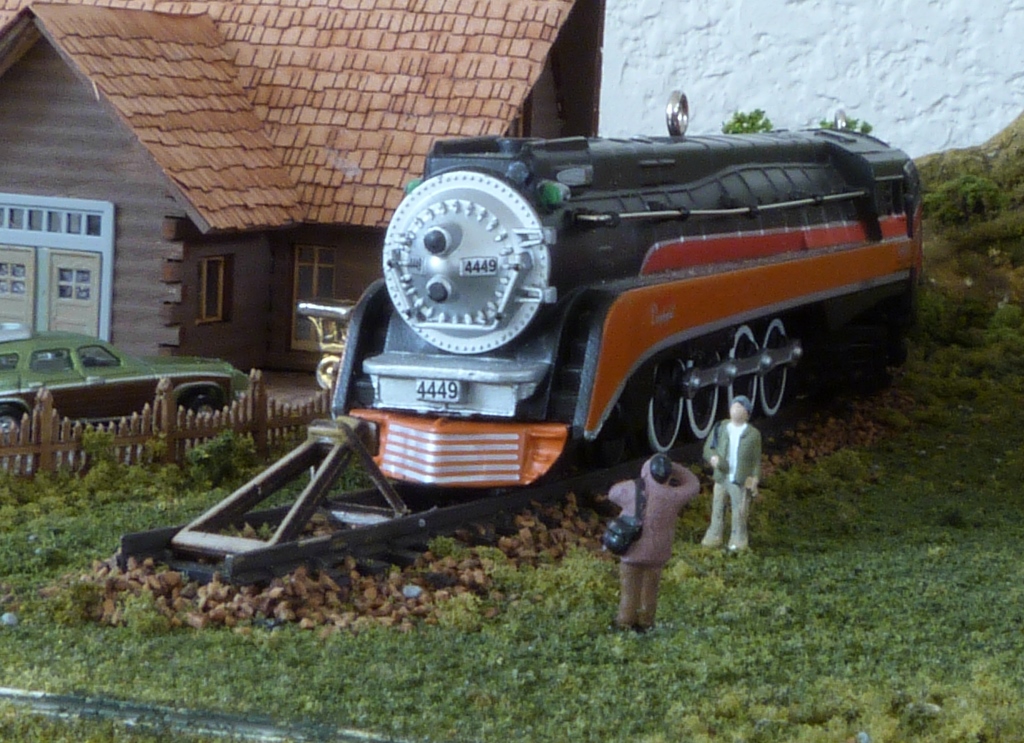
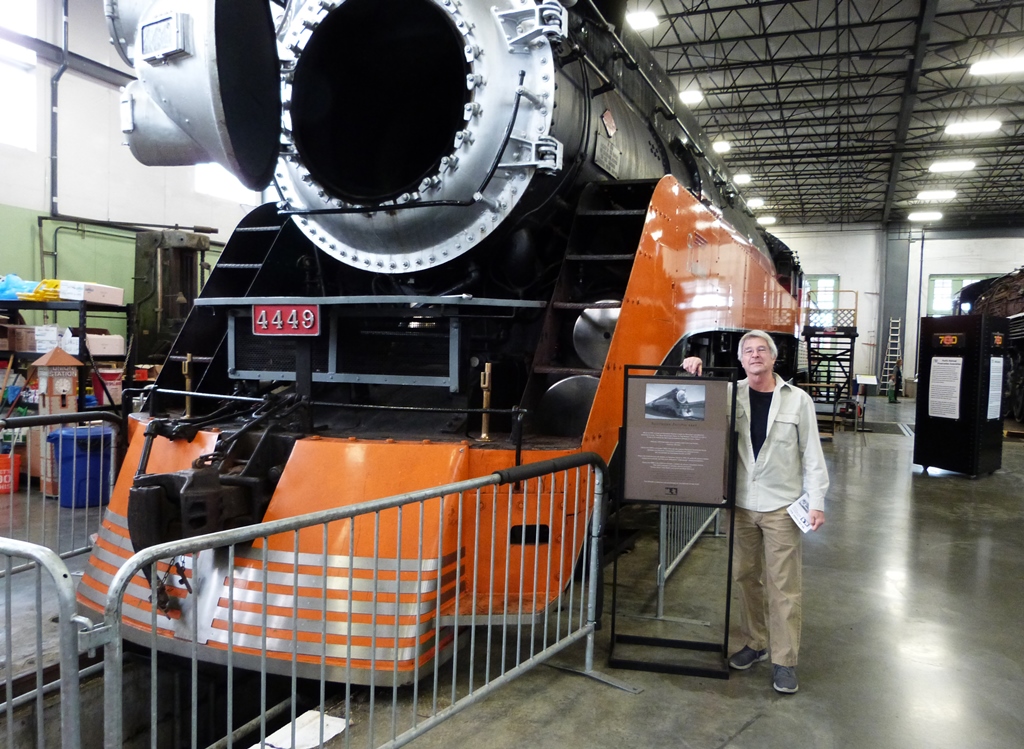
The resort building is an N-scale version of the log lodge I used on my main layout for the Taprock restaurant. Not knowing which one would look better I had purchased both N and HO scale versions (and wound up using the HO version). The N-scale verion was perfect for the resort. I built and slightly modified the kit. The small, laser-cut picket fence was also a leftover from another project. (I decided to leave the fence unpainted as well.) Gray ballast was used to create the parking lot. Some basic scenery was added to the side of the highway, and Photoshop and Word were used to create the signs. The golden steam locomotive statue that greets visitors is a lapel pin that a friend gave me years ago for use on a diorama. (Thanks Gibson!) The Southern Pacific Shasta Daylight in the display area (4449) is actually a Hallmark ornament and depicts the famous train which now resides in the Oregon Rail Heritage Center in Portland. By the way, this is the first scene I have made that is actually populated as the resort is being visited by photographers and picnickers. And there's a familiar looking guy standing next to the Daylight! Railfan Resort - what a fun place to visit. ;)
I had set out to see what could be accomplished at a kitchen table using only basic tools and materials, and I can confidently say I was successful at building a real diorama using Afta Plasta techniques. Like any new material, once you start working with clay, you get better and better. I'm sure there are some great videos on the subject. But while my experiment was "technically" successful, I learned some important considerations when using these methods. Storage I was very fortunate to already have the materials and structures that I needed to create this diorama. But because most of my inventory is stored in my garage, I spent quite a bit of time transporting stuff to the hobby room upstairs. For me, it wasn't really a problem – sort of like having a StairMaster in the house. But for others, this might be an issue, depending on the location of one's storage area. I also came to the somewhat ironic realization that a decent-sized storage area is a vital aspect of working in a smaller environment – in fact, I think it's as important a consideration as the work space itself. A dedicated set of shelves, cabinets or closet is a must – the bigger, the better. This situation points to the advantage of "specializing" in certain materials. I've been accumulating all types of material for years, and I'm fortunate that I have the room to store it all. Without that space, I'd have to make some tough decisions about what to buy - and what to keep. The Mess A vacuum cleaner, even if it's small and battery-powered, is a must. Having a floor/carpet sweeper is also a big plus. And trust me - always keep paper towels close by! Tools
As I started to work on my main layout where I left off, I realized that I had really missed working in the garage/workshop. For instance, the first task for my next section is using the bandsaw to cut a piece of foam to create a building mock-up. It was very enjoyable. I'm not sure what the point is, but I guess admitting that I missed using the bandsaw is yet another admission that I'm a geek. ;)
(Note that my next project appears on page 4 of My Layouts.) | |
| |